How to care for cat palm: a complete guide!

How to care for cat palm: a complete palm guide!

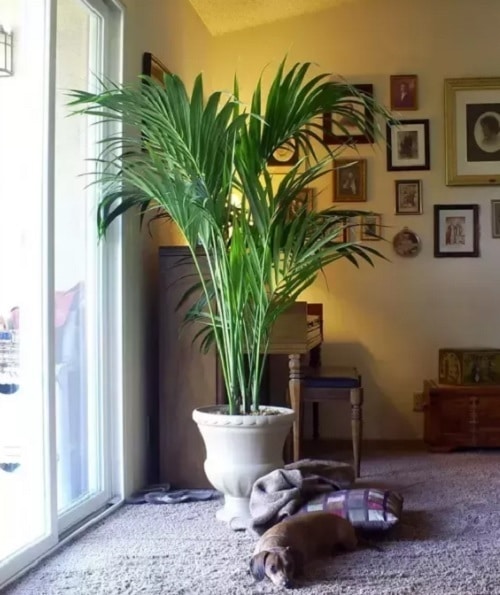
The Cascade Palm/Cataract Palm is another name for the Cat Palm (Chamaedorea cataractarum). Cat Palms are endemic to south-eastern Mexico and look similar to both the Areca Palm and Kentia Palm. So how shall you care for cat palm? Here you will find all the answers!

Did you know? Having a Cat Palm in your home during Victorian times showed that you were at the top of the social ladder. These plants were frequently placed in the windows of homes so that anybody passing by could see that the residence belonged to a wealthy and respectable individual.

How to care for cat palm: a complete guide!

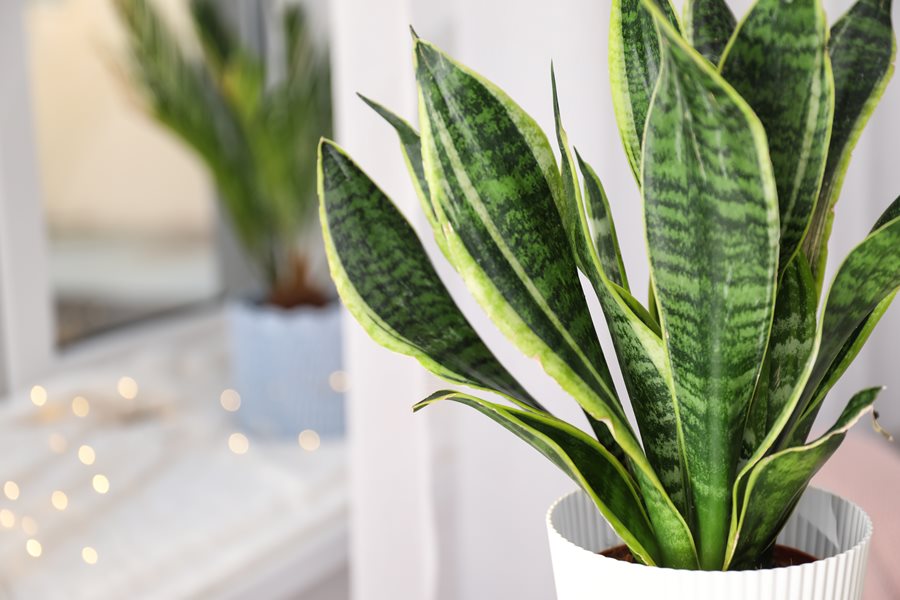
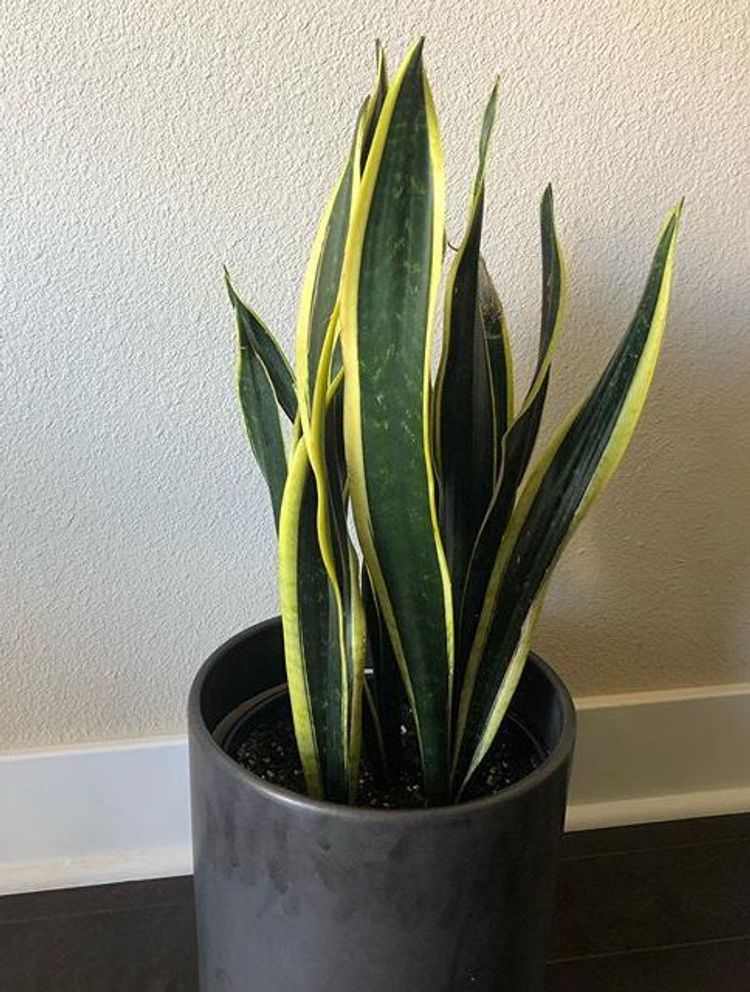
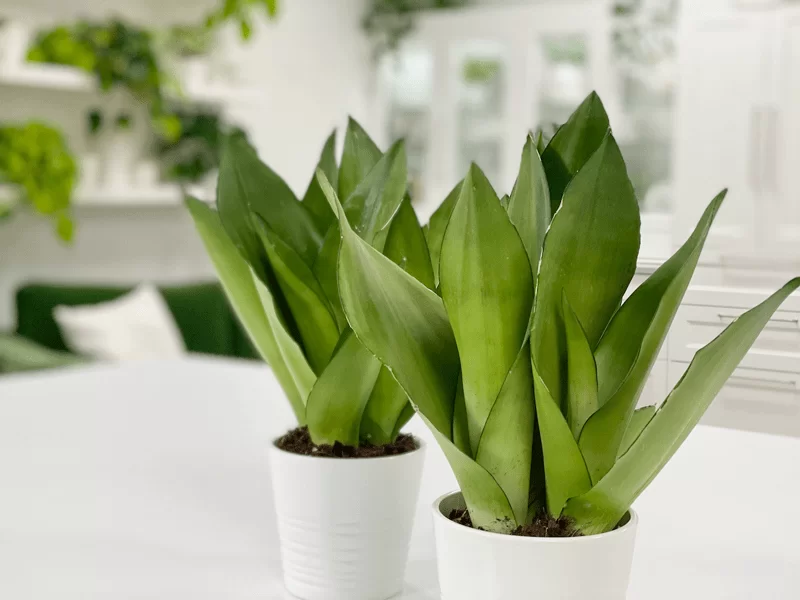
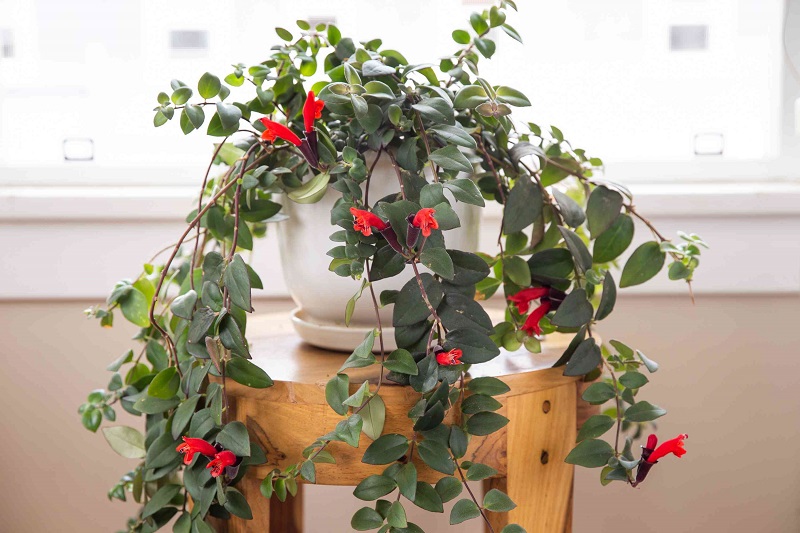
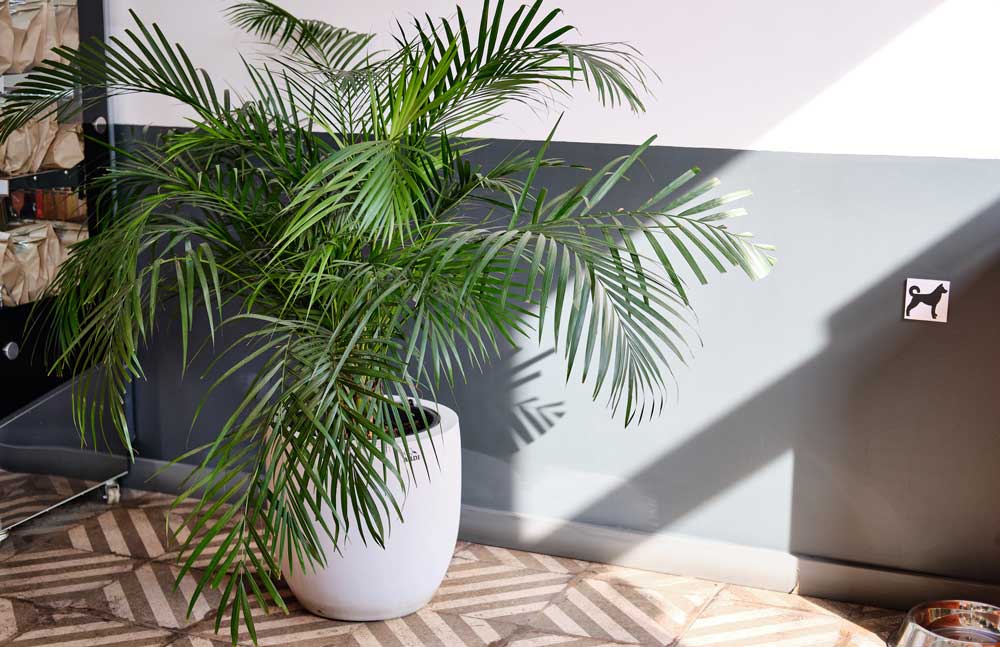
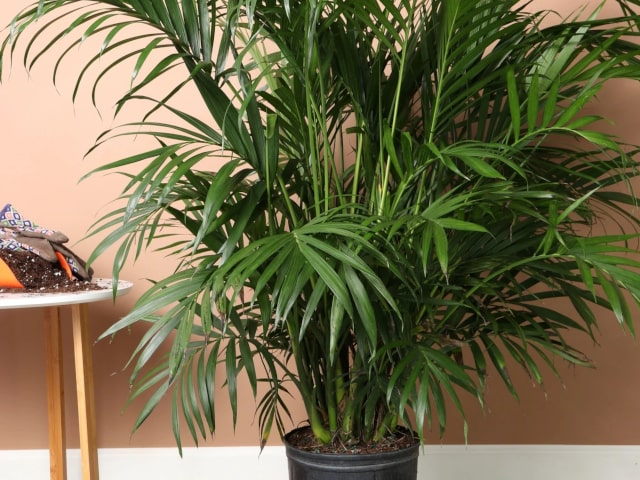
With its clusters of large, vivid green leaves, this plant can add a tropical feel to any home.

Care for cat palm plants-

This palm needs more water than most of the low-maintenance plants—just enough water to keep the soil moist but not saturated. Contrary to common opinion, palms are not desert plants. Regular watering will help to keep the fronds from becoming brown.

Dry soil, dry air, or tap water containing fluoridate can all cause brown leaf tips. Increase the humidity around the palm if the air is too dry.

Palm plants are extremely sensitive to soil salts. Chemicals included in tap water and fertilizers contribute to the accumulation of soluble salts. They can damage the leaves and roots.

Even if you’re a new gardener, the lush leaves of a cat palm may appeal to you. Their low maintenance, forgiving nature makes them perfect for usage both inside and outside.

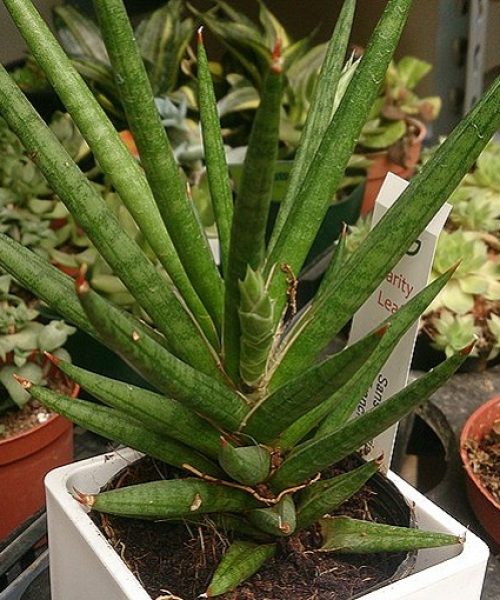
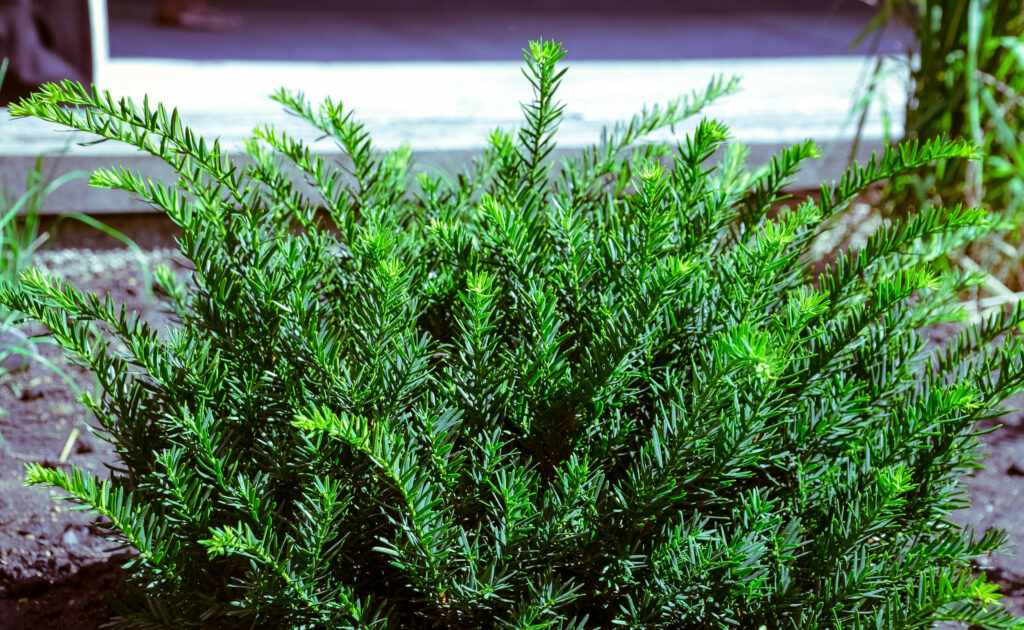
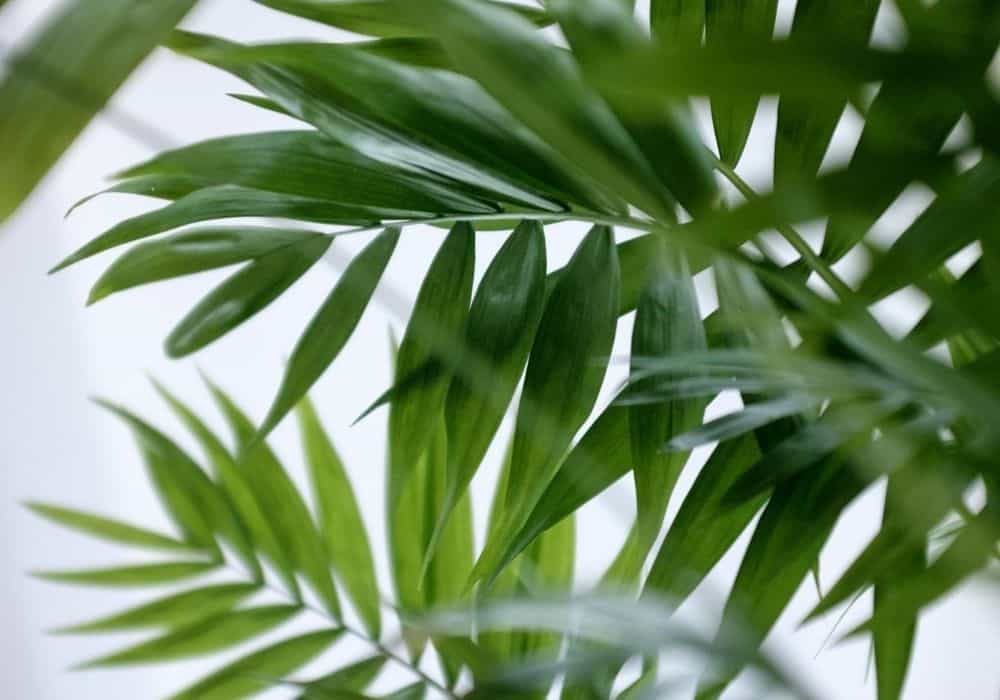
There is no central trunk but rather a tangle of stems that produce bushy fronds. They are broad, with feathery leaves up to 1 inch wide on each side.

These trees are grown for their year-round blue-green foliage, ease of care, and air-purifying abilities. Outside, they can reach heights of 6 inches. They are usually 2-3 inches in containers.

Care for cat palm plants-

Requirements to take care of palm-

Here are certain requirements to do cat palm care:

Temperature for cat palm

Cat palm plants flourish inside because their ideal temperature range is the same as that of a human. Temperatures ranging from 10 to 27 degrees Celsius (50 to 80 degrees Fahrenheit) are suitable for this tropical. So, plant cat palm as we mention here.

Keep the cat palm indoors and away from draughts and cold sources, such as single-paned windows, as it will not tolerate prolonged exposure to cold.

Light requirements for cat palms plant.

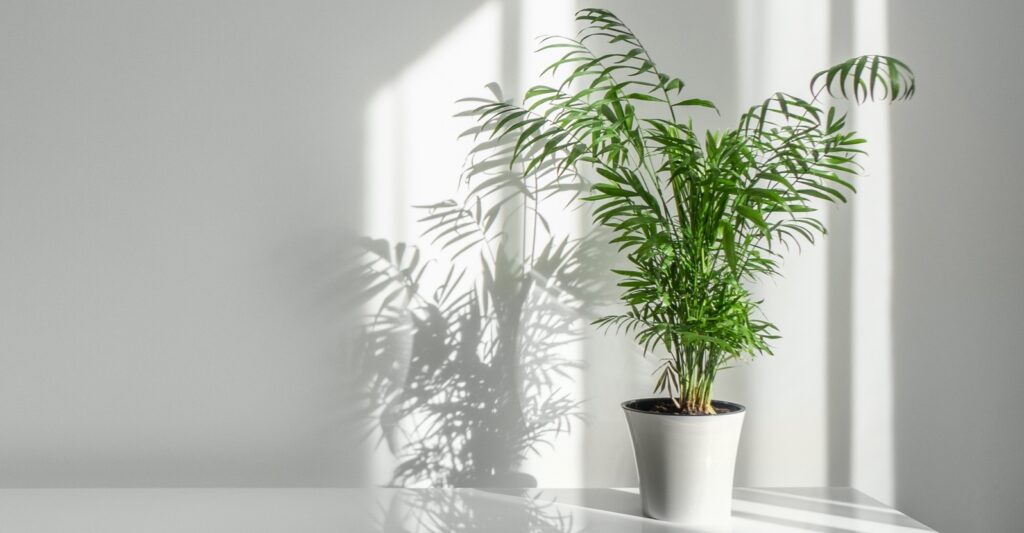
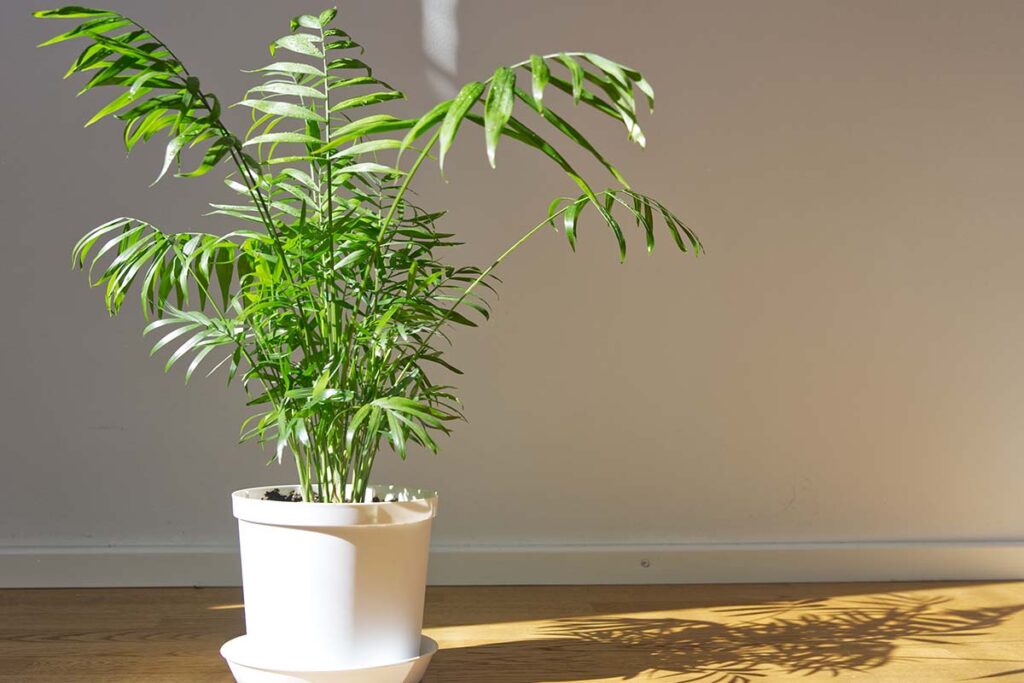
Although cat palm trees like bright light and can endure some direct sunshine, they are nonetheless susceptible to burning. These trees should preferably be near windows that face east or south and receive a lot of sunlight while gardening.

You can avoid scorching this plant by not resting your cat palm on the actual windowsill. Instead, place the plant 1 to 3 feet away.

Light requirements for cat palms

Soil needs of cat palm tree- plant care and needs.

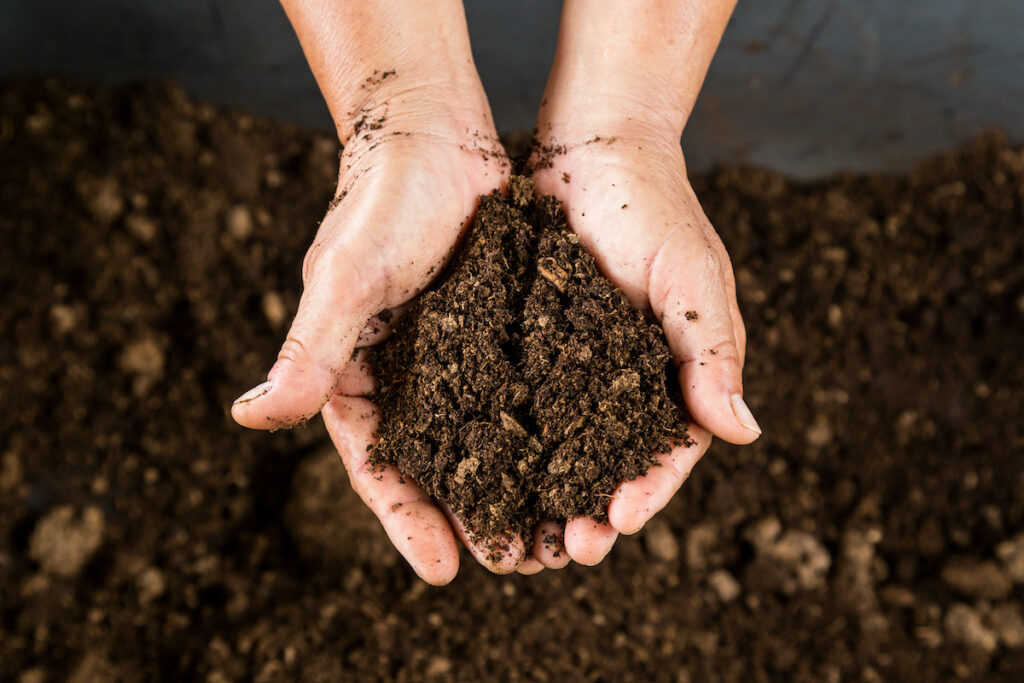
Use light, well-draining soil if you want to be successful with cat palm maintenance. Although these plants prefer moist soil, the water must be moving. If the roots are in still water for a long period of time, they may succumb to root rot, a silent killer of many houseplants.

The soil composition does not need to be complicated while gardening in palm tree. There are mixes available that will give the nutrients as well as space for the plant to breathe while water isn’t in one place. A mixture of potting soil, peat moss, perlite, and some bark chips should be sufficient for building your own soil mix that is ideal for cat palms trees.

Soil needs of cat palm


Humidity in which cat palms grow.

Humidity may be an essential component of this palm plant. One of the main reasons these plants cannot grow inside is based on the level of humidity in house. The optimal humidity level for the room is around 55%, but because this isn’t always possible, you have to put in a little extra effort.

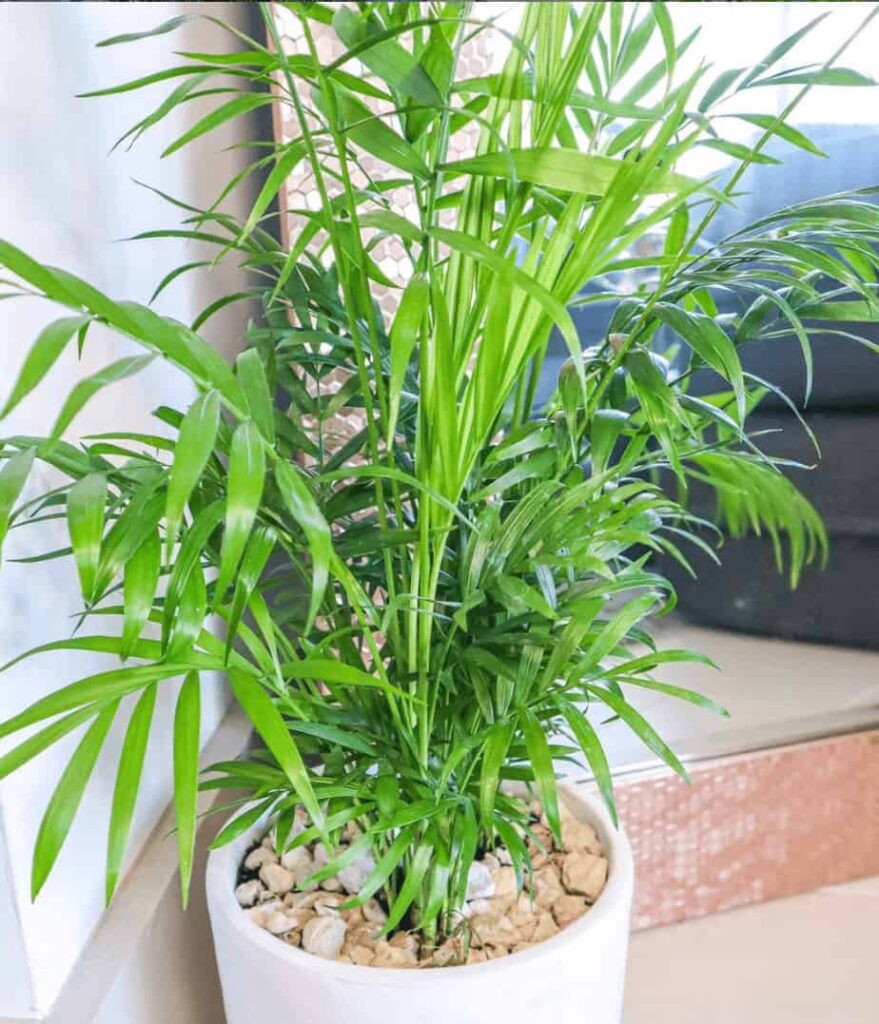
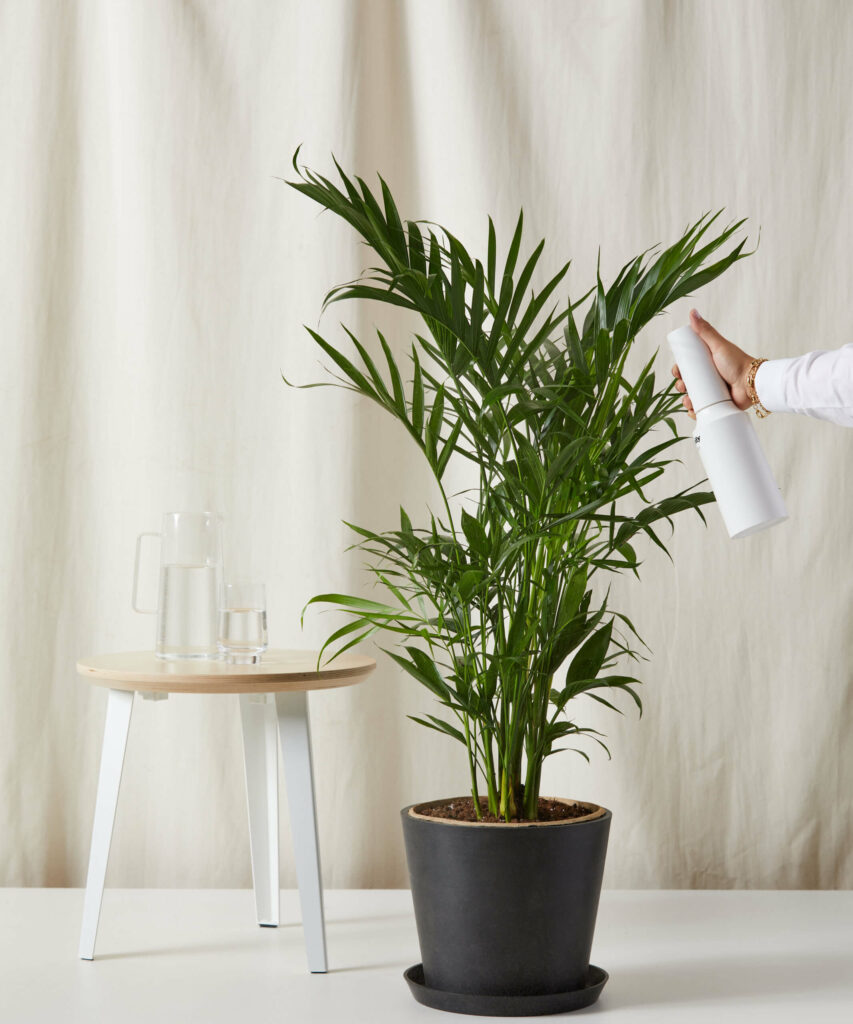
To keep this plant moist, use a humidifier or place it in a wet tray. Make sure it’s on the tray with stones, not in the water. Water cat palm accordingly!

Humidity the cat palm plant needs

Planting care for cat palms

Cat palm plants require little repotting because they grow slowly. Because these house plants want to be enclosed, a new container has to be slightly larger than the previous one. It’s also a good idea to repot at the same depth and to avoid manipulating the roots too much because they’re rather delicate.

Consider how you’ll manage your cat palm plants as they grow while caring for small cat palms.

Moving a cat palm plant around is easy when it’s tiny on a table, but it will get more challenging as your cat palm develops.

Watering care of palms

One of the most critical components of studying cat palm maintenance is determining how much water your specimen needs. Cat palms detest dry soil and prefer a moist climate.

If the soil is dry, it’s time to water this one! Check by your fingertips around 2 inches deep in the soil.

Tips-

  • Using a humidifier, particularly in the winter.
  • Misting is okay, but not always.
  • Planting on pebble trays, although may not be possible for larger cat palm plants.
  • Keeping plants in bathrooms/kitchens to benefit from the steam.
  • Creating an indoor forest by grouping plants together.

Watering needs of Cat Palm

Pruning the cat palm plant.

Any yellow or brown fronds should be removed as soon as possible from these trees. You can clip the brown leaves as well, but it will take away the look.

Pests on cat palm and how to control cat palm turning brown?

Spider mites, mealy bugs, and even ants can infest the cat palm plant to grow. Check all over the leaves, mainly the underside, where they like to hide. You may try spraying your plant with a pesticide to get rid of these pests, but make sure it is safe to use near other plants, pets, and children. Read further to control cat palm turning brown.

Cat palms are attractive and carefree plants, but if they are not given the right attention, they can get brown and die. Maintain properly wet and well-draining soil in your cat palm to protect it from becoming brown. Avert overwatering and letting the plant stand in water.

Cat palms grow in bright, indirect sunlight, so be sure to situate them in a spot where they receive enough light but aren’t repeatedly exposed to it. To remove dust and dirt, wipe the leaves with a moist cloth every so often. Finally, keep your kitty palm away from chilly draughts and temperatures below 55°F (12°C). These recommendations can help you stop browning and maintain the health and vitality of your cat’s palm.


Pests on cat palm and how to control it

Summary to plant cat palm

The Cat palm tree is an eye-catching houseplant that is easy to grow if they get sufficient care. A Cat Palm plant is a low-maintenance, attractive plant that may be used around dogs and children. Furthermore, most palm trees can also clean the air of harmful pollutants.

The lush tropical cat palm thrives in full sun. If you have a sunny room or window, place it there. Rotate your palm a quarter turn once a week so that all sides are exposed to sunlight. But too much of anything isn’t good!

How to care for bromeliads: Total bromeliad care guide!

How to care for bromeliads: Total caring guide!

Bromeliad is the name of a large and diverse plant family. Bromeliads plants are divided into 2,877 different species. There are about as many methods to care for bromeliads as there are different varieties. Having said that, there are a few things that will remain consistent.

Here we will let you know about the outdoor bromeliads as well as indoor houseplants bromeliad plant care for the plants.

How to care for bromeliads: Total guide!

A guide to planting care for bromeliads-

Bromeliad plants, like orchids, grow on rocks, trees, or other plants rather than in soil, bromeliads grown in soil do not give good results. Although they are not parasitic, they use the structures as perches to acquire nutrients, sunshine, and water.

Bromeliad plants are significantly more robust than orchids to careless feeding, drought, and temperature fluctuations. Outdoor bromeliad care includes watering them regularly and consistent feeding.

How to grow bromeliad plant- plant care?

For up to 10 days, just place your Bromeliad plant in a firmly sealed, clear plastic bag with a ripe apple. The apple will produce ethylene gas as it decomposes. However, before you begin, make sure that all water has been drained from the Bromeliad’s central cup or the plant’s core that accumulates water.

How to grow bromeliad plant-

All about Bromeliad plants- bromeliad care

The unusual appearance of the bromeliad signals that it is a high-maintenance plant that requires specialized gardening knowledge, from water needs to fertilizers. The bromeliad plant’s thick foliage, which forms a natural rosette, is prized.

A bromeliad plant may produce an inflorescence or flower, the shape, and color of which vary widely across kinds. The broad leaves are sword-shaped or scoop-shaped and grow in a circle around a central “cup.” This cup collects water from the plant’s surroundings.

Houseplants Bromeliad plants require a specific set of conditions to bloom, which varies from genus to genus and even species to species within the same genus. The length of the day, temperature, humidity, water, and feeding all have an effect on their bloom cycle.

The majority of bromeliads are a good option as indoor plants in a mixture of potting soil and sand. Watering is achieved by either moistening the soil or filling the leaf rosette’s center depression. Bromeliads can sometimes also grow without soil by anchoring or sticking the plant to something to hold it upright.

All about Bromeliad plants- bromeliad care

How often should you water a bromeliad plant?

Because of traits such as the trichomes/ outgrows, many bromeliads are drought-tolerant and dislike being over-watered. So how to care? To keep the soil healthy, water it every one to two weeks during the warmer months and every two to three weeks during the winter months.

If your home is particularly hot, you should water your bromeliads more frequently. Keep the following light and watering parameters in mind: The softer and greener the Bromeliad, the less light—and more water—it prefers.

Many outdoor bromeliads have a “tank” or “cup” generated by their center rosette of leaves; if your Bromeliad is one of these “tank types,” water it by filling its cup. Those without a cup like to leave their bromeliads dry between waterings; however, if your Bromeliad has a cup, it is advisable to keep it full the majority of the time.

When filling the “tank,” keep an eye on the water quality. To begin, use filtered or rainfall water, and if you must use hard water, let it sit out overnight. Second, changing the water every few days keeps the water fresh and reduces bacterial growth and salt accumulation. Ideally, fill the cup with new water, turn it upside down, and then refill it.

How often should you water a bromeliad plant?

Do bromeliad plants need humidity?

Because bromeliad flowers are native to tropical forests, they flourish in somewhat humid environments with about 50% humidity; therefore, it is recommended that you spray them once or twice a week, regardless of the humidity level in your home for better care.

If your home receives a lot of sunlight, or if your bromeliads are one of the thirstier epiphyte species of bromeliad plants, you should spray it more regularly or try placing it near a shower. It should be in mind that if its surroundings are particularly humid, it will require less watering than if they are dry.

Do bromeliad plants need humidity?

Light requirements of bromeliad plants

Unless you know your bromeliads enjoy a particular light intensity, supply bright, indirect light. Other bromeliad genera can withstand varying levels of light.

Soft, flexible, spineless leaves, on the other hand, prefer lower light levels, whilst stiff, rigid red leaves prefer powerful indirect light. Some people can endure full tropical sun, while others burn quickly.

Plants that turn yellowish are in too much light, whilst dark green or elongated plants may be in too little light.

Light requirements of bromeliad plants

Soil needs of bromeliads plant.

Bromeliads thrive in potting soil that maintains moisture but drains quickly. A combination of two-thirds peat-based soil and one-third sand is typically ideal. More alternatives include orchid mix, charcoal, and soilless potting mix. Many epiphytic bromeliads can grow in pots, or they can grow as actual air plants.

Soil needs of bromeliads plant

Fertilizers for bromeliads care

During the growth season, feed weekly using a diluted liquid houseplant fertilizer placed on the soil for better care. Spray a diluted plants fertilizer, bromeliads leaves need them in the growing season.

Don’t put fertilizer in the cup outdoors since it may burn the plant or cause algae to bloom in the pooled water. Fertilize plants only while they are dormant, not when they are in flower.

Fertilizers for bromeliads care

Pests and issues with the bromeliad plant

Mealybugs and other common pests attack bromeliads. To get rid of this bug, use a cotton swab dipped in rubbing alcohol.

A bromeliad is unique, but it’s not as difficult as you may anticipate. We highly advise you to try caring for a Bromeliad plant, whether you’re a beginner or a seasoned plant parent.

Are bromeliads safe for pets?

Although all bromeliad kinds including houseplants are safe for cats and dogs, keeping your pets away from these plants is still a good idea—if they get their paws on a bromeliad, it may cause stomach pain.

Bromeliad plant care conclusion

Bromeliad plants provide a tropical flair to any space, taking you to the tropics or sun-kissed locales. It is simple to grow the bromeliads as a houseplant, giving texture and color to the indoor landscape.

Learn how to care for a bromeliad plant, and you’ll have a long-lasting, unique houseplant that requires minimal care for years in your house.

It is usually a good idea to research the needs of your specific type of bromeliads. Bromeliad care needs vary, and you may need to tweak things like light exposure or watering practices to get the best results.

Types of snake plants: care tips 101

Types of snake plants: care tips 101

Snake plants (Sansevieria) are inherently resilient and simple to cultivate. They are also known as the ‘Mother-in-tongue’ due to their tall leaves that grow in the shape of a tongue with a thick texture. Sansevieria can flourish in low light and with little water; according to several research studies, it can absorb dangerous compounds such as formaldehyde and benzene.

Here are some of the most popular snake plants to consider adding to your garden.

Along with the conventional kinds with long, thin leaves, there are cylindrical, dwarf, and even corkscrew variations that not only provide greens but also act as eye-catching focus points.

Here in this article, we will go through the most unusual varieties that are appropriate for indoor gardens. Here’s a sneak peek at all of the types of snack plants-


Sugar Water's effects on plants
Snake plant species and cultivars may be grown indoors everywhere in the globe. That’s great news if your area lacks optimum conditions, such as warm temperatures for most of the year.

These plants may also be taken outside in temperatures over 60 degrees Fahrenheit and brought back in when the chill arrives.

A word of caution, however: some of the snake plants produce fruits after flowering that is slightly toxic to both humans and dogs with other pets. Keep them away from any pet that may chew on them to avoid damage.

Types of snake plants-

Sansevieria trifasciata snake plant

People commonly call it the mother-in-law’s tongue. This is the most often used snake plant variety. Its pointed dark green leaves grow vertically and can reach a height of 3 feet. It bears lily-like blossoms in white or cream.

Sansevieria trifasciata snake plant
Sansevieria trifasciata ‘Twist’ snake plant

Its pointed leaves twist from the top, as the name implies. It may grow up to 2 feet tall and has a golden variegated border with horizontal lines. It is a slow-growing plant, so anticipate it to keep the area green for a long time wherever you put it!

Sansevieria trifasciata 'Twist' snake plant

African bowstring snake plant

This plant’s common name derives from the long, strong fibers that run through its leaves and were commonly plucked for use as bowstrings.

This is a medium-sized species that matures to be 10 to 12 inches tall, with leaves emerging from a central stem at the base.

The plants have a thin overall profile, but they expand soon after maturing, allowing them to fill out an enormous container over time quickly.

Banana snake plant

Commonly people call it a ‘Banana,’ snake plant, but it is also known as ‘Samurai,’ ‘Samurai Dwarf,’ or ‘Blue,’ snake plant. It is a lovely small succulent that fits nicely on a bedside table or windowsill or tucked in with other potted members of your succulent collection.

The leaves are broad and robust, waxy and lustrous. The color is usually deep emerald green or occasionally somewhat blue-tinged, with red edges.

Banana snake plant

Golden hahnii’ Sansevieria snake plant

This snake plant type is a dwarf cultivar that may reach a height of 10 inches. Its dark green foliage has a prominent, creamy edge and a thick, erect rosette look, making it ideal for coffee tables and the center table of your hall.

Golden hahnii' Sansevieria snake plant

Sansevieria’ Black gold’ snake plant

One of the most attractive snake plants is Sansevieria black gold. Their leaves are big and dark green, with golden highlights on the borders. Like the other species, they thrive in low-light environments, reaching heights of up to 30-35 inches.

Sansevieria' Black gold' snake plant
The black Star snake plant

Bring the ‘Black Star’ snake plant, also known as ‘Yellow Bird’s Nest,’ into your house for a significant impact in a little package.

Because it is only 12 inches tall, it will fit perfectly in your apartment, on a shelf, or in any small space.
The cream-to-golden borders of the deep green foliage and the tight rosette of short, broad leaves, one nesting inside the other and stretching out from the center.

The black Star snake plant

Sansevieria ‘Cylindrica’ snake plant

The Cylindrica, which looks like a lucky bamboo plant, may grow to be 20-24 inches tall and thrives in indirect sunlight. Water it on a regular basis to ensure optimal development.
Sansevieria ‘Laurentii’ snake plant

Its dark green leaves with yellow highlights look well with the zig-zag, horizontal stripes. It can reach a length of 30-24 inches. Divide the plant to allow for growth.

Sansevieria ‘Cylindrica’ snake plant
Mikado Fernwood snake plant

Consider D. bacularis’ Fernwood’ snake plant, which will add a chic look. If you want edgier houseplants that demand attention, go to Mikado. This cultivar is undeniably the punk version of the common snake plant.

The thin, cylindrical leaves that sprout from the single-stemmed base resemble potted green and grey-striped plants.

Mikado Fernwood snake plant

Francisii snake plant

It has a unique growth habit seen only in snake plants. This may be the best option if you’re looking for a discussion starter. Unlike others, this plant has a strong core stem from which the thick, succulent green leaves with grey banding sprout.

Because the leaves on long stems are densely packed, when a new branch develops from the base of an old stem, it creeps horizontally until it forms roots to produce a new plant.

Francisii snake plant
Jaboa snake plant

The Trifasciata’ Jaboa’ snake plant is more famous despite having a similar pattern of deeper and brighter green mottling as the one we mentioned above.

It has a maximum height of 24 to 36 inches and will become the main point of any area.

Combine it with larger houseplants like a bird of paradise or areca palm to create your own mini-rainforest, or use it as the focal point of a collection of smaller species.

Jaboa snake plant

Moonshine snake plant

D. trifasciata ‘Moonshine’ snake plant. This lovely yet delicate species exudes peacefulness with smooth, watercolor-like pale green leaves enhanced with a silver-grey hue.

The color is spectacular, but so is the structure. The leaves expand in the center, with narrow, pointed ends and a little flare, lending a flowing, kelp-like look to this variety.

When clustered together, these plants make a simple yet elegant focal point with their towering rosettes that reach up to two feet in maturity.

Blossoms on ‘Moonshine’ appear on occasion and are packed along a slender, tall raceme, beginning as yellow-tinged white buds and growing to white, delicate flowers.

Moonshine snake plant

Sansevieria gracilis snake plant

This snake plant may grow to be 18 inches tall. It has pointy, long, thin, plumped leaves with a white-green ring. They enjoy indirect, bright, and partial sunlight.

Fischeri Sansevieria snake plant: If you prefer growing little plants, this is the kind for you. It is just around 16 inches tall. In the summer, it produces a cluster of white flowers. Plant it indoors during the winter since it is sensitive to frost and cold winds.

Sansevieria gracilis snake plant

Prepare to go shopping again since you’ll undoubtedly want to bring some of these homes! These are the best types of snake plants, and with little care and effort, you can have a focal point in your home or in your garden.

Black pagoda lipstick plant: all you need to know about lipstick plant

Black pagoda lipstick plant: All you need to know

The trailing houseplant Aeschynanthus Longicaulis better known as Black Pagoda Lipstick Plant, has magnificent leaves. This article will help you with all you need to know to help your Black Pagoda lipstick plant thrive.

A Black Pagoda lipstick plant is an ideal houseplant for beginners due to its unique leaves and ease of care.

But first, one must learn how to keep it healthy.

Facts about the Black pagoda lipstick plant- Aeschynanthus black pagoda.

Aeschynanthus longicaulis is also known as Zebra Basket Vine and Black Pagoda Vine.

It makes an excellent houseplant since it tolerates low light and dryness. It thrives in hanging baskets and indoors.

This is a rare blossoming plant from Asia that blooms in the late winter and early spring. However, treating the Black Pagoda with the necessary care will keep it blooming.

The lipstick plant, Aeschynanthus ‘Black Pagoda’ is endemic to Southeast Asia’s tropical climate. It is a plant capable of absorbing water and nutrients from its environment.

This plant has flexible, trailing green stems that brown and harden with maturity.

The zebra basket vine got its name from the creamy mottling and purple undersides of its leaves.

They typically grow to be 1-2 inches tall and are adaptable to a wide range of lighting conditions, making them appropriate for indoor usage.

Facts about Black pagoda lipstick plant-

Flowers on Black pagodas lipstick plant

In late winter or early spring, mature Black Pagodas can develop blooms at the terminals of their stems. The yellow stems and orange-red tubular petals distinguish the flowers.

Most lipstick plants are grown for their brightly colored blooms, but the Black Pagoda has some of the most gorgeous leaves of any lipstick plant. As a leaf plant, it stands out more.

This plant includes glossy, mottled leaves with purple undersides, which provide interest and color contrast. Display the Black Pagoda Lipstick Plant in a basket or on a ledge. Allow people to view the backside of the leaves. They will be mesmerized!

Black Pagoda plants, like other lipstick plants, will blossom. However, unlike other lipstick plant blossoms, its flowers are yellow and green. The blooms aren’t as eye-catching as the plant’s leaves. But that’s okay since the leaves of this houseplant are the most appealing aspect.

Flowers on Black pagodas lipstick plant

How much light does lipstick plant need?

Black Pagodas need a lot of indirect light to grow and bloom.

If you want your Black Pagoda to thrive, give it 5 to 6 hours of bright indirect sunshine. It can even endure brief exposure to intense morning sunlight.

Put this plant in front of a window that faces the sun. It will produce a lot of flowers and grow swiftly.

If your Black Pagoda isn’t flowering regularly or has few leaves, simply relocate it to a location with more indirect light.

Burnt leaves, on the other hand, are the signal that the plant is receiving too much direct sunshine. In this case, just pull it back into a more shaded place.

How much light does a Black Pagoda need?

Where to grow Black Pagoda Lipstick Plant?

If you live in a warm enough environment, you can grow your Black Pagoda lipstick plant outside all year.

Aeschynanthus lipstick vine may survive on tree branches or in a full shade location in the garden, or in a container with proper drainage.

When the temperature stays above 60°F, they perform well as houseplants for the rest of the crowd. They demand moderate indirect lightning and a site away from any heating vents or humidity devices.

Because of their trailing branches, they are ideal for hanging baskets or shelves with cascading branches.

Where to grow Black Pagoda Liptsick Plant

Water needs of black pagoda lipstick plants.

They can endure periods of dryness rather well, but if maintained wet for an extended length of time, they can suffer root rot.

Before watering extensively till the soil is moist but not saturated, wait until it is 2″ deep or more dry. Never leave the pot soaking, and always promptly drain any excess.

Overwatering is one of the most common problems, so utilize a moisture meter if you’re having trouble determining whether to water it more.

Water needs of black pagoda lipstick plant

Temperature requirements for Black Pagoda Plants

Temperatures ranging from 60 to 80 degrees Fahrenheit/16 to 29 degrees Celsius are ideal for Black Pagodas. Because it prefers temperatures comparable to room temperature, lipstick black pagoda plant will grow as a houseplant in your home.

Temperatures below 60°F (16°C) may cause yellowing of the leaves. If this occurs, move your plant to a warmer location. It will recover, but the yellow leaves may remain.

Temperature requirements for Black Pagoda Plant

Soil needs for Black Pagoda plant care.

Black pagoda lipstick vine type requires dense, well-draining soil. Allowing water to run through the soil of this houseplant aids in the prevention of root rot.

In reality, the best sort of soil for a Black Pagoda is an aroid soil mix. You might try this aroid soil mix mixture for your Black Pagoda.

Soil needs for Black Pagoda plant care

Fertilizer for a Black pagoda lipstick

After your Black Pagoda lipstick plant has stopped flowering, maintain it to promote healthy new leaf growth.

During the spring and summer, apply a balanced type of granular fertilizer once a month, or a diluted liquid fertilizer such as fish emulsion or compost tea every other week.

During the Spring and Summer, fertilize your Black Pagoda Lipstick Plant once a month. These are the months of growth, and this is the only time of year when you need to fertilize this plant.

Repotting for Black pagoda plant

Your Black Pagoda lipstick plant will not require repotting on a regular basis. They like to remain root-bound, and repetitive repotting can be both shocking and harmful.

Repotting for Black pagoda plant

Pruning for black pagoda lipstick

Regular pruning of black pagoda lipstick is a fantastic approach for producing bushier, fuller growth while also keeping them healthy.

Wait till lipstick plant black pagoda has completed flowering in the spring before planting. Remove any dead leaves and clip leggy branches with a sharp set of clean precision pruners or micro snips.

Toxicity level of black pagoda lipstick

Humans, cats, and dogs are unaffected by any portion of the Black Pagoda lipstick plant.

Toxicity level of black pagoda plant

Tips for black pagoda lipstick plant care:

Here are some tips for lipstick plant care:

Aeschynanthus black pagoda propagates effectively from stem cuttings.

In the summer, once flowering has ceased, pick a healthy branch cutting and bathe it in rooting chemicals.

Set black pagoda plant in a damp, loamy medium, then place it somewhere brightly lit. Keep it moist and warm for a few weeks, and roots should develop.

Excellent for indoor gardening and ideal for hanging baskets, its cascading stems and beautiful orange flowers will brighten any environment. The variegated foliage and shiny leaves add to the form of a black pagoda.

Flowers emerge in clusters at the growing tips, varied in color from deep orange red to orange to yellow and green. The bulging pistils add a unique touch. ‘Black Pagoda,’ as is typical for this genus, tolerates dryness and prefers lower light levels. It is a tropical Asia native that flowers for us in early spring and late winter.

How to attract honey bees to your garden- Attract bees easily!

How to attract bees to your garden?

Honeybees increase the productivity and beauty of your garden outdoor like never before. The presence of bees buzzing around as pollinators brings energy to the yard, making flowers and other plants lush and plentiful.

Planting native wildflowers, fruits, native plants, vegetables, and sunflowers, letting your garden grow organically, and providing them with water and shelter may be helpful to attract bees. Continue reading to find out how to attract honeybee’s species native plants to your garden.

Bees are among the most important pollinators in any garden. If they didn’t exist, there would be fewer flowers and even fewer fruits and vegetables. Because bees provide more than simply a soothing buzzing sound, it’s worth considering how to make your garden more inviting to them.

How to attract honey bees to your garden

When bees come to your local native plants, they are primarily looking for two things:

  1. Nectar: nectar is bees’ principal source of energy.
  2. Pollen: Pollen provides a well-balanced protein and fat diet to the colony.

Attracting honeybees towards flowers:

  •  By “going native,” you effectively create a new habitat for plants that thrive in your garden. Bees, as well as other species such as butterflies and birds, would benefit from this by encouraging them to have nectar. Creating a honeybee garden does not require a significant redesign when it comes to putting in the extra effort.
  • Simply mix up the native plants that have flowers and fruits with your existing plants and add species that bloom at different times of the season to keep the garden blooming throughout summer and into the fall. Each area has its own native flowers for this purpose, and it’s best to pick plants that grow natively in your area.

Gardening methods to attract honeybees.

Use only organic pesticides to attract bees.

Avoid applying pesticides near plants that attract honeybees and read product labels to learn about the safest application techniques while gardening. Use non-toxic insecticides, pest barriers, or repellents whenever feasible in your garden. You may also grow pest-repelling companion plants.

Plant pollinator-friendly plants to attract honeybees.

Honeybees require nectar, which includes carbohydrates, and pollen, which contains proteins and lipids; thus, choose pollinators native plants that provide these.

Growing flowers, trees, or shrubs that bloom at different times of the year in your lawn, such as hyacinths in the spring, lavender in the summer, and asters in the fall will keep the bees attracted to your garden all year. Go native!

Attracting bees to your garden

Grow flowers in vibrant colors to attract bees in your yard.

Bees are drawn to blue, white, yellow, purple, and violet blooms in your garden. Plant in clusters to make it easier for bees to discover and grow flowers in a range of shapes and sizes. Because there are hundreds of different types of bees, this attracts a diverse range of bees.

Reduce the size of your grass to have a bee garden.

Bees have a more difficult time reaching inside layers of flowers in your garden. Lawns do not have to be grass mats.

Reduce the size of your grass to have a bee garden

Make available water to attract bees in the garden.

Water is essential for the survival of bees. They’ll drink from your garden’s sprinklers or irrigation systems.

How to attract bees to a bee box in your garden?

While honeybees live in hives, many wild bees seek sanctuary in dead trees or branches, burrows and nests, so leave some space in your garden, especially for them. Mason bees, which are especially valuable for pollinating fruit trees, utilize holes in dead wood made by beetles and other insects. They will also make use of a bee box that you may place in the garden.

Remember- native plants and wildflowers attract bees to your lawn because they produce far more pollen and nectar than modern, hybrid blooms.

Plants and trees that attract honeybees to your gardens-

Single flowers, those with a simple corolla and only one ring of petals, should be preferred over double blossoms, which, like ornamental roses, have multiple layers of petals.

Single flowers carry more pollen and nectar than double blossoms, and they are thinner, allowing pollinators easier access to pollen in the garden. Remember to choose bees native plants with a diversity of bloom patterns for attracting a variety of local bee species.

Plants and trees that attract honey bees to your garden-

Native plant list-

  1. Asters
  2. Calliopsis
  3. Crocuses
  4. Dahlias
  5. Geraniums
  6. Clover
  7. Cosmos
  8. Hollyhocks
  9. Sunflowers
  10. Hyacinth
  11. Marigolds
  12. Poppies

Plant blooming vegetable and fruit plants to attract bees in your garden. Berries, squash, melons, cucumbers, and other fruit trees, especially cherry trees, all have fragrant blooms and fruit that attract bees to your garden. Because bees are beneficial to certain plants, having them in your garden will benefit both parties. The following fruits and vegetables are favorites of bees:

  1. Blackberries
  2. Cucumbers
  3. Gourds
  4. Cherry trees
  5. Peppers

Plant yellow, white, blue, and purple flowering in your yard. Bees prefer these colors over pinks, oranges, and reds. It is not necessary to have an exclusively yellow, blue, or purple garden, but having a range of flowers in these colors helps keep the bees happy.

Make your surroundings bee friendly.

Unlike honeybees, which live in large numbers in nests, many wild bee species are solitary and must construct their own homes. To attract wild bees, leave dead branches, twigs, and other raw materials in your lawn.

Make your surroundings bee-friendly

How to attract honeybees with sugar water?

Bees are unique, and their treatment must reflect this. There are a few reasons why you might wish to augment their food supply with sugar water, but it’s crucial to understand what they are when to feed them, and how to feed them.

So, under what circumstances should you feed your bees?

  • When you have a colony of bees, and they need a little assistance getting started — there is no stored food in their hive yet, so feeding them sugar syrup might be beneficial.
  • In the midst of winter, when the bees don’t have enough nutrients in their colony — and there is no flowering to feed them.

Bees that run out of nutrients or food can die in a matter of days, and it is your responsibility to keep an eye on the situation to avoid this.

Simply add water and sugar to a bowl and let the bees devour at their leisure. Isn’t that the end of it? No, it requires a bit more effort. Remember the 1:1 Ratio.

Ideally, you should provide a lighter syrup in the early spring. To acquire this sugar-water-for-bees ratio, simply combine equal parts water and sugar. It contains a liquid syrup with the consistency of natural nectar. Honeybees’ nest season begins in the spring. When the queen is given a dosage of light syrup, she knows it’s time to start producing eggs.

This feeder is kept outside the hive, just at the hive entrance. Typically, it is an upside-down mason jar with holes in the lid. The syrup drops into the hardwood base, which fits precisely into the entry grooves.

There are plenty of feeder alternatives available in the market; purchase one as per your requirement and affordability, and you are good to go.

In conclusion, to attract bees to your garden, remember,

Bees may be little, but they pack a powerful punch – and we’re not talking about their stinging skills. Honeybees and other native species pollinate up to one-third of the fruit we eat in our gardens. Many species are decreasing as a result of stress, illness, and parasites.

It is vital that we begin to consider how we might help bees and attract them to our gardens, where they may find food that is pollen and nectar and safe places to reside.

Although honeybees, mason bees, and other species are typically gentle and rarely sting unless they become entangled in your clothing, are disturbed, or are treated aggressively, some may sting. If you or a member of your family suffers from allergies or other health problems, see your doctor to confirm that bringing bees to your garden is safe.

So, what are you waiting for? Follow these tips on how to attract bees to your garden, and soon hear the mellow noise of buzzing!

Pet friendly houseplants: Safe plants for cats and dogs

Pet-friendly houseplants: Safe plants for cats and dogs

Plants and dogs are two of our favorite furry friends in life. The bad news is that many popular plants are not good for cats and dogs. When some plants are consumed by pets, they can become deadly, causing seizures, tremors, and even death.

Even the most well-behaved pets are going to consume a houseplant at some point. Since we strongly advocate adding flora to your home to clean the air, raise your mood, and ensure the safety of your favorite pet.

It might be challenging to keep a houseplant away from a curious pet; thus, it is our responsibility to develop pet-friendly plants. Although understanding which houseplants are safe for cats and dogs is helpful, it is also essential to know which houseplants are not pet-friendly and are harmful to them.

Plants, on the other hand, may live side by side with cats and dogs. With the exception of delicacies such as cat grass, it’s typically advisable to keep costly houseplants out of the reach of pets wherever feasible.

You adore your pet and your houseplants. However, there are situations when the two just do not combine. Choose vegetation that will not harm your pets if you have a curious cat or dog, a new pet, or a small creature you know likes to nibble on your plants.

Unfortunately, several popular houseplants, such as Swiss cheese plants, aloe vera, etc. that, are toxic and can cause serious illness in animals if consumed.

Top 12  pet friendly houseplants: safe plants for cats and dogs

List of non-toxic houseplants that are safe for pets: cats and dogs.

African Violet

It occurs in purple and pink varieties, takes minimal maintenance, and thrives in low light. Water African violets by allowing them to soak up water via the drainage hole in the container to avoid damaging the leaves and petals. Because it grows to be less than 12 inches tall, this flowering houseplant can enliven even the tiniest of settings and are pet-friendly houseplants.

African Violet is safe for pets

Goldfish plant

This one-of-a-kind plant is pet-friendly and ideal for cat and dog owners!

The Goldfish Plant is a lovely blooming plant named by its flowers! Their red-orange flowers appear throughout the spring and summer.

Goldfish plant is safe for cats and dogs

Watermelon Plant

The aluminum plant (Pilea genus) is a lovely, pet-safe houseplant with variegated grey-and-green leaves. It grows well in medium to low light, stays under 12 inches tall, and requires water only when the top inch of soil is dry. Because it tolerates low light, you can grow it almost anywhere your dogs can’t reach.

Watermelon Plant is safe for pets

Christmas Cactus

Like its dangerous holiday sister amaryllis, Christmas cacti are safe to keep around curious cats and dogs. Although you should not allow your dogs to chew on it, it is a better alternative than many other festive plants.

Christmas cacti are frequently confused with Thanksgiving cacti, despite the fact that both are pet-safe and require identical care. Both cacti grow very short (about 12 inches) but can spread up to two feet and do best with regular watering and bright, indirect light.

Christmas Cactus is also safe for pets

Baby’s Tears plant can be near pets safely

Soleirolia soleirolii’s spreading mat of tiny green leaves lends interest to terrariums, small hanging baskets, and as a companion plant at the base of indoor trees. Baby tears plants cover the earth and may stop pets from digging in your houseplants.

Baby's Tears plant can be near pets safely

Spider Plant

This plant is popular among veterinarians because it is simple to grow indoors and extremely hardy. Spider plants are also excellent air purifiers, so they may assist in the removal of pollutants from your house.

Spider plants dislike bright light; it scorches their leaves. Though they can withstand lower light levels, they thrive best in solid indirect light at temperatures ranging from 60 to 80 degrees F.

Parlor Palm

Place one on a nightstand away from a window, as this palm requires only a few hours of indirect light daily.

Parlor palms are naturally slow growers, taking several years to reach a height of three to four feet. For optimum results, keep this out of direct sunlight and keep the soil uniformly wet.

Parlor Palm is safe for pets

Succulents are pet friendly

Add some animal-friendly succulents, or a selection of air plants, to your countertop, and you’re set, as well as safe for your pet.

Though you won’t have to do much to care for these popular houseplants, make sure they get adequate direct sunlight and light watering every two weeks or so. Before you grab the watering can make sure the dirt is fully dry.

Succulents are pet friendly

Polka Dot Plant is safe for pets.

In its native Madagascar, this eye-catching polka dot plant may reach heights of three feet. The speckled beauty in a planter inside your house will only grow to around 10 inches tall.

These unusual indoor plants require continual bright, indirect light as well as a modest amount of moisture in the soil. Keep temperatures between 70- and 80-degrees Fahrenheit during the growing season and feed once a month. They are pet safe and pet friendly plants.

Polka Dot Plant is safe for pets

Friendship is pet friendly plants.

The name of the friendship plant comes from how readily it can be split and shared. If you get one as a gift, rest assured that your cats and dogs can eat the plant’s fluffy, wavy leaves. Friendship plants grow well in terrariums, tolerate medium and low light conditions, and seldom grow taller than 12 inches.

Friendship Plant is a safe plant for pets

Lipstick

These unusual indoor plants, pet-friendly shrub has flowers that resemble lipstick tubes and is suitable for both cats and dogs (other members of the Peperomia family are, too). The lipstick plant, a tropical native, thrives in bright light and prefers to be outside throughout the summer. It may reach a height of 20 inches and likes consistently damp soil, so don’t forget to water!

Lipstick Plant is safe plant for pets

Orchid

Orchids are among the most elegant plants. Fortunately, you may add one to your home without endangering your pet. Orchids may live for up to four months if properly cared for. They work best in low-light conditions. Water once a week in the winter and twice a week in the summer.

This Asian orchid thrives in bright sunlight, warm temperatures, and humidity. It generally blooms once a year for up to three months, after which the petals fall off, but the blossoms revive the following season.

Orchid is a safe plant for dogs and cats

Bromeliad

A bright bromeliad is a perfect way to lend a tropical vibe to any environment. Bromeliads, which produce blossoms that may last for months, can liven up any location in which they are put. They need a lot of airflow, so an open space with windows and indirect sunlight, such as a living room, kitchen, or bedroom, is ideal.

Watering thoroughly every one to two months, as well as strong, indirect light, will guarantee that your bromeliads bloom to their maximum potential.

Bromeliad is a safe plant for pets

While houseplants may add lushness and color to a space, several kinds can be poisonous to pets who may nibble on a leaf or two.

Fortunately, there are many plants that may beautify your home without hurting your Furry friend. If your pet does nibble on a plant, even one that is unlikely to cause health concerns, keep a watch out for any indicators of a negative response. Just because a plant isn’t poisonous doesn’t mean it won’t cause stomach pain in your pet if he or she consumes it.

10 partial shade shrubs: Shrubs to grow in shade

10 partial shade loving shrubs: Shrubs to grow in shade.

Some people believe that if they don’t get much sun in their area, they won’t be able to grow any bushes in their yards or gardens. However, it isn’t true at all! Don’t be disheartened if your garden receives little sunlight. There are many excellent plants for partial shade, and many of them flower!

There are plenty of options available for shrubs and bushes to grow in the dark and shade. You should have no trouble finding suitable shrubs to fill your space.

This restricted range of shade-loving shrubs that flourish in low-light situations makes it simple to landscape a gloomy place. Most of the following plants may even produce lovely and fragrant flowers, which may brighten up those hard-to-fill places in your yard.

10 partial shade shrubs: Shrubs to grow in shade

The deciduous or evergreen plants you pick for gloomy locations may change depending on the type of shadow you have in your backyard, so evaluate its patterns at different times of day and throughout the seasons. Smaller sections may be shaded all day; larger areas may only be shaded for part of the day; thus, the shrubs must be sun-tolerant.  There are several small shrubs that are suited to the specific environment found under trees or beside them.

How to grow and plant shrubs in garden?

It may be tough to develop a garden in a shady area in your home. You must ensure that you choose suitable bushes for the situation. Flowering shrubs may fail to blossom or bloom poorly if not given enough sunlight, and many shrubs may perform poorly overall.

Deep shadows could even hurt your plants unless they are species that naturally prosper in the shade. The plants mentioned below can flourish in at least partial shade, and some can grow in full shade.

How to grow shrubs in shade?

Shrubs are one of the solutions to your favorite trees, have numerous functions in landscaping, and may form an excellent focal point in your garden.

The most prominent advantage being they may also maintain blooming in a dark place! So, if your garden doesn’t receive a lot of sunrays, here are some of the most incredible Shrubs for Shade that you may grow!

List of shade shrubs to grow- Low maintenance shrubs

Hydrangeas

Hydrangea is a fantastic choice when picking bushes for partial shade. It is well-known for its vast, stunning flowers, which are ideal for bouquets or drying.

Late spring and summer blooms can range from white to pink, purple, magenta, or blue, depending on the variety.

There are many different species and hybrids. Some are just 36″ tall, while others may grow to be 12′ tall. It is best to grow them in zones 5-9.

Hydrangea is a shade loving shrub

Sumac

Sumac has a compact, shrub-like appearance that will fit into practically any size landscape. Sumac grows fast and requires rich, somewhat damp soil with some shade. You can grow them in zones 3-8.

Although wild sumac can become invasive, most new dwarf hybrids will remain contained, growing only 6 feet tall and broad. Some types like full sun, while ‘Tiger Eyes’ needs at least half shade and has a gorgeous golden tint to its leaves.

Conditions to grow them is in well-drained, regularly wet soil, grow in partial shade or full sun.

Sumac can grow in partial shade

Yew

Yews, one of the world’s most versatile shrubs, come in a variety of shapes and sizes and may be easily chopped into hedges. Yews like moderate sunlight but may thrive in the shade or full sun, depending on the variety. Use spreading variety along a foundation or path, then line up erect forms to offer isolation around a patio or spa. All year, the plant’s delicate, dark green needles are lovely.

Growing conditions are the full sun to light shade on well-drained soil.

Yew can grow in partial shade

Spirea shrub

These little shrubs have beautiful blue-green foliage and thrive in light shades. They are of the smallest growing plant ranging from 24-35″ tall.

Spireas are particularly cold and resistant, flourishing at temperatures ranging from 2 to 7 degrees Celsius. Precisely to be in zones 4-8.

It flowers from mid-spring to midsummer, with clusters of beautiful tiny umbrella-shaped flowers. Pink and white blooms attract bees and butterflies.

Spirea is a shade shrub

Bush Honeysuckles

Bush honeysuckles are excellent plants for shady areas because they attract pollinators such as butterflies and bees.

They may reach a height of 10-12′ and are resistant in zones 4-8. Pink or yellow blossoms appear in late spring to early summer.

It blooms brightly in early summer, brightening up the shady area where it is planted. They also have lovely fall foliage, which adds to their appeal.

Bush Honeysuckles can grow in shade

Serviceberry shrubs

If you’re seeking four-season beauty, you can’t go wrong with serviceberry, occasionally called shadblow. This lovely native tree has a shrub-like form and produces millions of tiny white blossoms in the early spring, followed by delicious blue-black berries in the summer.

In the autumn, the foliage becomes a beautiful crimson, and as winter approaches, the plant’s bark adds tactile interest to an otherwise lifeless setting.

Mild shade or partial sun in well-drained soil is ideal for this plant. Zones 2-8 are good as it is a versatile plant.

Serviceberry shrub can grow in partial shade

Camellia

Camellias are unquestionably the queen of the winter garden, flowering continuously from October to late April. These lovely plants have an almost infinite variety of flower colors, including red, white, and pink, and some are highly fragrant.

Camellias have a dense branching habit and glossy, vivid green leaves, making them attractive even when not in bloom. Camellias are slow growers, although most varieties may reach a height of 12 to 20 feet. They prefer moderately sandy, acid soil.

Growing conditions for camellia are no sun exposure, full shade in well-drained soil, with zones ranging from 6-8.

Camellia can grow in partial shade

Roses

Believe it or not, roses may be wonderful shrubs for shady gardens. Some types will not only endure but even flourish and bloom in partial shade.

Cultivate a couple of species in half shade, and they bloom lavishly.

There are several kinds to pick from, each with a unique blossom color. Depending on the variety, their resistance ranges from area to area.

You may also have them in any height you require. Small variants can grow to be as small as 24″ and as tall as 20′.

Roses can also grow in partial shade

Mountain Laurel shrubs

Several spring drives may reveal wild mountain laurels in bloom on slopes and meadows. This magnificent native spring-flowering shrub is a great landscape plant boasting enormous clusters of cup-shaped rose or white flowers with purple patterns. It prefers rich, somewhat acid soil.

Partial shade in wet, well-drained part shade soil are good for this one. USDA zones 5-9 are ideal for this hardy plant/shrub.

Mountain Laurel shrub can grow in shade

Barberry

Because of their beautiful, deep red leaves, barberries make great shade plants. They receive small yellow blooms in mid-spring but are more recognized for their leaves.

When interplanted, certain varieties have golden yellow foliage that contrasts attractively with the red foliage.

They not only have beautiful flowers, but they also provide bright red berries in the fall while being a hardy plant.

This hardy shrub spread in warm to cool climates and grows well in a wide range of temperatures. They can grow up to 48″ tall; however, dwarf versions stay smaller – between 24-36″.

Barberry can grow in partial shade

How to grow shrubs in shade?

Although it may be difficult to grow shrubs in the shade, there are a number of things you can do to improve the success of your plants. Prioritize bushes that can endure shade exposure, full sun can ruin it. To enhance soil quality and create the ideal full shade, soil condition, add organic matter to the soil.

Secondly, ensure that your shade loving shrubs get enough water, even in shady regions. Pruning often will promote growth and keep the flowering shrubs in good shape. Cut back neighboring bushes and trees to allow lighter to reach your plants.

Finally, take precautions to keep garden pests like slugs and snails out. You can effectively cultivate gorgeous and healthy shrubs planters, hanging baskets will also be helpful.

Amaryllis

The huge, trumpet-shaped blooms of the amaryllis, a stunning flowering plant with a variety of colors, including red, pink, white, and orange, are something which make them so popular. Depending on the kind, planting amaryllis bulbs in the fall will result in flowers in the winter or early spring while gardening.

Although they may take little shade, they like soil that drains well and lots of sunlight. The top third of these bulbs should be exposed above the soil line when planting them. Regular watering is recommended, however avoid overwatering as this might lead to the bulbs rotting. If given the right care, these plants can bloom for a number of years.

Conclusion

There are many shade shrubs that thrive in full or partial shade, so don’t ignore darker borders and corners of the garden and give them to storage areas, but rather make the most of them by adding interest and color via intelligent planting.

The best shade plants may provide varying levels of flowers throughout the year, and dealing with shifting degrees of light and shadow and fewer tools is something that every gardener must learn and understand.

Instead of perceiving shaded backyards as challenges, embrace the chance to include stunning contrasts in your backyard plans. Plant these lovely shrubs that flourish in shade or partial shade.

Peat pellets vs soil: Which is better for peat pots and why?

Peat pots vs soil: Which is better and why?

The new gardener could feel overwhelmed by the variety of soils and potting mixes available. It’s vital to keep in mind that most plants are flexible and can live in almost any environment. Which is better, peat pellets or soil? But we must take good care of the plants and the yard as a whole.

Let’s learn more about peat pellets and soil.

While though many gardeners enjoy creating custom blends and some plants require specific care, most of the time an exact mixture is not required. Peat moss is a frequent component in both types of potting mixes, which are typically either soil-based or soilless.

Peat pellets vs soil: Which is better and why?

Gardeners all across the world are searching for reliable ways to start their seedlings, and peat pellets are a simple and compact design plug for seedlings to take hold in. Peat pellets are just dried peat or coco coir that has been held together with biodegradable mesh netting, making them organic and easy to shift once your seedlings emerge.

What are pellets / pots exactly? Peat pellets know-how:

If you are new to gardening or seed starting, you might not be familiar with peat pellets know-how and jiffy peat pellets. Gardeners may now sow seeds more effectively and comfortably thanks to peat pellets.

The peat pots, which are formed of peat moss that has been compressed, resemble tiny earth discs. These peat moss-based compacted soil discs, as their name implies, are a favorite medium for growing seeds and plants.

Pellets for starting seeds make it simple to plant seedlings in the garden in addition to making it simple to sow seeds.

What are peat pellets/pots exactly? Know-how all about it-

What are jiffy peat pots?

Using compressed peat moss soil, jiffy pellets are tiny, biodegradable containers. These containers are frequently used by gardeners as a practical way to germinate cuttings or start seedlings. Jiffy peat pots are simple to use; just fill the jiffy pot with water to expand it, plant the seed or cutting, and set it in a sunny location.

There is no need to disturb the plant’s roots because the pot will gradually decompose as the plant grows and may be placed directly into the ground. Jiffy peat pots are a 100% biodegradable and sustainable alternative to plastic containers because they are made from a renewable resource.

Seed Sowing Peat pellet Vs Soil seed trays

When picking between these two methods, there is no “right” way to start your seed sowing. Many times, it will just come down to personal choice. So finally, it is soil vs peat pots!

However, you must weigh all of the benefits and drawbacks, not just the price. The simplicity of usage of peat pellets is one of its most significant advantages.

Peat pellets pros-

Here are some peat pellets pros:

  • Simple setup- no need to fill cells with soil; simply pour water into the peat pellet trays and watch the peat moss discs expand.
  • Less effort because you simply have to clean and disinfect the seed trays and not all of those plastic cells. Plus, less mess, which is unlikely in the case of using soil.
  • You don’t have to buy a new seed starting kit every year; just purchase peat pellet refills and reuse the tray.

Disadvantages of using peat pellets-

  • The seed-sowing peat pellets are kept together on the outside by a mesh or thin netting that does not appear to degrade in the garden. However, in using soil, there isn’t any waste.
  • Peat pellets dry faster than soil in plastic cells.
  • The opening on the top is too tiny for big seeds – However, sowing soil and mixes is an excellent alternative for larger seeds.

Seed Sowing Peat pellets -VS- Soil seed trays

Starting seeds indoors with peat pellets-

Starting seeds indoors with peat pots is an easy task!

  • Peat pellets, also known as seed plugs, are pretty helpful when starting seedlings inside. Whether you have a large or little garden this year, peat pellets are an excellent way to start!
  • Arrange the peat pellets in the Plant Tray and water each seed plug until it grows ultimately.
  • Make sure that no netting has moved over the plug’s top. If so, draw the netting to the edge using a pencil.
  • After they have expanded, draw a 14″ to 16″ deep hole with your pencil. Fill each peat pellet with one or two of the seed kinds of your choice.
  • Keep track of the seeds you put in which pellets by using plant labels or markers.

Next step:

  • Add sand over each pellet. It will hasten germination.
  • To give your plants a greenhouse appearance, wrap the soil plugs in plastic wrap. Put your plants in a spot with some filtered light.
  • To provide your plants with enough lighting, you can also utilize a grow lamp.
  • Drill air holes in the plants’ covering to keep them from overheating.
  • The jiffy peat pellets shouldn’t be completely dry, but they should be damp but not drenched in water. As the leaves appear, take off the cover and relocate the pellets so that they will get at least six hours of direct sunlight daily.
  • Transfer your seedlings to a larger container after they are a few inches tall. This enables the roots to spread out and grow deeper.
  • Your plants ought to be prepared for planting outside when the weather warms.
  • Your plants should be moved to a shaded area for progressively longer periods of time, starting with several days in a row. If it seems like the temperature is dropping, bring them inside or cover them.
  • As you notice that they are growing stronger and seeming ready, gradually increase the amount of time they spend outside and exposure to sunshine.
  • Before and after you transplant your seedlings, give them plenty of water. Avoid moving them in the middle of the day, when it is the warmest.
  • The main difference between peat moss and potting soil is that peat moss lacks soil whereas potting soil contains soil along with a few additional ingredients. Of course, peat moss can be included in potting soil to help moisture-loving plants.

Sowing seeds indoors with peat pellets-

Using soil during seed sowing

Potting soil, often known as soil-based potting mix, is made out of soil and other components. Fertilizers, moisture-retaining chemicals, peat moss, or perlite are examples of additional additions. Potting mix resembles quality garden soil in look and feel.

It has a good body to sustain huge plants through its roots. As a result, soil-based combinations can add weight to a container planter. This isn’t an issue for little houseplants, but it can be difficult for larger ones.

Peat pellets and hydroponics-

Jiffy peat pellets—can they be used in hydroponics? Only if you correctly install your hydroponics. The hydroponic system may become blocked if the biodegradable mesh netting contains peat material. It is advisable to add a filter to the hydroponic pump system or to start seedlings with various materials.

Jiffy peat pellets—can they be used in hydroponics? Peat pellets are generally not advised for use in hydroponic gardening. Peat moss gradually deteriorates, clogging the water pump and contaminating the nutritious fluid in the reservoir. Mesh netting’s effects on root growth and seedling health over time are possible.

Peat pellets and hydroponics-

Using jiffy peat pellets complicates problems for the hydroponic systems of your garden, although it is feasible to prevent major complications with preparation and monitoring.

Problems with peat pellets and hydroponic systems-

Danger of Clogging Over time, peat degrades, enabling particles to accumulate and choke pipes.

Inadequate Assistance Peat pellets are not tall or substantial enough to support budding plants compared to seedling containers.

Environmentally unfriendly The mesh netting can take years to degrade, and removing peat moss emits a significant amount of carbon.

Ways to use peat pellets in hydroponics.

Once the seedlings have developed leaves, remove them from the peat pellets and place them in different growth materials so the roots may extend freely.

If you intend to keep your seedlings in the jiffy peat pellet in your garden, prevent pipe clogging by installing a filter over your pump intake and frequently washing the remaining peat off the roots with pH-balanced water.

Ways to use peat pellets in hydroponics

What disadvantages does peat moss have?

Peat moss has some drawbacks even if most experts concur that it is important as an organic product containing vital elements like potassium and magnesium.

  • Due to its low availability, peat moss is not ideal for providing soil nutrients like nitrogen close to plant roots.
  • Due to its lack of nutrients, peat moss is ineffective as a standalone amendment. As a result, mixing peat with other materials is an excellent idea.
  • Pests like mites and nematodes that can infest other plants in your garden may be found in peat moss. It may be challenging for plants to thrive on peat moss due to its acidic ph.
  • The high salt content of the peat moss has the potential to damage plants if they are not planted correctly. Experts recommend using fresh peat or adding gypsum to assist balance its impact on plant development to help prevent this problem.

What disadvantages does peat moss have?

Jiffy pots for outdoor holiday decor

Jiffy peat pellets are an excellent substitute for other types of outdoor holiday decor, especially if you want to give your decorations a more organic look. Peat pellets can be shaped into many different holiday-themed shapes, such as stars, snowflakes, or wreaths, and embellished with lights, decorations, or ribbons.

Since the peat pellets disintegrate outside, keeping them there won’t harm the environment. The holiday decorations are simple to compost after the season is over, feeding garden plants. Jiffy peat pellets are a versatile and long-lasting option for outdoor Christmas décor that can help cut down on waste and promote eco-friendly living.

Conclusion

While there are some environmental issues with using peat mosses/pellets in gardening, this does not imply that cannot use them at all!

One can use Peat pellets or moss frequently as a soil supplement to improve drainage and moisture retention.

Peat moss can affect soil drainage and nutrients in your garden when coupled using compost or other organic matter like straw, helping to balance its impacts on plant development.

Consider using peat pellets instead of vegetation peat moss in your vegetable beds or raised planters.

Begonia plant care – A complete guide

Begonia plant care – A complete guide

Begonias are tropical and subtropical plants that we see in homes and in the shade of your summer gardens. Some are cultivated for their asymmetrical, variety of leaves, along with different patterns while others are grown for their vibrant flowers that add color to shady garden areas. Despite their small size, Begonia plants provide a big punch of color and appeal. Begonias are among the easiest plants to grow in containers. However, as with every other, begonia also needs specific care and effort.

Begonia plant care- A complete guide
So this is how you may care for the begonia plant-

Common begonia types

Begonia variants are almost infinite. Begonias come in a variety of colors, sizes, and shapes, with over 100 species and countless variations and hybrids. The four basic types are fibrous, tuberous, canes, and rhizomatous.

Wax begonias

The most popular are Begonia varieties, sometimes known as wax, annual, or bedding begonias. These shade-loving plants add a splash of color when planted beneath trees or when you place them beside your work/study desk. Wax begonias are frequently grown as annuals, with heights and widths ranging from 6 to 12 inches.

Tuberous begonias

Tuberous begonias are another popular variety with beautiful multicolored flowers that look great in hanging baskets or containers. They also grow more quickly than wax begonias, reaching heights of 12 to 18 inches as houseplants and 3 feet or more in outdoor containers.

So this is how you may care for the begonia plant-
Cane Begonia

Because of its upright growth habit and segmented stems, cane varieties have attractive foliage and bloom in a range of colors. Angel wing begonias, so named because of their wing-shaped leaves, also fall into this group. They are popular as houseplants, but they may also be grown outdoors. Their sizes range from 6- to 12-inch houseplants to bushy plants up to 5 feet tall, depending on the growing conditions.

Rhizomatous begonias

The most common form is rhizomatous begonias, which are distinguished by relatively thick stems, or rhizomes, that grow horizontally towards the soil surface and produce new roots and leaves. They also have some of the most unusual leaves and stems and are commonly grown as houseplants. Plants can grow to be several inches tall and three feet wide.

Rex Begonias

Rex begonias are widely available all year round and grow to be 12 to 18 inches tall and wide. Although they might be a slight temperature vary, they are popular houseplants due to their unique leaves. In the summer, they look lovely in flower beds or pots.

Begonias are among the most visually appealing plants you can cultivate indoors. They may be demanding light and water, making them an excellent beginner-level plant project.

Here’s what you should know about begonia plant care-

Planting Begonias

When to plant begonia: Plant them after all frost danger is nowhere near, as they are highly frost-susceptible and can die in low temperatures.

Planting Location: Choose a site with partial shade, with early morning sun and afternoon shade being ideal, especially in hot weather. Try a dark-leaved variety or one that specifies enhanced sun tolerance for sunny regions.

How to plant begonia: Plant wax begonia plants around 6 inches apart. Tubers may start indoors by placing in a small dish of moist potting mix. Place the tray in a dark location and water it just enough to keep the potting mix moist but not soggy. Tubers should sprout in 4 weeks and you can move them to a brightly lit environment when they are about one inch tall. Plant only when there is no risk of winter.

Planting begonia

Watering the begonias

The most challenging component of growing begonias is determining the proper watering routine. Because begonias are particularly susceptible to overwatering and can develop root rot quickly, the soil should be somewhat damp but not saturated at all times.

  • Test the soil with your finger before watering—the top inch should feel dry.
  • Water the soil directly while keeping the leaves dry.

Begonias also require high humidity to grow, making indoor cultivation problematic. Rex begonias are more humidity sensitive than other types. You might keep your begonia in the bathroom or kitchen, where the air is moister.

Watering the begonias
Soil requirements of begonias

When planting directly in the ground, find a moist, well-drained location and mulch to protect the roots. Make sure to incorporate drainage holes in your containers. A peat-based potting mix is ideal for containers. Light, healthy soil is suitable for Rex begonias.

Soil requirements of begonias

Temperature and humidity for begonias

Begonias are winter intolerant, most of them. They may be a better option as houseplants in the winter, much like other delicate winter flowers. Because these plants require high humidity, more than 50%, for example, maintaining rex begonias indoors throughout winter may be difficult.
Sunlight requirements for begonias

Cane begonias require strong, indirect sunshine. Rhizomatous and rex begonias love the shade. If your plant’s leaves appear to be dry, move it to a less sunny spot.

Temperature and humidity for begonias
Planting and potting of begonias – Although they love to be in a pot and thrive in it, you should repot them in spring. Rotating the rex begonias in pots keeps plants healthy and beautiful.

Pests problems with begonias – Bacterial leaf spots, mildew, and other infections may occur if the leaves remain moist. Root rot may be a problem in damp areas. Plant your begonias in well-drained soil and water them sparingly to avoid these issues. Growing begonias in a container allow you to bring them inside when it rains if you live in a flood-prone area.

Planting and potting of begonias
Fertilization of begonias – To foster bigger leaves and flowers, apply a liquid houseplant fertilizer according to package guidelines every two weeks. Fertilize the begonias as you do to your other plants.

Fertilization of begonias

Tips for begonia plant care-

  • Wax begonias thrive in flower beds as border plants.
  • Trailing and mounding varieties are perfect for pots, bedside windows, balcony hanging pots, etc.
  • Mix and match plants with contrasting leaf colors, shapes, and textures to create a healthy yet attractive begonia garden. They benefit from other plants and vice-versa.

So, begonias are particularly popular because of their little maintenance. In warm climates, they may bloom all year. Pruning is done in the spring in this climate. They can be brought indoors in cooler temperatures and kept as houseplants throughout the winter. Annual begonias can be cut back before frost and used as a houseplant all winter. Keep the soil moist, add humidity with a small stone tray, and place inside in bright, filtered light. So you know you are good to go!

Benefits Of Rain Barrels And How to use Rain Barrels

Benefits Of Rain Barrels And How to use Rain Barrels

Why should you harvest rainwater? There are several reasons, like saving money, less water shortage, and more prominent reasons, like helping the environment. But do you save rainwater? Obviously through rain barrels! The following are the main benefits of rain barrels.

Rain barrels capture and store rainwater that is coming from your roof, a process called rainwater harvesting. They typically hold from 50 to 80 gallons and have a connection for a hose in your garden. A rain barrel device at the top of a downpipe aids in filling the barrels. The use of rain barrels with appropriate plants in your garden and taking care of them promotes water conservation. Harvested water can also be used to feed the birds and provide water for outdoor activities or in landscape designing and fountains.

Benefits Of Rain Barrels And How to use Rain Barrels

Despite being one of the most available natural resources on the planet, fresh water isn’t available when you need it the most.

One of the most significant advantages of rain barrels is capturing and saving this resource to use later. However, rainwater harvesting is becoming woke these days for many other reasons as well.

Collecting rainwater is one of the most manageable steps you can take to make an incredible environmental and economic impact.

Benefits of rain barrels-

Chemical-free water for plants

Most tap water a municipality provides contains inorganic materials and compounds that are present in the soil over time and can visibly harm plant roots and several good microorganisms. Rainwater generally does not include the same compounds found in regular tap water. However, it is a different story for areas that are prone to acid rain.

Harvested rain benefits plant with time by clearing the soil of chemicals. Beneficial microbes and insects benefit, too.

Benefits of rain barrels-

Prevent flooding and soil erosion

Maybe your area gets too much rain, flooding your garden with puddles and eroding away your topsoil. A rain barrel can help you, too. All the water you catch from the downpipe doesn’t end up in your garden.

When you minimize flooding, you prevent wet garden problems such as damage to your flower beds, fungus on plants, and pests. As when you save it from soil erosion, you keep your soil healthy, prosperous and perfect for growing strong, healthy plants.

Prevent flooding and soil erosion

Provide water during a shortage

With high summer temperatures gradually increasing, having water in-store when you need it is always valuable for your plants, especially during the dry season.

Rainwater collecting provides extra moisture for plants and gardens during dry times and water shortages.

This is especially important during times of drought and water scarcity. You may keep your garden green and abundant without depleting common resources or incurring additional consumption expenses.

You may utilize collected rainwater to irrigate your garden as much as you need because you are not wasting any water.

Provide water during a shortage

Saves you money on bills

Even if environmental impact is not on your list of issues, you’re undoubtedly concerned about the financial cost. When you collect rainwater, you may utilize it for a variety of purposes, including:

  • Watering the lawn and garden
  • Watering indoor plants
  • Cleaning your vehicle
  • Garages, veranda areas, terrace, etc., must need cleaning
  • Cleaning the heavy carpets or curtains

Every gallon of rainwater collected and utilized around the house is a gallon of free water.

Saves you money on bills

Helps to conserve water

Another significant benefit of rain barrels is that they aid in conserving water by being utilized for reasons other than gardening.

While rainwater is not drinkable, it may be utilized to fill buckets for cleaning the car, patio furniture, windows, or other household chores like giving your pets the ultimate punishment: bathing.

 Helps to conserve water

Improves water quality

The removal of dirt, pesticides, fertilizers, and yard trash from our rivers and streams improves water quality.

Storm drain discharge pollutes natural waterways, causing severe river damage.

Preventing this from happening improves the state of our nearby rivers, keeping our lakes and rivers healthy while also safeguarding the people and animals who use them.

Improves water quality

Functioning of a rain barrel

Rain barrels are simple to use. Here’s a more detailed description of how they work:

  • Rain drips on the roof, enters the drain, and flows down the downpipe.
  • Water can enter the rain barrel directly from the downpipe or through a regulator that you install.
  • The rain barrel fills up steadily. Rain barrels typically have a capacity of more than 40 gallons.

To drain water, use the tap at the bottom of the barrel. Fill a bucket or watering can with water, or connect the fixture to a sprinkler or drip irrigation system.

An overflow valve keeps the barrel from overflowing by redirecting excess water away from your garden and home’s structure. You can connect the overflow to another barrel.

Functioning of a rain barrel

Rain barrel tips

While preparing your rain barrel, keep the following points in mind.

To keep dirt out of a rain barrel, use a filter. Ensure your rain barrel has a lid and a tight connector where water enters the barrel to reduce mosquito breeding and algae accumulation.

Remember that just covering the barrel with a cloth will not make the water drinkable. Rainwater collected in barrels is unfit for human consumption unless adequately filtered.

The danger of germs from the rooftop washing into the barrel is one disadvantage of rain barrels. Do not collect rainwater in a rain barrel if your roofing material contains hazardous elements.

Rain barrel tips

To summarise, because rainwater barrels are so adaptable and inexpensive, rainwater barrels are available in a variety of designs and sizes to fit your needs. If you reside in an area with little room for rainwater collecting, consider purchasing a compact, 50-gallon tank. If you have a considerable amount of property, you may want to consider a larger, 100-gallon rain harvesting tank.

So what are you waiting for? Save the planet and your wallet now!