10 Flowering Vines That Grow In Shade – Climbers You Can Start Growing in Shade

10 Flowering Vines That Grow In Shade – Climbers You Can Start Growing in Shade

Imagine the leaves that frame your view, the blossoms that bloom right at your eye level, all the while you seek shade from the Sun in that beautiful garden sipping’ tea! This can be your reality! In this article, we will talk about flowering vines that grow in the shade.

In nature, some vines grow across tree trunks, particularly in tropical forests. This has resulted in an abundance of garden varieties and cultivars that you may prosper in that low-light part of your garden. They’re also great for unwinding away from the summer heat.

Flowering Vines That Grow In Shade

Shade flowering vines are lovely additions to gardens, unattractive fences, or anything else in your yard that you want to hide. You could even benefit from these flowers because some of them produce food. Growing blossoming vines in your yard will attract butterflies, as well as hummingbirds and other species.

How to choose flowering vines that grow in the shade?

When choosing a blooming vine to plant in your yard, it is vital to understand how quickly and how large it will grow. Some of the vines here may extend to five times the height of a human. There is great news here- that many vines respond favorably to trimming, allowing you to keep them in check. Let’s have a peek at some of our favorites!

  • Vine plants aren’t very self-sufficient. As a result, they “cling” to other plants and strong structures.
  • They can accomplish this by wrapping their stems around the support or by using tendrils, which are “twisting branchlets.”
  • Wisteria is the most popular twisting flowered vine in the world. Tendrils, on the other hand, are used by grapes…
  • Grapes cannot be grown in partial shade soil or complete darkness since they demand a lot of sun exposure full of light!

Several vines, however, may flourish in partial or complete shade. However, to understand where to grow flowering vines in the shade, you need to know:

  • Complete darkness does not even indicate “complete shade,” just as full Sun does not imply “always in the Sun”! The presence of a complete shadow suggests that the place receives fewer than three hours of direct sunshine every day.
  • Similarly, partial shade indicates that the region receives 3 to 6 hours of direct sunshine on average every day. The vast majority of “shady spots” are just slightly shaded.

Vines to grow in a shade:
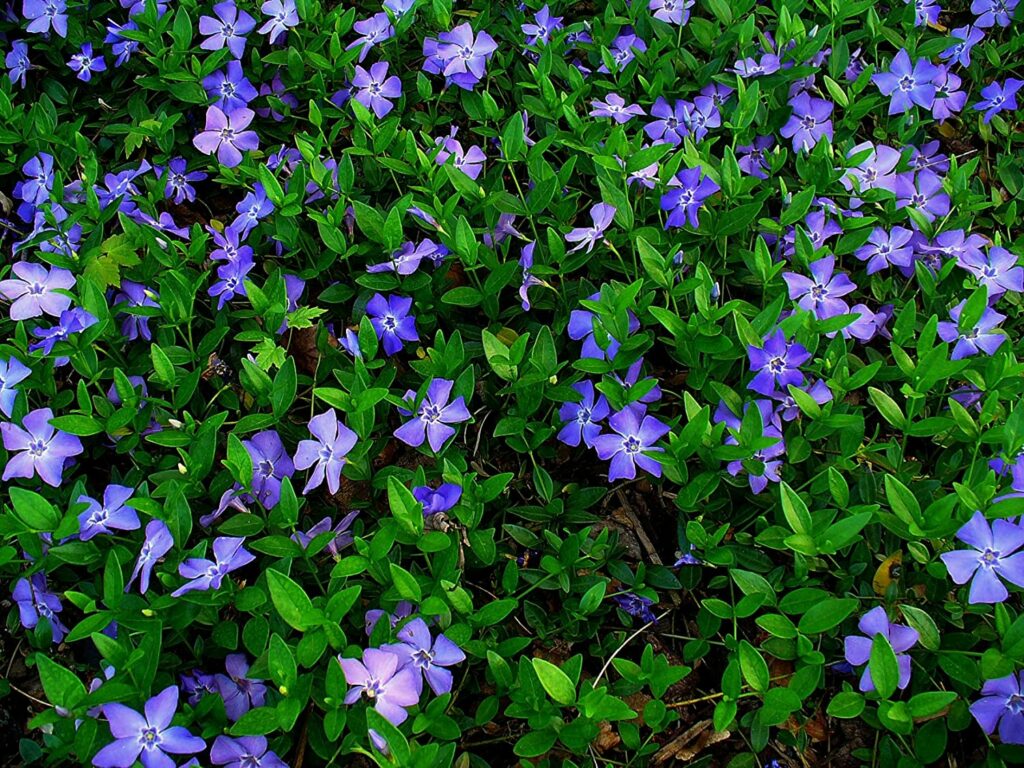
Vinca Minor

Periwinkle may be invasive in some circumstances, although it is very easy to manage in the landscape and produces gorgeous violet-blue flowers. It has the potential to be a wonderful vine for growing under trees.

Vinca is a drought-tolerant ground cover, allowing it to grow massive trees that take nearly all of the available water. Periwinkle is not a very big climber, unlike the other plants on this list. Many will appreciate its capacity to fill in an area that might otherwise be a resting home for weeds.

Vinca Minor is a vine for shade

Honeysuckle

The best Honeysuckle to grow in the shadow is Lonicera periclymenum. Among the notable European cultivars are L. ‘Graham Thomas’ and L. ‘Serotina.’

L. Cilicia, a native of western North America, blooms with orange trumpets in April.
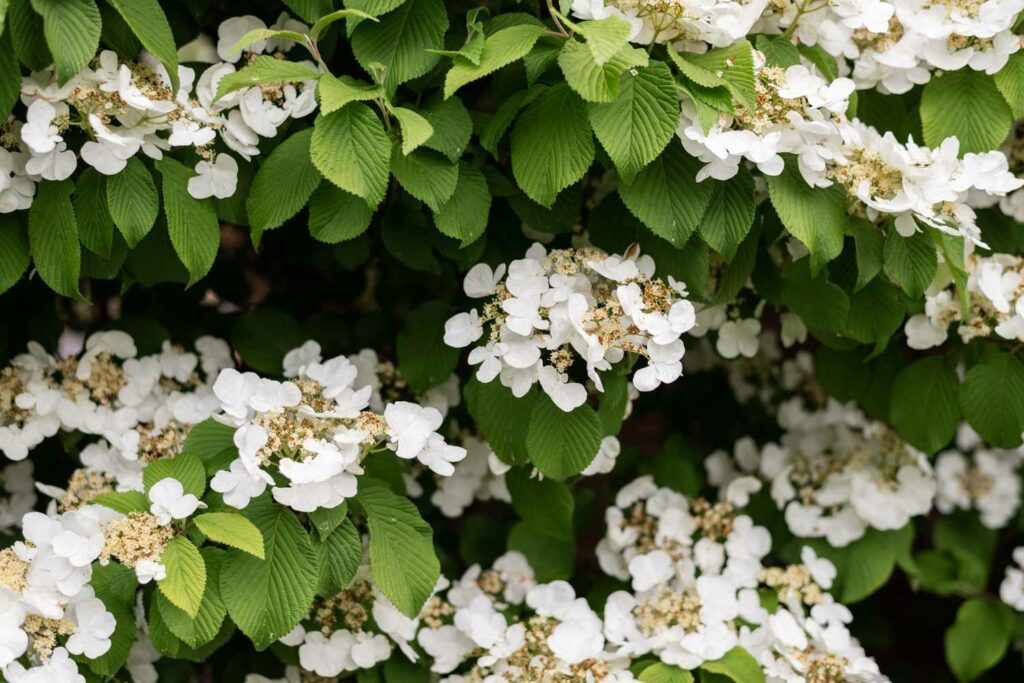
Honeysuckle to plant in shade

Climbing Hydrangea

Climbing Hydrangea blooms profusely in the spring and summer with characteristic white flowers.

These massive mostly evergreen plants take several years to develop, but once established, they become a valued legacy art piece in your setting zone.

Provide appropriate soil amendments, as well as solid supports, for this long-lived climber’s deep, damp, rich, and well-draining growing requirements.
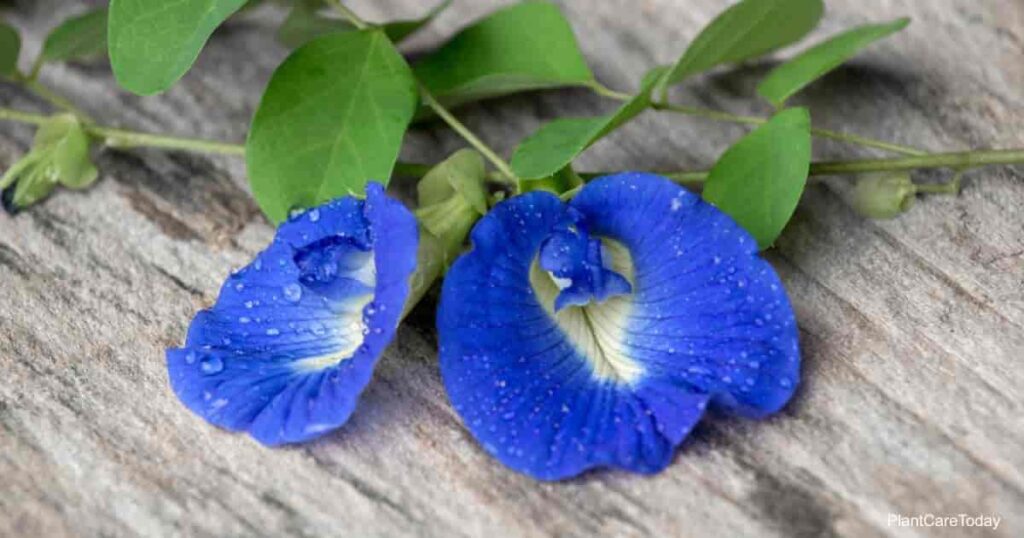
Climbing Hydrangea is another vine to grow in the shade

Butterfly Pea

The Butterfly Pea is a vine that grows on the ground and has twining vines. As a result, it’s an excellent ground cover for a blossoming vine. It has a gorgeous deep purple flower with a white center—butterfly peas-like moist, pH-neutral soil. Six to ten seeds mature in their flat pods and, if collected early, can be eaten. In Southeast Asia, this flower is often utilized as a food coloring.
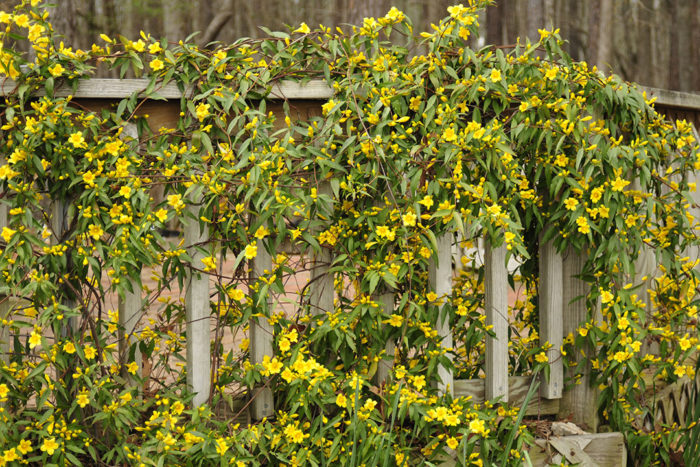
Butterfly Pea is a vine for shade

Carolina jasmine

The Carolina Jasmine grows in the Carolinas region of the United States. This jasmine thrives in subtropical and tropical conditions, and with the proper climbing support, it may reach remarkable heights.

Carolina Jasmine is distinguished by its trumpet-shaped vivid yellow flowers. These flowers form clusters and may be orange on the inside. You can’t help but notice how fragrant Carolina Jasmine flowers are as you walk past. As a result, insect pollinators are likely to sit on them.
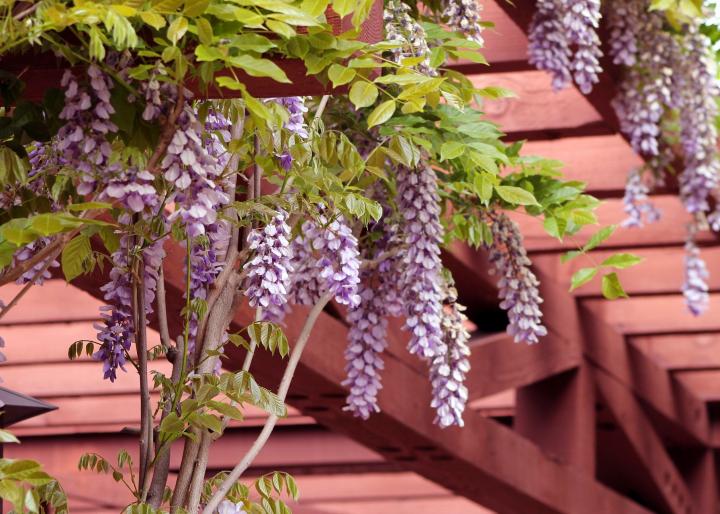
Carolina jasmine is another vine for shade

Chinese Wisteria

Wisteria frutescens, an American native, is a better choice for most gardens for shade vines. The American variety has the drawback of not blooming in the shade. In contrast, Chinese wisteria flowers grow well in the shade, but gardeners sometimes struggle with their invasive nature. They have long and beautiful climbing vines.
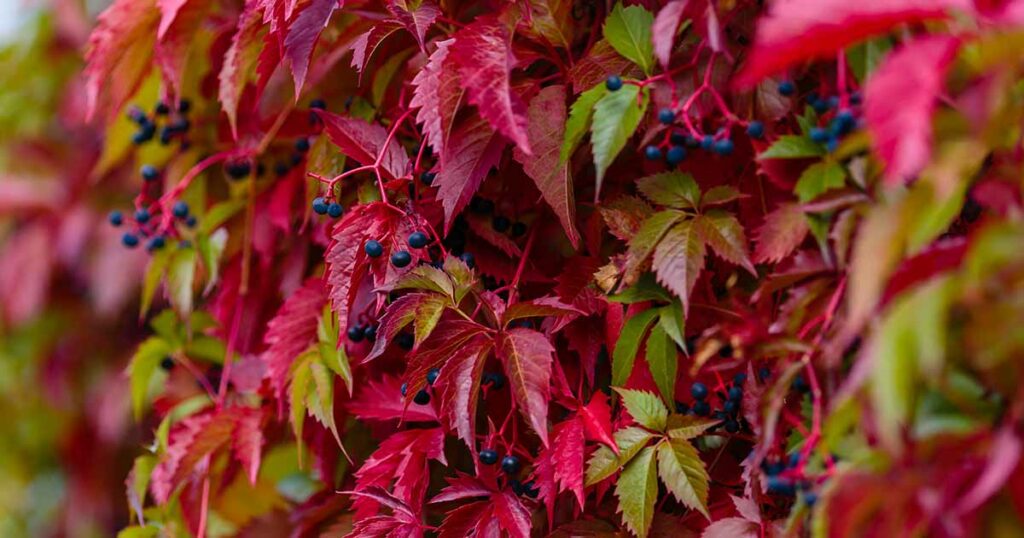
Chinese Wisteria is good in shade

Virginia Creeper

Virginia Creeper drops its leaves in the winter, exposing the complex arteries of branch works that run throughout its host building.

The most fabulous fall color stays on leaves that receive full sun exposure, but thick layered growth in shady regions is spectacular. Virginia Creeper is okay with pruning, and most soil types, reach a mature height of 30 to 50 feet.

Virginia Creeper can flourish in shade

Chocolate Vine

The Chocolate Vine has rich reddish-pink flowers that smell like chocolate. Some parts of this plant are consumable. The chocolate vine is a shade-loving vine that grows well on mountain slopes, hedges, and trees. It thrives sandy soil and needs a lot of water as well as appropriate drainage. In the past, people made baskets out of Chocolate Vines.
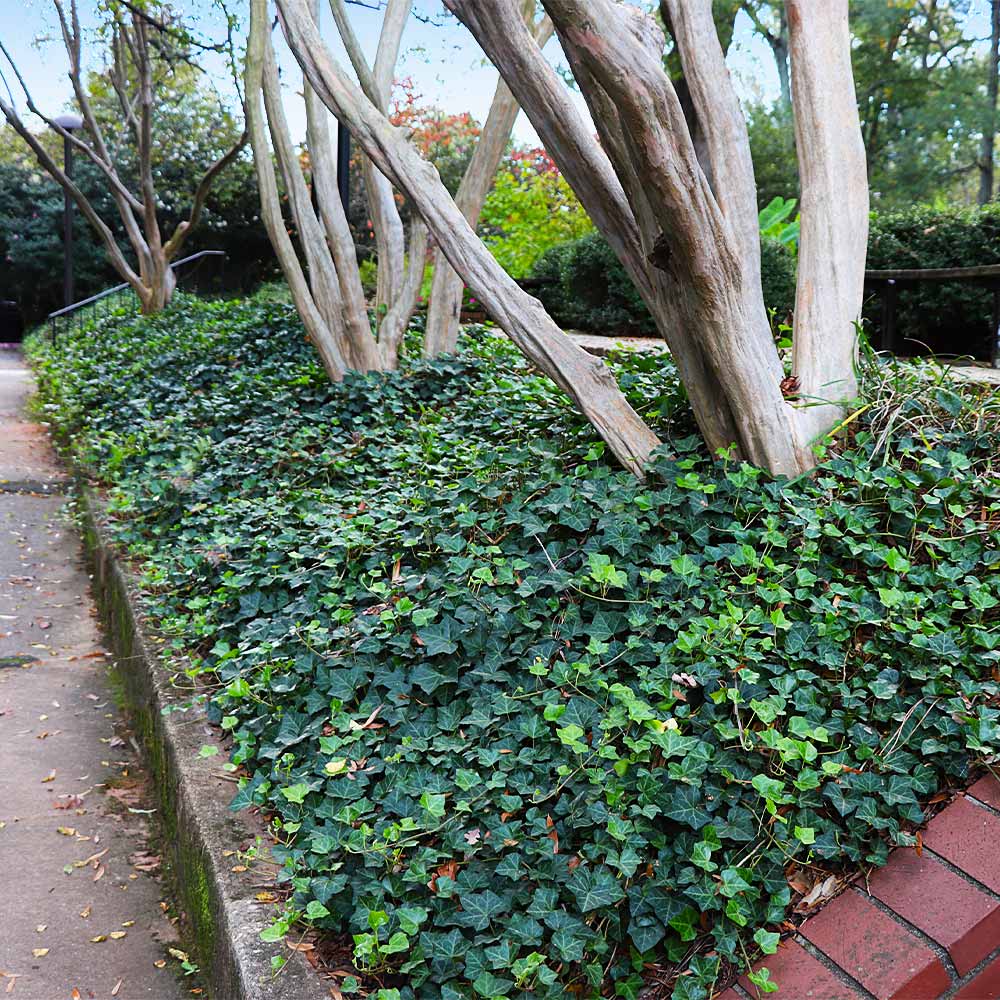
Chocolate Vine is a vine that can grow in shade

English Ivy

Because of its invasiveness, some gardeners consider English ivy to be one of the most dreaded vines in North America. Despite the fact that it grows well in the shady areas, growing this vine isn’t a cup of tea for many; however, with its uniqueness and ability to grow massive, one cannot help but love this beauty.
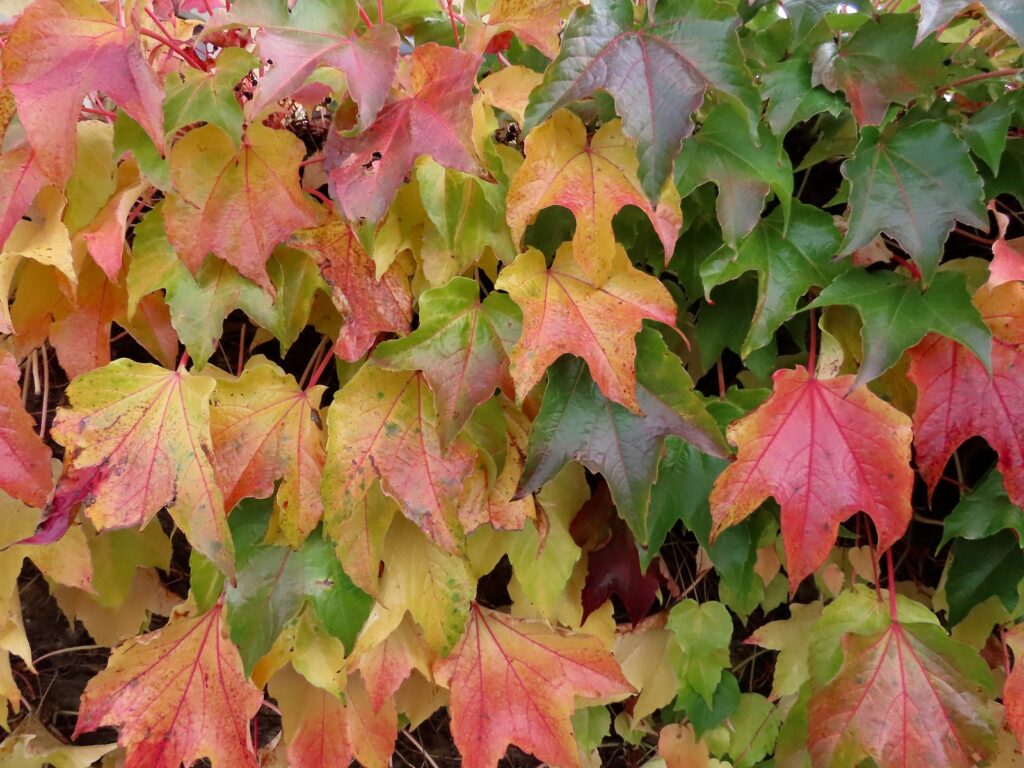
English Ivy vine can grow in shade

Boston Ivy League

Boston Ivy, famed for its gorgeous leaves, eventually clings to structures, creating amazing flowery waves. Most of the flowers in the spring transform into bird-feeding berries in the autumn. In suitable warm areas, Boston Ivy may grow to be 30 to 50 feet long, giving the impression of a well-earned institution.

Boston ivy thrives in the shade and has a range of leaf colors. The colors of autumn will be most vibrant on branches that reach sunny locations.

Boston Ivy League grows well in shade

Each blossoming vine has a different look when growing in the shade, but they all bring an elegant and royal look.

You can use the vines to soften the appearance of a short fence or trellis or just run across the supporter as a symbol of constantly moving. So, what are you waiting for? Plant these beauties today.

How to plant climbers in garden?

Growing climbers in the garden can be a great way to add height and interest to your outdoor space. Here are some steps to follow:

  • Choose the right plant: Select a climbing plant that is suited to the growing conditions in your garden.
  • Consider factors such as sunlight, soil type, and climate.
  • Provide support: Climbing plants need something to climb on, such as a trellis, fence, or wall. Make sure the support is sturdy enough to hold the weight of the plant as it grows.
  • Prepare the soil: Prepare the soil by removing weeds and adding organic matter, such as compost, to improve soil fertility and drainage.
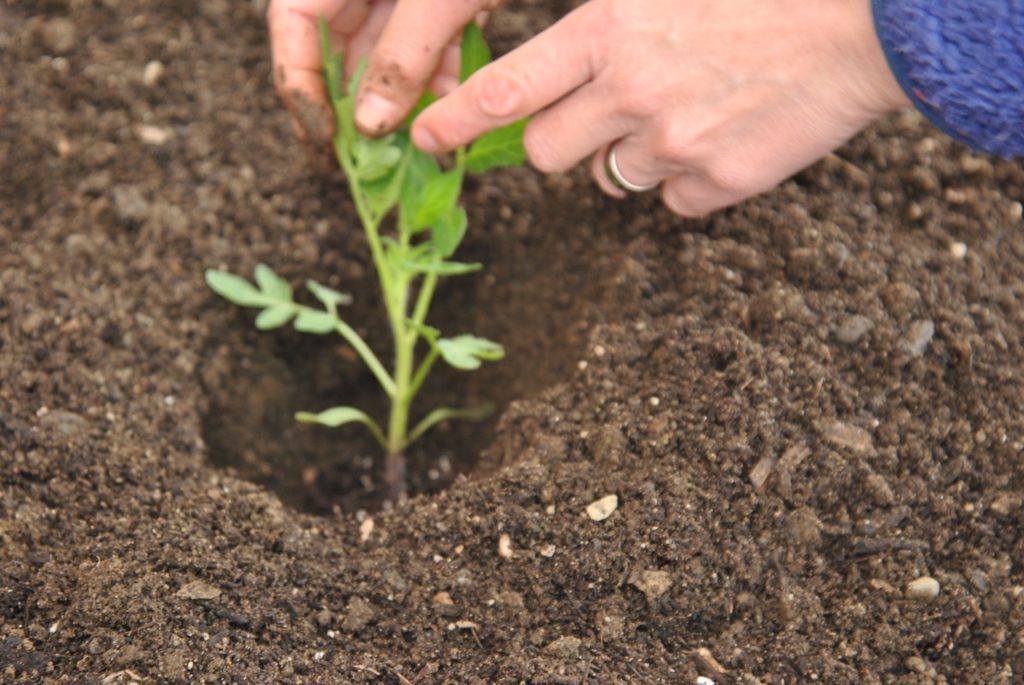
  • Plant the climbers: Dig a hole that is slightly larger than the plant’s root ball and set the plant in the hole.
  • Fill the hole with soil and water thoroughly.
  • Train the plant: As the plant grows, gently guide it to climb up the support structure. Tie it to the structure using garden twine or wire.
  • Water and fertilize: Water the plant regularly, especially during hot, dry weather. Fertilize the plant with a balanced fertilizer once a month during the growing season.
  • Prune: Prune the plant regularly to keep it in shape and prevent it from becoming too invasive. Remove any dead or damaged branches, and trim back any excessive growth.

By following these steps, you can successfully grow climbers in your garden and enjoy their beauty and height.

Care tips for growing flowering vine:

Flowering vines can be a beautiful addition to any garden or landscape. Here are some care tips for flowering vines:

  • Sunlight: Most flowering vines prefer full sunlight, but some may also do well in partial shade. Make sure to choose a location that suits the plant’s sunlight requirements.
  • Watering: Water the plant regularly, especially during dry weather, to keep the soil moist but not waterlogged. Avoid watering the foliage, as this can increase the risk of fungal diseases.
  • Fertilizing: Flowering vines benefit from regular fertilization to encourage healthy growth and blooming. Use a balanced fertilizer once a month during the growing season.
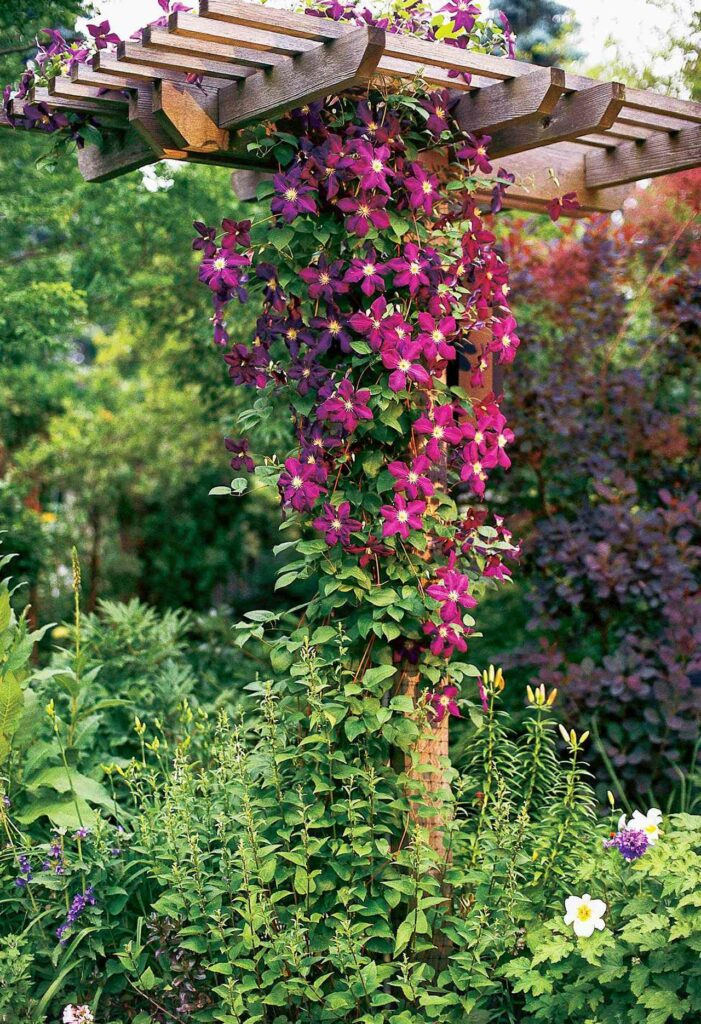
  • Pruning: Prune the plant regularly to remove dead or damaged branches and to control its growth. Some flowering vines, such as clematis, should be pruned in a specific way to promote blooming.
  • Support: Provide a sturdy support structure, such as a trellis, arbor, or fence, for the vine to climb on. Make sure the support is securely anchored to the ground and can support the weight of the plant as it grows.
  • Pest and disease control: Keep an eye out for common pests and diseases, such as spider mites and powdery mildew, and take appropriate measures to control them. This may include using organic or chemical controls, depending on your preference.

By following these care tips, you can help your flowering vines thrive and produce beautiful blooms for you to enjoy.

What herbs to plant in fall – Top 10 Herb Varieties to Plant and Grow in Fall

What herbs to plant in fall – Tips to grow fall herbs

While spring is considered the greatest season to plant many garden plants, late summer and fall are also good times to plant trees, shrubs, perennials, and herbs. Indeed, herbs! Herbs that may be planted in the fall include annuals, biennials, and perennials. Here are five excellent herbs to cultivate in your yard and pots in autumn.

In this article, we will find the top ten herbs to plant in the autumn:

  • While many perennial plants require well-drained, low-fertility soil, the annual herbs mentioned below flourish with compost and regular watering.
  • Fall is a great time to start an herb garden. Drought-resistant herbs like rosemary, sage, and Thyme may be planted now and flourish in mild winter regions.
  • If you are starting your cool season gardening for the fall, you may plant annuals such as herb cilantro leaves and parsley, harvest them, and enjoy their flavor before the cold season hits.

What herbs to plant in fall

The change in weather does not mean you should abandon your garden. Several vegetables and plants thrive in colder temperatures. The best fall herbs to plant differ based on where you reside in the country and what climatic zone you live in. Examine the list and pick which herbs to grow this fall.

Tips for fall planting

After investigating which herbs are acceptable for your climate conditions, there are a few general suggestions for planting in the autumn.

  • Plant the herbs one month before the chilly winters. This allows them plenty of time to settle in before the cold winter hits.
  • Examine the water drainage for the type of soil you’re growing in. Otherwise, frost heaving can take young seedlings out of the ground.
  • Plant in pots so you may bring them inside if the weather turns chilly.

Tips

Top 10 Herbs that you can plant in fall

Garlic

Garlic is related to chives in the Allium family, and while it is not precisely an herb, we utilize garlic in our kitchens to flavor meals. Plant garlic in the fall and let it grow during the winter. You’ll return to harvest in the spring or summer. It is a perfect option for beginners.

Garlic is a herb to plant in the fall

Chives

If you live in a chilly environment, chives are great. This strong perennial grows up to dipping temperatures. Chives, being one of the most popular herbs, need no introduction: they taste great on everything, have wonderful springtime pom-pom flowers, and are a nutrient-rich diet.

Provide your chive seeds with nourishing, damp, well-draining soil, and grow them in full to partial sunlight. These plants may be grown in both indoor and outdoor pots; simply place them on your sunniest windowsill!

Chives are the herbs you can plant in the fall

Echinacea

Echinacea is a good choice for you if you have a running nose every alternate day when the temperature dips. It is commonly known as coneflower. The pink petals complement the rusty red cores in the spring, attracting a variety of pollinators. Once a week, a cup of Echinacea tea can help prevent illness.

These perennial plants may thrive in various soil conditions, even rocky terrain! Keep these beauties dry and in bright light. If you’ve opted to keep your Echinacea seeds in a container, make sure there’s enough room for the taproot.

Echinacea are the herbs for the fall season

Sage

Sage is a semi-woody perennial that, if properly cared for, may survive in your garden for a long time. It has beautiful silver leaves and gives a chic look which makes it favorite fall herb. Take cuttings from your sage plants, place them in water, and you’ll never have to buy sage from the shop again.

Rosemary grows well in the fall herb garden.

This woody evergreen herb is native to the Mediterranean, and while it enjoys plenty of light and warmth, it can survive in a variety of frigid climates. It is pretty easy to grow and is a beneficial herb health-wise.

Sage is one of the most beautiful fall herbs

Thyme

Thyme is a low-growing shrub that makes an excellent garden-edging plant. It is a savory addition to practically any dish in the kitchen, including omelets, soups, and chicken. Treat bronchitis and other illnesses using the leaves, flowers, and oil of this plant.

This perennial should be planted in well-draining soil in your sunniest location and watered when the top 2 inches of soil dry in a routine manner.

Thyme

Greece’s oregano

Oregano, like Thyme, is a low-growing plant that you can use to frame taller plants. Use this herb to flavor a delicious sauce or just sprinkle it as a garnish. You can use oregano as a natural insecticide and in medicine to treat viral infections.

Like other Mediterranean herbs, they should be planted in bright light in well-draining soil; mature specimens should dry out before rewatering.

Greece's oregano herb to plant in fall

Chamomile

Chamomile, a member of the Aster family, with daisy-like flowers that provide a hilly feel to any environment. It takes little maintenance and easily self-seeds for the next growing season. It is beneficial to gather a handful of leaves in the fall, dry them, and boil them into warm teas for the winter.

Chamomile is a great herb to plant in the fall

Cilantro

This herb adds a fresh, zesty flavor from salsa to pasta salads. As previously said, if you plant cilantro now, you’ll have plenty of time to enjoy the leaves before the winter freezes your soil. The seeds, often known as coriander, are not only edible but also tasty.

Cilantro is easy to maintain in the fall and only causes problems when it blooms in hot weather.

Cilantro is another fall herb to grow

Parsley

Flat leaf and curly parsley are additional choices, but both strong herb parsley is easy to maintain. Parsley is an easy-to-grow herb in the carrot family that grows well in chilly weather. It can even survive the winter if your location isn’t too chilly because it’s a perennial.

Growing fall herbs in the fall ensures that you always have fresh herbs on hand for your favorite comfort foods.

Although the concept of cultivating fall herbs appeals to many of us, it is only possible in locations with moderate winters. It is challenging to produce fall herbs in areas prone to brutal winters or frequent severe freezes, but it is possible with greenhouses or growing lights.

If you have moderate winters, grow fall herbs in a container near your kitchen.

Can you use rose food on other plants: Rose Plant Food as Fertilizer

Can you use rose food on other plants: Rose Plant Food as Fertilizer

There are all-purpose fertilizers and general-purpose fertilizers. Specific plant fertilizers are also available for fruits, vegetables, and flowers.

Rose fertilizer is particularly developed to help roses bloom faster. However, many gardeners are now asking, “Can I use rose food on other plants?” The answer is yes, you can use rose fertilizer for vegetables as well.

Rose fertilizer was one of the most popular fertilizers on the market years ago and is still relevant. It has the proper amounts of Nitrogen, Phosphorus, and Potassium – an NPK ratio of 4:3:2 – making it ideal not just for roses but also for other vegetable and fruit plants.

However, there is also magnesium, calcium, copper, zinc, iron, boron, cobalt, and water-soluble magnesium. This Rose Tone fertilizer is a bonus for your plants, but only if they are in their initial stages of development.

Can you use rose food on other plants


What Is Rose Plant Food?

Rose food is just a well-designed rose fertilizer. It is nothing special; it just satisfies the nutritional needs of a rose plant. Because so many people grow roses, numerous companies specifically provide fertilizers for this industry.

When we consider fertilizers, we get NPK – Nitrogen (N), Phosphorus (P), and Potassium (K). Typically, we will look at the NPK number, which will be something like 4:3:2 – this means that there is 4% nitrogen, 3% phosphorus, and 2% potassium. The balance of the fertilizer you buy is often the key ingredient.

There are several micronutrient products that provide all of the extra micronutrients that plants require, including iron (Fe), copper (Cu), zinc (Zn), and many others.

Rose plant food

The ideal rose food contains the following components:

Nitrogen (4%)

Strong, vigorous leaf growth is aided by nitrogen. Nitrogen is necessary for plants to produce strong roots, stems, flowers, and fruits. Both protein synthesis and plant vigor depend on nitrogen.

Low nitrogen levels cause plants to turn a pale green color and their leaves to become yellow. But too much nitrogen can also harm your plants.

Phosphorous (3%)

Strong, robust roots can grow because of phosphorus. Phosphorus is necessary for your plants’ cell division as well as the growth of their roots, blooms, and fruits. A lack of phosphorus in plants can cause leaf loss, fragile flower stalks, and stunted development. Also, their sprouts won’t open.

Potassium (2%)

To recover from disease, pests, or harsh climatic circumstances, plants require Potassium or potash. Potassium deficit causes stunted growth, weak flower stems, and fading bottom leaves, among other symptoms.

Magnesium, calcium, copper, and zinc are all included in rose fertilizer. There is iron, boron, cobalt, and water-soluble magnesium also present.

Components of rose fertilizer

Can You Use the Food of Rose on Other Plants?

Plant food flowers may be used for different plants which are in your outdoor garden. Cut flowers such as roses, carnations, iris, and dahlias thrive in them. It’s also ideal for growing vegetables such as tomatoes, peppers, eggplant, cucumbers, and others.

  • The NPK ratio in Rose Tone fertilizer is 4:3:2. Some rose fertilizers have higher NPK levels than others.
  • Researchers recommend 0.4 KGs of 10:10:10 fertilizer every 10 feet and 0.8 KGs of 5:10:10 fertilizer in the same area. You will need to apply a lot of rose fertilizer to your garden to meet this NPK combination.
  • As a result, it is advisable to use rose fertilizers on your specific veggies during the early phases of growth because this is when your crops require a lot of nutrients for optimal root development. However, going organic first is always a better option.
  • You can guarantee that your vegetable plants grow properly by adequately preparing the soil before planting and during the early phases of development.
  • Add enough fertilizer, compost, mulching, and watering to minimize weed invasion—Rose fertilizer functions as an extra fertilizer for your plants. You may use it on your crops throughout the growing season if they have appropriate nutrients during the early stages of growth.

Because rose fertilizer includes low nitrogen levels, unlike other synthetic and organic fertilizers, your plants will not be burnt.

How Should You Use It on Other Plants?

Because there are so many different “rose food” formulae, providing basic instruction is challenging. Adhere to the instructions on the fertilizer container.

Check to see if the soil is damp in your garden. Don’t overfertilize – certain rose-feeding products include a lot of fertilizer. When we look at this combination, it appears to be a 6:7:6 ratio, yet this fertilizer from natural sources is a 4:8:4 ratio. Although the ratios of the various components vary considerably, if the Nitrogen number is high, you can quickly burn your plants in the garden if you apply too much fertilizer.

How Should You Use Rose Food on Other Plants?

Benefits Of Using Rose Food on Plants

  • Rose foods are essentially fertilizers. It improves plant growth in the garden, root development, disease resistance, and yield, just like any other fertilizer. Natural fertilizers are favored since they aid in soil strengthening. Natural rose foods will be beneficial in this circumstance.
  • It aids in increasing the size of the fruit as well as the productivity of some plants
  • It encourages the growth of healthy, strong plants in the garden and, in some instances, improves the flavor of fruits.
  • It helps to improve fruit quality and quantity.

Rose Fertilizer Varieties

Rose fertilizer comes in a variety of types. The type of rose fertilizer you use on your plants is determined by the kind of plant and the soil condition. Your decision is also influenced by the temperature and the amount of time you have to devote to your garden.

Rose Fertilizer Granular

Granular fertilizer resembles sand grains and hence seems similar to the soil it is augmenting. Granular rose fertilizer is spread under plants all over the ground, and the soil is scraped with a trowel blade.

Rose Fertilizer Granular

Spray Rose Fertilizers

Plants are sprayed with fertilizer, with nutrients traveling through the leaves rather than the roots. You shall apply Spray rose fertilizer with a spray bottle or a hose-end sprayer, available in the market.

Fertilizer for Roses in Liquid

Dissolve liquid fertilizers in water and then administer them to your plants in your home.  They make your plants green up much faster than granular fertilizers.

You can apply liquid rose fertilizer every one to two weeks.

Rose Fertilizer Varieties

Can You Feed Flower Food to Houseplants?

Here Are the Specifics!

Our houseplants are usually ok with a little bit of sunlight and basic water, but every now and then, they may want a little extra feeding boost to develop and be their best selves.

So, can we give flower food or rose food to houseplants? The quick answer is that houseplants cannot be fed flower food. It is futile to provide flower food to your houseplants. It is just meant to be a temporary solution for the flowers and should not be used on the soil or foliage.

Key Takeaways

Can you use rose food on other plants? Yes, rose food is just a properly manufactured and marketed fertilizer. However, if you’re using a 4:8:4 rose food fertilizer, you might save money by switching to a 4:8:4 “vegetable” fertilizer.

When using any fertilizer, including rose food, always follow the instructions. Too much fertilizer might cause your plant to become bright yellow, lose its leaves, and die. Plants require a lot of nutrients, and they grow when they acquire the right ones. Rose plant food is one of the essential plant nutrients and you can use it in a wide range of plants.

Here is why your fiddle leaf fig turning brown: Reasons for leaves turning brown

Here is why your fiddle leaf fig is turning brown.

One of the most common questions fiddle leaf fig shop owners has been how to treat brown stains on their plant’s beautiful leaves. Finding brown spots on your fig’s magnificent large green leaves is disappointing, and the problem may be aggravating and perplexing since knowing what’s causing the brown patches on the fig leaf takes a keen eye and a little bit of effort.

Here are the reasons why your fig leaves are turning brown.

To help your fiddle leaf fig properly recover, it is vital to identify and address the problem as soon as possible. Four significant reasons contribute to brown spots:

• Rotting root systems

• Bacterial contamination

• Dry leaves

• Insect damage


What are the brown marks on a fig leave?

Fiddle’s brown areas on a fiddle-leaf fig generally indicate problem. If your fig’s leaves begin to turn brown, this signals that your plant is unwell or anxious and needs treatment. The good news is that none of the possible reasons for spots on your fig is dangerous. If detected early and treated immediately, your fig leaf has a good chance of fully recovering.

The most common reason for your fig leaves turning brown is an external or internal infection. To put it another way, plant tissue starts to die, resulting in patchy, brown leaves. This isn’t the sole explanation for brown spots on figs leaf.

They can also acquire sunburn, which seems to be a sickness. In most cases, illness in fig leaves is directly tied to their growth circumstances. Fortunately, you can rapidly adjust them and have your beautiful plant back to life. The first step is to identify the source of the brown areas on your fig leaf.

What are the brown marks on a fiddle leaf fig?

What produces brown patches on a fig leaves?

There are a few primary reasons why the fig leaves houseplant may have brown spots. These include bacterial or fungal root rot, insect infections, more sunshine, and dryness.

A thorough study of your leaves may help you pinpoint the exact problem that your plant is experiencing.

Root Rot causes fig leaves to turn brown.

Overwatering causes root rot, which is likely the most common cause of brown spots on a fig leaf.
Root rot is a fungal infection that happens when roots are submerged in water for an extended length of time without adequate drainage. A lack of sunlight might aggravate root rot illness. A container that is too big may also cause your plant’s roots to become excessively wet between water routines.

Your plant’s bottom leaves are the first to be harmed by root rot, so begin your search there. Roots of fiddle leaf figs, in particular, demand well-drained soil. Root rot is frequently treatable, especially if detected early.
Make sure you’re using a well-draining container and fast-draining potting soil and that you’re not overwatering.

The next stage will be to evaluate the damage. If your plant simply has a few brown patches on the leaves, you do not need to repot it. Allow two weeks or longer for your plant to dry out to allow the roots to recuperate. Remove any damaged leaves and make sure your plant gets enough sunlight.

Root Rot causes fig leaves to turn brown
Invasion of insects causes fig leaves to turn brown.

Fig brown spots can also be created by insects, although small holes in the leaves commonly accompany them. To spot an insect infestation, look for indications of little insects crawling over your plant, as well as remaining webs or eggs.

Dealing with an insect infestation may be a simple process since removing the bugs, and damaged leaf detritus should cure the problem. Insect spots are lighter in color than root rot spots and do not spread on their own.

Bacterial Infection in Figs causes brown leaves.

Bacterial root rot shows as irregular dark brown spots along the leaf margins of your fig. Bacterial root rot is caused by overwatered or waterlogged soil, which is mainly caused by insufficient drainage and aeration. The goal is to address afflicted regions as soon as possible before the damage becomes too severe. The treatment is similar to that of root rot: ensure that the roots of your plant dry out between waterings and that it receives plenty of sunlight.

Remove all of the leaves with brown spots and repot your plant in a container with appropriate drainage and fresh, sterile soil if the damage is minor. Allow it plenty of light and water sparingly till it heals. Fresh air also helps in this case!

Bacterial Infection in Figs causes brown leaves
Dryness causes brown spots on Fig leaf.

Parched fig leaf plants can soon develop brown spots that are tanner than brown in color and start at the leaf’s edge and travel within.

Your plant’s relative humidity should be between 30-65%; therefore, if your home humidity is significantly lower or your plant, you may need to mist or move it to produce extra humidity for your fig plant. The most basic treatment for a dry plant is to keep it from drowning and having a proper watering routine. Water your plant just until the top inch of soil has dried up. If you see soil shrinkage, repot your plant to ensure the root receives adequate water.

Repotting is simple, and just a few actions are required to ensure success for your houseplants. Water your fiddle leaf fig plant on a regular basis and keep an eye on fiddle leaf to ensure it gets enough water.

Sunburn causes your fig’s leaves to turn brown.

If you expose your indoor fig suddenly to a lot of sunshine, your fig leaves might acquire sunburn. While this is not very common, it does occur and shows as light-tan spots on your plant’s upper outer leaves.

The size of sunburned areas of fiddle leaf fig leaves can range differently, depending on how much exposure the plant has received. The burned edges will not recover, but they may be removed without causing more damage to the plant.

Illness or bruising of the leaves.

Sometimes brown spots on your fig, might be caused by leaf bruising or by a leaf-specific disease, such as bacterial leaf spot.

In this case, you can spot brown patches usually on yellow fiddle leaf figs. The yellowing of the leaves is visible and precedes the brown spots that follow.

Spray with fertilizers on fiddle leaf fig’s plant to stop them from turning brown. Spray the underside of each leaf, giving careful attention to where the leaf meets the stem. Wait two weeks before examining again and, if required, repeating the spraying process.


What should you do if there are brown spots on your fig leaf?

Once you’ve identified the source of your fiddle leaf brown spots, you’ll want to treat the issue as quickly as possible so that your plant may fully recover. Here are some tips to save your houseplants:

• Fix your irrigation difficulties to avoid the recurrence of brown areas.

• Use a fast-draining soil

• Make sure your plant receives adequate sunlight for food

• Fertilize appropriately

• Inspect your plant on a regular basis

While fig leaves are relatively resistant, keep an eye out for any disease symptoms to fix the problem. Fiddle leaf fig brown spots on your plant might suggest a variety of issues with your plant and if left untreated, your fig leaves may fall off, inflicting irreversible damage to your plants’ health.

Vertical gardening benefits – Top advantages of vertical gardens

Vertical gardening benefits – Top advantages of vertical gardens

In today’s world of concrete jungles, there are people who enjoy gardening but lack space at home. How about starting your vertical garden? Vertical gardening is more than just a trendy fad these days; it also has various advantages. In this post, we will be looking into various vertical gardening benefits and also its disadvantages.

Vertical gardening backed by technology is the most cost-effective and environmentally friendly way to green the office area. Although the use of green furniture with built-in plants in wall-mounted or sliding form may appear to be an unnecessary investment, it results in considerable savings in the long term – the money invested in the project will bring extra benefits.

Vertical gardening benefits

Many people desire to have a garden, but with all of the high-rise buildings surrounding us, there isn’t much space for one. Furthermore, the bulk of us lives in apartment complexes with little control over what happens around us. On the other hand, those who own their own homes can simply grow a garden.

Many people have resorted to growing lovely flowers in plastic plant pots in order to imitate the surroundings and beauty. It succeeded in establishing the mood, but it failed to depict the actual experience of having a garden. Plastic pots are not the same as having a garden.

Top benefits of vertical garden

Here are the top benefits of vertical gardening that can woo you to start your gardening journey right away!

Lowering risk and investment costs

If you can get a subscription model for starting your vertical yard, you may replace a large upfront payment with a much lower monthly fee based on your budget. This will save money on investment and maintenance, and if budget cuts are required, you may choose another alternative that simply requires months’ notice.

This way of gardening is simple to build with recycled materials such as plastic bottles, old shoe organizers, broken ladders, baskets, shoes, and other stuff. So repurposing any of these will do the job for you as well as nature.

Lowering risk and investment costs

Growing plants in vertically designed structures can save space, water, and electricity

Green walls are vertical gardens that allow plants to grow in areas that would otherwise be unused. You can collect substantially more flora by selecting furniture with built-in plant containers without thinking about space.

Green walls are illuminated by energy-efficient LED assimilation lighting, which has a good effect on plant development. So, in addition to the economic issue, there is a significant environmental component.

Variety of plants to choose

You may cultivate a wide variety of plants in a vertical garden. Planting and growing different types of plants, such as decorative and vegetable plants, row by row in a vertical garden will help to increase the garden’s aesthetic. A vertical garden is also a lot easier to keep up with.

Here are the top benefits of vertical gardening-

Vertical gardens are safe and act as a protection

The plants are raised above the ground, which reduces the likelihood of a pest infestation in the garden. It also prevents the plants from being harmed by other factors such as dogs.

Because plants absorb pollutants and other dangerous substances, vertical gardens act as a protective screen, providing you with a clean atmosphere to breathe in.

Vertical gardens provide isolation

Exterior vertical gardens are useful to keep your home and private space concealed from prying eyes. This will also provide you with some more cover from the sun and solitude from the people.

Vertical gardens provide isolation

More greenery at home or workplaces

In terms of vertical gardening, you get to have a variety of plants in your garden by planting climbers like cucumbers, tomato plants, and melons or other vegetables at the bottom of your garden and small plant types on top.

A vertical garden increases the amount of greenery in your place as it allows you to grow a wider range of plants. Vertical gardening offers more sunlight and air circulation since it grows taller, resulting in a healthier garden.

More greenery at home with vertical gardening

Stress relievers

Vertical gardens have a significant environmental impact. They have an enormous potential to benefit the environment if implemented at a large and appropriate scale.

And what do they do to us? Many studies have discovered that growing plants around can help people minimize physical signs of stress and increase their psychological well-being. While vertical garden maintenance is not an easy job, having them around saves space and relieves stress.

Stress relievers

Reduces noise levels and enhances mood

Another surprising benefit of having a vertical garden nearby is that it helps to reduce noise levels in your space. The amount of noise vertical gardens can reduce is close to 40 percent more than an ordinary facade.

Humans and nature have an unbreakable link, and studies have proven that spending time outside, surrounded by nature, is a must. A vertical garden improve your mental health and provides all of the environmental benefits that you desire.

Vertical gardens may also lift one’s spirits. According to a study, spending time in nature has been linked to increased happiness, positive social interaction, subjective well-being, a sense of purpose in life, and a sense of meaning.

Help with Mood Enhancement

Types of vertical gardening in brief

  • Green walls – Green walls (also known as “living walls”) are made up of containerized plants or modular green panels that are arranged over a wall face. Herbaceous and shrub-like plants, as well as small trees, may be suitable for green wall plantings.
  • Green facades – In contrast to green walls, green facades are made up of climbing or scrambling plants that grow upwards or across a support structure such as a trellis.
  • Freestanding vertical gardening systems – Around the world, freestanding vertical gardens are sprouting up in parks, playgrounds, and other public spaces. In these systems, people grow plants vertically and occasionally above vertical garden frames.

Freestanding vertical gardening systems

Vertical Gardening Disadvantages

While vertical gardening is highly beneficial, there are a few ways that a vertical garden is disadvantageous.

  • Any vertical gardening technique requires maintenance
  • They can damage the ambiance at home and your health if you pick the wrong plants that are potentially allergic, or polluting.
  • Irrigating a vertical garden can be difficult.

Vertical gardening disadvantages-

Vertical gardening is not only attractive, but it also offers other advantages. It is a great way to grow your favorite flowers and veggies. Vertical gardening benefits are many. Growing vertically saves space in the garden, allowing you to grow more in the same amount of space.  They not only save space, but they are also easier to manage, grow healthy plants, and aid in the reduction of bugs and disease worries.

When to start seeds indoors – Starting seeds indoors 101

Starting seeds indoors 101

It’s tough to know when to sow seeds inside, especially if you’re new to gardening. In this blog, you will know exactly how to figure out when to start, as well as how to seed indoors as per your schedule.

There are several planting charts available, and they might be useful as a guide for beginning seeds. However, because there are so many variables to consider, it is advisable to develop your own specific timeline.

When to start seeds indoors- Starting seeds indoors 101

Your overall guide to starting seeds indoors-

Why do we need a seed starting timetable for seedlings?

Time management is essential when starting seeds indoors. And if you use it too soon, you run the risk of creating weak seedlings that won’t make it to the garden.

If you wait too long, though, spring won’t come around with them fully grown and ready for transplanting.

You’ll need to put some work into it, but eventually you’ll be able to create a schedule for seed planting, so you’ll know when to start each type.

Why do we need a seeds starting timetable?

Finding your best indoor seed starting dates while gardening

  • Step 1: Locate the dates on the packet – To begin, read the directions on each packet. Most will offer you suggested planting dates for starting seedlings inside.
  • Step 2: Sort your seed packets, seeds best planting dates – Sort all of the packets you intend to start inside by the suggested planting dates listed on the packet.
  • Step 3: Sort them by date – Once you’ve sorted everything into piles, sort them by date. You’ll always know which ones to sow at the same time this way.

General guidelines for when to plant seeds indoors.

In general, you should sow seeds indoors 6 to 8 weeks before the average last frost date in your location.

The typical last frost date varies according to the growing zone.

Most annual vegetables should be planted indoors and not outdoor six weeks before the last frost date in your area. Check the frost dates in your area for starting seedlings indoors.

Typically, the seed box will mention when the seeds should be plants started indoors and when seeds germinate in your area.

General guidelines for when to plant seeds indoors

When to start seeds indoors for fall garden- Time to grow seeds inside in soil.

You may think that when to plant seeds? It may not feel or taste like it right now to plant seeds, but the months of July through September are great for beginning fall/winter seeds indoors as they are frost-free date and transplanting them into your garden 6-8 weeks later for much of the country.

Of course, you may direct-sow your fall/winter seeds in your garden beneath the cooling shade of your larger summer annuals if you like tomatoes, peppers, etc.

When to start seeds indoors for fall garden- Time to grow seeds inside

Growing vegetables/plants Indoors with grow lights

Artificial lights may be used to start seedlings indoors, as well as to help in growing a variety of vegetables and plants. When grown under lights, most leafy greens and several root crops will flourish. Fresh lettuce, spinach, and radishes are a delightful treat in the dead of winter.

Hang your lights from the top and center shelves with chains and hooks. Connect the lights to the timer on the power strip and the timer to the outlet.

Set your timer, arrange your plastic gardening trays on the shelves, and start growing seedlings and veggies within. To avoid scorching the foliage, keep the lights about two inches above the plants and adjust the brightness as the plants grow.

Keep an eye on your plants for indicators of too much or too little light, and adjust the lights as needed to get the ideal light intensity. Plants that receive too much light will exhibit yellowing and leaf burning, as well as burned and bleached papery patches on the leaves.

Why should you start seeds indoors?

There are many benefits to sowing seeds indoors:

  1. It allows you to get a head start on the growing season, which might result in more numerous harvests.
  2. It is genuinely necessary for many plants. Due to the cool soil, warm-season plants such as tomatoes, peppers, and eggplant cannot be planted too early in the spring. Many places may not have enough growing days for the plants to develop if they are started outside. Seed starting containers provides you with a few more weeks of growing time, which can make or break your crop. In hotter climates, starting seeds inside allows you to plant an extra crop before the summer heat stifles growth.
  3. If you do not want to start seeds inside, you will need to buy small plants known as “transplants” or “starts” from a garden store or nursery. Planting your seeds resulted in healthier starts since you can care for them right away.
  4. A far broader choice of kinds is accessible as seeds—varieties that you would never discover in a store.
  5. You’ll know how they were raised—organically as opposed to chemically. You may time the plants to be ready when you want to plant them.

Finally, indoor seed, starting plants are far less costly than plants purchased from a garden retailer.

Warm-weather vegetables are not the only ones that can be produced from seed. Many vegetables, such as carrots and radishes, grow best from seed because their roots resist being disturbed once they start growing. See the table below for a list of which seeds should be started indoors and which should be started outside.

Why should you start seeds indoors?

Which seeds should you start indoors?

It is not necessary to start all seedlings inside. In reality, most veggies thrive when started outside and prefer not to be transplanted. Finally, it’s critical to examine how each sort of vegetable develops as well as where you’re growing it.

Broccoli, sprouts, cabbage, and tomatoes are excellent indoor crops. Cauliflower, celery, eggplant, and peppers, which have slower root growth, should also be started inside.

Because delicate vegetables like tomatoes, eggplants, and peppers are sensitive to the low temperatures of spring, it’s best to start them indoors and protect them from uncertain weather.

Examples, when to start vegetables/fruits seeds indoors-

Plants that do not travel well, such as cucumbers, muskmelons, pumpkins, and watermelons, should be planted outside or in containers. Because these are all delicate, don’t leave them outside while frost is still present in vegetable garden.

Some seedlings plants started are truly resistant to transplanting. Because root vegetables like carrots, turnips, and beets detest having their roots disturbed, it’s usually best to sow their seeds in the ground rather than transplanting them afterward.

Examples, when to start vegetables/fruits seeds indoors-

Finally, plants with large tap roots, such as dill and parsley, resent being relocated.

Spring is here and it’s time to get your garden with seed organic flowers started. But when should you start your seeds? The answer is your location. The United States Department of Agriculture determines zone boundaries. They divide the zones based on temperature. It is critical to understand the best times for starting garden plants. This will improve germination and contribute to healthy, strong plants.

When to start winter sowing? All about starting winter sow.

When to start winter sowing?

It makes sense to plant seeds in the same way as seeds grow in nature. Seeds fall to the ground in late summer when left to their own devices. They gradually wrap themselves in leaves and other natural materials to begin their lengthy winter beneath the earth. When exposed to cold temperatures and damp circumstances, the winter sowing seeds break dormancy and germinate when temperatures rise in the spring. So, what exactly is winter sowing? Read this post to know more.

Winter sowing is the practice of growing seeds in a container outside during the winter months. The container will be left outside until the seedlings sprout in the spring. The container protects the seeds from animals and extreme weather, yet the seeds germinate when exposed to cooler temperatures. In addition, the container provides an optimal environment for germination.

When to transplant seedlings into your garden- Plant seedlings in your garden

What to Sow in Winters?

Some annuals, perennials, and wildflowers thrive throughout the winter. Examine a seed catalog, most will include some information regarding germination needs. Look for seeds that reseed, self-sow, are hardy, and can tolerate cold. Sow outdoors in late fall or early winter or sow outside in early spring while frosts may still occur, requires pre-chilling; and requires stratification.

In which month you should start winter sowing?

Depending on the weather in your location, the optimum time to winter sow perennials and hardy annuals is often from December to March. Before germination in the spring, these seeds require a sustained period of damp, chilly conditions. This is the appropriate winter sowing schedule.

Tender plants, such as fruits and vegetables, can be planted later in the spring of March or April since they do not require a cold spell to germinate. Also, remember that don’t start until after freezing temperatures are here to stay.

When to start Winter Sowing?

What are the benefits of winter sowing?

Seeds sown directly in the ground are at the mercy of Mother Nature. Heavy rains can carry them away; rodents, insects, and birds can eat them, they can desiccate in the wind, or they can decompose in the soil.

Plastic Container-grown seedlings are more compact and do not require hardening off before planting in the garden.

Winter seed sowing with right potting mix is ideal for those with limited indoor seed starting space. Germination does not necessitate the use of any special lighting or equipment.

How to winter sow the seed- in zones 4-6?

  1. Clean the container – In warm, soapy water, rinse a milk jug or other appropriate winter sowing containers. Take off the top. Remember rain and melting snow might enter the hole and moisten the soil.
  2. Cut the container — If you’re not using a hinged lid, slip a box cutter into the side of the jug, and cut all the way around, leaving roughly 1.5 inches so the top hinges open. Make use of a coffee cup with a marker on the top. Cut a straight line around the container.
  3. Make air holes – Poke drainage holes at the bottom of the container using a knife, screwdriver, or nail. This is critical because if you do not construct drainage holes, your seeds will drown! If you’re using a container with a hinged lid, make a few air holes in the lid’s top.
  4. Fill the jug with 2 to 4 inches of soilless seed starting media. Garden soil containing diseases and weed seeds should be avoided.
  5. Water the soil – Moisten the growth medium lightly and allow excess to drain.
  6. Sow the seeds – Follow the instructions on the seed package and sow seeds on the soil’s surface. Cover the seeds with dirt and gently pat them down.
  7. Seal the container – Use light-colored duct tape to seal the container’s cut edges. Keep the top open. Make holes for cleaners instead of tape for simple opening and closing without the stickiness of the tape.
  8. Label the container with a marker and record the seeding date. Insert the label into the container’s bottom.

Place it outside and walk away – Place the container in a location that receives winter sun. Because the seeds require moisture from rain and snow, do not place the container on a covered porch. They should be exposed to all the weather conditions in nature. If the weather is windy, consider storing containers in a milk crate.

How to winter sow the seed- in zones 4-6

Can you winter sow seeds that are not cold hardy?

Start winter sowing with any seed. On the other hand, cold-tolerant seeds are planted in the coldest months of the year to provide the necessary chilling time.

Any delicate or heat-loving seeds are planted later in the spring when overnight temperatures are unlikely to dip below freezing. At this point, the milk jug is merely acting as a mini greenhouse.

What is early winter sowing? Winter sowing schedule-

Sow seeds that will require weeks or months in calendar of stratification.

In addition to native plants, trees, shrubs like lavender, and vines, this category contains several floral perennials and cold-tolerant veggies.

The sowing season in zone 6 is December and January.

What is mid-winter seed sowing?

Plant cold-tolerant perennials or annuals.

The winter-sow season in zone 6 is February and early March.

Some examples for sowing are Brussels sprouts, bee balm, and pansies.

Late Winter / Early Spring Sowing?

Tender annuals, such as flowers and vegetables, do not require stratification and demand steady temperature.

The late winter sow technique is used in late March and early April.

Cosmos, zinnia, tomato, and eggplant are among the examples.

What types of jugs can be used to grow plants?

Milk Jugs: Milk jugs are the perfect container for winter planting seeds in general. Jugs in January and February for spinach and other greens, along with 2-liter water bottles tape two bottoms together, so you get more height for your seedlings to grow in.

Water Jugs: You can also obtain gallons of water in equivalent jugs for a fair price and begin winter sowing.

What types of containers  for winter sowing?

Winter sowing plants – what are winter sowing plant examples?

Classic cool-season vegetables such as broccoli, cauliflower, and cabbage are some tasty possibilities for winter planting. Leafy greens such as lettuce, kale, and Bok choi are also hardy annuals. Herbs like sage, oregano, dill, and mint are all excellent options for winter seeding.

Vegetables for winter sowing-

  • Arugula
  • Asian Greens
  • Kale
  • Lettuce
  • Peas
  • Radish
  • Cabbage
  • Cauliflower
  • Cress
  • Spinach
  • Spring Onions
  • Swiss Chard
  • Beets
  • Bok Choi
  • Broccoli

Annual flowers for winter sowing

  • Amaranth
  • Bachelor’s Buttons
  • Cosmos
  • Strawflowers
  • Sweet Peas
  • Zinnias
  • Bells of Ireland
  • Calendula
  • Marigolds
  • Poppies
  • Sunflowers

Winter sowing plants- what are winter sowing plant examples?

Another reason to enjoy winter sowing is that it helps to get back into the gardening flow before the weather permits.

Winter sowing in gardens helps you to start gardening in the winter without having to cope with the unpleasantness of winter. You may start the seeds indoors, then put them outside and let nature take care of the rest.

When to transplant seedlings into your garden: Tips to plant seeds in gardens

When to transplant seedlings into your garden?

Raising plants from seeds may be a rewarding and appealing way to add a touch of excitement to your yard. Sometimes many unique vegetable and plant varieties are just not available at your local nursery, leaving you with the option of growing them from seeds. However, in order to grow these unusual varieties, you must first understand how to plant seedlings.

Understanding when to move seedlings from the seed tray to a larger container is vital. For transplanting your seedlings in the garden, a few weeks after beginning them should be part of your seed-starting routine.

When to transplant seedlings into your garden- Plant seedlings in your garden

But how do you know when to transplant the seeds?

There are few straightforward indications that your seedlings require in a repotting-

They now have one or two real leaves.

Transfer seedlings three weeks after sprouting or when they have 1-2 sets of genuine leaves. It is advisable to transplant your seedlings to new containers before they display the stress signs.

The cotyledons are turning yellow.

Cotyledons are the first leaves to emerge in the seedling. They are not the same thing as true leaves. True leaves are the second and subsequent sets of leaves that sprout after the cotyledons appear.

It is normal for cotyledons to turn yellow and fall off, but if this happens when your plants only have one or two sets of leaves, you should transplant them.

Roots are going around the root ball.

When it’s time to plant, you want to see roots in your growing media, but if they’re looping around the outside of the root ball, it’s too crowded.

But how to do you know when to transplant the seedlings?

Why is there need for transplanting annual flowers?

You may be wondering why one would bother repotting seedlings in gardens at all. Why not simply feed fertilizer or, even better, transplant annual flowers in a larger pot, to begin with?

Seeds will germinate considerably more successfully if they are started in tiny pots. This gives you more control over the temperature and humidity in the seed starting container. Studies discovered that smaller cell trays produce significantly higher sprout rates than other types of seed-starting containers.

You can fertilize your plants in a garden as this will accelerate growth of the seedlings.

When to transplant the seedling in garden? The best time to transplant the seedlings-

A variety of factors influence the correct date for transplanting seedlings outside. Everything is determined by where you live, the consistency of your soil, and the plants you have.

When to transplant the seedlings? The best time to transplant the seedlings-

How to know the timings of transplant seedlings?

To get the time just right, you must first determine your expected last frost date. Contact a local garden center if you don’t know what day it is in your area.

Subtract two weeks from that date, and you’ll be able to sow cold and its hardy seedlings. After that, you should wait two weeks on average before transplanting your non-hardy seedlings.

However, because it’s simply an average, some years will have a frost later than that date. So, use these figures as a general guide.

Then, keep an eye on the forecast and plant the sensitive ones two weeks after the last frost. It’s always advisable to wait a week or two before planting heat-loving seedlings.

How to know the timings of transplant-

Which weather is best for transplanting the seeds?

When to transfer seedlings into your garden depends a lot on the weather.

The greatest day to do it is one that is cloudy with little chance of rain. Avoid days that are hot, sunny, or dry as they may raise the possibility of transplant shock.

Plan to do it in the early morning or late at night if there are no clouds. This will allow you to avoid the hottest part of the afternoon sun.

Which weather is best for transplanting the seedlings?

Transplanting seedlings too early?

If seedlings are transplanted too soon, they are considerably more likely to perish from a late spring cold wave. Even hardy seeds will perish if temperatures drop below freezing for a lengthy period of time.

Seedlings can be transplanted prematurely. This happens in the spring when temperatures aren’t consistently over 60F (15.5 C), and there’s a frost or snowstorm.

Temperature changes can also occur in the early fall.

Step-by-step guide to transplanting the seedlings-

  • Transplanting seedlings is a straightforward procedure. You only need a new container and some potting soil.
  • A 50:50 mix of potting mix and seed starting mix. This is especially advantageous for young seedlings with delicate roots.
    To ensure equal watering after planting, wet down your soil mixture before filling your pots.
  • The seedling should then be nestled in the new container, with the soil filling up around the plant’s base and pressed down to secure it and remove air pockets.
  • Bury the stem off for example tomatoes, leaving just one or two sets of leaves above the soil line. Plant all others level or bury the stem approximately 1/4 inch or less.
  • Water your transplanted seedlings thoroughly and return them to the sun. Once they get enough water, transplanting perennials will be easy.

Step by step guide to transplant the seedlings-

Transplanting seedlings in soil Guide

  • Remove any mulch – If your garden has mulch, push it aside to make a place for each seedling.
    You don’t have to remove all of the mulch; doing so would take much too long! Simply brush it away in the area where you want to plant each seedling.
  • Dig a small hole – Planting holes should be double the size and depth of the container or plant cell. Begin by filling the hole with organic granular fertilizer, compost, and worm castings. This will aid in the establishment and development of newly planted seedlings.
  • Remove the seeds from the tray with care – You risk shattering their delicate stems if you pull them out or grasp them straight.
  • Remove the seedlings from the container gently, holding only the root ball.
  • Plant the seedling – If the roots are entirely encased in the container, carefully pry them apart to liberate them. Roots should be placed in the hole at the same depth in which they were placed in the container.
  • Fill the remaining hole to cover all of the roots thoroughly, then put the root ball in it.
  • Then carefully compress it to prevent the seedling from sinking too deeply into the soil after transplanting annual flowers. Water your garden regularly, however control watering nozzle to avoid over watering.
  • Over watering your plant can be controlled by thumb control watering technique.

Step by step guide to transplant the seedlings-

Can you put your seed plant outside during the day?

If the weather is really hot, cover your seedlings or move them into partial shade during the hottest portion of the day. Finally, let your seedlings outside all day and night until they are ready to transplant into the garden.

When one mentions “transplanting a seedling,” it means transferring seedlings or small plants from their containers to garden soil. You can either-

Buy small beginning plants also known as transplants from a nursery. Some veggies are difficult to raise from seed or take too long; therefore, we rely on nurseries. Examples include tomatoes, eggplant, and peppers.

Begin planting seedlings from seed at home. Some gardeners grow plants from seed indoors, especially if they live in a northern climate with a short growing season.

We hope this article helps you in transplanting the seedlings with ease! Give the review after transplanting your seeds.

No dig gardening explained! Your complete guide on No-dig gardening  

No dig gardening explained! Your complete guide on No-dig gardening

No dig gardening has been in popularity in recent years, but what exactly it is, and how can it help the garden?

Organic produce growers typically adopt the no-dig gardening strategy, but it also applies to aesthetic plants.

Rather than digging up the soil to remove weeds, this approach involves applying organic ingredients to the soil surface, such as garden compost or well-rotted manure, to simulate natural decomposition processes that occur when plants die, and leaves fall.

Rather than digging into the soil, the no-dig gardener encourages plants, fungi, and soil organisms to break down and absorb organic materials.

No dig gardening- explained! Your complete guide on No-dig gardening  

The soil structure is not disturbed as a result of the no-digging. Worms and other species are also not disturbed; therefore, the soil’s ecology remains intact. Vegetable yields are higher when plants are on no-dig soils. Furthermore, it’s an excellent choice for time-crunched gardeners who don’t have the time to spend digging over soil beds.

How do you begin with a no-dig bed while gardening?

  • A no-dig bed can be constructed in a variety of ways.
  • Create a lasagna garden- a flat raised bed with layers of biodegradable material.
  • Try hugelkultur, which are beds made in a similar way but with a core of decaying wood in the center and a mounded appearance.
  • Bring straw blades, cover them with compost, and plant into those instead of the soil.

How do you begin with a no-dig bed?

What are the requirements for no-dig gardening?

  • A plot of land or an allotment
  • Cardboard or newspaper
  • water access
  • manure
  • organic waste/compost
  • seeds/plants
  • gardening gloves and essentials

How long does it take for a no-dig garden to decompose?

The amount of time it takes for the materials in your no-dig garden to deteriorate is dependent on the materials used. As with a cold composting system, the materials typically decompose in 6 to 12 months to produce rich compost or humus.

How long does it take for a no-dig garden to decompose?

Where shall you have a no-digging yard?

It may easily be spread over old soil, leaving grass and weeds alone. The mulch on the top will be enough to bury them, with no digging required for any soil other than a base site! It is best to grow vegetables apart from big trees and hedges as they consume all the moisture.

There are three critical points of the no-digging method:

The soil has not been disturbed, enabling its organisms to work and multiply.

The majority of soil already has a structure for roots to develop and nutrients to sustain plants, as well as organisms that support development.

When there is no excavating, you just build on top of it. Organic material is supplied to organisms on the surface, faster.

Allow the soil to work its magic. When plants demand nutrients, they become available owing to a combination of air and soil temperatures that are high enough for photosynthesis to occur. Fungus seeks food and moisture from roots, and fungi flourish in undisturbed situations, which is why no-dig soil develops more quickly.

Plant nutrition is based on fungi rather than on nutrients.

When there is no digging, plants are better equipped to get food. Compost mulches feed soil organisms quickly and boost their activity, improving soil structure. Compost is good for mulching in wet situations since it provides no suitable habitat for beneficial organisms.

There are three critical points of the no-digging method:

What exactly is the no-dig gardening method?

Plants have evolved to flourish in soil’s natural, layered structure. As it sits on the surface, dead plant debris gets invaded by bacteria and fungi. These helpful microorganisms start the process of converting organic waste into humus, or natural compost.

Earthworms and beetles, for example, eventually take the decomposed material deeper into the soil, where plant roots may receive nutrients released by the soil.

The work of living soil organisms helps to maintain a well-aerated environment, which allows for deep rainwater absorption and healthy plant development.

Nature’s slow-release fertilizer is consistent replenishment of nutrient-rich organic material, which feeds the entire ecosystem. This is the system used by gardeners who practice no-dig gardening. Instead of a shovel, they just apply compost to the soil surface at regular intervals and let the soil-dwelling organisms do the rest.

In this approach, the only soil disturbance is the little, cultivation necessary to eradicate weeds or plant seeds and seedlings. Less soil disturbance leads to fewer weed seeds reaching the surface, while compost layers bury many extra weed seedlings before they can thrive.

Because the soil does not need to dry up before tilling, no-dig gardeners may plant their gardens earlier in the season than traditional gardeners.

Why shouldn’t we dig the garden?

Gardeners and farmers have been disturbing the soil for several years. Tilling loosens and aerates the soil, eliminates weeds and previous crop residues, and increases soil microbial activity in the near term.

Starting the gardening season with a blank slate feels natural for many individuals. Excavating the soil has negative implications that impair plant health, weed management, and total yield.

Tilling disturbs the natural structure of the soil and lowers the populations of beneficial organisms that are essential for releasing natural soil fertility. Tilling’s mechanical action can kill more notable species like worms and beetles, and it encourages bacteria to devour an excessive quantity of organic materials.

Tilling also brings latent weed seeds to the surface of the soil. Whether it’s a new garden or one that has been tilled on a regular basis for many years, using the no-dig approach can result in fewer weeds and pests, as well as good plant health and output.

Why we shouldn't dig the garden?

Why is no-dig gardening beneficial?

A no-dig garden bed offers various benefits, including increased yield, fewer weeds, and less time spent on chores. Most weed seeds and early seedlings are smothered by compost, which also provides a rich supply of nutrients.

No-dig gardens use less fertilizer as well. High-quality compost applied annually meets the nutritional needs of two or more garden crops. Millions of beneficial bacteria in compost convert organic matter into natural plant food at a pace that garden plants can ingest, limiting nutrient runoff.

Advantageous to your health

Gardening is excellent exercise, but digging over a bed may be too much for you if you’re not physically fit, especially if the ground is still cold and wet. This may discourage individuals from producing their own vegetables. The most challenging aspect of no-dig gardening is making your compost and spreading it over the soil; after that, only light will be a requirement.

Carbon capture in soil from no-dig gardening

As a result of digging, carbon in the soil is oxidized and released as carbon dioxide. By not digging, you can preserve this carbon in the soil. As a consequence, we can all contribute to mitigating climate change by ensuring that carbon remains in the soil.

Why is no-dig gardening beneficial?

Where to start for your no-dig gardening?

  • You should remove weeds from your plot by hoeing or plucking them away.
  • You can make mulch from the compost of garden waste, like wood chips or leaves, or manure.
  • Divide your vegetable plot into beds, with pathways in between for easy access.
  • Plants love it when you plant them or seed them directly into compost mulch.

So, to sum up,

Gardeners rarely identify digging as one of the reasons they do what they do. Even the seemingly mundane task of weeding gives the simple pleasure of reflecting on the progress made. Digging, on the other hand, produces back pain and blisters.

Fortunately, Charles Dowding developed and popularized no-dig gardening method.

Gardeners may use the no dig method to build attractive and profitable gardens without having to dig garden.

In theory, avoiding digging/ no-dig gardening will not harm the soil’s life. These are the microorganisms, fungi, and worms that help feed plant roots.

You will require a large amount of organic stuff. Homemade compost, well-rotted manure, green waste compost, etc. are helpful in growing plants in home.

When to harvest onions – Onion harvesting guide 101

When to harvest onions while gardening?

We consume onions for over 4,000 years. Onions are a popular cool-season food that you may produce from seeds, seedlings, or transplants. In the fall and winter, onions may be a mainstay in the kitchen because of their low-maintenance nature.

Onions are remarkably simple to grow, but understanding how to harvest and preserve onions is vital if you want to get the most out of this culinary staple. Knowing when to harvest onions might help you get the most flavor and quality from your harvest. Let’s look at the onion organic gardening tips:

When to harvest onions- Onion harvesting guide 101

Harvesting Green Onions from Soil

Green onions are bunching onions that one may use in a number of recipes. They lack the large bulbous appearance of typical onions. They are collected while they are young and have a considerably milder flavor than storage onions.

Green shoots should be plucked when they reach 6-7 inches in height. If you wait any longer, the plant will become stronger and more difficult to pluck. Your crop is not dead yet if you missed the best harvesting season for green onions and they have bolted and gone to seed with the formation of flower stalks.

Pull out the onion bulbs as soon as possible and utilize the onions from garden organics soil. These onions will not keep well, but you may use them right away.

Harvesting Green Onions

When to harvest onions?

Aside from correct planting, knowing when to harvest for the best flavor is essential. You should pluck green onion tops when they reach 6 inches in height (15 cm). The longer you wait to harvest the green tips, the stronger they become.

It is appropriate to harvest bulb onions when the onion tips naturally fall over and brown. This is usually 100 to 120 days after planting, depending on the variety. You should harvest onions early in the morning when temperatures are not too high.

When to harvest onions-

Drying and storing Onion Bulbs

After harvesting, you must store onion bulbs. Before onions can be preserved, they must first be dried. Spread the onions out on a clean and dry surface in a well-ventilated area, such as a garage or a shed, to dry.

Drying and storing Onion Bulbs

How do you know when onions are ready to harvest

Harvesting onions from gardens is easy and applies to all types of onions. When the bulbs start to plump up in July, start selecting individual onions as needed. In late summer or early fall, the leaves on your onion plants will begin to droop over. This occurs at the “neck” of the onion and signifies that the plant has done growing and is ready for storage. You should pluck soon onions after, signs your onions are ready for harvest:

Soft neck

The transfer of carbohydrates from the leaves to the rings is complete when the area immediately above the neck where the leaves meet the bulb begins to feel mushy, suggesting the last cell division inside the rings. Water less often at this stage.

Tops are falling apart.

Even if not all of the tops are down, when some do, this symbolizes a 100% soft neck. You can pluck and consume the onions if you intend to eat them right away. There is adequate skin development and green tips at this phase to avoid sunscald while drying.

Last Leaf

Examine all the leaves, giving special attention to the one that has just appeared. The leaf sheaths form and dry from the oldest to the youngest leaf. If you take the onions from the soil before the last leaf is dry, rot may develop during storage.

It is best to remove your onions first thing in the morning, before the heat and harsh sunlight become unpleasant.

Signs your onions are ready for harvest

How to dry onions in the sun?

Simply stretch your onion gardening raised beds out on a level surface in a location that receives full sun exposure to dry them out in the sun. Allow the onions to dry for a few days, or until the onion roots and plant itself are dried and brown, or the outer skin is crisp. If there is a forecast for rain during the drying time, just cover them or bring them indoors until the sun returns.

When your onions are dry, brown, and crisp, cut off the tops about an inch from the bulb and snip off the dried roots. Continue to cure the onion bulbs by laying them loosely on a table or counter in a warm, well-ventilated place, out of direct sunshine, for one hour.

How to dry onions in the sun?

Drying onions easily-

After harvesting, dry or cure the onions in a warm, dry, well-ventilated area, such as a shed or garage. Arrange the onions in a single layer on a clean, dry surface. Allow the onions to cure for two to three weeks, or until the tops and necks are totally dry and the outer bulb scales rustle.

Once the onions have been totally cured, cut the tops off about an inch above the bulbs. As they are topped, remove any onions that show signs of rotting.

How long does it take for curing onions?

People frequently cure commercial onions at extremely high temperatures for six weeks before being gradually cooled to refrigerator levels. However, naturally curing onions for a month in a warm, dry atmosphere works just as well.

Freshly harvested onions benefit from early drying, but not in direct sunshine, which can cause uneven drying.

Of course, one must cure not all onions. Gardeners who grow mostly short-day onions in warm climates just need to dry the onions for a few days before trimming and storing them in the refrigerator.

How long to cure onion harvest?

When to harvest onion flowering from garden?

If you detect your onion plants producing flowering stalks too early in the season, act quickly to protect your onion harvest before the flavor is ruined.

As soon as you notice your onion plants bolting, cut off the blossoming heads. This will halt the growing process that is causing the bulb to split. Then, pluck the bulbs of any bolted plants and eat the onions as soon as workable.

Remember, you’ll want your onion plants to live as long as possible now that you have removed them from the soil. This necessitates a lengthy drying and curing process. If the weather is dry and no frost is there, the onions can be gently removed from the soil and placed in the garden for a day or two. If the weather is moist or chilly, move the onions to a protected position right once.