What herbs to plant in fall – Top 10 Herb Varieties to Plant and Grow in Fall

What herbs to plant in fall – Tips to grow fall herbs

While spring is considered the greatest season to plant many garden plants, late summer and fall are also good times to plant trees, shrubs, perennials, and herbs. Indeed, herbs! Herbs that may be planted in the fall include annuals, biennials, and perennials. Here are five excellent herbs to cultivate in your yard and pots in autumn.

In this article, we will find the top ten herbs to plant in the autumn:

  • While many perennial plants require well-drained, low-fertility soil, the annual herbs mentioned below flourish with compost and regular watering.
  • Fall is a great time to start an herb garden. Drought-resistant herbs like rosemary, sage, and Thyme may be planted now and flourish in mild winter regions.
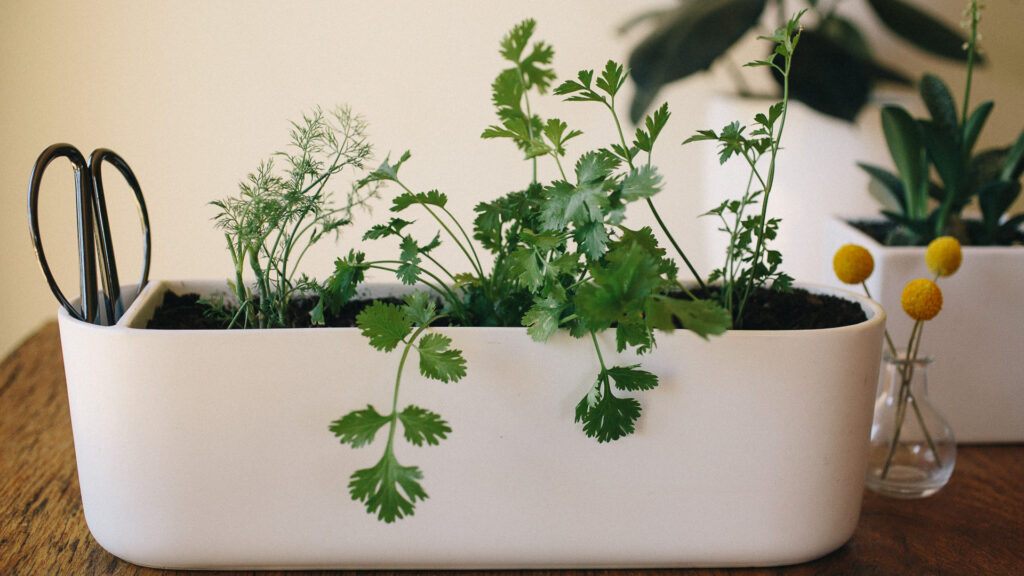
  • If you are starting your cool season gardening for the fall, you may plant annuals such as herb cilantro leaves and parsley, harvest them, and enjoy their flavor before the cold season hits.

What herbs to plant in fall

The change in weather does not mean you should abandon your garden. Several vegetables and plants thrive in colder temperatures. The best fall herbs to plant differ based on where you reside in the country and what climatic zone you live in. Examine the list and pick which herbs to grow this fall.

Tips for fall planting

After investigating which herbs are acceptable for your climate conditions, there are a few general suggestions for planting in the autumn.

  • Plant the herbs one month before the chilly winters. This allows them plenty of time to settle in before the cold winter hits.
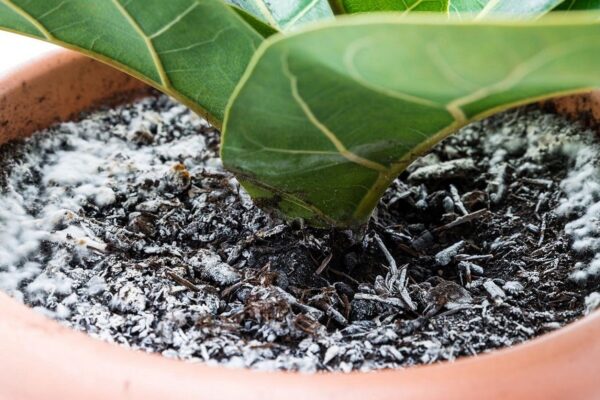
  • Examine the water drainage for the type of soil you’re growing in. Otherwise, frost heaving can take young seedlings out of the ground.
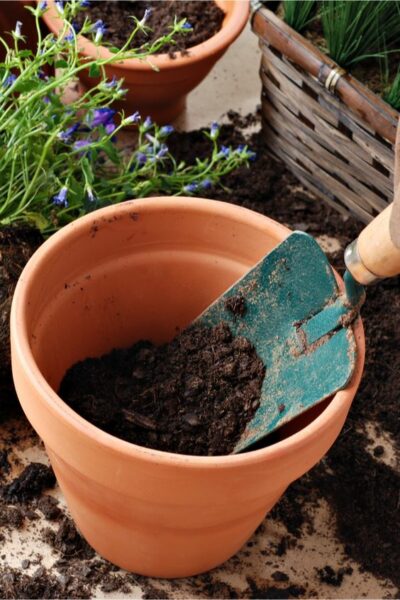
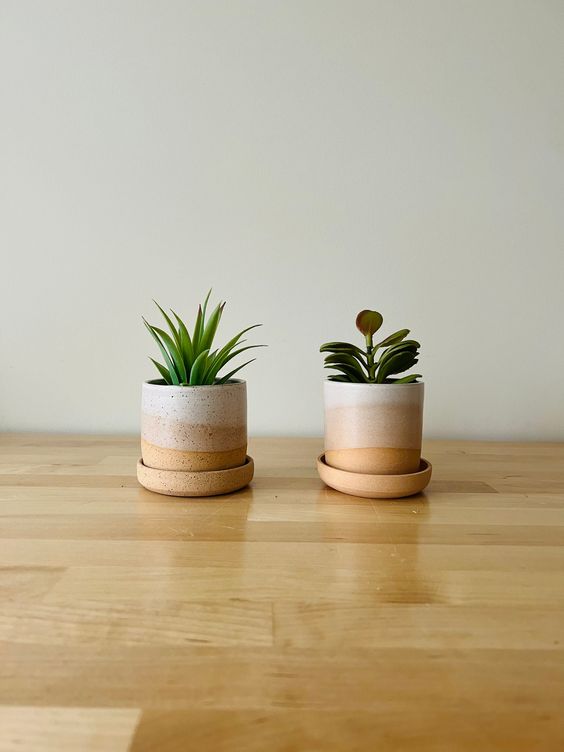
  • Plant in pots so you may bring them inside if the weather turns chilly.

Tips

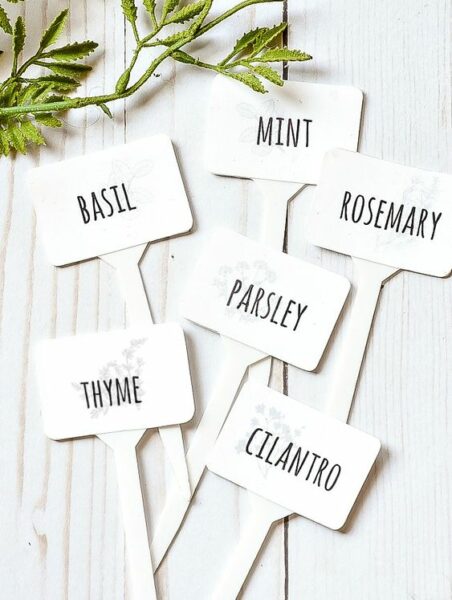
Top 10 Herbs that you can plant in fall
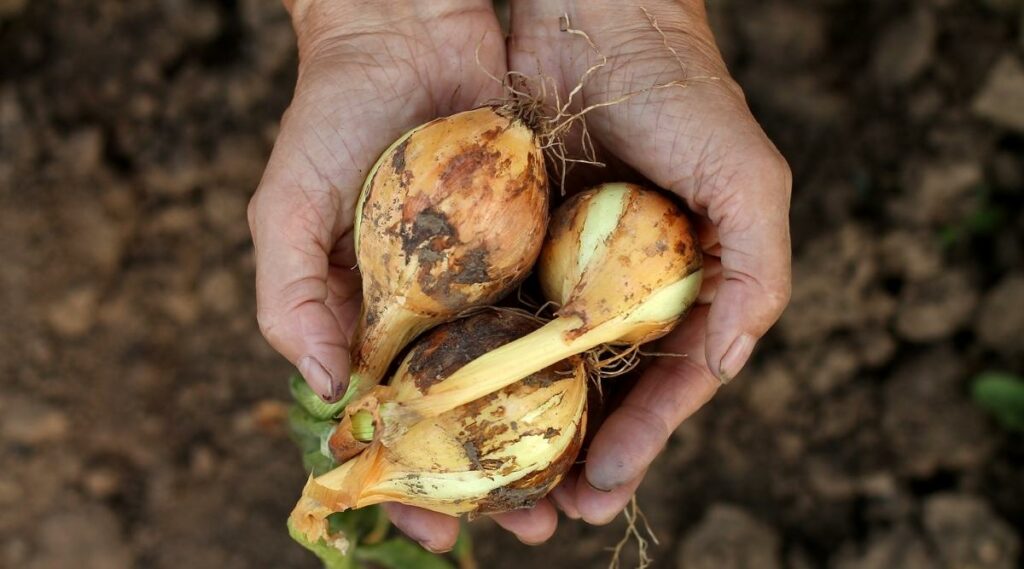
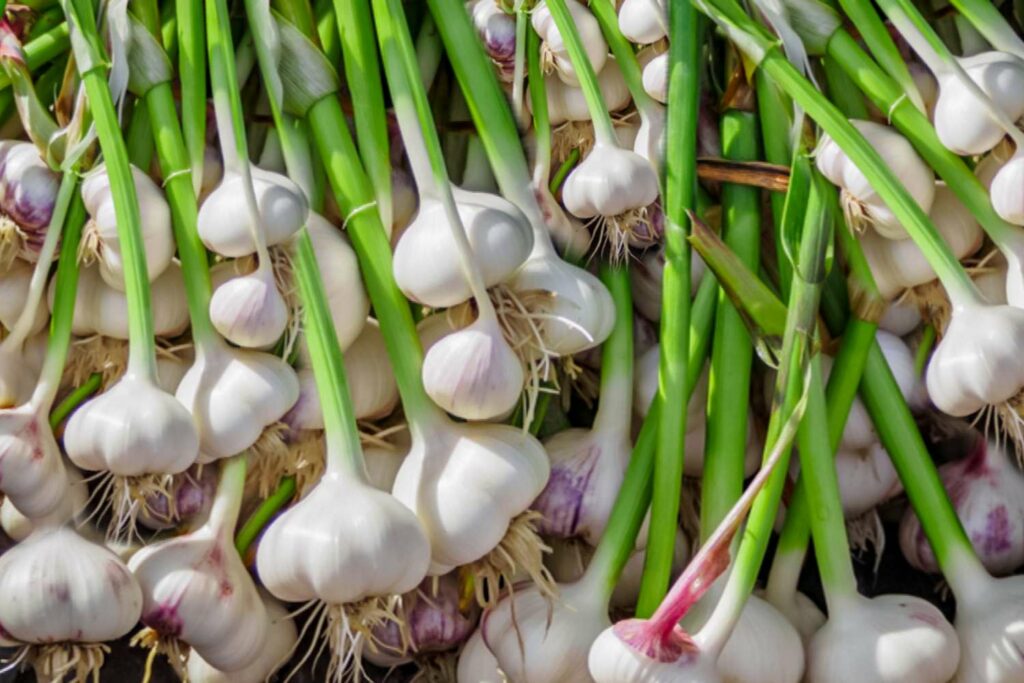
Garlic

Garlic is related to chives in the Allium family, and while it is not precisely an herb, we utilize garlic in our kitchens to flavor meals. Plant garlic in the fall and let it grow during the winter. You’ll return to harvest in the spring or summer. It is a perfect option for beginners.
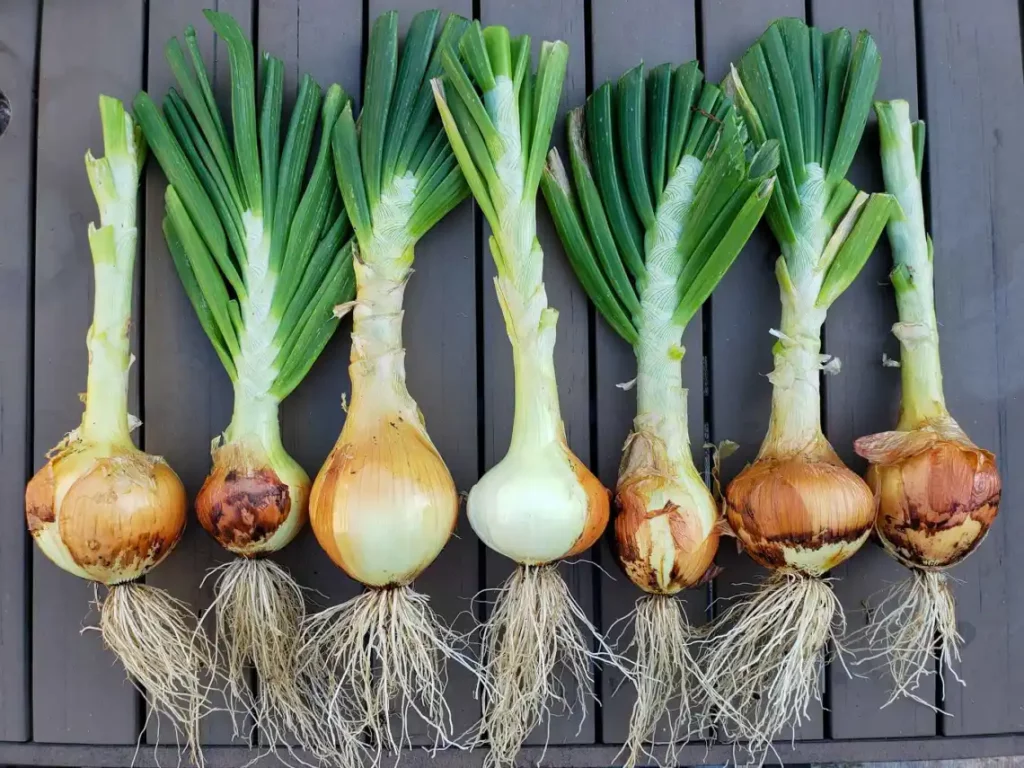
Garlic is a herb to plant in the fall

Chives

If you live in a chilly environment, chives are great. This strong perennial grows up to dipping temperatures. Chives, being one of the most popular herbs, need no introduction: they taste great on everything, have wonderful springtime pom-pom flowers, and are a nutrient-rich diet.

Provide your chive seeds with nourishing, damp, well-draining soil, and grow them in full to partial sunlight. These plants may be grown in both indoor and outdoor pots; simply place them on your sunniest windowsill!

Chives are the herbs you can plant in the fall

Echinacea

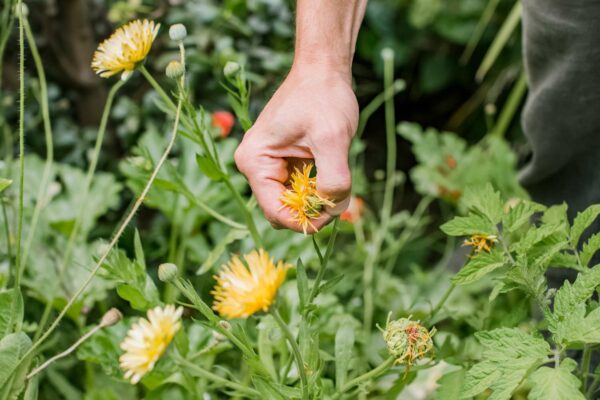
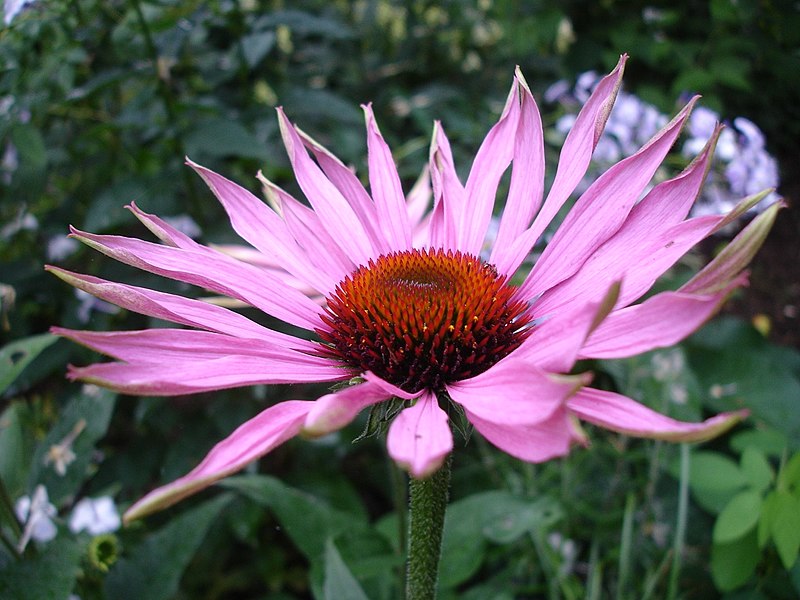
Echinacea is a good choice for you if you have a running nose every alternate day when the temperature dips. It is commonly known as coneflower. The pink petals complement the rusty red cores in the spring, attracting a variety of pollinators. Once a week, a cup of Echinacea tea can help prevent illness.

These perennial plants may thrive in various soil conditions, even rocky terrain! Keep these beauties dry and in bright light. If you’ve opted to keep your Echinacea seeds in a container, make sure there’s enough room for the taproot.
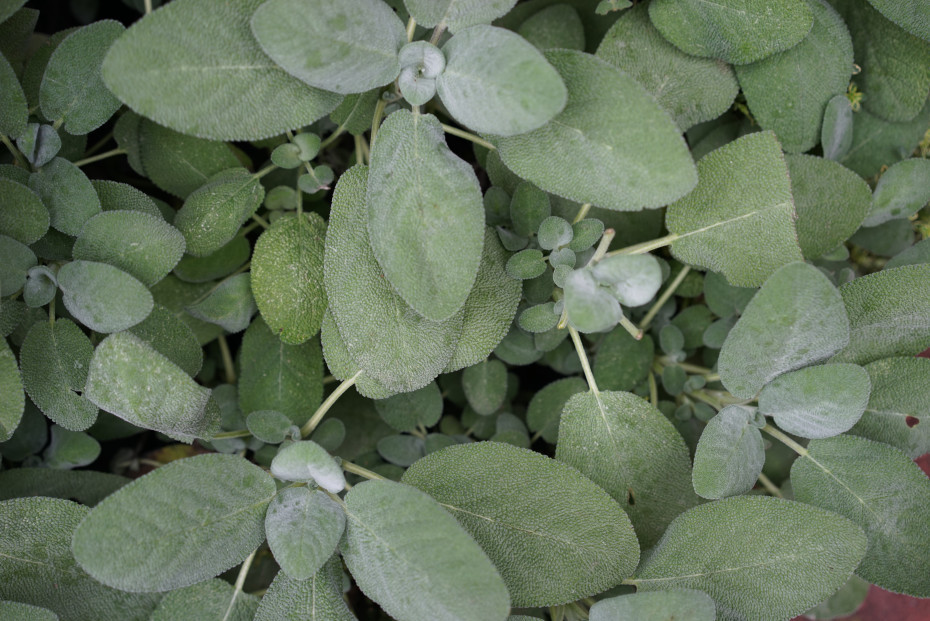
Echinacea are the herbs for the fall season

Sage

Sage is a semi-woody perennial that, if properly cared for, may survive in your garden for a long time. It has beautiful silver leaves and gives a chic look which makes it favorite fall herb. Take cuttings from your sage plants, place them in water, and you’ll never have to buy sage from the shop again.

Rosemary grows well in the fall herb garden.

This woody evergreen herb is native to the Mediterranean, and while it enjoys plenty of light and warmth, it can survive in a variety of frigid climates. It is pretty easy to grow and is a beneficial herb health-wise.
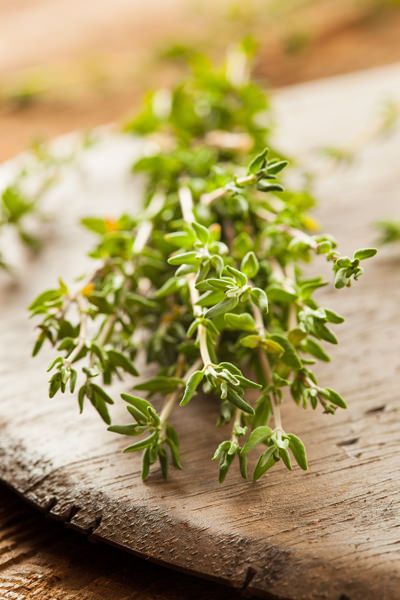
Sage is one of the most beautiful fall herbs

Thyme

Thyme is a low-growing shrub that makes an excellent garden-edging plant. It is a savory addition to practically any dish in the kitchen, including omelets, soups, and chicken. Treat bronchitis and other illnesses using the leaves, flowers, and oil of this plant.

This perennial should be planted in well-draining soil in your sunniest location and watered when the top 2 inches of soil dry in a routine manner.
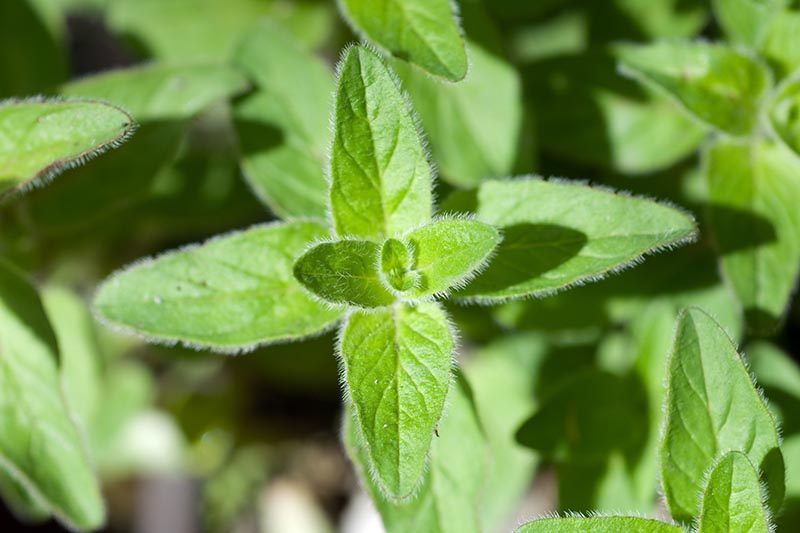
Thyme

Greece’s oregano

Oregano, like Thyme, is a low-growing plant that you can use to frame taller plants. Use this herb to flavor a delicious sauce or just sprinkle it as a garnish. You can use oregano as a natural insecticide and in medicine to treat viral infections.

Like other Mediterranean herbs, they should be planted in bright light in well-draining soil; mature specimens should dry out before rewatering.
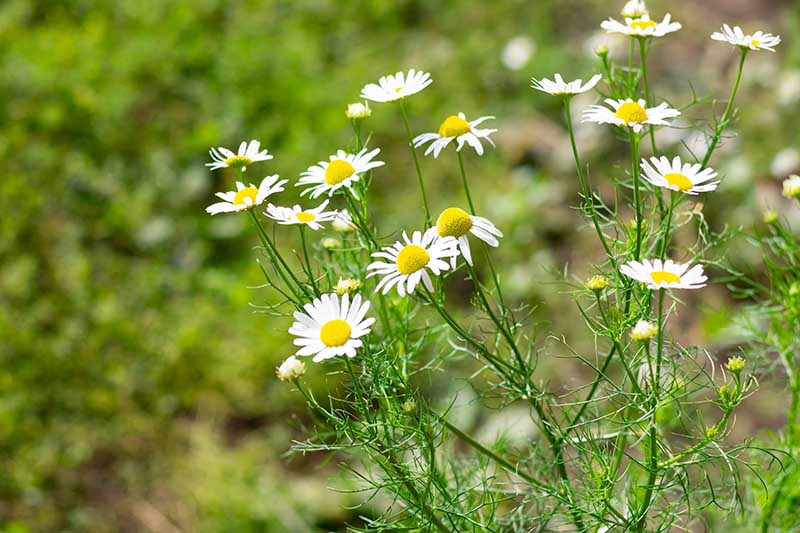
Greece's oregano herb to plant in fall

Chamomile

Chamomile, a member of the Aster family, with daisy-like flowers that provide a hilly feel to any environment. It takes little maintenance and easily self-seeds for the next growing season. It is beneficial to gather a handful of leaves in the fall, dry them, and boil them into warm teas for the winter.

Chamomile is a great herb to plant in the fall

Cilantro

This herb adds a fresh, zesty flavor from salsa to pasta salads. As previously said, if you plant cilantro now, you’ll have plenty of time to enjoy the leaves before the winter freezes your soil. The seeds, often known as coriander, are not only edible but also tasty.

Cilantro is easy to maintain in the fall and only causes problems when it blooms in hot weather.
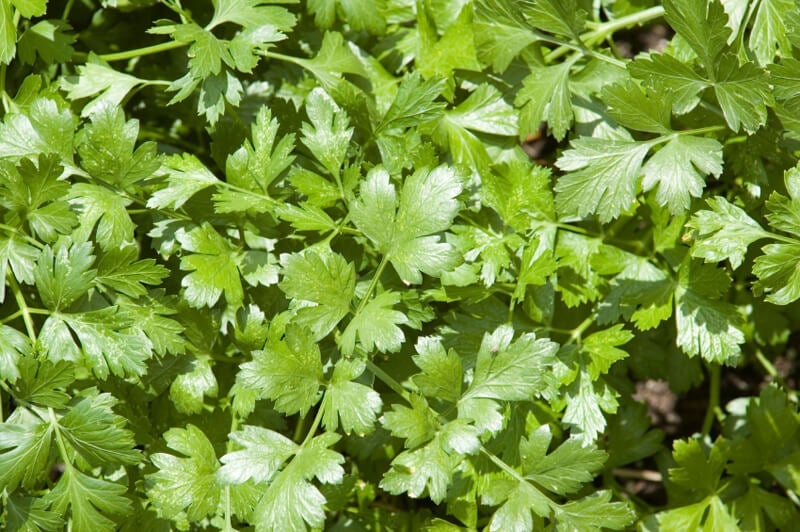
Cilantro is another fall herb to grow

Parsley

Flat leaf and curly parsley are additional choices, but both strong herb parsley is easy to maintain. Parsley is an easy-to-grow herb in the carrot family that grows well in chilly weather. It can even survive the winter if your location isn’t too chilly because it’s a perennial.

Growing fall herbs in the fall ensures that you always have fresh herbs on hand for your favorite comfort foods.

Although the concept of cultivating fall herbs appeals to many of us, it is only possible in locations with moderate winters. It is challenging to produce fall herbs in areas prone to brutal winters or frequent severe freezes, but it is possible with greenhouses or growing lights.

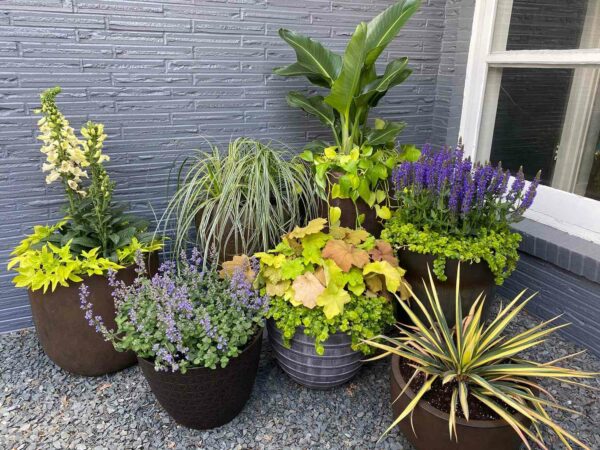
If you have moderate winters, grow fall herbs in a container near your kitchen.
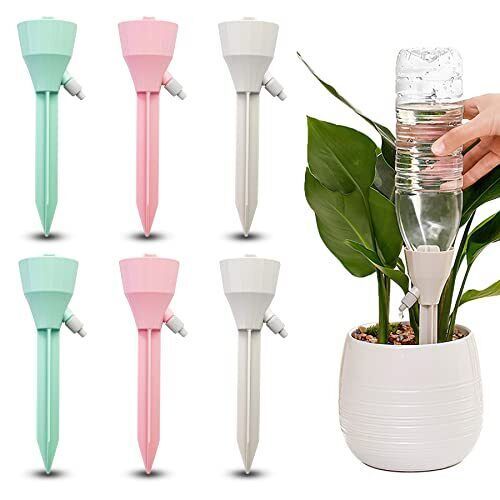
Low maintenance perennials for shade: Plants that bring beauty

Low shade perennial flowers that bring beauty

Low maintenance perennials for shade: Plants that bring beauty

To make the most of the garden space, it would make sense to grow a wide variety of plants and arrange them as thoughtfully as possible. This requires knowing the individual needs of each species and grouping them according to their needs. You simply cannot place hardy, sun-loving plants next to those with very sensitive, flammable leaves.

When grouping plants, always consider their needs for light, water, soil, and nutrients. Carefree perennials are great additions to any garden because they can last for years. Although all of them require a certain amount of light to photosynthesize, some can do well in low light. Many are also low maintenance because they can be left outside home for the winter, don’t require frequent pruning, and are unlikely to spread out of control. Continue reading this blog to know more.

Growing plants in shady areas can be quite difficult for beginning gardeners. Steaming times can be delayed in the shade, low lighting can prevent flowering, air temperature can be significantly lower, and low UV light can promote the spread of pathogens. The best shade plants are hardy, low-maintenance species whose leaves live to brighten the area.

Low shaded perennials bring beauty to your garden

Plants that are easy to grow in your shade:

Here are some low-maintenance plants for shade:

1. Abelia grandiflora

  • This plant Abelia comes in a variety of sizes, from 2-3 feet to 5-6 feet.
  • This plant is hardy, and you can handle it very easily as they don’t need some extra requirements in soil or etc.
  • Some varieties of the plant have leaves that transform hues, first copper pink and then to bright green, while others have variegated green leaves that add visual appeal throughout the growing season.
  • Later in the summer, small trumpet-shaped flowers appear in white, pink, yellow, or lavender, depending on the variety of the plant. Despite its small nature, this genus is durable and adaptable.

2. Lamprocapnos spectabilis (bleeding heart)

  • Varieties The bright flowers of the bleeding-heart plant appear in early spring.
  • They are most suitable for growing in shade. This bloody heart signifies love. Few shade flowers can compete with the old-fashioned bleeding corundum, as the heart-shaped flowers grow arching from the ferny leaves.
  • Bleeding Heart has varieties of white to pink. After flowering, this plant dies in summer. Bleeding hearts grow beautifully in the woods with other shade-loving plants. 3 feet high and wide; this varies from 1-1.5 feet tall and wide.
  • Alba, White Old Fashioned, and Snow blow are suitable for your garden.
  • Generally, bleeding heart plants (Lamprocapnos spectabilis) die after one-time flowering. Dicentra eximia, also called bordered bleeding hearts, bloom for a long time and do not go dormant.

3. Columbine

  • Columbine flowers brighten any shady garden and are a welcome sign of spring.
  • They usually bloom in very early spring, with a flowering window of two to three weeks.
  • Columbines blossom in winter but they don’t like summer. These perennials are very short-lived but can produce a lot of seeds and by taking the necessary care you can grow them next year.
  • This genus has unique flowers and Gardeners know this plant for its attractive flowers.
    Its unique flowers attract hummingbirds and have very different shapes.
  • lightly shaded areas suitable for this plant and are drought-tolerant once established.
  • These are beautifully planted in rock gardens with other shade perennials. Green Apple and Munstead White are great for your garden.

4. Tricyrtis hirta (Toad Lily)

  • Toad Lily can enhance or give an elegant look to your garden.
  • These are very easy to grow, and they blossom with very attractive flowers and can outlook the orchids as well.
  • Many blossoms with purple or blue hue flowers.
  • Growing Conditions: Full shade in evenly moist, well-drained soil is necessary for these plants. They can grow up to 2 feet tall zones.: White Towers bear white flowers which are very popular among gardeners.

5. Honeysuckle

  • It is astounding that honeysuckle is not popular and commonly planted although it is easy to care for.
  • Only 3 to 5 feet tall and wide, it is very much suitable for gardener lovers.
  • Leaves remain bright green, rusty or maroon throughout the season, depending on the variety selected. It gets its name from the small yellow tubular flowers that attract pollinators from late summer to fall. Deer tends to bypass it.

6. Hemerocallis (Daylily)

  • One perennial that has worked very well for me is the daylily. Like hosts, they die back in the fall, so they are easy to clean. Their flowering period is short, but the blooms are abundant and vigorous.
  • We have divided these daylilies a few times and moved some to the front garden. These are Stella D’oro, the most common variety.

7. Agastache urticifolia

  • Bottlebrush-like flower spikes make this low-maintenance perennial an ideal and astounding addition to the landscape. Giant hyssop grows 2 to 3 feet tall.
  •  Bunch of flowers rising above modest green leaves.
  • In addition to giving a wonderful color, the leaves smell wonderfully like aniseed when crushed. Hyssop blossoms in many varieties including blue, and pink hues.
  • It forms small colonies on its own, and although it is not an aggressive breeder, it must be tamed a little every year, so that it does not disappear.

Some tips related to gardening low shade perennials.

Watering tips for gardeners

Install drip irrigation or an automatic watering system. Avoid sprinklers as they are inefficient and waste a lot of water. If you pay for water, that’s a big deal. Also, sprinklers water from above, which leaves wet leaves and invites pests and diseases. Watering on the ground is the best scenario.

Care little and check the virus or pesticide attacks.

Schedule regular inspections of the landscape and plants. You have to check regularly for pests, it can deteriorate the situation of your plants. You have to do this checking at least once in a week. Also, well-drained soil, size of pot, bloom time is also important to check.

Spotting problem early is important, so things don’t need maintenance. If problems are allowed to fester, they will get worse and take more time to deal with.

Mulch addition to safeguarding the plant.

Mulch around plants to reduce weed growth and increase water retention. A 2- to 3-inch layer of mulch will prevent water from evaporating quickly, which means you won’t need to water as often.

Can you grow a beautiful or eye catchy garden in shady places?

Many people are discouraged from gardening because they don’t have any space, or the available space is shady. They believe that because there is less sunlight, there is less chance to grow a garden. This concept of gardening is not true at all. Shade gardens can be easier to maintain and also have some remarkable advantages over normal gardening which get enough sunlight.

White is a color that will amplify your garden to a new level, it can give wonderful look to brighten up your shady flower garden. White signifies peace which takes us to peaceful but a beautiful world. It will help to calm your mental stress as well.

In conclusion, the low shading perennials plants grow very easily, and they can enhance the beauty of your garden immensely. They are a bit expensive as well but it’s worth your time and money. You need to care about pests and viruses once or twice a week at least. Don’t worry about sunlight or shortage of a place.

Problems with Self Watering Pots: Save Plants from Self-Watering Pots

Problems with Self Watering Pots: Save Plants from Self-Watering Pots

“Self-watering” containers are another option for container gardening. Instead of drainage holes in the bottom, these bins have overflow holes on one side. The growing medium is placed on a perforated platform just above the reservoir. Plant roots extend into the water through the medium. In most cases, water is drawn into the medium from a reservoir.

These containers can be considered a hybrid of hydroponics (plant roots growing in nutrient-rich water) and traditional container gardening. Automatic watering containers help conserve water and nutrients and allow you to ignore containers for days.

Problems with Self Watering Pots: Save Plants from Self-Watering Pots

The simplest application is to place a saucer under the pot. Excess water is either sucked into the media or drawn up by the roots reaching the saucer. Many commercial models are available, or you can create your own.

When you buy an automatic watering pot, it usually comes with a grow bed, water container, potting soil and a wicking system. Auto-watering pots use this wicking system to distribute the perfect amount of water to keep plants moist.

The plant roots in auto-watering pots absorb water and keep the roots well-watered. uptakes additional water from the soil to maintain a constant moisture level. With this bottom-up irrigation system, you only need to keep the reservoir filled with water throughout the growing season.

Problems with self-watering pots


Why are watering pots bad? Problems you face in watering pot:

Potential mosquito breeding grounds

The main problem or cons with using automatic watering pots is that they can be mosquito breeding grounds. This is due to the drainage holes that allow water to accumulate in the reservoir. Due to watering planters work, water retained in the reservoir is the perfect place for mosquitoes to lay their eggs because the water is stagnant.

In most cases, mosquito eggs can hatch within 28 hours, and the constant high humidity in the pot facilitates mosquito breeding. This problem tends to be more severe if you live in a warm and humid country.

self-watering pots are Potential mosquito breeding grounds

Self-watering pots are not ideal for every plant.

Some plants aren’t suitable for self-watering pots and these types of plants favor well-draining soil. These plants include cacti and succulents. If plants such as succulents are provided with continuous watering, they can die due to root deterioration.

This is because succulents and cacti are native to desert environments, and they will need to dry out in between watering sessions. Hence, self-watering pots won’t work for plants such as cacti and succulents.

Can damage plant roots.

Normally, most plants like to spread their roots and watering pots’ top disadvantage includes damaging roots. Therefore, their roots can push out in any direction, including the ground. There is an automatic watering planter under the flowerpot.

Now when the roots branch in the pot of the watering planter, water overflows in the roots. When plant roots land in clean water, the lack of oxygen limits plant growth, and this is the reason for watering pots’ bad working style.

Can attract algal and fungal gnats.

The constant soil moisture due to water supplied by the automatic watering planter can make plants susceptible to algal and fungal gnats. Therefore, algae may thrive or grow due to excess moisture in the soil. The presence of algae can be a problem as it greatly affects plant growth by competing for water and nutrients. There is a fungal gnat, an insect the size of a fruit fly that usually looks like a mosquito.

Fungus gnats usually infest most houseplants. These fungal gnats are attracted to the moisture present in the soil and tend to lay their eggs in organic matter on the soil surface. In as little as a week, the eggs hatch into larvae, which burrow into the ground where the fungus grows. and eat decaying plants.

Self-watering pots are a bit expensive

Of course, it’s more economical to buy standard planters. Automatic watering pots are more complicated to initially set up and require a few additional parts to run efficiently. Prices vary entirely depending on the size and style you choose. One way to look at it is: Automatic watering pots help you save money on your water bill and eliminate the need to run to the store to replace dry or over-watered plants.

Self-watering pots are a bit expensive

The pots are not for watering outdoor plants.

Plants need oxygen to live, but they should not risk death to get it. Keeping plants outdoors exposes them to all kinds of weather conditions and, conversely, risks overwatering, starvation, and freezing. Automatic watering pots are equipped with overflow holes, which do not help the plants during heavy rains. They will keep your plants hydrated regardless of humidity, so you have a responsibility to protect them.

On the other hand, if a plant is exposed to direct sunlight, it will not even be able to retain moisture in the soil. The potting soil will dry out completely, the water in the reservoir will evaporate, and the sub-irrigation system will inevitably fail. It is harmful to plant health. In low temperatures, the water in the reservoir can freeze and it can harm the plant. If the necessary precautions are not taken, the water in the tank will freeze, causing the compartment to swell, bend, warp, or crack.

Causes toxic mineral deposits.

Minerals that are not absorbed by plants dissolve in water to form soluble salts. Their high concentration in water is due to the need to add water-soluble fertilizers to the potting soil when caring for plants to ensure better quality and provide nutritious nutrition to the plants. Evaporation causes residual minerals and salts to gradually accumulate on the surface and become toxic.

As a result, the leaves of the plant begin to fall off, wither and change color. Left untreated, the sediment will eventually kill your plant. Although more information can be found online about preventing salt build-up, there remains a long-term complication associated with automatic watering containers.

A common misconception among new plant parents is that you can fill a reservoir with water and leave it there. You need to understand your plant’s needs and monitor, assess, and provide suitable soil. Automatic watering does not mean filling the reservoir and then walking away.

What are watering pots top benefits?

Time saver

Consider the environmental cons of self-watering planters. These devices are designed to save water and dispense the right amount at the right time. Using automatic watering can save you time using sprinklers and hoses. If you’re a chronic waterer, a self-watering pot will definitely be a great garden companion for you.

Auto Watering Planters Work and Come in a Variety of Styles As

Auto Watering containers become trendier, and manufacturers are finding new ways to let gardeners express their style, also it can avoid self-watering planters’ problems. There are simple pots, large planters, whole wall elements, or flower boxes in black, white, or concrete. Once you’ve decided which plants to put in your automatic watering pot and where to store them, choose the best pot for the job.

The planter is environment friendly.

Environmentally Friendly: Consider the environmental benefits of the Automatic Watering Pot. With an automatic watering pot, you spend less time with sprinklers and hoses. If you are a chronic waterer, a self-watering pot will definitely make a great garden companion for you.

Some benefits of the self-watering pots

The Self Watering Pots offers great benefits and convenience for busy people. Before heading to the nursery, however, you should research the target plants for the pot. If the plant doesn’t mind constantly moist soil and doesn’t form extensive roots, you can start using watering pots, final results depend on your needs.

What temperature is frost for plants: Protecting plants to freeze in frost temperatures

What temperature is frost for plants?

What temperature is frost for plants

“FROST” is predominantly ice crystals that develop when ice crystals form on the outside of your plant. It forms when the moistness in the air and converted to ice without first becoming mist.

In our middle school these phenomena of gaseous interconverting into solid or ice crystals without becoming liquid. Some factors are noteworthy for evolving it.

Firstly, the temperature of the atmosphere has to fall between 36- and 32 degrees Fahrenheit. The moisture of the air converts into ice crystals, so there has to be a little breezy. It usually occurs on clear nights.

Our hardiest and coldest plants can withstand frost without the help of a gardener as they are natural health survival. Most of the sensitive plants, valuable summer produce vegetables such as tomatoes, peppers, and squash, can thrive at this temperature with the help of a gardener.

To shield your outdoor plants from cold temperatures while gardening, learning to anticipate when requirements for frost strike the area and what safeguards to take is useful.

How to Protect Them from Frost and Avoid the Freeze?

1. The potted plant should be kept inside at room temperature.

When it is in the forecast or you predict frost, at dusk you have to move your potted plants and hanging baskets indoors.

Plants in pots are more in danger or susceptible to harm because they aren’t benefited from the insulating capacities of the ground soil like in-ground plants are.

Roots of potted plants are exposed to colder temperature and at that temperature frost occurs. Although they have threats, extreme survival of these plants saves them.

Gardeners have to choose a place that isn’t too warm because sudden shifts in temperature can shock plants.  A place in your garage shed or cellar can be used as a shelter for plants.

Examine plants thoroughly for pests and diseases before fetching them inside your home. Keep plants separated from your houseplants to discourage the potential spread of insects.

Once the threat of frost has passed from the air, transport all plants back outside first thing in the morning.

How to Protect Plants from Frost

2. Shield them with coverings like plant frost cloth.

To protect a larger group of plants, simply wrap them with coverings like bed sheets, towels, or drop cloths.

Before applying the plant frost cloth, place some stakes around the plant so that the plant is in warm weather. Let the material drape over the plants to the mud line. Do not tie around the stem or stem of the plant.

Tie them together to prevent heat from the earth from reaching your plants. For even more resistance, consider adding a final layer of plastic.

No part of the plastic cover should come into contact with plant vegetation, as plastic can interfere with plants.

Weigh down the corners and boundaries with heavy stones or bricks to prevent the coverings from blowing away in the night. The next day the first task of the gardener should remove the covers of plants.

How to Protect Plants from Frost - shield plants with coverings

3. Watering them in the afternoon

It appears counterintuitive because it can hold the soil moist can aid protect plants from freezing weather.

Damp soil has an insulating result, which emits warmth upward come nightfall.

If you water your plants before the cold wind blows, do so at the meridian, when the temperature is still slightly warm.

4. Adding a dense layer of mulch

When it’s freezing, you should add a layer of mulch to your garden beds. It will help shield the soil from impulsive swings in temperature.

  • Utilize straw, wood chips, dry leaves, or precisely just a heap of leaves. It provides necessary insulation for the plant’s root system below ground.
  • Heavy mulch 3 to 6 inches deep to create a good barrier.
  • Leave one or two openings around the central stem to allow heat from the soil to reach the plants.
  • Mulching your green beds is one of the best things you can do to keep them low maintenance. But be sure to remove some of the defensive mulch when the weather warms up.

5. Soil perfect to use as frost resistant

The kind of soil your garden is thriving in also influences the quantity of dampness it maintains. Profound, loose, heavy, productive soil discharges more moisture into the air than sandy, nutrient-poor soil.

The more humid the air is, the better elevated the moisture point will be, and less frost can form on those plants. The mulched plants are more likely to become frosted since the mulch holds moisture and heat released from the soil and heats up the surrounding air.

6. Comprehend the behavior of plants in garden.

The plant itself defines its probability of harm. Immature plants or those still growing are most susceptible. Especially the new growth plants are in danger. The toleration against frost tends to be more elevated in the plants with deep maroon leaves and such leaves can absorb and controls heat.

Soft-leaf plants also can retain their warmness. Hardy or frost-resistant plants expose less portion of their leaves to chilling and drying winds.

In what temperatures frost can damage a plant?

Plants can endure a huge variety of temperature ranges, however, there are particular threshold temperatures that should be met earlier than they may develop and flourish. Frost is the maximum not unusual place form of plant harm that takes place at temperatures below 32 stages Fahrenheit.

Plants will develop naturally withinside the low-temperature sector as much as 32 stages Fahrenheit, however, beneath this temperature it can also arise on stems or leaves in bloodless climates.

Should you cowl flora at 39 stages? Are forty stages too bloodless for flowers?

When plants are exposed to frost, the temperature can damage the plant completely. The damage can deviate from browning leaves and drying out the plant to killing the tender plants completely.

  • Understanding how to inform in case your plant has hoar destroyed is essential if you want to keep away from unnecessary waste of time and money.
  • The leaves may be brown and there may be masses of lifeless or loss of life leaves in addition to stems.
  • The plant could have a great yellowing or browning color. If you detect those symptoms, they perhaps had been killed because of frost.
  • For interior plants, it’s an exceptional test of the leaves for frost harm inside. To do this, you need to use your arms softly to push down at the pinnacle of the leaves and experience any raised regions or bumps. For a door plant, it’s simpler to look if the leaves are frosted.

To do this, sincerely have a take a monitor how a whole lot of water you spot popping out of in which stems meet leaves.

Here are a few florae that need not be blanketed with the aid of using frost protection:

Here are a few florae that need not be blanketed with the aid of using frost protection:

Frost is an herbal phenomenon that takes place all through wintry weather. Rhododendron, Petunias, and snapdragons are some frost-resistant varieties.

It generally determines flora due to low temperatures. Its injures flora, which may be devastating to the general fitness of the tender plants.

Some people suppose that if they spray water on the frosty leaves, they may clean the frost and kill it.
Nonetheless, that is a wrong practice and can even induce extra troubles than it solves.

Frost is a form of ice that administrators and accumulates on flora and shrubs all through the bloodless wintry weather months.

More frequently than now that no longer, it’s now simply the leaves of plants that get frosted, however, the flowers, stems, trunks, or maybe the roots.

Key Takeaways

Climate change induces several differences in the physical conditions, such as plants and leaves. The natural environment and local climate extremes influence flowers and plants. The anticipated growth in frost events drives sense in plant replica and plant structure vegetation.

Plant life’s ability to avoid frost is dependent on the timing of its development and reproduction on the same hand for survival gardening, off-grid method is also useful.

In this article, we have evaluated the impact of frosts on plants and flowers, how the frost is damaging the roots, and tips on how to protect them from frost.

After that, we have to predict frost occurrence to take standards to save plants. The prediction of hoar frost events comprises a complicated decision study that employs conditional possibility and economists.

Will baking soda make hydrangeas pink: Baking Soda for Hydrangeas

Will baking soda make hydrangea pink?

Will baking soda make hydrangea pink

Pink Hydrangea is not a miracle is a chemistry that brings beauty to gardening. Hydrangeas are a beautiful plant with many tints of pink and white. These are widely known as hortensia. Hydrangeas are exceptional performers and add a spectacular asset to the garden. Hydrangeas have the potential to change hue depending on the condition of the soil.

So, the common question amongst gardeners is whether baking soda helps transpose the color of hydrangeas to pink or not. The answer is yes and no because it needs both acid and alkaline to thrive which means they are most likely not like the presence of baking soda.

The pH of the soil determines flower pigment- particularly whether or not the hydrangeas are taking up aluminum from the soil. The pink color indicates the plant is getting aluminum and the blue indicates it isn’t.

Gardeners can control the color by altering the ph so it is useful to add baking soda as baking soda is the most cost-effective way to turn your hydrangeas in pink color.

Will baking soda make hydrangeas pink?
How Does Baking Soda Good for Hydrangeas?

The question is baking soda good for hydrangeas has these answers:

  • Baking soda is sodium bicarbonate. It’s used in so many different ways in gardening, and also used in industrial applications. It’s a naturally occurring substance, which indicates it’s safe to use in both organic and non-organic gardens.
  • A simple and quick way to check the pH level of garden soil is through the soil test kit. If the soil pH level is below 5.5, then it is acidic. If the pH level is at or above 7, then the soil is alkaline and perfect for growing pink hydrangeas.
  • After a soil test is done, gardeners know how important pH is to the health of the plants. That’s the reason a gardener is advised always plant in acidic soil and add lime if he is in an alkaline environment. So, sodium bicarbonate is added to water to change the pH level.
  • It also causes the carbon dioxide in water to escape. This makes the water less acidic, which is why baking soda is used as a pH buffer. If you have soil with a high pH (above 6.5), baking soda will help to lower the pH level.
  • If the soil has a pH of 6.0 or lowers that means the soil is acidic and it helps to induce blue or lavender-blue hydrangea. Alkaline soil, with a pH above 7.0, facilitates pinks and reds. When a pH is between 6 and 7, the blossoms turn purple or bluish pink.

What Is Appropriate Soil for Hydrangeas?

Hydrangeas love acidic soil. They prefer soils with high amounts of compost, decomposed leaves, and aged manure. However, their soil also has a high pH level of between 5.5 and 6.2. Baking soda can’t help soil with a high pH level.

That’s why a gardener is supposed to improve the acidity of the soil. Adding compost, aged manure, or additives like sulfur improves the acidity of the soil which helps to change the hue of the Hydrangea flower.

What Is Hydrangea Soil?

Baking Soda for Hydrangeas

So, by adding baking soda, hydrangeas can get help to lower the pH level in soil with a high pH level. And that’s exactly what a gardener wants to do for enhancing the beauty of the flower. If the soil has a high pH level, one will be able to plant more types of flowers in one’s garden and even grow citrus trees.

In organic gardens plants, baking soda can be safely used. It is sodium bicarbonate, and plants cannot be harmed in any manner by it. Baking soda enhances the pH buffering properties of soil by causing the release of carbon dioxide from the soil and can change hydrangea color easily.

The Pros to Add Baking Soda to Change Hydrangea Color.

  • Baking soda is the most cost-effective way to grow pink hydrangeas and baking soda is the secret of it.
  • It works well to bring down soil pH levels and can be a fantastic remedy for acidic soil.
  • The irrigation system is easily expanded by it.
  • Baking soda changes the pH buffer in both organic and inorganic gardening.
  • It can be used to enhance soil structure by increasing its porosity and aeration.
  • Both soil sanitizer and plant fertilizer can be made from it.
  • It can also be used to eliminate unpleasant smells from one’s backyard.
  • The carpets and floors in your house can also be cleaned using it.
  • Every non-organic garden can use baking soda or NaHCO3 without risk.
  • Obtaining a reasonably priced new garden might be beneficial.
  • You may find it beneficial to stay away from rotten tomato odor.

The Cons of Using Baking Soda

It is caustic, which means it will burn the skin if it gets on the gardeners.

  • Baking soda is alkaline and is not a natural soil amendment that can be made so it can leave behind a sour smell.
  • It can cause soil to become alkaline, leaving it harder to grow vegetables and flowers.
  • It only works on hard, compacted soils. If you don’t rinse off the baking soda, it can stain your driveway.
  • NaHCO3 or baking soda must use carefully. It can damage some plants if used too often. It may be harmful to animals.

Make sure to mix the baking soda (1 tablespoon) well and evenly distributed it through the soil before bedding in the plant. Adding baking soda to the soil around the hydrangea will give the roots the protection they need from the winter temperatures as well as the summer ones.

Because hydrangeas are such large plants the roots often battle to provide enough moisture for the leaves, so keeping them cool and moist ensures that the plant survives both hot and cold temperatures.

The Pros and Cons of Using Baking Soda on your hydrangeas

Baking Soda on hydrangeas

It does take time to change the ph. level of the soil from 3 to 8 months. Adding excessive baking soda for a long time may damage the soil so gardeners have to keep patience as a substitute he can use garden lime as well which will help the blossoms to become pink.

Maintaining consistent pink blossoms will demand standard applications of baking soda, so it’s a suitable idea to add the baking soda with the fertilizer. When hydrangea flowers turn pink, they won’t change color, so gardeners have to wait until the following year to see a different tint resulting from the efforts to modify soil pH.

In Conclusion, Baking soda can be a helpful addition to your hydrangea fertilizer regimen. It can help to lower the pH level in your soil and make it more acidic, which is what hydrangeas are looking for. Also, baking soda will make hydrangeas pink.

Baking soda is also a good soil sterilizer and odor eliminator, so used as unwanted smells is a problem.

It uses to disinfect home floors, so it is a helpful addition to the backyard fertilizer regimen.

But baking soda should use with caution and moderation, as it is not a natural additive and can harm your plants if used too frequently.

It uses in moderation, as it damages some soil types. Baking soda is an inexpensive and easy-to-find addition to your hydrangea fertilizer regimen, so it can be a great way to get a new garden.

Growing Onions in 5 Gallon Buckets – Complete Guide to Grow Onions in Bucket.

Growing Onions in 5 Gallon Buckets – Complete Guide to Grow Onions in Bucket

Growing Onions in 5 Gallon Buckets

Sandwiches, salads, soups, and other dishes can all benefit from the simple and extremely easy addition of onions. Also, there are numerous types of onions, including red, yellow, and white, and those with hot and sweet stems.

Of course, there are green onions, which give the meal flavor and color. For both rookie and seasoned gardeners, growing onions is enjoyable. Many people think homegrown onions in a 5-gallon bucket taste better than store-bought ones.

Some gardeners have asked me if they can grow onions in 5-gallon buckets.

If you’re wondering if you can grow onions in a 5-gallon bucket while living in an urban area, the answer is unquestionable yes. To make room for the bulb’s subsurface root system to expand. Likewise, provided the bucket is at least 10 inches deep, you may grow onions in 5 gallon buckets.

How many onions grow in a 5-gallon bucket?

How many onions grow in a 5-gallon bucket

Within each bulbous plant, there is only one bulb. The good news is that six to eight bulbous plants can fit in a five-gallon bucket. It gets even better by making the most of the available space in your bucket.

Some things need to be taken care of.

  • Selection of container: The soil depth of bulb containers should be at least 10 inches. The diameter can be as large as it fits but remember that each bulb needs about 3 inches of space to grow in container gardening.
  • A 5-gallon bucket is perfect for growing 6 or 8 bulbs.
  • A large planter box or even a container works well.
  • Make sure your tank has good drainage holes and try to raise it slightly off the ground.

The proper soil for onion in gardens

Container-grown onions do best in well-drained clay soil in pots with a slightly acidic to neutral pH. Before planting or growing, enrich the soil with plenty of mature compost and a balanced fertilizer to grow onions indoors.

How many onions grow in a 5-gallon bucket?Proper watering

The onion needs about 1-2 cups of water per week. Be sure to check the soil because bulb plants often look healthy even though they need water. If using soil, the onion plant doesn’t need as much water. However, they should be checked regularly and watered, if necessary, especially during hot and dry periods. Review the dampness by sticking your finger into the soil from time to time. If you don’t feel moisture after that, it’s time to water.

Choosing a proper container

  • Choosing the appropriate container can make a significant difference in growth. Like a root, an onion needs a lot of room to grow. But they don’t require as much space as people think. The actual onion you consume takes up most of the space.
  • In addition, the root system is relatively shallow. At 10 inches depth, bulbs can grow as large as possible without worrying about overcrowding. Depth is the most important factor, so please get as wide a container as you want. Using regular 5-gallon buckets is an excellent choice for these homegrown plants.
  • A standard hardware store 5-gallon bucket can grow 6-8 bulb plants. Plastic containers are light, durable, compact, and easy to carry with a handle. Take a few buckets and you can get a whole crop without taking up a lot of space. Other containers also work suitable for onion harvest.
  • Onion family plants do well in pots, bed-like containers, or terracotta pots. You can even use hanging plants or simple containers so that onions grow well in a bucket. Just make sure it’s 10 inches deep and the pot will work just fine.

Before you start planting onions, you need to make some preparations

Before you start planting onions, you need to make some preparations.

  • 5-gallon buckets are convenient but not suitable for container growing. So, it has to be rebuilt a bit. First, we need to make drainage holes. If you plant an onion directly in a bucket, water will collect at the bottom.
  • This can create a fungal problem. Use the drill to make a hole in the bottom of the bucket. Make sure the auger you use is large enough to allow the water to seep in while keeping the soil contained.
  • Place the drainage holes evenly around the perimeter of the pot. Also, some holes should be placed near the center. The goal here is to make sure there are no places for water to pool. We want all your tub bulbous plants to get the same amount of drainage capacity.
  • Most 5-gallon plastic buckets have a reinforced rim. This is great for carrying heavy loads, but not so good for gardening. Place the bucket directly on the ground and this reinforced rim will prevent water from leaking.
  • The easiest way is to use some pavers to grow onions. Arrange them so that they do not block the holes and you are ready to go. Many stores also sell risers that fit in 5-gallon buckets of onions.

Fertilization Methods for Onion Plants

  • Despite the shallow root system, onions are heavy in nutrients. Plants use the nutrients in the soil as much as possible. Fertilization helps improve soil quality and promotes the rapid growth of plants.
  • Onion needs all three major nutrients. These include nitrogen, potassium, and phosphorus. Plants take up moderate amounts of nitrogen. But they are higher in potassium and phosphorus. In general, standard nitrogen formulations work well. A 10-10-10 organic fertilizer works best.
  • We recommend using nitrate-based formulas rather than sulfate-based formulas, as sulfates tend to make the resulting crop sharper. If you want sweet and tangy onion, you need to do this, use nitrate-based fertilizers. Side-feed the bulbs with a water-soluble fertilizer about three weeks after planting. Additional applications can then be applied every time in 2-3 weeks during the growing season. This step will help a lot to plant onion sets.

Fertilization Methods for Onion Plants

How to Harvest Onions?

  • After treating the plants for about 90 days in a bucket, the bulbs are ready to be enjoyed in bucket. But you have to harvest them at the right time. Therefore, it is necessary to rely on the appearance of the culm.
  • Onions are usually ready when the stems begin to dry and turn yellow. They will fall over, indicating the onion is ready. To harvest, simply pull out the vegetables with a stick. Shake the onion well to remove any dirt and set aside. Don’t cut the tip of onion sets yet! It takes about 7-10 days for the onions to harden.
  • The aging process helps lock in and develop flavors. When you pull the vegetable out of the ground for the first time, you will notice that it has thin skin and thick flesh. Vegetables are very delicate at this point.

How much sunlight do onions need?

How much sunlight do onions need

Bulbs still need plenty of sunlight while growing underground in buckets indoor. These plants need full sun every day. It is not a plant to put on a windowsill or in the shade. Place the pot on the south side of your home so the plant can enjoy the sun from dusk to dawn. To grow large, healthy onions, it is important to choose varieties suitable for the indoor region. There are 3 types of onions to choose from. The difference between these categories has to do with the amount of daily sun you need.

Short Day Onions

Short Day Onions require medium sunlight for maximum performance. These plants should be taken daily for 10-12 hours. They thrive best in the South, where the days are slightly shorter. North can grow short-day onions with a long day. But you end up with a smaller bulb. In addition, plants can start flowering much earlier. Common varieties include Southern Bell and White Bermuda.

Long Day Bulbs

Long Day Bulbs are ideal for Northern gardens with long days. These strains require 14 hours of sunlight per day. Anything else and pears will not form properly. There are varieties of long-day onions such as Yellow Sweet Spanish and Ring Master. Chunichi Onions, these varieties are intermediate between long-day and short-day onions. Ideal for the Midwest and the Middle East, these bulbs require 12-14 hours of sunlight per day for bulb formation.

What are good companion plants for growing onions?

Onions are a popular vegetable crop that can benefit from growing companion planting. Growing some good companion plants can help repel pests or attract beneficial insects, while others can improve soil health and nutrient availability. One good companion plant for growing onions is garlic, which can help deter onion flies and other pests that feed on alliums.

Another helpful companion is chamomile, which can attract hoverflies that prey on aphids and other harmful insects. Additionally, growing beans or peas near onions can improve soil fertility by fixing nitrogen.

Marigolds can also be useful as they have been known to repel nematodes, which can damage onion roots. Overall, planting a variety of companion plants alongside onions can help support their growth and health, while also creating a diverse and thriving garden ecosystem.

Are carrots and potatoes good companion to plant onion sets?

Indeed, onions and potatoes make good gardening partners for planting onions.

Because their roots are at various depths, onions and carrots complement one another well. Carrots have longer roots than onions, which have shallower roots. As a result, they won’t have to compete with one another for the same soil nutrients as they develop together.

Also, a wonderful companion plant for onions is potatoes. By generating a smell that is repulsive to these pests, they can assist in warding off insects that can attack onions, such as onion flies. Furthermore, because potatoes require different nutrients than onions, they can assist maintain a balance in the soil’s nutrient levels.

Conclusion

In a 5-gallon bucket, grow onions at home in an affordable and efficient manner. Maintaining proper soil drainage, providing enough sunlight, and watering frequently are the keys to growing onions successfully in a bucket. With the right care and attention, onions may be grown in a 5-gallon bucket and will produce a sizable crop. Whether you have a small balcony or a large backyard, growing onions in a bucket is an excellent way to enjoy fresh, home-grown vegetables. Why not start growing onions and observe the consequences for yourself?

What vegetables grow well together in containers: Planting Vegetable in Container

What vegetables grow well together in containers: Planting Vegetable in Container

What vegetables grow well together in containers: Planting Vegetable in Container

Container gardening is a great way to enjoy fresh produce year-round. If you don’t have the space for a full-sized garden, you may feel like your options are limited. However, with a little gardening knowledge and careful attention, many vegetables and herbs can be grown in a container and harvested right on the plate.

Some vegetables that grow well in containers are nightshades, such as tomatoes, potatoes, peppers, and eggplants. Some plants such as peas, and lettuce are fast-growing and easy to grow in plants it will magnify the beauty of your garden. In general, use a good-quality organic potting with good drainage soil to fill your vegetable pot.

what vegetables grow well together in containers? In this article we try to answer this question. The container can vary in size depending on the type of vegetable you are harvesting. Some vegetables, such as leafy greens, have relatively shallow roots and do not require a deep container. But others, like potatoes, need deep soil for proper development. Some container garden ideas include using fabric pots that are lightweight to move when needed or planting a vertical garden with pots attached to a fence or wall.

Easy vegetables to grow in pots are listed in this article.

You can grow vegetables together in containers if they both have the same requirement for nutrition. For example, herbs and salad greens can often be grown together. If you’re peeking for ideas for vegetable containers, here are some vegetables that do well in containers on your verandah, terrace, or balcony, as long as they get adequate sun.

Vegetables combination ideas that well together in container gardening.

Here are more details about each of these pairs you can harvest in your little indoor garden.

Carrot and tomato growing together.

  • Tomatoes are suitable to plant with carrots, it gives them shade in your home. Tomatoes protect carrots from weeds, carrot flies, and pests as well.
  • Carrots give tomatoes soil to aerate. This ensures good moisture and nutrient circulation in the soil. Tomatoes and carrots grow well together in container its evident from these facts.
  • Leeks, Rosemary, Sage, and Chives can as well protect the tomato plants from weeds as well. You want to avoid growing plants like cilantro and dill near carrots, as they will slow their growth.

Basil and Chili plant are good for each other.

  • Basil is a good partner for chili plants as they help improve their growth and flavor in your home.
  • It can also prevent some harmful insects from entering your plants.
  • Basil also grows together with tomatoes, parsley, oregano, and rosemary. But it is not good to grow basil together with sage. Basil needs soil with a lot of moisture to grow well. But a sage prefers dry soil.

Vegetables that grow well together in containers - Basil and Chilli

Beans and Pumpkin grow well together

  • Beans and squash are three staple vegetables. This is a very common choice of staple veggies to grow together for a very long term. Although they often grow in containers, beans, and squash easily grow together in large pots. Zucchini also good to grow with beans in a container garden.
  • Beans are nitrogen fixers, which means they take nitrogen from the air and store it in the soil. This is useful for squash, which needs a lot of nitrogen to produce long vines and fruit.
  • Squash acts as a natural mulch for the beans, binding moisture and nutrients. Both beans and squash are available as vine and bush varieties. Choose one of each, such as beans, and a squash, such as a pumpkin. This way you benefit your container and cover space.

Okra, Lettuce vegetables, and Basil

  • If you live in the south or another warm climate, you should really try to grow okra in your container garden. It is a unique, highly productive addition to your other herbs and vegetables.
  • Lettuce and herbs like basil, and mint are good neighbors for long, shiny okra. Okra plants a long stem and grows up to 6 feet tall, providing partial shade for lettuce and basil.
  • They like the full sun, but in the hottest part of the summer, they can take a breather in the middle of the day.
  • Lettuce and basil have lower root systems that do not compete with okra. Basil, like other herbs, can repel many pests and is a good companion plant for many vegetables.

Vegetables that grow well together in containers - Okra, Lettuce, and Basil

Green beans and corn vegetables

  • Green beans grow well with them because they can be used as a grill. Green beans fix nitrogen in the soil, which is good for the plant.
  • Other useful companion plants for green beans are broccoli, Brussels sprouts, cabbage, cucumber, potatoes, and radishes.
  • You don’t want to grow beets or onions near green beans because they stunt growth.

Onions and carrots in containers

  • Onions grow well with carrots because they protect them from pests such as the carrot fly or aphids.
  •  Lettuce, Beetroot, Cabbage, Tomatoes, Cucumber, and Rosemary are also very suitable to grow together with them.
  • You want to keep bulbs away from plants like beans, peas, cucumber, and asparagus because they slow the growth of those plants.

Vegetables that grow well together in containers - Onions and carrots

Green beans and corn in pots

  • Green beans grow well with corn. Green beans fix nitrogen in the soil, which is good for the corn plant.
  • Other useful companion plants for green beans are broccoli, Brussels sprouts, cabbage, cucumber, peas, and potatoes.
  • You don’t want to grow beets or onions near green beans because they stunt growth.

Spinach and Peas (easy vegetable to grow in pots)

Peas are perfect for containers and small spaces. The grid behind the container gives the peas plenty of space. This leaves room in the rest of the dish for the legume lover, spinach.

Spinach helps keep the soil moist thanks to its low-growing leaves. A tall pea trellis can also provide shade from the hot afternoon sun, something spinach needs to survive warmer weather.

Eggplant and paprika planting

  • Eggplant and paprika both belong to the night cream family. Because they belong to the same family, they have similar nutrient, pH, and sunlight requirements.
  • Planting them together can be beneficial and you don’t have to worry about them competing for nutrients or resources.

Cabbage and cauliflower vegetable container garden

Cabbage and cauliflower are both members of the Brassica family. When plants belong to the same family, it means that they have similar needs for nutrients, pH, and sunlight. So planting them together is a good way to make a good environment for them as there is no competition for resources.

Vegetables that grow well together in containers - Cabbage and cauliflower

Much of the success of your container garden depends on the growing medium you choose. Plants have very limited access to water or nutrients, so you have to choose substrate on the basis of its quality so that your vegetables can obtain their required nutrition.

When choosing a containers gardening, consider the following characteristics:

  • Does the soil hold adequate moisture and nutrient?
  • Does the soil have enough drainage and ventilation system?
  • If the soil has weeds and pests that can harm your vegetable?

For container garden, you can buy pre-mixed potting soil in bags. It is excellent if you are planting a few containers for your vegetables and watering them. However, if you intend to plant widely, it is more economical to mix the mixture yourself. Container gardens are the best gifts you can give to your family or friends.

Prepare soil for planting vegetables in container.

The garden soil or normal soil is not suitable for tools or products for container gardening. Most often, the garden soil in the containers becomes too dense, which prevents the growth of the plant. It also has a greater chance of becoming contaminated with weed seeds, diseases, and pests.

Don’t get disappointed because of the shortage of space. Container gardening is very useful for households, and it can help you to stay healthy as well. Just go for the combination of veggies you want to harvest.

8 Tips for Container Gardening – Container Garden Tips From Grooming to Fertilizing

8 Tips for Container Gardening – Container Garden Tips From Grooming to Fertilizing

Tips for Container Gardening

How do you make a successful container garden? Well, we may think that anyone can become successful in container gardening. Many gardeners find it easy to start gardening. However, it is important for us to understand that we didn’t reach the finish line yet!

We must know the basics of container gardening, and some important gardening safety tips that we need to follow before starting our container gardening journey. Later comes the real deal, i.e; maintaining the plants, caring for them, and watching them thrive beautifully. This post will provide you with some of the most reliable and working container gardening tips from grooming to fertilizing. Happy reading and happy gardening to you!

Container Gardening Tips – From Grooming to Fertilizing!

Here are the container gardening tips from grooming to fertilizing. Read till the end to know the in-depth information on what type of fertilizer is good for which type of plants.

Pinching

Pinching

Pinching plants refer to removing the growing tip of your plants. Once you pinch the tip, new shoots start to develop to fill the entire plant. This technique is very important if your plants get too tall than necessary. Pinching the tip of the plant results in a lowering of the plant’s height and makes the plant bushier. This technique also helps maintain a certain shape of the plant.

Deadheading

Deadheading

This term applies to all flowering plants. Once the plants have finished flowering and all that is left are dead flower heads, the plants look very unsightly. Moreover, the dead flower heads also promote diseases to develop and also make the plant flowerless. Once the flowers start to decline, cut the flower stalk out; however, some plants do not require deadheading including petunias, vinca, begonia, and hibiscus as they often have the mechanism to de-head themselves once their flowers mature.

Regular Clean up

Regular Clean up

This technique refers to the removal of leaves and flower parts that are affected by insects, diseases, or just by natural decline.

Keeping your container garden tidy is not as difficult as you think it would be. The most difficult part of this task is if you have a lot of container plants in your house that you need to take care of. If the number of plants in your area is too much to overwhelm you with the cleaning, what you can do is slowly take your time grooming your plants.

Trimming the climbers

Trimming the climbers

Well, we’re sure you do not want your sneaky neighbors to bother you all the time. So, why do that for plants? Make sure to trim the climber plants at regular intervals or whenever necessary if you see them clinging to other plants. This way, the climber plants will not climb over other plants and bother them. Also, you may use support sticks to let them grow in an even manner.

Move the containers

Yes, move them! By this, we do not mean that you make them dance across your container garden all the time. Different plants need different amounts of sunlight, air, and water. The air is a natural element and we will discuss the water part in the next section. In the case of sunlight, make sure to rotate or move the containers as and when necessary depending on the seasons so that every plant gets enough of it.

Water the plants thoroughly

Watering 

“Watering regularly” doesn’t mean drenching your plants with water all the time. Here’s a little catch! Unlike our regular garden, container plants will not be able to enjoy the benefits of the groundwater and moisture. Therefore, make sure to cover the soil with water thoroughly and check the water and drainage levels regularly in the case of water container plants.

Mulching

Mulching

Weather is not always the same. You may see a heavy storm or a downpour with heavy droplets or a little snow suddenly. In these cases, mulching is the savior for all container plants. Mulch your beautiful plants with beautiful things like pebbles, and moss, or with something like cedar bark. This can prevent damaging the roots due to rains, or drying up quickly due to excess drainage of water, etc.

Fertilizing Fertilizing

Fertilizing your container plants will always help them thrive free from pests. In the case of containers, we must understand that there is soil only up to a certain level and there is a constant need for water and a proper drainage mechanism at the same time. Therefore, providing the plants with enough nutrients from time to time is an important pointer that we need to keep in mind. Make sure to use good slow-release and water-soluble fertilizer in the potting mix and use it for the soil.

Types of fertilizers to use in container gardening

It is important to take note that most all-purpose potting mixes have low nutrients so you need to add fertilizers at some point. This is especially true if your plants are still starting to establish themselves or are already blooming.

Seaweed Extracts

Fertilizer recipes made from seaweed extracts contain a pretty good amount of auxins, alginic acid, and gibberellins which are necessary for the growth and development of plant shoots. Moreover, the addition of seaweed extracts can also improve the water-retaining abilities of soil.

Fish Emulsion

This type of fertilizer comes from fish processing waste. The fish parts are fermented in molasses for a week before applying a diluted solution of it. This type of fertilizer contains a lot of nitrogen which is perfect for improving the foliage of the plant. This works best for lettuce and similar container plants.

Flower Booster Fertilizers

This type of fertilizer is great for plants that are about to bloom. It is high in phosphorus and potassium to encourage the plants to bloom more. Apply the fertilizer as soon as you see the flower buds start forming.

Vitamin B

Do you know we humans and plants have something in common besides being alive or dead? Plants also need Vitamin B just like humans do. Fertilizer recipes with Vitamin B are good to ease transplantation shock for young plants transferred to a new and bigger pot.

Root stimulators

If you are trying to grow plants from seeds, then you need root stimulators to encourage the plants to root and grow properly. This type of fertilizer is also crucial if you are growing plants from cuttings.

Fertilizers are crucial for the success of your potted plants. Without them, your plants will appear stunted and lanky. Make sure that you know about the nutrient requirement of your plants so you do not overdose them with too much fertilizer input.

Along with following the list of container gardening tips discussed here, make sure to pick the right kind of container for the plants, share love and care for the container gardening plants, make sure to provide them with sufficient water and nutrients, and then you become a successful container gardener. We hope this post on gardening tips could help you become a successful container gardener.

Drip Irrigation System – DIY Drip Irrigation Watering Techniques And Automated Kit Installation

Drip Irrigation System – DIY Drip Irrigation Watering Techniques and Automated Kit Installation

 Drip Irrigation System

There is nothing more worrying for a plant lover than watering plants when they are away from their garden. If you love to travel and do gardening, this makes it even more difficult to work. In this post, we will discuss some of the simplest and the easiest DIY Drip irrigation watering techniques. Also, read till the end to know how to automate your drip irrigation system in case you wish to use one for a medium to large garden. Happy reading and happy gardening to you!

So when you are not around, the following options may help:

  • Someone at your home shares your responsibility. This is the simplest and easiest option.
  • You hire someone professional to water your plants. Occasionally you can spend some money but you have to be sure about the reliability of the service. A typical gardener in your society’s garden can also do this job but do not expect them to show the same care when they water your plants.
  • You ask for help from neighbors or relatives. Well, you may have similar concerns as point b.

So all the above may work for some time or if you have a relatively less number of plants. But, no one can care for your plants the way you do, as you know about each of them and their requirements. That’s where gardening beginners fail after all those options are exhausted.

Drip Irrigation System

Well, we do not want you to skip your travel plans for watering your plants! These days ready-to-install drip irrigation kits are easily available with user manual and guidance. It is quite easy setting up the system on your own for your terrace garden.

The drip irrigation system is a watering system that has the potential to water the plants directly at the roots. Therefore, there’s far lesser scope for water wastage and evaporation. This system can be used for almost everything from your container plants to a huge field of crops. Although the technique is quite similar in both cases, the components involved in the system differ depending on the area. In any scenario, there are some factors to consider when installing a drip irrigation system:

Water Storage:

Drip irrigation works best if the water is supplied from a storage tank that is installed at least 8 feet above the ground where your plants are placed. If this is not possible then you have to rely on a low-power water pump like a water cooler pump.

Water outlet:

If you already have a water storage tank, then you may have to set up a tap or water outlet with an On/Off valve. This is where you will connect the mainline.

Organization of containers:

organizing containers for drip irrigation

Perhaps the most important and challenging aspect of drip irrigation. If you have one single large roof or terrace then it’s easier to organize. A row & column layout works best if you have so many plants however that’s totally up to you if you have plants scattered across space.

If you have multiple terraces/rooftops then a more planned approach would be required. You can either install separate systems for each space with their water storage and supply or you can centralize the storage and supply by introducing multiple outlets.

Another great option is to have one single storage and one outlet that takes care of all your spaces by spreading the main pipeline across spaces.

Timings and Control:

When drip irrigation is in place, all you need to do is open the main valve for a certain amount of time and then close it again. That’s it. Now, this process can be outsourced to a family member, friend, relative, or neighbor in your absence without worrying about their mistakes.

This eliminates a lot of scope for error and quite some dependency. But wouldn’t it be great if your system just works on its own without human support? The valve opens at 6 am for 15 minutes and then closes automatically while you were doing your yoga, meditation, or traveling.

6 Easy Drip Irrigation System DIY Techniques

Well, before getting into installing an automated drip irrigation kit all by ourselves, let us first know a few simple and easy DIY watering techniques that work best for small balcony gardens and our regular container gardens.

Here are some of the favorite and most reliable drip irrigation system DIY techniques of pro gardeners. You can pick any of these based on the requirements. These methods can help you water your plants when you are away from them for a few days. In the later sections, we will look into how to install an automated drip irrigation kit.

1. Using a plastic bottle

Using a plastic bottle

This DIY drip irrigation technique is everyone’s favorite.

  1. Take a plastic bottle and punch a few holes in the cap. The number of holes depends on the amount of water that you’d like to drip into the roots.
  2. Fill the bottle with water and close it with the lid.
  3. Place the bottle upside down into the pot.

2. Watering wick and bottle

Instead of placing the bottle upside down into the soil, you can use a watering wick to water your plants.

  1. Take a few plastic bottles (preferably of the same size and water capacity), and punch two to three holes depending on the size of the bottle and the diameter of the wick.
  2. Take the wicks and insert them into the bottle thoroughly via those holes.
  3. Now, stick the other end of the wick into the soil.
  4. Fill the bottles fully with water and place them on the soil surface and let the water seep through the wick.

3. Using a milk jug

This works best for a small to medium-sized garden.

  1. For this project, punch a few holes in the milk jug and bury the jug into the ground beside your plants (do not destroy the roots while burying the jug) leaving the mouth of the jug open to fill it with water.
  2. As you fill it with water, the water gently seeps into the soil underground.

4. Indoor plant watering DIY

Indoor plant watering DIY

As the name suggests, this works best for indoor plants.

  1. Place the pots that you need to water in a corner.
  2. Take a large container or a bucket and fill it with water.
  3. Now, place the container with water at 1 foot higher than the ground level.
  4. Cut the wicks as per the distance from the container to the pots.
  5. Immerse one end of the wicks into the container and stick the other ends into the soil of the pots.

5. Olla technique

Olla technique

To let you know what olla is in simple terms, it is basically a big size clay pot.

  1. Like we do in the case of the milk jug technique, bury the olla underground and fill it with water as and when needed.
  2. Oh yes! Do not punch holes!

6. Gravity-based DIY irrigation technique

Gravity-based DIY irrigation technique

For this technique, you need thin water pipes, T-shaped plastic valves, steel air valves, a large bottle, and cable ties.

  1. Firstly, punch a hole for the bottle’s cap, and place it upside down at 5 feet higher than the ground level (you can tie it to a pipe in your balcony or a railing in your garden).
  2. Take the water pipes and cut them depending on the distance between the bottle and the pots.
  3. Place one end of the pipe into the hole of the bottle cap and fix a T-shaped air valve at the other end.
  4. To the air valve, fix a smaller piece of pipe and let the end of it face the soil of the pot.
  5. Fill the bottle with water and use the air valve as a tap to regulate the water flow.

Installation of an Automatic Drip Irrigation System Kit

Installation of an Automatic Drip Irrigation System Kit 

There are two ways you can automate the entire process:

  • Buy a readymade controller designed for your drip irrigation system and connect it to your main supply.
  • Gather some parts and build your controller. It’s easier than you think.

Readymade controllers are easy to set up. They are expensive and usually come as one single unit. The downside here is that if they go out of order, you have to buy a new unit unless you buy a good quality commercial-grade controller which comes with a warranty, and may be quite expensive too.

They work and you can certainly choose them. They may also offer features like controlling your water supply using wifi connection using a mobile app.

But if you are like me who want to save money and enjoy a little DIY project. You can make your little controller that works just the way you need. It’s cost-effective and made up of simple parts that can be purchased separately if one stops working.

Drip Irrigation System Parts and Steps

To make your fully automated drip irrigation system you would need a drip irrigation kit as per your needs (usually available in terms of the number of plants like 25, 50, 100, and so on) and a ready-made controller. If you’d like to make one, we will see how to make a DIY controller in the last step of this section. Here is the step-by-step process to build your fully automated system:

Step 1: Space Inspection

While inspecting the space, the following are key things to consider:

  • Location of water supply/tap. You have to make sure that you have enough main pipe to reach your source.
  • The water storage tank must be placed at a height of 8-10 feet above.
  • Location of power supply/socket/switch. It is not always the case that you have a power source next to the water supply therefore arrange to provide a power extension using an additional wire. Warning: Never install a power switch near the water supply.
  • Location of your containers. How many plants are you trying to cover using a drip irrigation kit?

Step 2: Placement of your containers

It is a good idea to organize your containers systematically for example in a set of rows. There are several advantages of it:

  • It is tidy.
  • There is no waste of the pipes because you can calculate easily the length of each pipe and cut it accordingly.
  • It’s safe. You may not want to stumble by getting your foot tangled in one of those pipes lying here and there.
  • It’s extensible. You can add more containers in the same organization.

Step 3: Calculating the length

Calculate the length of the main supply pipe and the length of the feeder pipes. Cut them accordingly.

Step 4: Connecting the pipes

Connect all components to complete the installation as guided in the kit (usually they come with a manual). Keep all the emitters at the end turned off.

Step 5: Connecting the main supply pipe

Connect the main supply pipe to the water source and test if the water is reaching the end i.e. one of the emitters. Take a small plastic mug or container and pour water into it through the emitter. Start a timer on your mobile and check to see how much time it was required to fill the mug. This is the time required to keep the water supply on for drip irrigation to water the plants. You can increase it as you fill more mugs or bigger mugs.

If all your containers are of equal size then you can set the same settings for all emitters but if some are bigger or small, you have to adjust the water flow accordingly. This takes time to figure out but it’s usually not a big deal.

This is it, your drip irrigation is installed and ready. All you need to do now is turn on the water supply at a particular time or at various intervals to water your plants.

Step 6: Automating the system

If you have a readymade controller, all you need to do is connect the controller to your water supply and connect your main supply pipe to the device’s outlet. Connect it to a power source and set the interval and timer in the controller. Test it and you have a fully automated drip irrigation system.

  • Now given the advantages of a DIY controller, let’s make one. Connect the solenoid valve to the water supply. Make sure you connect on the inlet side. Clamp it if required.
  • Connect the solenoid valve to the main supply pipe. Connect the switch to its power adapter and plug it into the power supply. Turn it on and off to check if it is working as intended.

Now the final step is to set your manual timer or separate timer device. Let’s say you set it to 7 am every morning for 15 minutes. Insert the timer switch into the main power socket and make sure to leave it on. Insert the power adapter of the solenoid valve into the timer socket. Voila!! Your automated drip irrigation system is all set.

Takeaway:

  • Like any other system, it would require maintenance like cleaning of emitters, pipes, and connectors.
  • Over time, you have to replace some parts.
  • If you have a hard water source, there are higher chances of emitters getting clogged frequently.
  • Drip irrigation systems for commercial uses have a lot of other aspects like
    • Micro misting sprinklers for maintaining humidity
    • Sand or sedimentary filter
    • Regular flushing of the system using acids or chlorine
    • Screen filters

You may keep these factors in mind should you plan to expand your garden.

When it comes to technology and gardening we must agree that the sky is the limit. Inventions like IoT (Internet of things) have taken various gardening automation to next level and simplified a gardener’s life. But hold your horses from buying everything fancy that claims to solve your gardening problems. We hope this article on DIY Drip Irrigation Watering Techniques And Installation could help you gets your hands on some amazing DIY hacks and understand how to install an automated irrigation kit.

Problems with Container Gardening: How to fix various issues with container gardens?

Problems with Container Gardening: How to fix various issues with container gardens?

Container gardening, if done incorrectly, may cause you to lose most of your plants. Let’s discuss problems that you will encounter in container gardening and how you can overcome them so that you will become a successful gardener. In this article, we will discuss various issues like various tools that are useful in container gardening, water and soil maintenance, tips for maintaining a disease free container garden, challenges in container gardening, different diseases, and how to fix them. Happy reading and happy gardening to you!

Container Gardening Tools – Things to use for container gardening

Well, gardening is definitely a therapeutic experience. However, container gardening isn’t going to be a cakewalk! To make it easier to an extent, having the right kind of container gardening resources is a must. As a gardening lover, you might already have a basic understanding of different gardening tools, let us understand a few important tools that are especially useful for container gardening.

Planter Caddy

Planter Caddy

The planter caddy is a savior if you have heavy container plants. These planter caddies come with wheels underneath a circular or rectangular sturdy platform that allows you to place the plant pots on them and move across your home or garden.

Soil Moisture Metre

Soil Moisture Metre

Due to lack of practice or experience, we usually tend to overwater or underwater the plants which may eventually lead to their death. You cannot kill a few plants for the practice of course! So we recommend that you buy yourself a soil moisture meter to save your plants from over-watering or under-watering. This little device will let you know the level of moisture in the soil, and you can water the plants accordingly.

Soil pH Metre

Soil pH Metre

Do you know that there are acidic soil loving plants and alkaline soil loving plants? The pH of the soil determines the acidity or alkalinity of the soil. Okay if you think that’s too much science for you, let’s keep it simple. It is important to understand and maintain the pH levels of the soil to let the plants thrive. And a soil pH meter is the most important device to keep a check on it.

Self Watering Spikes

Self Watering Spikes

Ever wished for something that is more inexpensive than a fancy drip irrigation setup but something that works almost similarly? If you are someone who travels a lot or forgets to water your plants and feels sad about it later that your plants are wilting, these self-watering spikes are for you. You can use these spikes with a regular water bottle and place the bottle in your pots upside down.

Plant Labels

Plant Labels

Plant labels? One of the most important tools for container gardening? Well, don’t you think it is cute for you to name your plants and watch them thrive? On a serious note, these plant labels are especially useful when you have different varieties of the same plant as they help you keep a check on your plants in the right way.

Water And Soil Maintenance – How to choose a container for growing plants?

While container gardening is extremely advantageous, maintaining the moisture levels in the different types of plants that you have in your garden is of course a challenge. In the section below, we will be looking into the most reliable and working tips for water and soil maintenance in your container garden.

Water And Soil Maintenance in Container Gardens

  1. Make sure to use coated ceramic containers or good quality plastic containers over terra cotta or coir baskets that can make your plants go dry quickly.
  2. Use a soil moisture meter at regular intervals to check for moisture levels. Or the easiest way is to test the soil with your finger by sticking it as deep as you can into the soil.
  3. Make sure that the soil in the containers is thoroughly watered. To check if you have done that right, see if the draining holes of the pot are getting rid of excess water.
  4. Do not drench the leaves with water. Make sure to water only the soil and not the foliage.
  5. In some cases, you might not notice that the water is over flown but the soil is not watered properly. Do not let the soil dry completely.
  6. Use the right soil and potting mix as per the plants’ requirements.

Challenges in Maintaining Container Gardening

Challenges in Maintaining Container Gardening

Challenges are everywhere. And your garden maintenance is definitely not an exception. In this section, we will look into some of the most common challenges in maintaining container gardening and ways to deal with them.

Plants wilt even if you provide them with enough water. Caused by Insufficient aeration and drainage

  • Use a lighter and less compact soil mix.
  • Increase more drainage holes in the pot.
  • Use a soil with higher amount of organic matter.

Leaf edges burn or turn dry or brittle. Caused by High salt content.

  • Leach the container with fresh water at regular intervals until the water drains from the drainage holes.

Plants appear spindly and unproductive. Caused by Too much nitrogen and Not enough light.

  • Apply fertilizer at least once a week or less often and allow the water to drain from the drainage holes.
  • Relocate your plants to an area where they can receive more light.

Plants are yellowing from the bottom and leaves lack vigor and color. Caused by Soil not being fertile enough and too much water.

  • Use fertilizers that contain a lot of nutrients.
  • Waterless and check for good drainage

Plants have spots or powdery, rusty, and many old dead leaves. Caused by Low phosphate levels and Grown at a temperature that is too low.

  • Use fertilizers with a higher amount of phosphate.
  • Move your plants to a warmer area.

Best Practices for Disease Free Container Gardens

One of the most neglected container gardening mistakes is, we tend to overlook little things like cleanliness, proper watering, plants’ exposure to light, etc. In this section, we will discuss some of the most important and common container gardening practices that we need to follow for a disease-free container garden.

Maintain the health of your plants

In the case of container gardening, bear in mind that you need to pay attention to the amount of sunlight, the right quantities of fertilizers, and proper watering. Make sure that you are not under watering or over watering the plants.

Burn the infected plants

Find the infected plants in your garden and get rid of them so that they do not contaminate other healthy plants. Make sure to burn them a little away from your garden.

Do not reuse the potting mix 

Do not reuse the potting mix if you do not want diseases in your container garden. This is especially important when the used potting is in contact with disease causing elements like fungus, viruses, etc.

Clean the containers

Make sure to clean the containers thoroughly before planting something in them. Also, it is important to scrape off the lumps of soil and algae, etc. formed due to excess moisture around the containers.

Choose healthy plants when buying

Let’s get back to what’s been taught in the school. Prevention is definitely better than cure! This is true especially when it comes to container gardening. Make sure to pick healthy and disease free plants while buying them.

Clean the garden area at regular intervals 

Cleaning the containers and planting healthy plants isn’t the end of your job. It is extremely important to clean the garden at regular intervals to avoid water stagnation and attracting diseases.

Diseases Common in Container Garden Plants

Botrytis

Container gardening plants are also prone to diseases. This section will discuss the common diseases that affect container garden plants.

Aster yellows

  • Caused by Phytoplasma (a bacteria), aster yellows cause stunting of leaves and the appearance of yellow-green foliage. This type of disease is carried by insects like leaf hoppers thus the disease is spread when insects feed on plants.
  • Destroy the infected plant by uprooting and burning it. The application of insecticides also helps.

Alternaria

  • Alternaria is a fungal attack common among Calendulas. It causes small red to purple spots that enlarge over time. The spotted leaves eventually turn yellow and drop. The fungal disease is common during the rainy season as fungi require moisture to spore.
  • Practice good sanitation within your garden. Moreover, boost the immune system of your plants by feeding with the right fertilizers.

Anthracnose

  • Anthracnose is another type of fungal infection that causes brown spots on the host plant. The spots can kill the entire leaf if left untreated.
  • The fungus is prolific in environments that are cool and with a lot of moisture thus growing plants in the sun is a great idea to treat container garden plants from anthracnose. You can also remove the affected part provided that you incinerate it to kill the fungus.

Botrytis

  • Also called Gray Mold, Botrytis is common among tulips and bromeliads. It eventually kills the plants as this is an invasive form of the pathogen for any kind of plant.
  • Implement proper sanitation within your container garden.
  • Make sure that the leaves do not collect moisture to deter the development of Botrytis.

Powdery Mildew

  • The white and powdery growth often affects the leaves, young stems as well as flowers.
  • Make sure that your container plants get proper air circulation to avoid humidity which encourages the growth of powdery mildew. Avoid placing plants that are susceptible to mildew in shaded areas. Also, practice good sanitation practices by removing dead and diseased leaves from the plant.

Root rot

  • Root rot is caused by fungi Pythium and Phytophthora that attach to the base and roots of the plant causing rot. Plants are infected by contaminated soil, water, and tools.
  • Ensure that the soil drains well. Also, avoid overwatering your plants.

Sooty mold

  • Sooty mold is caused by a fungus that is often introduced by the plant from the honeydew excreted by insects like scales and aphids. This particular fungal infection kills the foliage by reducing the access of chlorophyll to light which eventually kills the entire plant.
  • Eliminate the presence of scales or aphids by applying fungicide.

Fusarium wilt

  • Plants infected by Fusarium will show signs of poor health through wilting. The plant then turns yellow, followed by browning, and eventually dies.
  • If the plant shows early signs of wilting, avoid overwatering the plant. If the disease has progressed, uproot the plant and burn the affected plant to prevent the spread of the disease. Do not plant anything on the pot to naturally kill the bacteria as they no longer have food to sustain them.

Aphids

  • Aphids are insects that have sucking mouth parts and they can cause puckering or distortion on the plant tissue. Aphids are also vectors of different viral diseases in plants.
  • Introduce natural insect predators in your gardens such as ladybugs, lacewings, and parasitic wasps.

Mealybugs

  • Mealybugs are insects that are common in container gardens. Their population balloon out of proportion and they inflict damage to the plant while feeding.
  • Manually wash off mealy bugs from the plant by brushing them off or using a Q-tip rubbed in alcohol. Unfortunately, the waxy substance on the exoskeleton of mealy bugs makes them highly difficult to kill using pesticides.

White fly infestation

  • Severe infestation of white flies can cause mottling as well as yellowing of the leaves thus lowering the yields of your plant. This is a great concern for those who do vegetable container gardening.
  • Use a pesticide that is specific to white flies.

Container gardening is a fun and therapeutic activity that everyone can do. It does not limit your ability to grow many things despite the lack of space in your area. The best thing about container gardening is that it is one of the simplest types of gardening that you can do and all there is to get planting materials, some garden tools, a lot of passion for growing those beautiful beings, and watching them thrive!