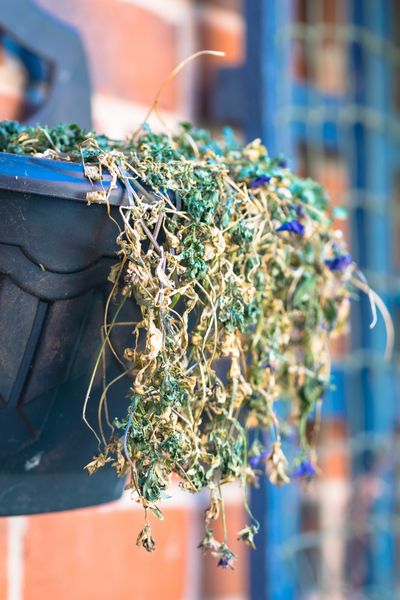
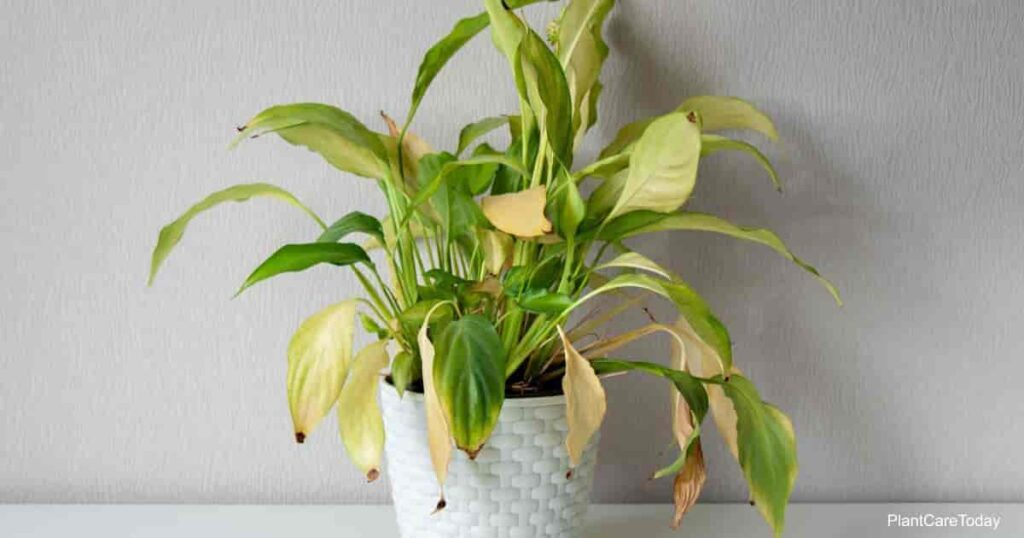
Why is my elephant ear plant turning yellow?
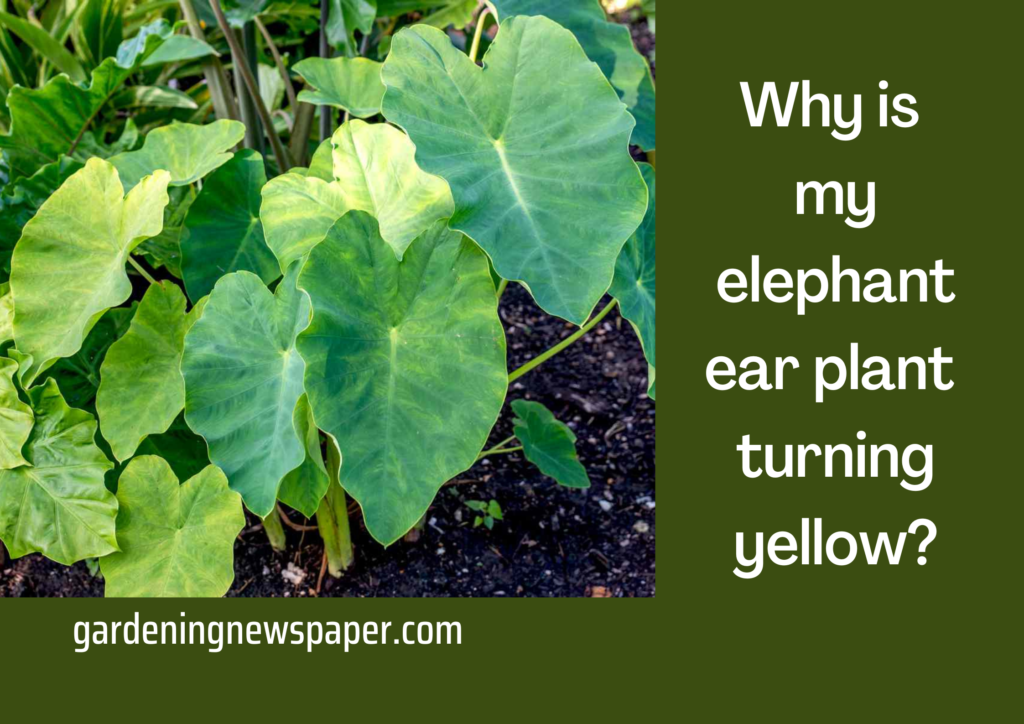
Why is my elephant ear plant turning yellow?

Why is my elephant ear plant turning yellow?

What is the reason my elephant ear plant leaves turning yellow? What should I do? The better news is that the maximum reasons why this happens are quite typical and nothing to worry about. Some reasons are simpler to heal than others. In this article, you can know the reason and cure for your elephant ear plant.

Elephant ear plants indoors (Colocasia) are certainly fascinating plants. Their name came from their tall stems and big leaves and giving them an exquisite look. Plus, their deep, gorgeous green color is sure to please the eye. Maintaining an elephant ear plant gives real pleasure both indoors and outdoors. It is also a great choice for beginning gardeners who want a focal point in their home or garden, as the plant is quite easy to look for.

It may be cause for alarm if you see that the leaves of your cherished plant are becoming yellow or brown. To stop future harm to your plant, it’s critical to determine the underlying cause of this, which can happen for a number of different causes. It is advisable to look into the particular needs of your plant species in order to solve the problem.

You will learn about eight possible reasons why elephant ear plants may yellow in this article.

Here are some reasons for elephant ear plants turn into yellow leaves.

Due to the biological life cycle

  • This is a normal reason and usually occurs due to the seasonal cycle nothing to worry about. When it gets cold, the plants prepare for dormancy.
  • In such cases, it’s a good idea to prune the yellowed leaves to make room for new growth in the spring. Plants with large leaves turn yellow in late fall. Some plants, like hosta, have large leaves that make them appear yellower than they actually are. Given the natural life cycle of plants, there is not much to do as that is plant life.
  • Due to lack of humidity.
  • If they’re watered inconsistently.
  • An imbalance in light to water ratio.
  • That’s a good reason for the relief. Just making sure the plants are at the right temperature when they transition to dormancy can really make a difference when they come back in the spring. Recommended to cover it with mulch if you have it. This will protect the plant from harsh winter temperatures.

Here are some reasons for elephant ear plant turn into yellow foliage

Due to sunlight

  • In keeping with the temperature, you should know that this particular plant likes warmth. Direct sunlight is not recommended for these plants. Colocasia prefers filtered light coming from the penumbra.
  • Colocasia shows yellowish leaves earlier because they are light-sensitive. This way you can get the temperature you need to grow without the risk of burning your leaves. Keep in mind that if the leaves of the plant are brown and have a crunchy texture, they are probably in the wrong place and should be moved as soon as possible.
  • Plants may also become yellow if they are kept in an environment with too much shadow. Since sunshine is essential for photosynthesis, the process by which plants make food, keeping plants in a gloomy environment without exposing them to regular sunlight can be hazardous. Lack of sunshine can starve plants, which will eventually result in lower leaves that become discolored and yellow and eventually fall off the plant.
  • This indicates that the plants are not getting enough sunlight. You can see that the yellowest areas are in the areas with the least amount of sunlight. You can give your plants a boost by placing them in the right place in your garden or home.

Soil requirement for elephant ears

  • Haven’t watered yet but be aware that poor soil conditions can cause discoloration. As mentioned above, the soil used should be porous and well-drained to avoid moisture from watering. Crumbly clay should work well.
  • Avoid rocky soils as this can damage the plant’s tubers. Additionally, a good soil pH is important for Colocasia. These plants prefer acidic soil with a pH of 5.5-6.5. Exceeding that can adversely affect plant health and cause yellowing and browning.
  • Plant nutrition is significantly influenced by the pH of the soil. Plants cultivated in soil with an incorrect pH level won’t thrive, even with fertiliser. You can use a soil test kit to find out your soil’s pH level, and it might also offer recommendations for bringing it closer to the optimal range.
  • To ensure that plants receive the proper nourishment, soil must also be improved with organic matter, such as fertilizer and compost. Poor soil quality can cause plant starvation and yellowing if there is insufficient organic matter in the soil.

Soil requirement for elephant ear

Proper fertilizing usage

  • Overfeeding elephant ear plants can also cause the leaves to turn yellow. Elephant ears are generally a powerful bait, so this can shock you.
  • This can cause problems that manifest themselves as leaf discoloration. We recommend using a water-soluble fertilizer that is high in nitrogen and stimulates leaf production and growth.
  • You should apply fertilizer only once a month don’t exceed it. Applying more frequently increases the risk of over-fertilization, which can lead to yellow leaves. Nitrogen deficiency can also cause leaf discoloration. But it usually gives different results. Old leaves may turn yellow, but young leaves are very bright green.

Proper fertilizing usage

Give proper nutrition.

  • The main problem that causes plants to discolor is a lack of nutrients. As mentioned earlier, this can be caused by inadequate sunlight, inadequate watering, and unfavorable soil conditions.
  • Nutrient deficiencies are detrimental to the health of all living things, and elephant ear plants are no exception. Nutrient deficiencies can be recognized by yellow leaf tissue and green veins. You’ll also notice that the top leaves turn yellow first.
  • Too little fertilizer is easily remedied by caring for the plants with plant fertilizer. However, it is important to follow the package instructions whenever possible.
  • Too much fertilizer can also burn plants and cause discoloration, so follow directions carefully. If you want to keep Colocasia as a houseplant, buy fertilizer for houseplants and fertilizer for spring and summer.

Root deterioration

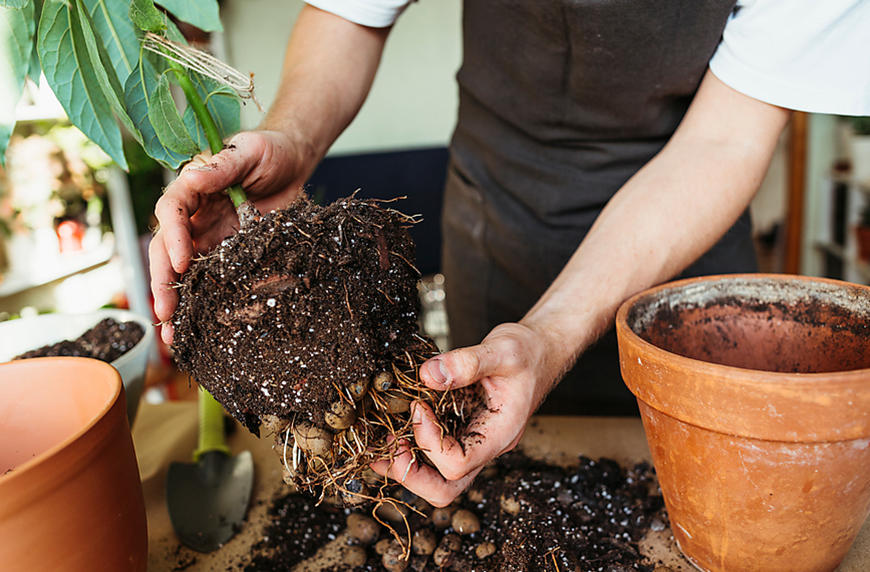
  • Root damage can also lead to discoloration. Pots too small, shovels too rough, or even root rot. Dense roots develop as your plant grows beyond the pot it lives in.
  • Elephant Year plants tend to grow beyond the pot fairly quickly. This inhibits the movement of oxygen, water, and nutrients, which can cause leaves to turn yellow or drop off.
  • Looking at the bottom tray of the plant can help determine if the plant is growing out of its pot. When the roots come out, it’s time to change the pot. This will make the plants healthy again. Make sure to check the roots often as the plants grow, as they may need to be checked fairly often to make sure they have enough space.
  • With sideways plantings, you can prevent root damage, just make sure that the plant gets well-aerated soil. Well-drained soil, both indoors and outdoors, will prevent root compaction.
  • Pay attention to the color when looking at the roots of the plant. Pale, white, yellow is the original color of a healthy root. Dark roots often indicate rot, especially if they smell bad. In that case, unfortunately, it’s time to ditch the plant and start over.

How to stop elephant ear leaves turning yellow?

There could be a number of reasons and issue why your elephant ear plant is turning yellow. Overwatering or inadequate drainage is one of the main culprits. The roots may rot in perpetually wet soil, turning the plant yellow and making it wilt. Make sure your plant receives water only until the top inch of soil feels dry to the touch, and check that the pot has drainage holes so that any extra water can drain.

Lack of nutrition may also be the cause of fading elephant ear leaves. Make sure you are using a high-quality fertiliser with the right ratio of nutrients since elephant ear plants need fertilisation to develop and thrive. Avoid overfertilizing as this can also result in yellowing and other issues.

Elephant ear plants also require direct, strong light to survive. Your plant may begin to discolor and weaken if it doesn’t receive enough light. Try relocating it somewhere brighter but stay out of direct sunlight to prevent scorching the leaves.

Tips for growing elephant ear

Elephant ear plants are tropical plants known for their large, heart-shaped leaves. They can add a tropical feel to any garden or indoor space. Here are some tips for growing elephant ear plants:

  • Soil: Elephant ear plants prefer rich, well-draining soil that have good moisture but not waterlogged. You can add compost or other organic matter to the soil to improve its fertility and drainage.
  • Light: Elephant ear plants prefer bright, indirect light. They can be grown indoors near a window that receives filtered light or outdoors in a partially shaded area.
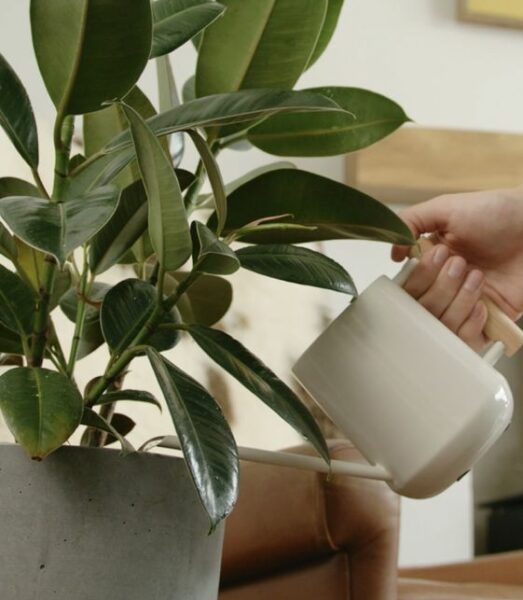
  • Watering: Elephant ear plants require regular watering to keep the soil moist but not waterlogged. You should water them when the top inch of soil feels dry to the touch.
  • Fertilizer: Elephant ear plants benefit from regular fertilization during the growing season. You can use a balanced fertilizer or one that is high in nitrogen to promote leaf growth.
  • Temperature and humidity: Elephant ear plants thrive in warm, humid environments. They should be kept in temperatures between 65-80°F (18-27°C) and in a location with high humidity.
  • Propagation: Elephant ear plants can be propagated by dividing the rhizomes, which are underground stems. Wait until the plant has finished its growing season before dividing the rhizomes and planting them in separate pots or locations.
  • Pests and diseases: Elephant ear plants can be prone to spider mites, mealybugs, and other pests. Keep an eye out for any signs of infestation and treat with insecticidal soap or neem oil. Overwatering can also lead to root rot, so make sure the soil is well-draining and not too wet.

How to take care of elephant ear plant leaves?

Improving the quality of elephant ear plant leaves is an important aspect of growing these plants. Here are some tips for caring for elephant ear plant leaves:

  • Clean the leaves: Elephant ear plant leaves can accumulate dust and dirt, which can interfere with their ability to photosynthesize. Wipe the leaves with a damp cloth or sponge to keep them clean.
  • Prune damaged or yellow leaves: If you notice any yellow leaves or damaged leaves on your elephant ear plant, prune them off with a clean, sharp pair of scissors or shears. This will help redirect the plant’s energy towards healthy leaves.
  • Support large leaves: As elephant ear plant leaves can grow quite large, they may need support to avoid bending or breaking. Use stakes or plant ties to support the leaves as needed.
  • Provide adequate light: Elephant ear plants require bright, indirect light to grow healthy leaves. If the plant is not receiving enough light, its leaves may become smaller or turn yellow.
  • Monitor humidity levels: Elephant ear plants thrive in high humidity environments. If the air in your home or growing space is dry, consider using a humidifier or placing a tray of water near the plant to increase humidity levels.
  • Water correctly: Overwatering or underwatering can cause problems with elephant ear plant leaves. Water the plant thoroughly when the top inch of soil is dry, but make sure not to let the soil become waterlogged.
  • Fertilize regularly: Elephant ear plants benefit from regular fertilization during the growing season. Use a balanced fertilizer or one high in nitrogen to promote leaf growth. Follow the instructions on the fertilizer packaging for best results.

Conclusion for elephant ear turning yellow.

In conclusion, if the leaves of your ear plants turning into yellow is one of the issues for you then it is because of many reasons such as root damage, over-watering, full sunlight, and improper nutrition. Follow the remedies of this article on the basis of your problem.

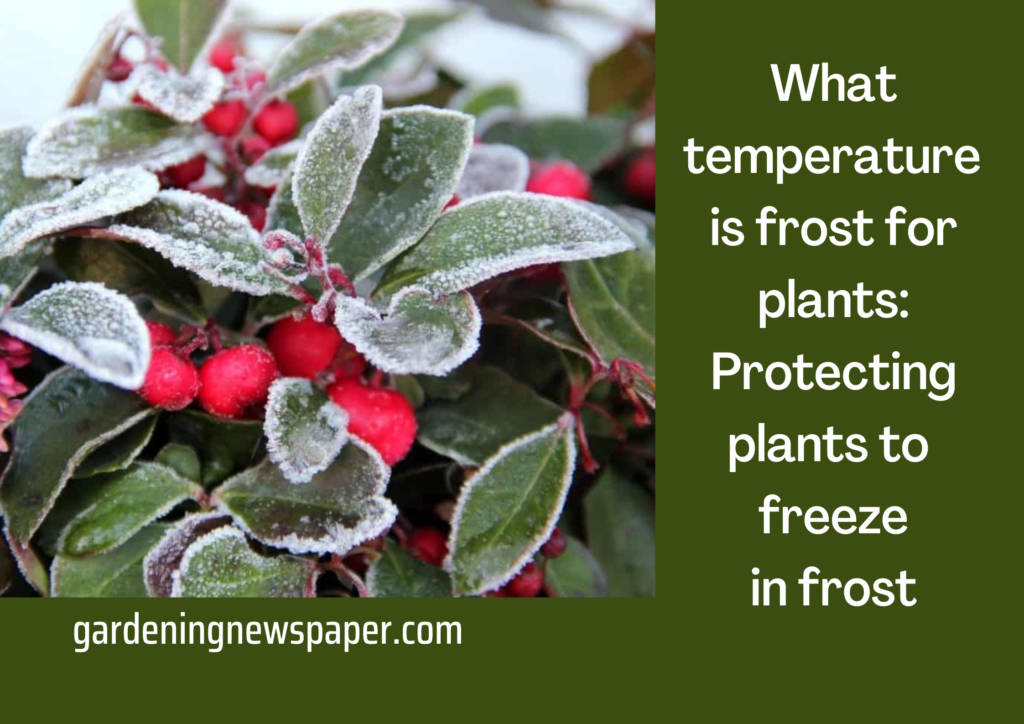
What temperature is frost for plants: Protecting plants to freeze in frost temperatures

What temperature is frost for plants?

What temperature is frost for plants

“FROST” is predominantly ice crystals that develop when ice crystals form on the outside of your plant. It forms when the moistness in the air and converted to ice without first becoming mist.

In our middle school these phenomena of gaseous interconverting into solid or ice crystals without becoming liquid. Some factors are noteworthy for evolving it.

Firstly, the temperature of the atmosphere has to fall between 36- and 32 degrees Fahrenheit. The moisture of the air converts into ice crystals, so there has to be a little breezy. It usually occurs on clear nights.

Our hardiest and coldest plants can withstand frost without the help of a gardener as they are natural health survival. Most of the sensitive plants, valuable summer produce vegetables such as tomatoes, peppers, and squash, can thrive at this temperature with the help of a gardener.

To shield your outdoor plants from cold temperatures while gardening, learning to anticipate when requirements for frost strike the area and what safeguards to take is useful.

How to Protect Them from Frost and Avoid the Freeze?

1. The potted plant should be kept inside at room temperature.

When it is in the forecast or you predict frost, at dusk you have to move your potted plants and hanging baskets indoors.

Plants in pots are more in danger or susceptible to harm because they aren’t benefited from the insulating capacities of the ground soil like in-ground plants are.

Roots of potted plants are exposed to colder temperature and at that temperature frost occurs. Although they have threats, extreme survival of these plants saves them.
Gardeners have to choose a place that isn’t too warm because sudden shifts in temperature can shock plants.  A place in your garage shed or cellar can be used as a shelter for plants.

Examine plants thoroughly for pests and diseases before fetching them inside your home. Keep plants separated from your houseplants to discourage the potential spread of insects.

Once the threat of frost has passed from the air, transport all plants back outside first thing in the morning.

How to Protect Plants from Frost

2. Shield them with coverings like plant frost cloth.

To protect a larger group of plants, simply wrap them with coverings like bed sheets, towels, or drop cloths.

Before applying the plant frost cloth, place some stakes around the plant so that the plant is in warm weather. Let the material drape over the plants to the mud line. Do not tie around the stem or stem of the plant.

Tie them together to prevent heat from the earth from reaching your plants. For even more resistance, consider adding a final layer of plastic.

No part of the plastic cover should come into contact with plant vegetation, as plastic can interfere with plants.

Weigh down the corners and boundaries with heavy stones or bricks to prevent the coverings from blowing away in the night. The next day the first task of the gardener should remove the covers of plants.

How to Protect Plants from Frost - shield plants with coverings

3. Watering them in the afternoon

It appears counterintuitive because it can hold the soil moist can aid protect plants from freezing weather.

Damp soil has an insulating result, which emits warmth upward come nightfall.

If you water your plants before the cold wind blows, do so at the meridian, when the temperature is still slightly warm.
4. Adding a dense layer of mulch
When it’s freezing, you should add a layer of mulch to your garden beds. It will help shield the soil from impulsive swings in temperature.

  • Utilize straw, wood chips, dry leaves, or precisely just a heap of leaves. It provides necessary insulation for the plant’s root system below ground.
  • Heavy mulch 3 to 6 inches deep to create a good barrier.
  • Leave one or two openings around the central stem to allow heat from the soil to reach the plants.
  • Mulching your green beds is one of the best things you can do to keep them low maintenance. But be sure to remove some of the defensive mulch when the weather warms up.

5. Soil perfect to use as frost resistant

The kind of soil your garden is thriving in also influences the quantity of dampness it maintains. Profound, loose, heavy, productive soil discharges more moisture into the air than sandy, nutrient-poor soil.

The more humid the air is, the better elevated the moisture point will be, and less frost can form on those plants. The mulched plants are more likely to become frosted since the mulch holds moisture and heat released from the soil and heats up the surrounding air.

6. Comprehend the behavior of plants in garden.

The plant itself defines its probability of harm. Immature plants or those still growing are most susceptible. Especially the new growth plants are in danger. The toleration against frost tends to be more elevated in the plants with deep maroon leaves and such leaves can absorb and controls heat.

Soft-leaf plants also can retain their warmness. Hardy or frost-resistant plants expose less portion of their leaves to chilling and drying winds.

In what temperatures frost can damage a plant?

Plants can endure a huge variety of temperature ranges, however, there are particular threshold temperatures that should be met earlier than they may develop and flourish. Frost is the maximum not unusual place form of plant harm that takes place at temperatures below 32 stages Fahrenheit.

Plants will develop naturally withinside the low-temperature sector as much as 32 stages Fahrenheit, however, beneath this temperature it can also arise on stems or leaves in bloodless climates.

Should you cowl flora at 39 stages? Are forty stages too bloodless for flowers?

When plants are exposed to frost, the temperature can damage the plant completely. The damage can deviate from browning leaves and drying out the plant to killing the tender plants completely.

  • Understanding how to inform in case your plant has hoar destroyed is essential if you want to keep away from unnecessary waste of time and money.
  • The leaves may be brown and there may be masses of lifeless or loss of life leaves in addition to stems.
  • The plant could have a great yellowing or browning color. If you detect those symptoms, they perhaps had been killed because of frost.
  • For interior plants, it’s an exceptional test of the leaves for frost harm inside. To do this, you need to use your arms softly to push down at the pinnacle of the leaves and experience any raised regions or bumps. For a door plant, it’s simpler to look if the leaves are frosted.

To do this, sincerely have a take a monitor how a whole lot of water you spot popping out of in which stems meet leaves.

Here are a few florae that need not be blanketed with the aid of using frost protection:

Here are a few florae that need not be blanketed with the aid of using frost protection:

Frost is an herbal phenomenon that takes place all through wintry weather. Rhododendron, Petunias, and snapdragons are some frost-resistant varieties.

It generally determines flora due to low temperatures. Its injures flora, which may be devastating to the general fitness of the tender plants.

Some people suppose that if they spray water on the frosty leaves, they may clean the frost and kill it.
Nonetheless, that is a wrong practice and can even induce extra troubles than it solves.

Frost is a form of ice that administrators and accumulates on flora and shrubs all through the bloodless wintry weather months.

More frequently than now that no longer, it’s now simply the leaves of plants that get frosted, however, the flowers, stems, trunks, or maybe the roots.

Key Takeaways

Climate change induces several differences in the physical conditions, such as plants and leaves. The natural environment and local climate extremes influence flowers and plants. The anticipated growth in frost events drives sense in plant replica and plant structure vegetation.

Plant life’s ability to avoid frost is dependent on the timing of its development and reproduction on the same hand for survival gardening, off-grid method is also useful.

In this article, we have evaluated the impact of frosts on plants and flowers, how the frost is damaging the roots, and tips on how to protect them from frost.

After that, we have to predict frost occurrence to take standards to save plants. The prediction of hoar frost events comprises a complicated decision study that employs conditional possibility and economists.

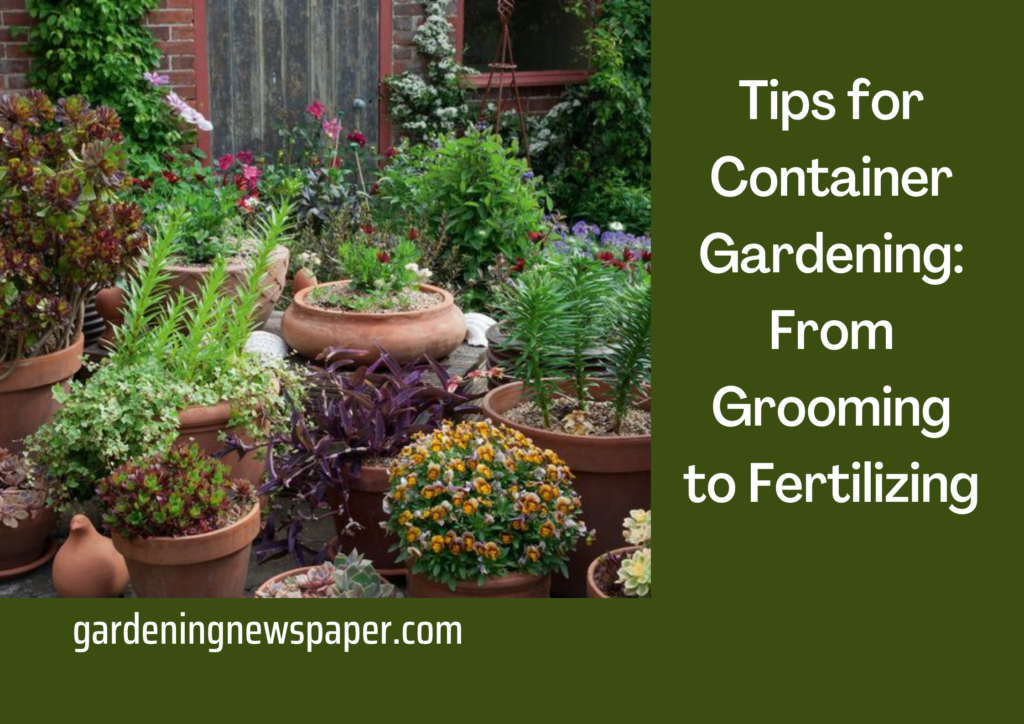
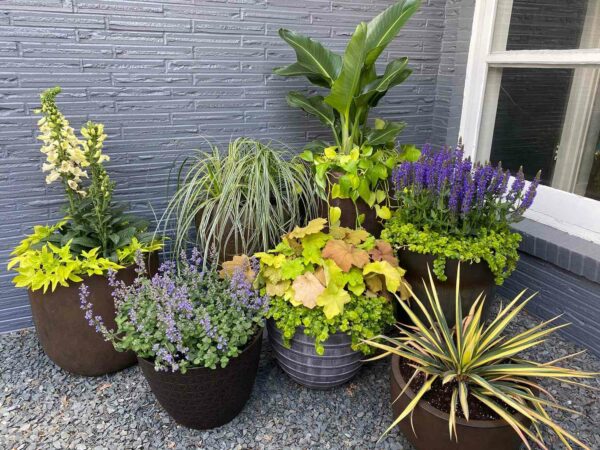
8 Tips for Container Gardening – Container Garden Tips From Grooming to Fertilizing

8 Tips for Container Gardening – Container Garden Tips From Grooming to Fertilizing

Tips for Container Gardening

How do you make a successful container garden? Well, we may think that anyone can become successful in container gardening. Many gardeners find it easy to start gardening. However, it is important for us to understand that we didn’t reach the finish line yet!

We must know the basics of container gardening, and some important gardening safety tips that we need to follow before starting our container gardening journey. Later comes the real deal, i.e; maintaining the plants, caring for them, and watching them thrive beautifully. This post will provide you with some of the most reliable and working container gardening tips from grooming to fertilizing. Happy reading and happy gardening to you!

Container Gardening Tips – From Grooming to Fertilizing!

Here are the container gardening tips from grooming to fertilizing. Read till the end to know the in-depth information on what type of fertilizer is good for which type of plants.

Pinching

Pinching

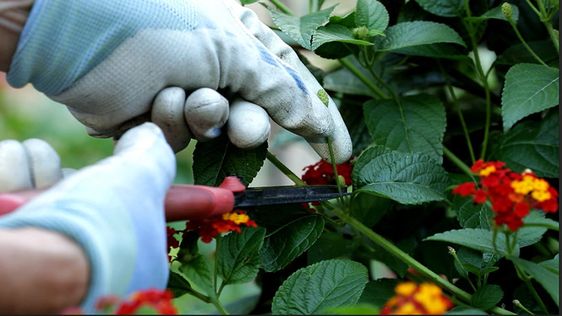
Pinching plants refer to removing the growing tip of your plants. Once you pinch the tip, new shoots start to develop to fill the entire plant. This technique is very important if your plants get too tall than necessary. Pinching the tip of the plant results in a lowering of the plant’s height and makes the plant bushier. This technique also helps maintain a certain shape of the plant.

Deadheading

Deadheading

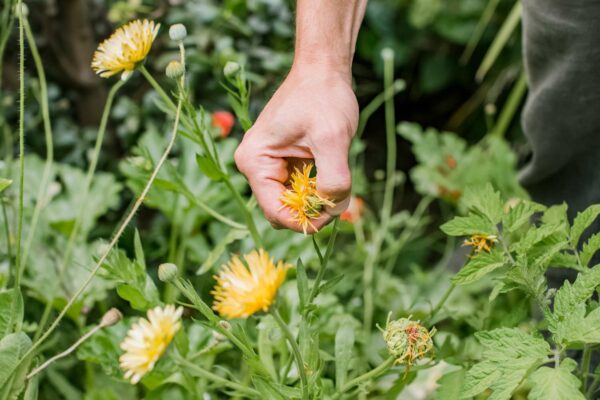
This term applies to all flowering plants. Once the plants have finished flowering and all that is left are dead flower heads, the plants look very unsightly. Moreover, the dead flower heads also promote diseases to develop and also make the plant flowerless. Once the flowers start to decline, cut the flower stalk out; however, some plants do not require deadheading including petunias, vinca, begonia, and hibiscus as they often have the mechanism to de-head themselves once their flowers mature.

Regular Clean up

Regular Clean up

This technique refers to the removal of leaves and flower parts that are affected by insects, diseases, or just by natural decline.

Keeping your container garden tidy is not as difficult as you think it would be. The most difficult part of this task is if you have a lot of container plants in your house that you need to take care of. If the number of plants in your area is too much to overwhelm you with the cleaning, what you can do is slowly take your time grooming your plants.

Trimming the climbers

Trimming the climbers

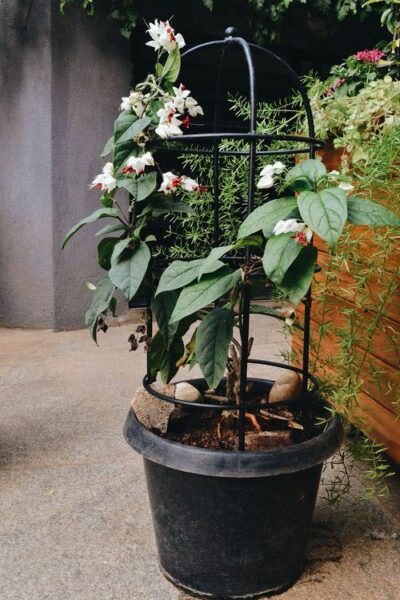
Well, we’re sure you do not want your sneaky neighbors to bother you all the time. So, why do that for plants? Make sure to trim the climber plants at regular intervals or whenever necessary if you see them clinging to other plants. This way, the climber plants will not climb over other plants and bother them. Also, you may use support sticks to let them grow in an even manner.

Move the containers

Yes, move them! By this, we do not mean that you make them dance across your container garden all the time. Different plants need different amounts of sunlight, air, and water. The air is a natural element and we will discuss the water part in the next section. In the case of sunlight, make sure to rotate or move the containers as and when necessary depending on the seasons so that every plant gets enough of it.

Water the plants thoroughly

Watering 

“Watering regularly” doesn’t mean drenching your plants with water all the time. Here’s a little catch! Unlike our regular garden, container plants will not be able to enjoy the benefits of the groundwater and moisture. Therefore, make sure to cover the soil with water thoroughly and check the water and drainage levels regularly in the case of water container plants.

Mulching

Mulching

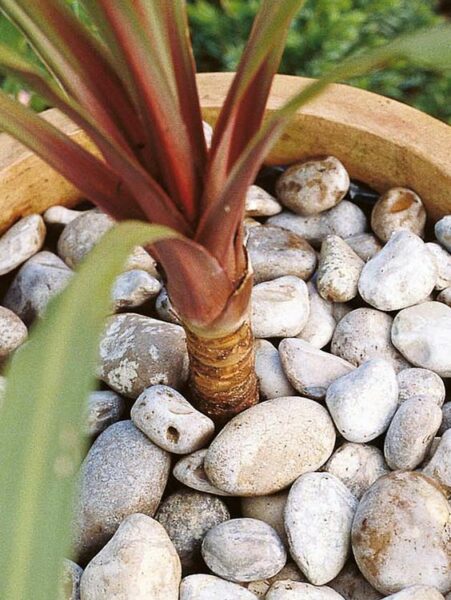
Weather is not always the same. You may see a heavy storm or a downpour with heavy droplets or a little snow suddenly. In these cases, mulching is the savior for all container plants. Mulch your beautiful plants with beautiful things like pebbles, and moss, or with something like cedar bark. This can prevent damaging the roots due to rains, or drying up quickly due to excess drainage of water, etc.

Fertilizing Fertilizing

Fertilizing your container plants will always help them thrive free from pests. In the case of containers, we must understand that there is soil only up to a certain level and there is a constant need for water and a proper drainage mechanism at the same time. Therefore, providing the plants with enough nutrients from time to time is an important pointer that we need to keep in mind. Make sure to use good slow-release and water-soluble fertilizer in the potting mix and use it for the soil.

Types of fertilizers to use in container gardening

It is important to take note that most all-purpose potting mixes have low nutrients so you need to add fertilizers at some point. This is especially true if your plants are still starting to establish themselves or are already blooming.

Seaweed Extracts

Fertilizer recipes made from seaweed extracts contain a pretty good amount of auxins, alginic acid, and gibberellins which are necessary for the growth and development of plant shoots. Moreover, the addition of seaweed extracts can also improve the water-retaining abilities of soil.

Fish Emulsion

This type of fertilizer comes from fish processing waste. The fish parts are fermented in molasses for a week before applying a diluted solution of it. This type of fertilizer contains a lot of nitrogen which is perfect for improving the foliage of the plant. This works best for lettuce and similar container plants.

Flower Booster Fertilizers

This type of fertilizer is great for plants that are about to bloom. It is high in phosphorus and potassium to encourage the plants to bloom more. Apply the fertilizer as soon as you see the flower buds start forming.

Vitamin B

Do you know we humans and plants have something in common besides being alive or dead? Plants also need Vitamin B just like humans do. Fertilizer recipes with Vitamin B are good to ease transplantation shock for young plants transferred to a new and bigger pot.

Root stimulators

If you are trying to grow plants from seeds, then you need root stimulators to encourage the plants to root and grow properly. This type of fertilizer is also crucial if you are growing plants from cuttings.

Fertilizers are crucial for the success of your potted plants. Without them, your plants will appear stunted and lanky. Make sure that you know about the nutrient requirement of your plants so you do not overdose them with too much fertilizer input.

Along with following the list of container gardening tips discussed here, make sure to pick the right kind of container for the plants, share love and care for the container gardening plants, make sure to provide them with sufficient water and nutrients, and then you become a successful container gardener. We hope this post on gardening tips could help you become a successful container gardener.

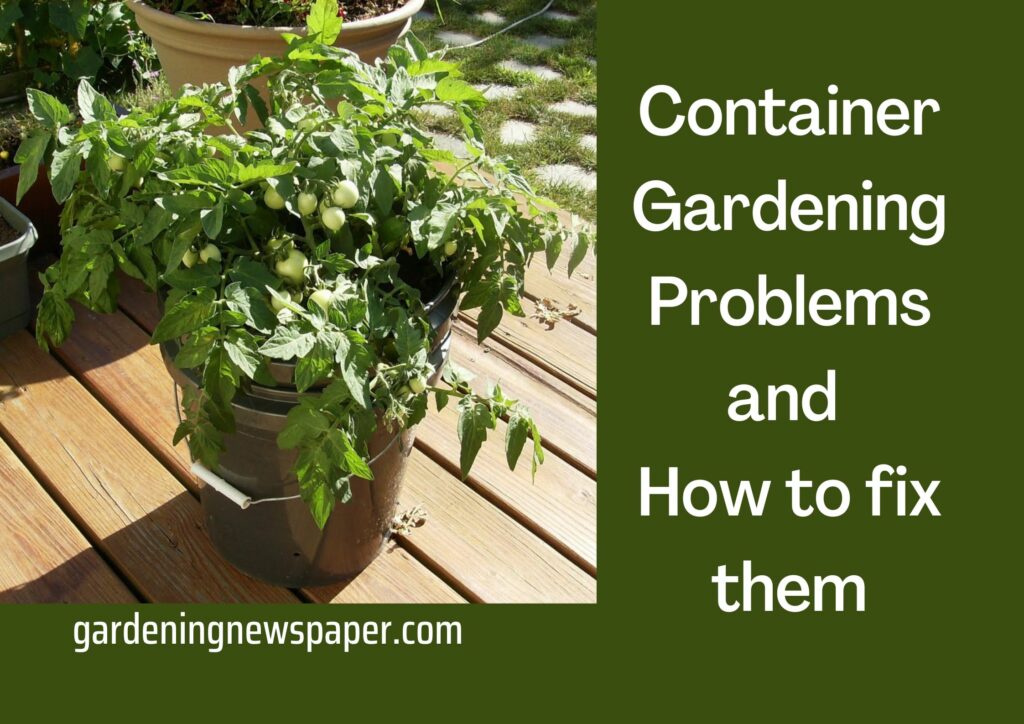
Problems with Container Gardening: How to fix various issues with container gardens?

Problems with Container Gardening: How to fix various issues with container gardens?

Container gardening, if done incorrectly, may cause you to lose most of your plants. Let’s discuss problems that you will encounter in container gardening and how you can overcome them so that you will become a successful gardener. In this article, we will discuss various issues like various tools that are useful in container gardening, water and soil maintenance, tips for maintaining a disease free container garden, challenges in container gardening, different diseases, and how to fix them. Happy reading and happy gardening to you!

Container Gardening Tools – Things to use for container gardening

Well, gardening is definitely a therapeutic experience. However, container gardening isn’t going to be a cakewalk! To make it easier to an extent, having the right kind of container gardening resources is a must. As a gardening lover, you might already have a basic understanding of different gardening tools, let us understand a few important tools that are especially useful for container gardening.

Planter Caddy

Planter Caddy

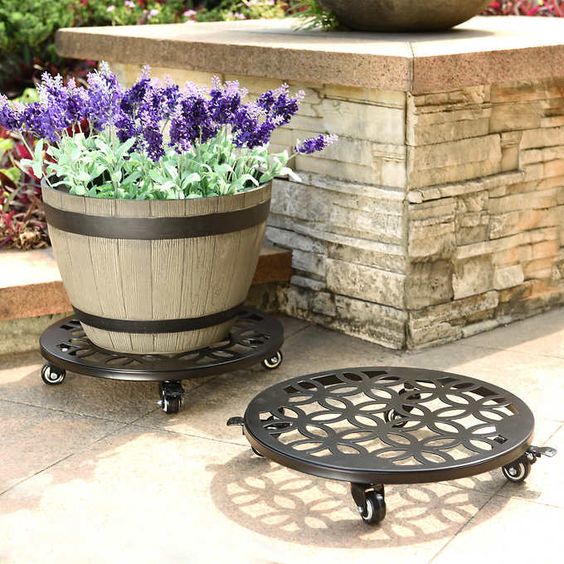
The planter caddy is a savior if you have heavy container plants. These planter caddies come with wheels underneath a circular or rectangular sturdy platform that allows you to place the plant pots on them and move across your home or garden.

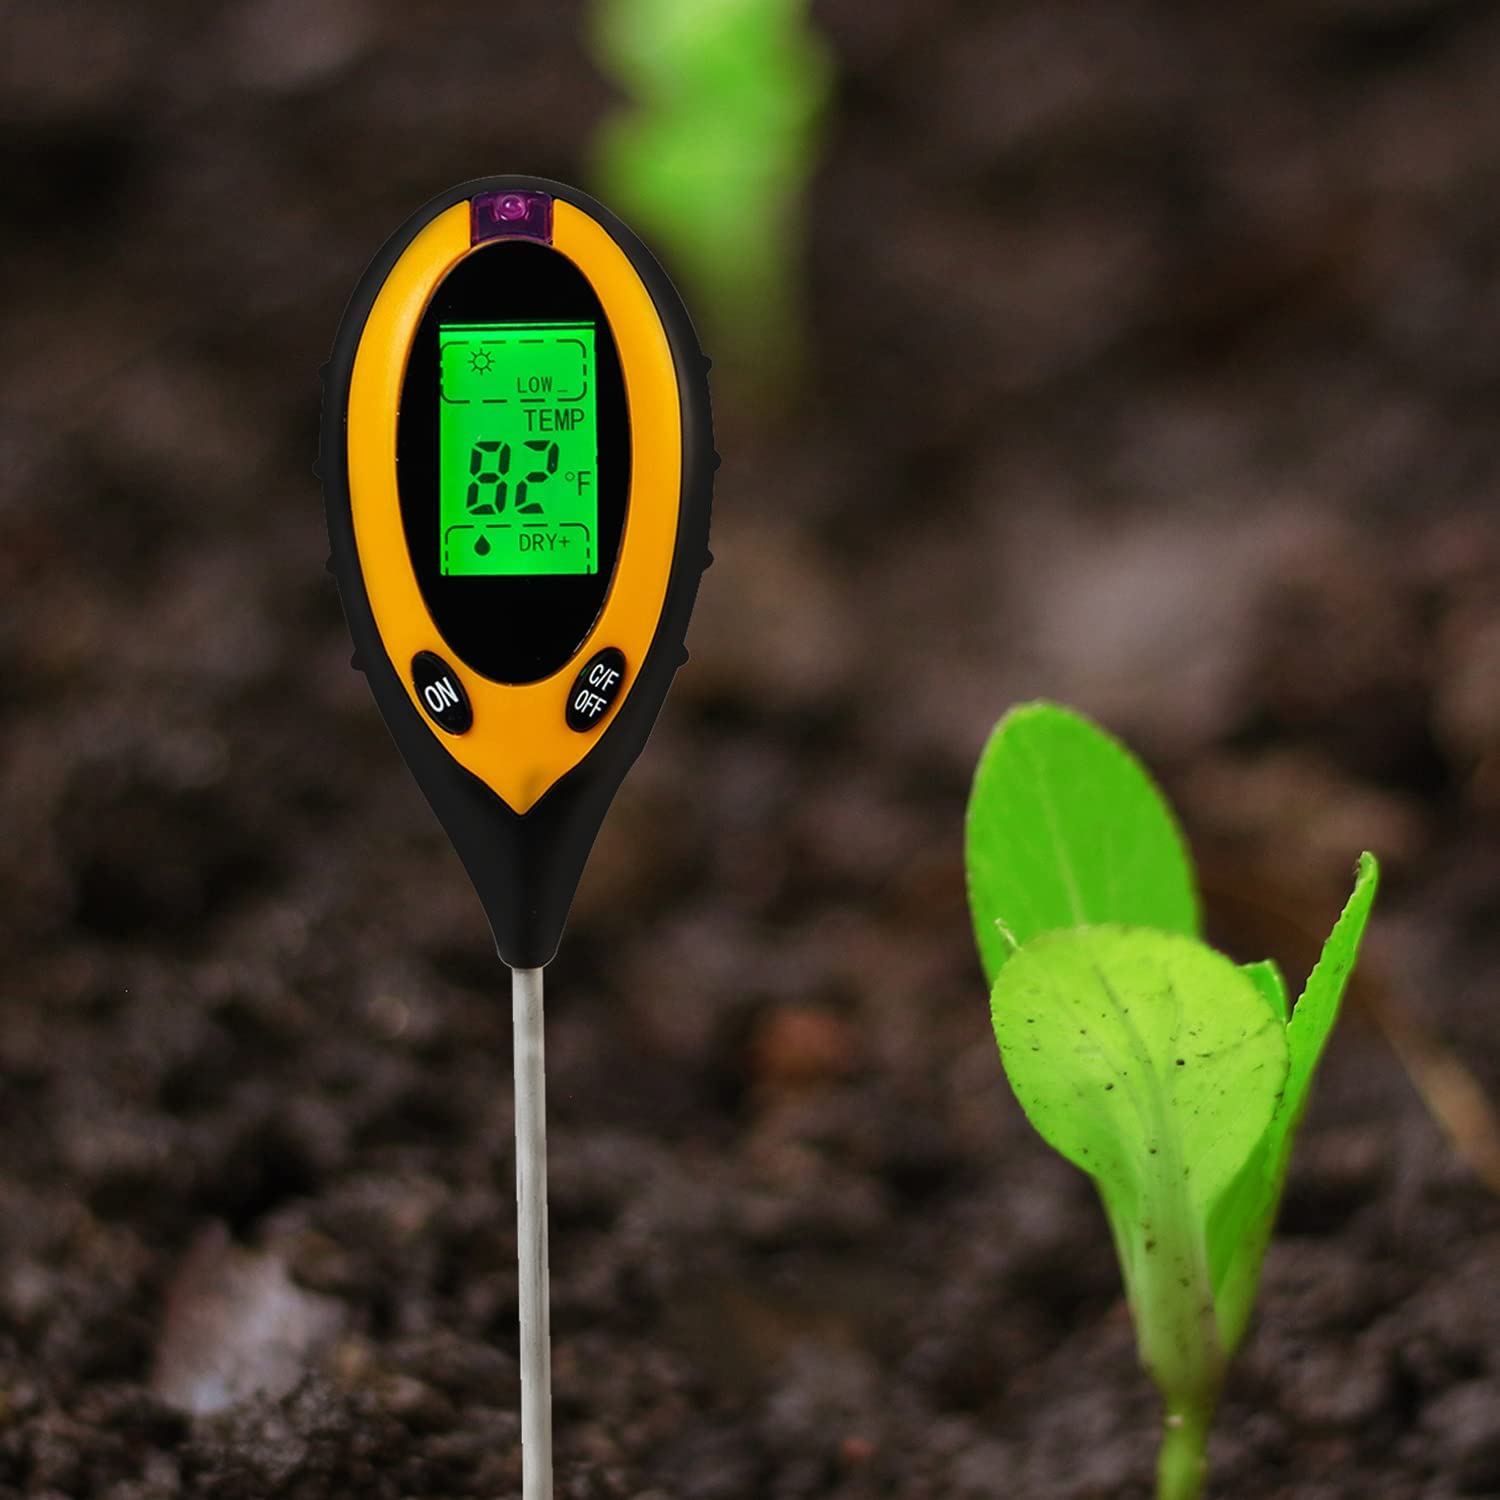
Soil Moisture Metre

Soil Moisture Metre

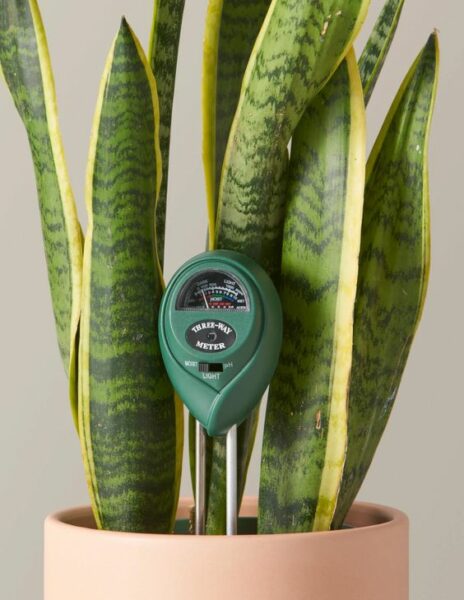
Due to lack of practice or experience, we usually tend to overwater or underwater the plants which may eventually lead to their death. You cannot kill a few plants for the practice of course! So we recommend that you buy yourself a soil moisture meter to save your plants from over-watering or under-watering. This little device will let you know the level of moisture in the soil, and you can water the plants accordingly.

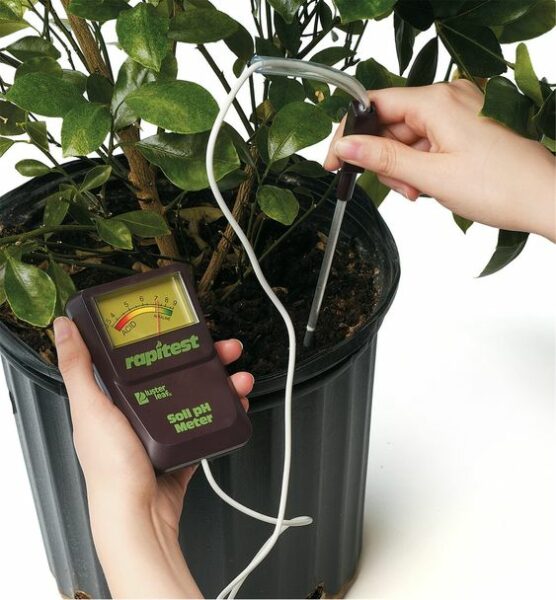
Soil pH Metre

Soil pH Metre

Do you know that there are acidic soil loving plants and alkaline soil loving plants? The pH of the soil determines the acidity or alkalinity of the soil. Okay if you think that’s too much science for you, let’s keep it simple. It is important to understand and maintain the pH levels of the soil to let the plants thrive. And a soil pH meter is the most important device to keep a check on it.

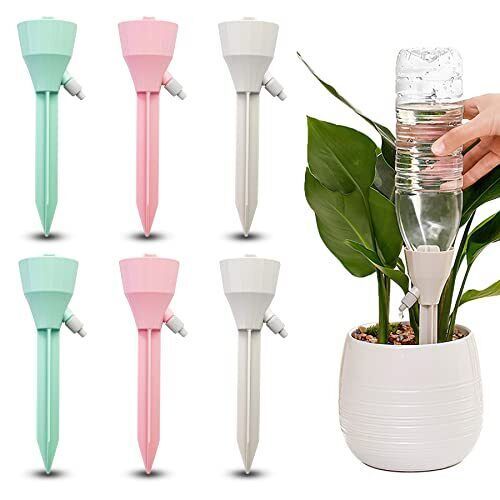
Self Watering Spikes

Self Watering Spikes

Ever wished for something that is more inexpensive than a fancy drip irrigation setup but something that works almost similarly? If you are someone who travels a lot or forgets to water your plants and feels sad about it later that your plants are wilting, these self-watering spikes are for you. You can use these spikes with a regular water bottle and place the bottle in your pots upside down.

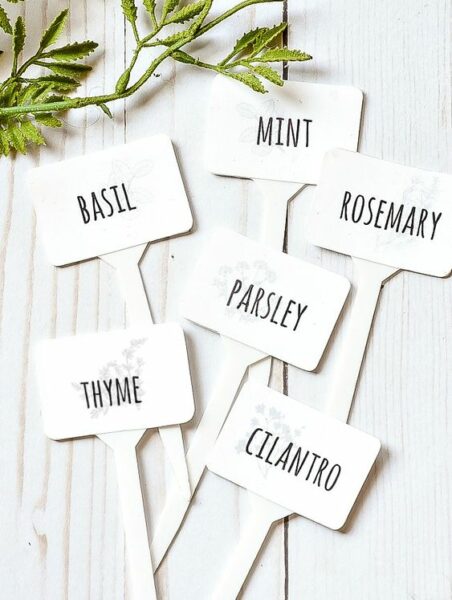
Plant Labels

Plant Labels

Plant labels? One of the most important tools for container gardening? Well, don’t you think it is cute for you to name your plants and watch them thrive? On a serious note, these plant labels are especially useful when you have different varieties of the same plant as they help you keep a check on your plants in the right way.

Water And Soil Maintenance – How to choose a container for growing plants?

While container gardening is extremely advantageous, maintaining the moisture levels in the different types of plants that you have in your garden is of course a challenge. In the section below, we will be looking into the most reliable and working tips for water and soil maintenance in your container garden.

Water And Soil Maintenance in Container Gardens

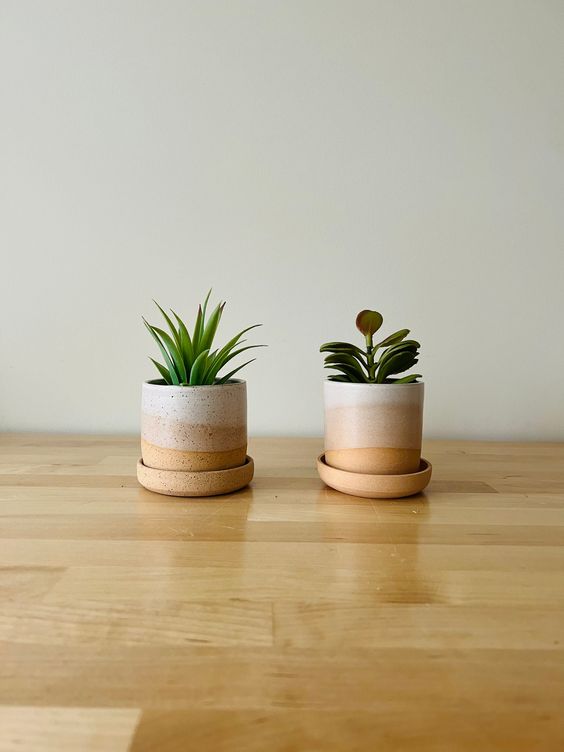
  1. Make sure to use coated ceramic containers or good quality plastic containers over terra cotta or coir baskets that can make your plants go dry quickly.
  2. Use a soil moisture meter at regular intervals to check for moisture levels. Or the easiest way is to test the soil with your finger by sticking it as deep as you can into the soil.
  3. Make sure that the soil in the containers is thoroughly watered. To check if you have done that right, see if the draining holes of the pot are getting rid of excess water.
  4. Do not drench the leaves with water. Make sure to water only the soil and not the foliage.
  5. In some cases, you might not notice that the water is over flown but the soil is not watered properly. Do not let the soil dry completely.
  6. Use the right soil and potting mix as per the plants’ requirements.

Challenges in Maintaining Container Gardening

Challenges in Maintaining Container Gardening

Challenges are everywhere. And your garden maintenance is definitely not an exception. In this section, we will look into some of the most common challenges in maintaining container gardening and ways to deal with them.

Plants wilt even if you provide them with enough water. Caused by Insufficient aeration and drainage

  • Use a lighter and less compact soil mix.
  • Increase more drainage holes in the pot.
  • Use a soil with higher amount of organic matter.

Leaf edges burn or turn dry or brittle. Caused by High salt content.

  • Leach the container with fresh water at regular intervals until the water drains from the drainage holes.

Plants appear spindly and unproductive. Caused by Too much nitrogen and Not enough light.

  • Apply fertilizer at least once a week or less often and allow the water to drain from the drainage holes.
  • Relocate your plants to an area where they can receive more light.

Plants are yellowing from the bottom and leaves lack vigor and color. Caused by Soil not being fertile enough and too much water.

  • Use fertilizers that contain a lot of nutrients.
  • Waterless and check for good drainage

Plants have spots or powdery, rusty, and many old dead leaves. Caused by Low phosphate levels and Grown at a temperature that is too low.

  • Use fertilizers with a higher amount of phosphate.
  • Move your plants to a warmer area.

Best Practices for Disease Free Container Gardens

One of the most neglected container gardening mistakes is, we tend to overlook little things like cleanliness, proper watering, plants’ exposure to light, etc. In this section, we will discuss some of the most important and common container gardening practices that we need to follow for a disease-free container garden.

Maintain the health of your plants

In the case of container gardening, bear in mind that you need to pay attention to the amount of sunlight, the right quantities of fertilizers, and proper watering. Make sure that you are not under watering or over watering the plants.

Burn the infected plants

Find the infected plants in your garden and get rid of them so that they do not contaminate other healthy plants. Make sure to burn them a little away from your garden.

Do not reuse the potting mix 

Do not reuse the potting mix if you do not want diseases in your container garden. This is especially important when the used potting is in contact with disease causing elements like fungus, viruses, etc.

Clean the containers

Make sure to clean the containers thoroughly before planting something in them. Also, it is important to scrape off the lumps of soil and algae, etc. formed due to excess moisture around the containers.

Choose healthy plants when buying

Let’s get back to what’s been taught in the school. Prevention is definitely better than cure! This is true especially when it comes to container gardening. Make sure to pick healthy and disease free plants while buying them.

Clean the garden area at regular intervals 

Cleaning the containers and planting healthy plants isn’t the end of your job. It is extremely important to clean the garden at regular intervals to avoid water stagnation and attracting diseases.

Diseases Common in Container Garden Plants

Botrytis

Container gardening plants are also prone to diseases. This section will discuss the common diseases that affect container garden plants.

Aster yellows

  • Caused by Phytoplasma (a bacteria), aster yellows cause stunting of leaves and the appearance of yellow-green foliage. This type of disease is carried by insects like leaf hoppers thus the disease is spread when insects feed on plants.
  • Destroy the infected plant by uprooting and burning it. The application of insecticides also helps.

Alternaria

  • Alternaria is a fungal attack common among Calendulas. It causes small red to purple spots that enlarge over time. The spotted leaves eventually turn yellow and drop. The fungal disease is common during the rainy season as fungi require moisture to spore.
  • Practice good sanitation within your garden. Moreover, boost the immune system of your plants by feeding with the right fertilizers.

Anthracnose

  • Anthracnose is another type of fungal infection that causes brown spots on the host plant. The spots can kill the entire leaf if left untreated.
  • The fungus is prolific in environments that are cool and with a lot of moisture thus growing plants in the sun is a great idea to treat container garden plants from anthracnose. You can also remove the affected part provided that you incinerate it to kill the fungus.

Botrytis

  • Also called Gray Mold, Botrytis is common among tulips and bromeliads. It eventually kills the plants as this is an invasive form of the pathogen for any kind of plant.
  • Implement proper sanitation within your container garden.
  • Make sure that the leaves do not collect moisture to deter the development of Botrytis.

Powdery Mildew

  • The white and powdery growth often affects the leaves, young stems as well as flowers.
  • Make sure that your container plants get proper air circulation to avoid humidity which encourages the growth of powdery mildew. Avoid placing plants that are susceptible to mildew in shaded areas. Also, practice good sanitation practices by removing dead and diseased leaves from the plant.

Root rot

  • Root rot is caused by fungi Pythium and Phytophthora that attach to the base and roots of the plant causing rot. Plants are infected by contaminated soil, water, and tools.
  • Ensure that the soil drains well. Also, avoid overwatering your plants.

Sooty mold

  • Sooty mold is caused by a fungus that is often introduced by the plant from the honeydew excreted by insects like scales and aphids. This particular fungal infection kills the foliage by reducing the access of chlorophyll to light which eventually kills the entire plant.
  • Eliminate the presence of scales or aphids by applying fungicide.

Fusarium wilt

  • Plants infected by Fusarium will show signs of poor health through wilting. The plant then turns yellow, followed by browning, and eventually dies.
  • If the plant shows early signs of wilting, avoid overwatering the plant. If the disease has progressed, uproot the plant and burn the affected plant to prevent the spread of the disease. Do not plant anything on the pot to naturally kill the bacteria as they no longer have food to sustain them.

Aphids

  • Aphids are insects that have sucking mouth parts and they can cause puckering or distortion on the plant tissue. Aphids are also vectors of different viral diseases in plants.
  • Introduce natural insect predators in your gardens such as ladybugs, lacewings, and parasitic wasps.

Mealybugs

  • Mealybugs are insects that are common in container gardens. Their population balloon out of proportion and they inflict damage to the plant while feeding.
  • Manually wash off mealy bugs from the plant by brushing them off or using a Q-tip rubbed in alcohol. Unfortunately, the waxy substance on the exoskeleton of mealy bugs makes them highly difficult to kill using pesticides.

White fly infestation

  • Severe infestation of white flies can cause mottling as well as yellowing of the leaves thus lowering the yields of your plant. This is a great concern for those who do vegetable container gardening.
  • Use a pesticide that is specific to white flies.

Container gardening is a fun and therapeutic activity that everyone can do. It does not limit your ability to grow many things despite the lack of space in your area. The best thing about container gardening is that it is one of the simplest types of gardening that you can do and all there is to get planting materials, some garden tools, a lot of passion for growing those beautiful beings, and watching them thrive!

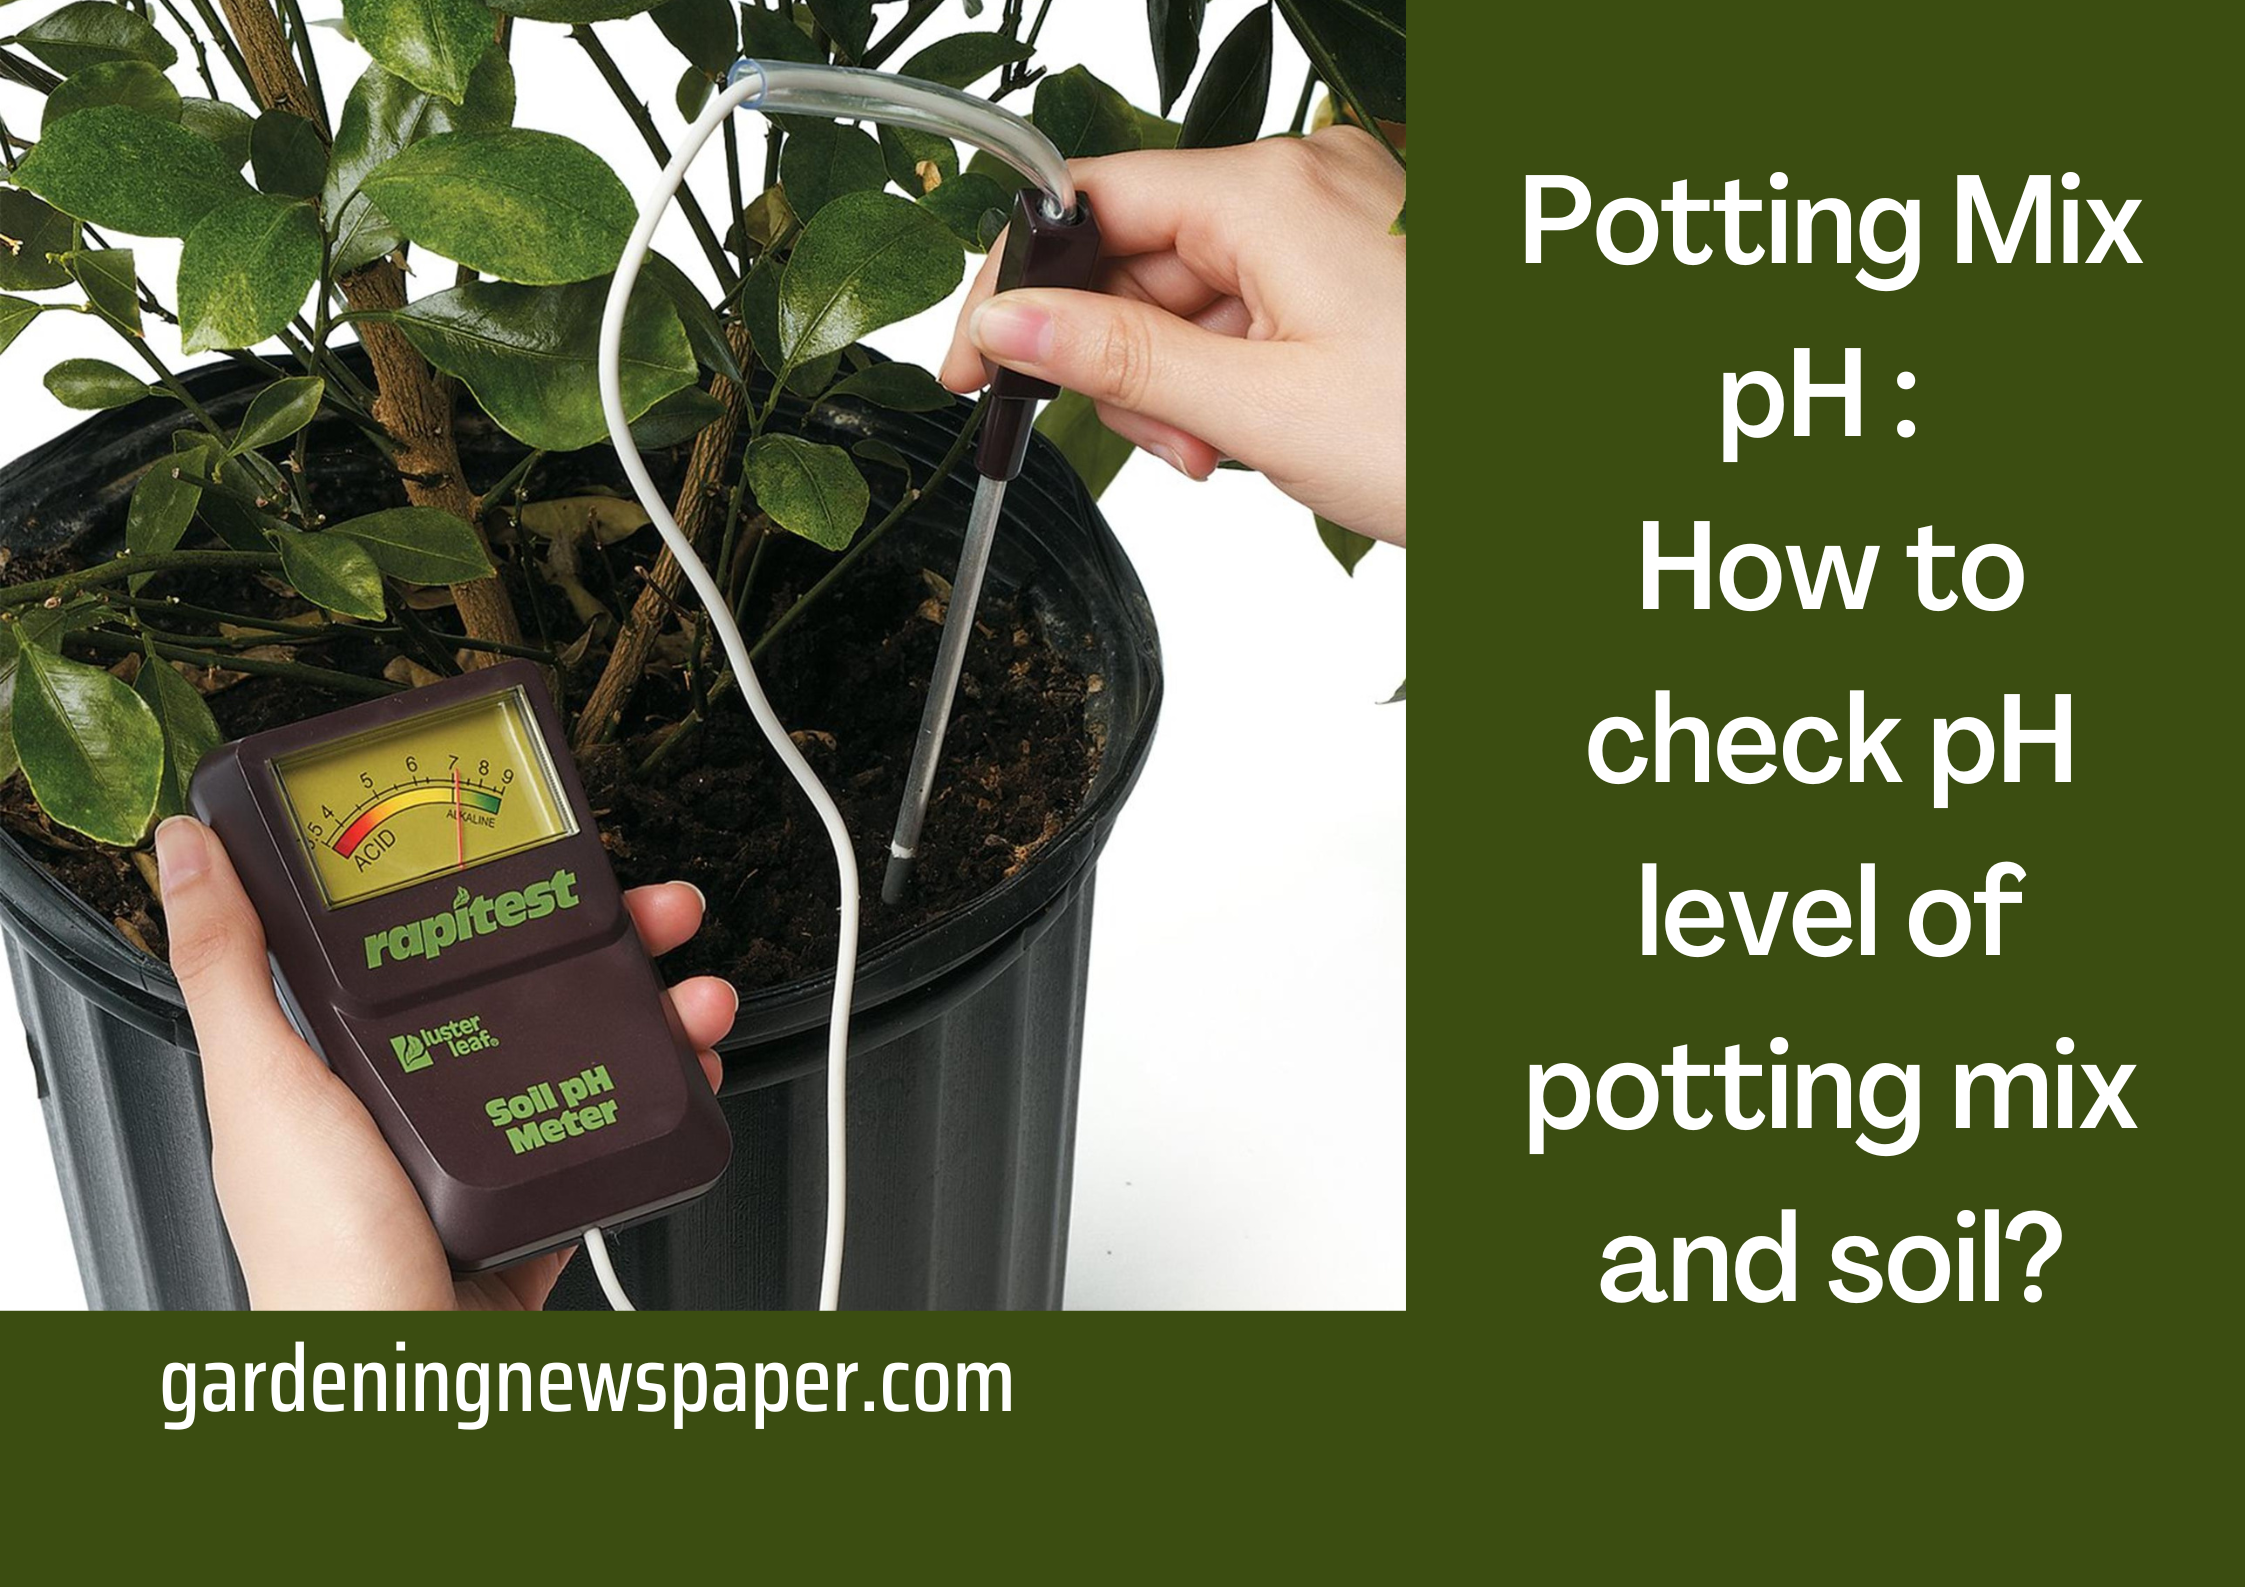
Potting Soil and Potting Mix pH – How to check pH level of potting mix and soil?

Potting Soil and Potting Mix pH – How to check pH level of Potting Soil?

Potting mix PH - How to check pH level of Potting Soil?

Usually, you do not have to worry about the pH balance of your potting mix and that’s a good thing because unnecessarily messing up with the ph balance may affect the overall health of your plant in a bad way or it may even kill the plant. In this article, you are going to learn about the potting mix, the pH of the potting mix, how to check the pH of the soil at home, how to fix the soil’s pH, etc. Happy reading and happy gardening!

Potting Mix Ingredients – What is pH?

Plants are grown in potting soil, also known as potting mix, which is a mixture of materials other than actual soil. Potting soil is the best-growing medium for plants in containers, whether you’re trying to grow some seeds for repotting, using plant cuttings, etc. The most common potting mix ingredients are perlite, peat moss, and compost in a 1:1:2 ratio.

So, what is pH? In layman’s terms, the pH level determines the acidity of potting mix. The pH of potting mix determines the absorption of nutrients by the plants. Sounds too scientific? In the coming sections, you will be able to understand the signs of bad pH and how to fix the levels using different techniques.

0 Most Acidic, 7 Neutral, 14 Most Basic

The plant thrives when pH is between 5.0 and 8.5. If the ph is beyond this range in either direction, the problem occurs. When pH values are lower than 5.0, manganese & aluminum can become toxic to plants. Plants get excess of these liberated nutrients and cannot process them, leading to plant death.

Signs of low pH

  • Yellow spots lead to browning and leaf death.
  • Wilting leaves
  • Stunted growth
  • Blighted leaf tips
  • Yellowing of foliage
  • Other leaf discoloration
  • Poor stem development.

WARNING: Please understand that the above symptoms may also be due to other factors like nutritional deficiency, lack of light, improper watering, etc. So before you start working on identifying and fixing the Ph, do check these factors.

So here’s the top advice, do not worry about the pH balance of your potting mix unless everything else fails.

What causes Low pH?

Several factors drop the ph level of your potting mix and render it acidic. The following are some of the most common factors to consider:

  • Rainfall: Naturally acidic but it has less effect in urban areas so consider yourself lucky if you live in a city. But this does not just happen in one rainy season.
  • Chemical Fertilizers: Especially nitrogen fertilizers that contain ammonia. The biggest culprit.
  • Organic matter: Yes, that’s right, the decomposition of organic matter makes the soil acidic. Always use well-decomposed manures.
  • Treated Water: Treated water may increase the acidity of your potting mix.

How to check pH level?

How to check pH level

You can easily check your soil pH by investing in an easily available device called a pH meter, it’s not very expensive and can save you from a lot of hassles. You can monthly check your potting mix’s ph level if the aforementioned factors are verified by you.

Alkaline and Acidic Potting Soil Recipe – How to fix pH?

In my experience, a good potting mix, timely addition of macro and micronutrients, proper watering, and light can save you from pH-related troubles. But if despite doing everything right your plants are not thriving, please check your potting mix pH and fix it. So how do we FIX it?? There are different methods to make your soil acidic or alkaline based on the needs of the plants that you grow. Interesting isn’t it?

To make the potting soil more alkaline:

To make the potting soil more alkaline

Well, you certainly do not want to make your beautiful Lilacs, exotic brussels sprouts, asparagus, etc unhappy, do you? So to treat these alkaline soil loving plants right, here are some ways to make the soil more alkaline.

1. Mixing Lime: Adding lime to the soil is the most common way to make the soil alkaline. You can add the usual limestone powder or dolomite limestone to the soil and it takes around two months to show the effects completely.

2. Ash of burnt wood: The wood ash can also raise the pH levels of the soil. Wood ash contains large amounts of calcium carbonate and little amounts of Phophoous and potassium which are also important for plants.

3. Powdered Shells: By shells we mean eggs shells, clam shells, oysters, etc. Powder these shells and add the powder to the soil and the pH of the soil is raised!

To make the potting soil more acidic:

To make the potting soil more acidic

There may be two cases where you need to keep your soil more acidic. One, when your soil is excessively alkaline or two, your plants prefer acidic soil. This section will tell you about different ways to keep your soil more acidic. Let’s dive in and learn!

1. Aluminium Sulphate: Using Aluminium sulfate can make your soil more acidic. Use 0.6 pounds of Aluminium Sulphate for 10 sq.ft of soil.

2. Coffee Grounds: Well, coffee grounds work to acidify the soil drastically only when the coffee is full of its contents intact. In other words, used coffee grounds will give very minimal results, therefore, you can use them when there is no need for high levels of acidic peat but your plants call for a little fix in the pH.

3. Peat Moss: Although using peat moss to acidify the soil is a slow process, it is definitely an effective one. Considering the size of the plant, layer the soil with peat moss for about 2 to 3 inches to gradually acidify the soil.

4. Fertilizers with Nitrogen: Using fertilizers with nitrogen as a base is the most effective way to acidify the soil dramatically due to the amount of Ammonium present in them. Since the aftermath of using these fertilizers is drastic, we recommend you go to the nearest gardener or a nursery for the best proportions.

This way you can make the blueberries, magnolias, etc in your garden happy!

Takeaways to maintain the pH of the soil

  • Always use well-decomposed cow manure, vermicompost, and compost. This resists changes to potting mix PH.
  • If you live in areas where rainy seasons are continuous and longer, provide a transparent/translucent cover/shade to your Terrace garden so that they get sufficient light but are protected from excess rainwater.
  • Add Lime. If you detect a low ph, adding lime to your mix helps elevate the ph levels. Loosen the top mix by lightly hoeing for about 4-6 inches and mix the lime powder. Start adding in small quantities first and retake the reading after 3-4 days.
  • When your soil pH level is higher that means it’s more alkaline. Sulfur helps in bringing down the pH level. Add small amounts of sulfur since a larger quantity may kill the plant.

We hope this tiny crash course about the potting mix, potting soil pH, and the techniques you can use to balance the pH levels could help you understand the basics. However, we would suggest you consult the nearest nursery directly for further exploration of the topic if you experience it as a major issue in your garden.

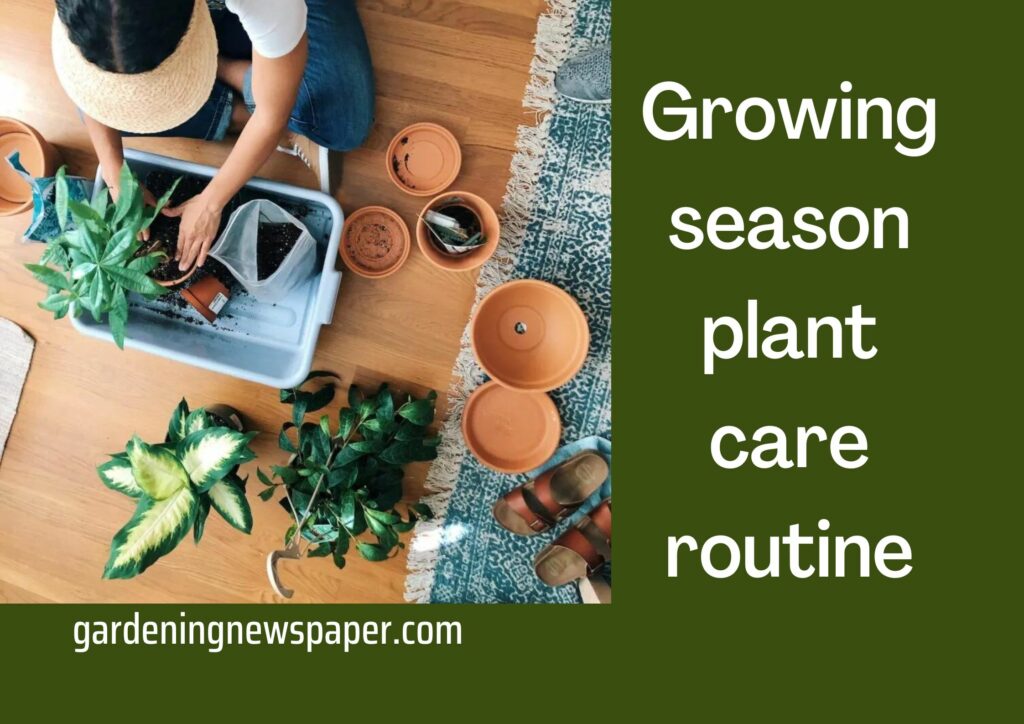
Routine During Growing Season For Plants – How to repot your plant?

Routine During Growing Season For Plants – How to repot your plant?

The time of year when a particular plant (plants, cuttings, seeds) shows rapid growth, is called the growing season in simple terms. A growing season provides an optimal environment for the plant to grow and that’s why some gardening activities are done especially during the growing season.

Well, the growing season and the sowing season are two different things! In this article, we will be looking into the growing season plant care routine. You may search the internet to easily find recommended sowing months for a specific variety of vegetables/fruits/flowers. Let’s dive in to learn about pruning, its types, repotting, and how to repot your plant. Happy reading and happy gardening!

For most gardens at home and of course, for most plant varieties, there are two growing seasons in the southern zone of the world during a calendar year:

  1. Spring Season: March – April (Feb-March (early), Early April in some regions)
  2. Rainy Season: May end to June (till July in some regions).

And for the northern hemisphere, the growing season usually lasts for 4 to 5 months and begins in early May, and lasts till early October.

Growing season 1: Pruning

When a plant’s dormancy period ends it shows signs of new growth. That is why when you prune a plant it shows new growth with new leaves and branches. For a majority of plants, spring is the best time to prune. The best time to prune in the spring season is from the 1st week of Feb to the 3rd week. Why do you think you need to prune your plants? How should you do it? Let’s find out!

Why prune?

Below are some of the most important benefits of pruning.

  • Pruning makes a plant dense by promoting new branches. More branches mean more fruits and flowers. This is especially true if you have fruit trees in your garden.
  • Pruning is an opportunity to get rid of old/dead/damaged or malformed (like one over another) branches.
  • Some plants can only fruit/flower over new branches for example apple ber, etc.

When to skip pruning?

You can skip pruning in a few cases. Here are the scenarios where you can or should rather skip pruning.

  • If your plant is too young like you just bought it from the nursery or it is still establishing in its container. Otherwise, it is suggested to prune young plants to promote growth.
  • If your plant is a slow grower.
  • If your plant is not healthy.

Hard prune or soft prune?

There are two types of pruning. Take a look at this section to know what works best for your plants.

When you hard prune a plant you do aggressive pruning and leave the plant in a reduced size with all branches (smaller as well as bigger ones) cut to a much shorter length. Hard pruning is usually done on well-established and matured plants.

When you soft prune a plant you cut the smaller branches, trying to maintain the shape of the plant. Soft pruning may also involve defoliation (removal of leaves) to promote new growth but it is not always necessary. Depending on the plants soft pruning can be done almost any time of the year, for example, you may soft prune a bougainvillea plant after every flowering cycle to promote more flowering branches.

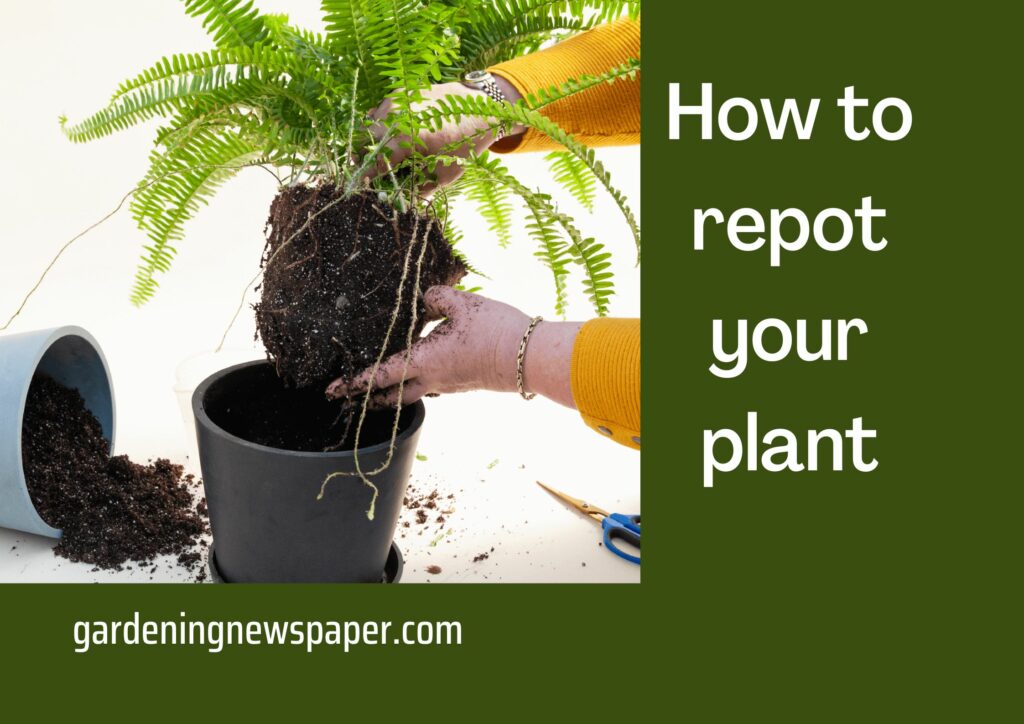
Growing season 2: Repotting

When you have to shift your container plant from one container to another usually a bigger one (but not necessarily), it’s called repotting. Just deciding on repotting your plant isn’t the end! Read on to know about when and why should you repot, if you should repot the plants only during the growing season, and also the most important part, i.e; how to repot your plant!

Why repotting?

Here are the most important scenarios where you need to repot your plants:

  • Roots are coming out of the drainage hole at the bottom of the container.
  • Roots are growing so thick inside the container, that they are de-shaping the container.
  • Signs of stunted growth or slower growth than usual.
  • The overall structure has become big and heavy such that it may imbalance the container.
  • Leaves are getting wilted out quickly after watering and need more frequent watering.
  • Salt deposits on plants or the container.
  • Soil is shrinking inside the container.
  • To rejuvenate or replace potting mix.

Repot only in the growing season?

Well, it’s a no and a yes! NO, because most of the reasons mentioned above may require immediate action to save your plant. For example, your plant is overgrown or root bound, or not retaining water. Please repot.

In such a case I recommended taking the whole ball out and simply shifting it to a bigger container with fresh potting mix. Lesser or no damage to the plant and a higher recovery rate.

YES because repotting is usually stressful to plant and repotting a plant at the start of the growing season ensures safe recovery of the plant. Also, the plant growth in some plants is better when you re-pot them periodically like annually or once in 18-24 months.

How to repot your plant?

The garden experts say that we can divide the repotting technique into two types as follows:

  • Extract and Repot
  • Extract, Reduce & Repot

Since both types have an extraction, extraction can be defined as the careful removal of a plant from its container.

How to extract?

  1. To extract a plant from the container, stop watering the plant a day or two before, this will introduce slight compaction in the mix and allow the mix to move away from the container’s inner wall.
  2. Then gently pat the container from all sides to further loosen the entire ball.
  3. If you have followed the advice for larger drainage holes, you may even gently use your fingers to push the ball from the bottom.
  4. Use gravity to help you if necessary by turning the plant upside down, but be aware that soil may fall out.
  5. If you have a higher platform/table/stool then place the container lying down and gently pull the plant holding it from the stem, if you sense that the stem is not tightly bound, stop and try to give gentle pushes to the container, making it slightly tilted from the bottom.
  6. As a final step, gently remove the plastic net/cloth/ or if you have used broken clay pot pieces from the ball. It is okay if tiny roots break a little but not too much.
  7. A loose textured and well-drained mix will fall on its own without damaging the roots, otherwise, gently brush them to loosen a bit only if they seem tangled otherwise leave them as it is. This will give some air to the roots in the new container and provide space for the mix.

Extract and Repot

Extract and Repot

When you extract a plant and repot just the way it is in a new larger container with the fresh mix to accommodate the space after putting the entire root ball as it is. Here’s how you do it:

  1. Prepare your new container preferably larger with some potting mix and place the entire ball inside such that when you add more soil, it should cover the surface to the stem at least an inch.
  2. Gently poke fingers or stick all around the newly added mix to clear air pockets and add more mix. Keep tapping the container from the sides too.
  3. Don’t fill the container till its neck. You want some room for water to soak slowly into the container.
  4. Don’t pack the potting mix too tight by pressing it with your hands, do it gently to provide support let the remaining work be done by watering for you.
  5. Finally, water the plant generously and that’s it.

Extract, Reduce and Repot

Extract, Reduce and Repot

The extraction and repotting processes are just the same with one big difference. Reduction. In this process you will most likely do all or some of the following:

  • Shedding as much old potting mix as possible without hurting the root ball attached to the stem.
  • Trimming fibrous roots that are overgrown/tangled/damaged/rotted.
  • Trimming the entire ball from the sides and bottom sacrificing a lot of roots all across.
  • Once you do that, then spray the roots with some fungicide preferably organic like crushed and boiled garlic diluted with water in a ratio of 1:10, or sprinkle Trichoderma powder (available at online stores).
  • Prepare a new container with the fresh potting mix, place the reduced ball, and cover it with more potting mix gently pressing from all sides, poking the mix with fingers or a wooden stick to remove air pockets.
  • Make sure the ball is well-stabilized and not tilted.
  • Water the plant.
  • Allow the mix to dry between subsequent watering. For some plants, you may have to wait for very long periods before you water after repotting so that the roots are well settled for example Jade plant, Adenium, or similar succulents or plants specific to such treatment.

Planting a number of plants and getting disappointed when they do not thrive as expected is not okay to do even as a beginner! Mother nature needs a certain amount of love, care, and special attention. We hope that this article could help you understand the growing season plant care routine including comprehensive information about the growing seasons, pruning techniques, its benefits, repotting, and how to repot your plant. Happy gardening!

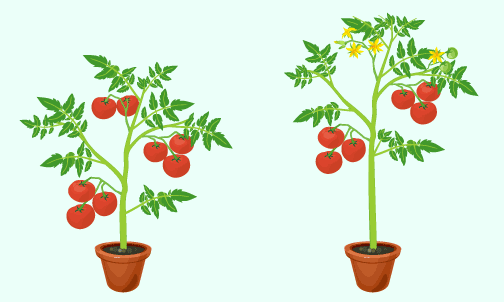
Tomato Plant Life Span – How To Grow Tomato Plants

Tomato Plant Life Span – How To Grow Tomato Plants

Tomato Plant life span

Tomato plants are plants that grow better in warmer conditions and in bright sunlight. People love to grow tomato plants in their home since it is used for many purposes, to make dishes tasty, for diet, to lead a healthy life, and many more. Well, any homegrown plant needs extra care and attention for a good quality output.

Want to grow tomato plants at home as a beginner in gardening? We are here with an article to tell you all things important about tomato plant life span and how to grow tomato plants along with some useful tips.

Tomato Plant Lifespan – The Life Cycle of Tomato Plant in Days

Tomato Plant Lifespan

Here is everything you need to know about a tomato plant’s lifespan. Continue reading further to know about how to grow tomato plants including some important tips.

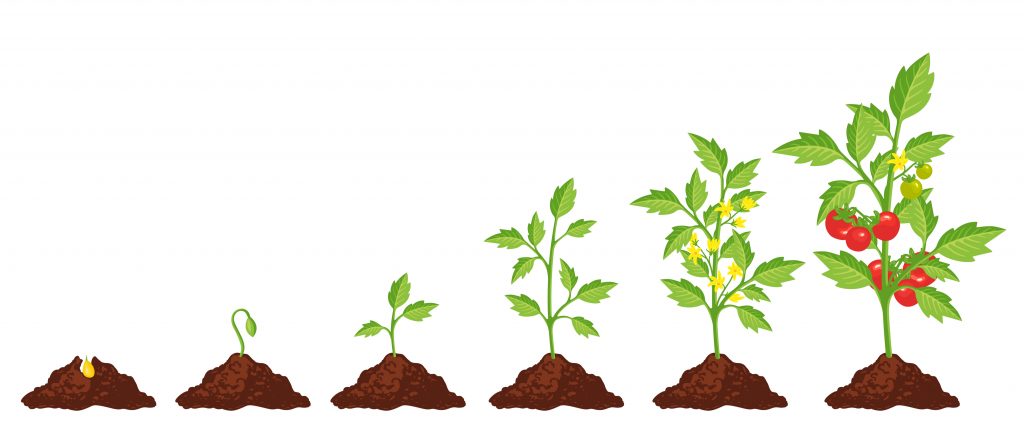
  1. the seeds are usually sown within six to eight weeks prior to the last day of frost since warm soil can help improve the process of germination.
  2. The young saplings are twice their height in two weeks and are left to grow for about 6 weeks. Further, they are planted in the ground once the cold and frosty weather passes away.
  3. Then comes the flowering part! The plants start flowering by the end of the spring or early summer at most. At this point, posts are used for supporting the plant from falling off.
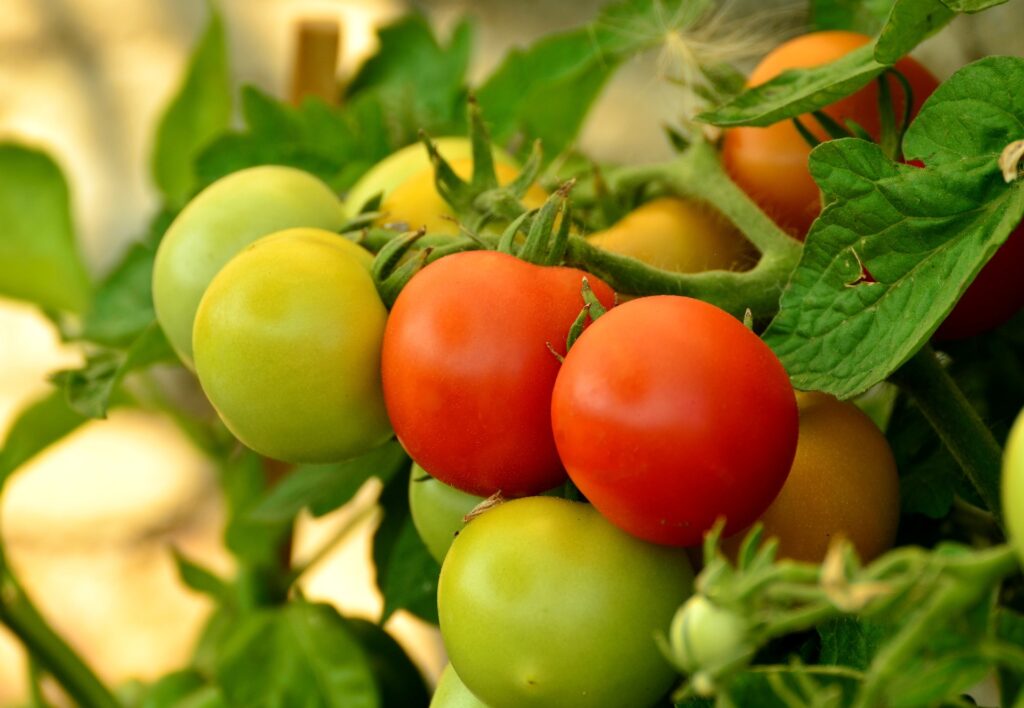
  4. Eventually, these little yellow flowers fade off and the tomatoes start growing. The tomatoes grow as time passes by for about fifty days and are turned red in seventy days.
  5. By now the tomato plants produce the most delicious tomatoes and are now ready for harvest.

One should also keep notice of several things while growing a tomato plant including the varieties of them to decide upon what variety to plant for what purpose. In the coming sections, check out the information about the varieties of tomato plants.

Determinate Vs Indeterminate Tomato Plant

Determinate Vs Indeterminate Tomato Plant 

Determiante Tomato Plants 

Determined tomatoes are a variety of tomatoes that reaches a certain size at maturity and the fruits are ripened very quickly, usually in less than two weeks. After this first batch of tomatoes ripens, the plant’s ability to produce the tomatoes will eventually decrease and tomato plants die.

Indeterminate Tomato Plants

In the case of an indeterminate tomato plant, the plant continues to produce fruits throughout its growing season. As a result, they provide a consistent supply of tomatoes rather than a single enormous harvest.

Most people grow both varieties, indeterminate ones for consistent product harvest and determinate ones for freezing and preserving purposes. Well, the determinate variety needs more care and attention for good quality produce.

How To Grow Tomato Plants? Can you keep tomato plant indoors?

Tomato plants are very easy to grow and even those who are beginners in the gardening area can grow this plant. Here are a few tips that you should follow while growing tomato plants for healthy growth of the plant. 

How To Grow Tomato Plants

Take A Clean Container

You should take a container which is larger in size. So that it allows tomato plants full growth without any root diseases. Make sure to make great pores in them for well-drainage. Plastic or fabric containers are best for the growth of the tomato plant. Since they provide warmer conditions for the soil.

Choose The Seed Of The Variety Of Tomatoes You Want

There are various types of tomatoes, some of them are cherry, plum, oxy heart, and many more. Depending on the plant type you will require a container or all other conditions. Below are a few factors stated for the better growth of the tomato plant that is taken on average.

Fertilize The Soil And Pour It Into The Container

Before pouring soil into the container, ensure that you put fertilizers that are high in phosphorus. Make sure that you don’t put extra fertilizer in the soil, it will be harmful to the growth of the plant. Underfertilised soil is much better for the plant than overfertilized soil. 

Plant The Seed Underground The Soil

Before you plant the seed in the soil make sure that it absorbs moisture and grows in temperatures which is nearly 70 degrees Fahrenheit to 90 degrees Fahrenheit. Then, dig the soil to nearly 2 inches deep and then plant the seed. Cover the seed tightly with the soil so that it remains in contact with the soil in a better way. 

Give Enough Sunlight 

Tomato plants grow well in direct sunlight. It depends on the climatic conditions of the place where you grow tomato plants. On average allow the plant to receive sunlight for nearly six to seven hours. If you wish to place the tomato plants indoors, ensure to keep them in sunlight for long hours to absorb enough of the nutrients they require. 

Try To Maintain The Moisture

Water the tomato plants regularly and slowly. Ensure that the soil of tomato plants always remains moist because it is essential for the proper growth of the plant. If the moisture level fluctuates then it will hamper the growth of the plant. 

Maintain The Air Circulation Near The Roots

Tomato plants require a great amount of carbon dioxide around their roots. When the plant has a good intake of carbon dioxide it grows faster. They need air circulation properly because of photosynthesis and to breathe properly. Plants convert oxygen into energy to make their food. Nitrogen is very harmful to the growth of the plant. One must ensure that plants must not intake or take less intake of nitrogen. 

What Affect The Growth Of The Tomato Plant

Tomato plants are adaptable to warmer climates. There are some things that affect the growth of the tomato very badly. Below are some factors that may affect the growth of the tomato plant.

What Affect The Growth Of The Tomato Plant

Cold Soil

In cold soil, the growth of the roots stops and it leads to an increase in the growth of diseases and pests. They prevent the roots from developing properly, and later also affect the growth of the plant and flowers to grow. 

Overwatering And Watering At Different Time

The soil of the tomato plant must remain moist always for better growth of the plant. Ensure that you do not pour too much water so that the soil becomes soggy. 

Water the tomato plant at regular intervals, irregular intervals may lead to the death of the plant. Ensure that the soil gets moist at the same time of the day and should be watered twice. 

Excess Nitrogen

Excess nitrogen is very harmful to the growth of tomatoes in the tomato plant. Due to excess nitrogen leaves, stems and roots grow very strong and large with less production of tomatoes. Since nitrogen is very harmful to the growth of fruits.

Poor Pollination

If the plant suffers from poor pollination then the flower will grow and die. And those flowers will not get converted or get less converted into tomatoes. 

The flower of the tomato plant does not need insects for pollination, they get pollinated by themselves. The flowers of the tomato plant have both male and female parts for fertilization.

Decrease In Humidity

Tomato plants need humidity levels ranging from 70% to 90%. This helps in photosynthesis. If the humidity level decreases then, the production of the food for the growth of the plant will also decrease with the lowering of photosynthesis.

Do you know the essential conditions to grow tomato plants? Read further to know about the suitable conditions to grow tomato plants.

Suitable Conditions To Grow Tomato Plants

tomato plant life span

Tomato plants are very easy to take care of. Some of the tips mentioned below help in increasing the growth of the plant. 

  • Watering– You should water the tomato plant twice a day. It helps the plant in retaining moisture and maintains the humidity level to 70% to 90%. In bright sunlight, the soil dries sooner. You should try to keep the soil moist.
  • Sunlight– Full sunlight is very essential for the proper growth of the plant. Tomato plants grow in warmer conditions and bright sunlight for photosynthesis and proper growth.
  • Soil type– Tomato plants need well-drained soil for the development of the roots of the plant. Sand or loamy soil is very essential for the growth of the plant, because of its drainage system.
  • Temperature– Tomato plants grow in warmer temperatures and nearly 21 to 24-degree celsius is ideal for the plant’s growth. Too cold a temperature will lead to less fruiting of the tomatoes in the tomato plant.

Key Takeaways

Tomato plants have an average lifespan of only six months. Varieties of tomato plants grow for different lifespans. The growth of any plant also depends on the growing conditions of the tomato plant. The factors affecting the growth of tomato plants also play a crucial role in it. 

If this article attracted your attention and satisfies your lust for knowing about tomato plant life span, subscribe to this post for more updates. We all have needs and it’s okay to search for info at the right places. We will be very happy to inculcate values that get into your core knowledge and encourage you to do the right thing.

Why are your peace lily flowers going brown? Reasons of peace lily flower turing brown

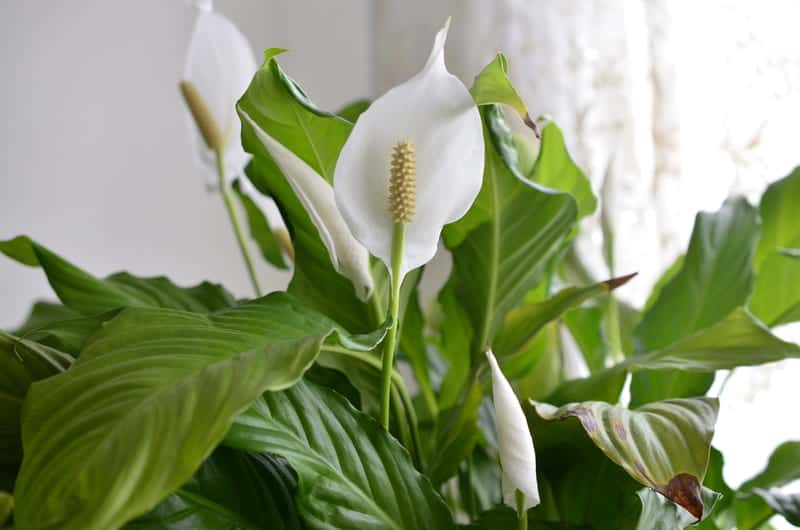
The peace lily flower is a gorgeous, low-maintenance indoor plant with uniquely shaped white flowers that bloom even in low-light circumstances. But that doesn’t mean peace lilies don’t have problems, like their beautiful white flowers turning an unhealthy shade of brown.

So why are your peace lily flowers going brown?

Your beautiful peace lily flower was white a few days ago, but today it has already become an unappealing brown. You thought you were taking good care of your houseplant, but it appears that you were not. What caused your peace lily flower to turn such an unsettling color?

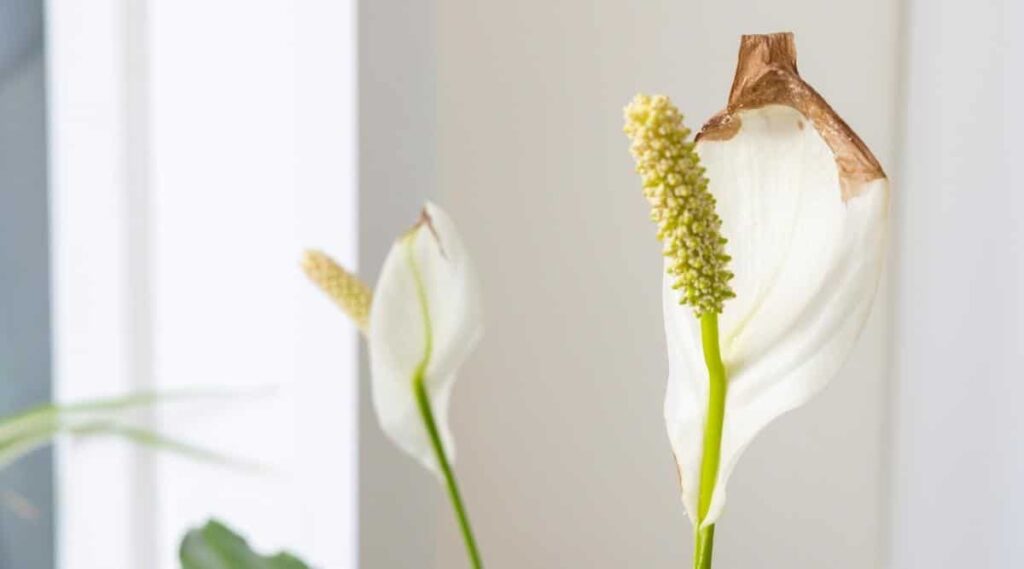
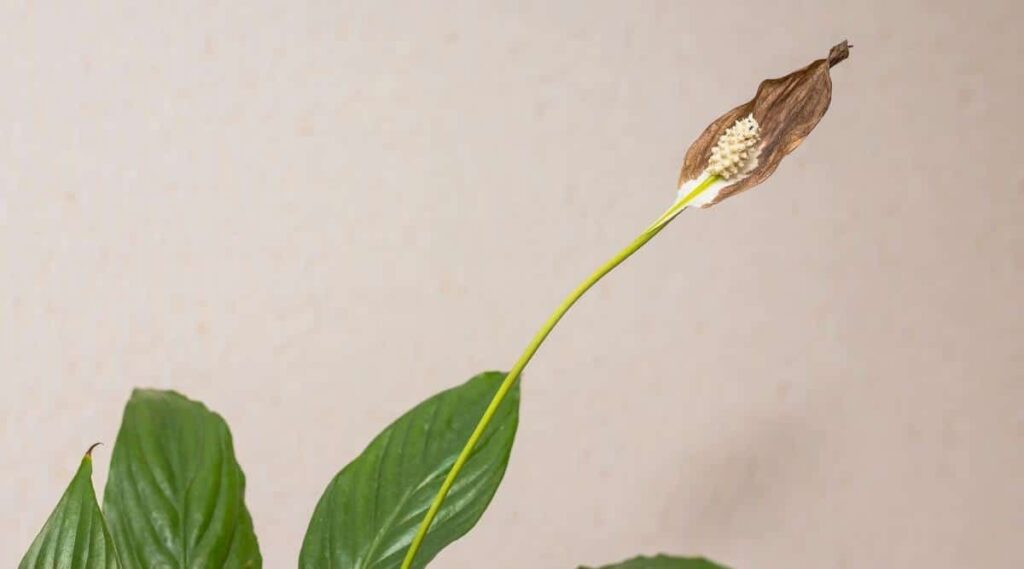
If your flower has become brown, it might be due to overstress or a little neglect of the houseplant. Furthermore, all peace lily flowers will age and turn brown.

why are your peace lily flowers going brown?

Peace lily flowers naturally become brown at the conclusion of their life cycle. It’s pretty standard, and if your plant is otherwise healthy, you shouldn’t be concerned.

However, in rare cases, flowers may turn brown too soon. Let’s take a look at why flowers turn brown, how to make them last longer, and how to get rid of faded blossoms.

When the growing conditions of your flower do not satisfy its needs, it reacts with stress. This permits your plant’s limited resources to be directed into life-sustaining portions like main stems, new green leaves, and roots.

Because flowers are less critical to your plant than leaves or main stems, your peace lily will sacrifice its blossoms to keep the essential aspects that ensure its existence. As a result, brown flowers are typically an early warning sign that your plant is in trouble.

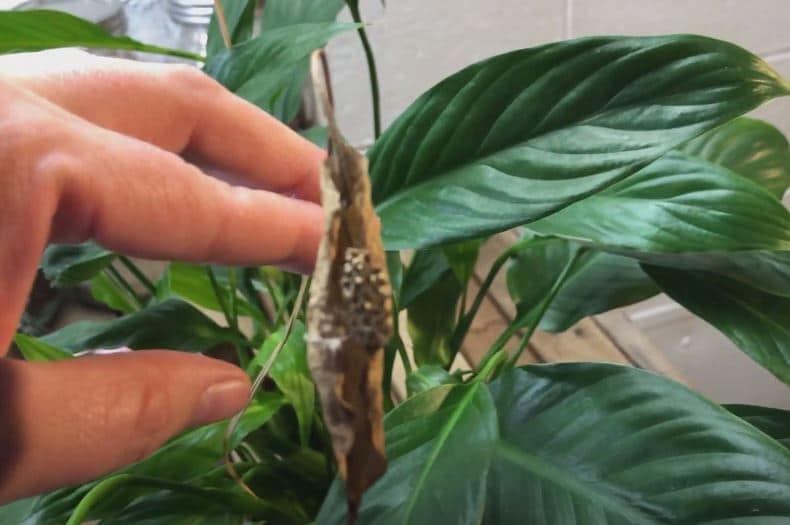
Hydration issues or light problems commonly cause brown tips on peace lily leaves.

Here are the top reasons why your peace lily leaves are turning brown-

Excessive Water can be the reason of your lily flower turning brown.

Peace lily plant that has improper watering and humidity issues and receives an excessive amount of water is unable to acquire the oxygen they require. The roots collect oxygen from the air gaps in the soil, and if the earth becomes too saturated, the roots of your peace lily cannot breathe.

It’s tempting to believe that if oversaturated soil is the issue, all you need to do is waterless regularly, but this may not be the case. Overwatering can also occur if the soil does not drain quickly enough or if the plant is growing in an extremely big container. Peace lilies perform best when they are little root confined rather than grown in an overly huge container.

This is because it is challenging to provide sufficient water to the plant without oversaturating the surrounding soil. The extra soil in a large pot absorbs water and drains slowly, causing the roots to sit in perpetually damp soil.

It’s best to let the top inch of soil dry up between watering routines; however, this isn’t necessarily a good indication. Even if the top inch of soil dries up, the soil beneath it may remain moist.

Excessive Water can make your peace lily flowers go brown

Too Much Bright Light can be a reason that your peace lily flowers turn brown.

All plants require light to some level for photosynthesis, but the most common cause of a peace lily flowers turn brown is bright direct sunlight.

This is because peace lilies grow naturally on the rainforest bottom, where the dense forest canopy naturally filters light. When your peace lily is exposed to too much direct sunlight, the plant might be burned, causing the flower to droop and become brown.

As a result, avoid placing your peace lily under a window that gets direct sunlight, especially during the hot afternoon hours so that it blooms.

Instead, position your plant in a pot by the window with some shade or anything else outside to help shade it from the light. If there is nothing outside to shade the plant from direct sunlight, move it a few feet away from the window.

Another issue to consider is the seasonal variation in sunlight patterns.

Too Much Bright Light can make your peace lily leaves go brown

Drainage problems can also cause peace lily leaves to turn brown.

Even if you provide your plant with enough water, if the container has insufficient drainage, the roots are likely to sink in oversaturated soil for far longer than they should and can cause lily flower turning brown.

There are many gorgeous and affordable pots available with no drainage holes, but they aren’t the ideal types.

A container with at least one drainage hole at the bottom is better in the long run.

Even if your pot includes a drainage hole or two, be sure they aren’t clogged. Simply move your finger or a chopstick around the surface of the pot.

Drainage problems can also cause peace lily leaves to turn brown

Lack of humidity is another reason for peace lily flowers to turn brown.

As a tropical rainforest native, the peace lily requires high humidity levels of 50% or more. If your home lacks proper humidity, you’ll see dried-out and crunchy leaf tips, followed by browning blossoms.

So, the remedy is straightforward: increase the humidity in the space surrounding your plant.

  • Regularly mist your peace lily with Purified Water.
  • Set the pot on a shallow tray filled with gravel or stones and water regularly but not too much.
  • Because many plants release water via their leaf, gather other houseplants around your peace lily.

 Lack of humidity is another reason for peace lily leaves to turn brown

Overfertilizing the peace lily may lead to the browning of leaves.

Excessive fertilizer application to a plant might result in a buildup of sodium and other salts in the soil and can be a reason of your flower turning brown. Because peace lilies use relatively little fertilizer, preventing this problem should be simple – but that doesn’t mean it can’t happen.

Watering from the top rather than the bottom can assist remove excess salt from the soil. Few market-available fertilization treatments are also advantageous.

Fertilize once a month with an all-purpose indoor plant which you can buy from any online site, and make sure this occurs during the spring and summer.

Instead of applying full-strength fertilizer, dilute it by half and avoid fertilizing your plants during the fall and winter to fix it.

If you’ve already applied too much fertilizer, remove the plant from its container and remove most of the potting mix too.

Repot with new peace lily soil in the same or a different container so that peace lily blooms.

Overfertilizing the peace lily may lead to the browning of leaves

To best understand your peace lily’s needs and symptoms, you have to look at its natural habitat. In the wild, peace lily grows on the rainforest floor in Central and South America. This means that its ideal growing conditions for blooming include filtered lighting, warm temperatures, humid air, and moderately moist soil.

When those conditions aren’t met in your home, your peace lily will often respond with prematurely browning flowers.

Growing beefsteak tomatoes indoors: guide to grow beefsteak tomato

Growing beefsteak tomatoes indoors: guide to grow beefsteak tomatoes indoors


Nothing beats a juicy, delicious, and from your indoor garden tomato, right? The beefsteak tomato plants produce large, pink, red, or orange tomatoes with primarily red or orange flesh that are deliciously fresh and look great on burgers or sandwiches.

While growing beefsteak tomatoes is similar to growing other varieties, there are a few things to keep in mind if you want to succeed in increasing America’s favorite food.

Know how to grow beefsteak tomatoes indoors

Here you will learn all about how to grow beefsteak tomatoes indoors!

These plants have an unpredictable growth pattern and can produce fruits weighing several pounds. They are late-maturing, large, and need a lot of water, among other things. The beefsteak type has a substantial shape due to a mutation that causes the normally small fruits to swell. Their pumpkin-like ribs easily distinguish them.

It’s no wonder that they’ve become garden and table favorites because they’re abundant in vitamins A and C and have distinct acidic or sweet flavors depending on the variety.

Indoor gardeners regard the “beefsteak tomato” as a distinct species, and several hybrids and traditional varieties are available, offering a wide range of color, flavor, and size possibilities.

Plant seeds half an inch away in a damp peat-based growing medium, cover with plastic or a humidity management mechanism to preserve moisture, and keep warm (70 to 75°F). Once the seeds have germinated, please place them in a sunny location and regularly check the humidity and water in the soil.

Beefsteaks are among the planting beefsteak tomatoes indoors as long as they get enough sunlight and water.

Choosing the Best Beefsteak Tomato Varieties

Colors, sizes, harvest times, and other features differ amongst beefsteak tomato varieties. The same is true for growing tips for cherry tomatoes and all different tomato kinds. It is critical to decide whether to generate a determinate or indeterminate variety.

Indeterminate tomatoes produce plenty of fruit throughout the season on vines that grow indefinitely if not carefully clipped. Determined cultivars are more compact and yield tomatoes in a shorter period of time.

Choosing the Best Tomato Varieties for Beefsteak

Heirloom tomatoes have fewer fruits per plant, are less disease-resistant, and have a shorter shelf life than hybrid tomatoes. They, on the other hand, are tasty and available in a range of colors.

Growing Beefsteak Tomatoes

The first step in your tomato-growing quest is to learn how to cultivate beefsteak tomatoes from seed. Start with tomato seeds for six weeks before planting them outside.

In a seed container filled with a well-drained soilless mix, plant one seed per cup. Plant the seeds about a half-inch deep. Your beefsteak tomato seeds should germinate in six to twelve days.

Maintain a moist but not saturated potting mix until the seeds germinate. After germination, provide adequate water to the plants.

How to Grow Beefsteak Tomatoes Indoors?

Select Good Soil for tomato.

Indoor gardening refers to growing plants in pots or containers. Beefsteak tomatoes have a ferocious appetite. Use potting soil to grow beefsteak tomatoes indoors.

Because the potting mix comprises both organic components and nutrients like phosphate and potassium, before sowing seeds, here are some soil preparation tips:

Use new potting mix in your container at all times; never reuse soil since the previous crop may have bugs or diseases.

Cover the soil with mulch. This loosens the soil and enables better root growth. Beefsteak tomatoes thrives in slightly acidic soil.

Select Good Soil for beefsteak tomatoes


Container Choice for growing beefsteak tomatoes indoors

A single plant requires no more than 1-2 square feet of pot or container.

Herbs should not be grown with beefsteak plants since they will compete for nutrients and moisture.

Inside, fabric grows bags can be utilized. Fabric grows bags are the most affordable alternative. Fabric grows bags are made of a very breathable fabric. They are portable and lightweight.

Container Choice for growing beefsteak tomatoes indoors

Sowing the Seeds for beefsteak tomatoes

At this point, you have two options. You may either plant the seeds or purchase healthy seedlings from a nursery. Place some potting mix in a cup or small container, add a little water to the soil, and scatter the seeds.

Each cup contains one seed. Temperatures between 70- and 80-degrees Fahrenheit are ideal for seed germination. Seeds germinate in 6-12 days and can be transplanted into bigger pots in 6-8 weeks. When the seedling reaches 8 inches in length, it is time to transplant it into a larger pot.

However, you will save eight weeks by using seedlings.

Sowing the Seeds for beefsteak tomatoes

Light requirements for growing beefsteak tomatoes indoors

Under normal conditions, tomato plants require 8 hours of direct sunlight. That is why they are known as sun-loving plants. Because there is no natural light indoors, we will augment it with LED grow lights. Here are some suggestions for LED grow lights:

  • 12 hours of light is good for at least 3-5 weeks during the germination period.
  • Increase the light duration from 14-16 hours during the first 2-3 weeks, then reduce it to 10 hours every day until the plant produces fruits.

Light requirements for growing beefsteak tomatoes indoors

Provide beefsteak tomatoes support.

Tomato plants are unable to survive naturally. They will need help because they can grow to be up to 8 feet tall. Here are some ideas to aid your plants:

  • Insert a wooden ladder-type structure into the pot.
  • Build your own trellis from wood or other materials or purchase one from a shop.

Provide beefsteak tomatoes support

Pollination of beefsteak tomatoes indoors

Fruit production requires pollination. Insects are also essential for pollination, something we lack inside. As a result, the plants must be pollinated manually.

Touch the plant stems lightly when the flowers open to allow pollen to spread. You can also use a cotton swab or Q tip to transfer pollen from blossom to flower.

Pollination of beefsteak tomatoes indoors

 Pruning indoors for beefsteak tomatoes

Trimming too soon and too frequently is harmful to the plant’s health and growth. So, Remove the yellow leaves from the plants since they are only there to eat the glucose.

 Pruning indoors for beefsteak tomatoes

Watering beefsteak tomatoes

Watering beefsteak tomatoes is vital for the growth of beefsteak tomato plants. Keep the soil wet. Fungal infestations will develop from waterlogging the soil. First, check the soil with your finger.

With your finger, feel the soil to determine if it is dry. Only water the plants when they appear to be dry. Here are a few things to remember:

Water well and gently. Plant roots are often located in the container’s bottom. Water will rush out the drainage holes of the pots, and the roots will receive nothing. As a result, when watering the plants, you must be patient.

Water the soil instead of the foliage. Watering the leaves may cause the plants to burn and develop a fungal infestation.

Watering the beefsteak indoors

Keep beefsteak tomato plants disease and pest-free.

This is one of the most significant benefits of growing tomatoes inside. There is significantly less risk of sickness or insect infestation. As previously stated, replace the soil in the pot every time you cultivate a new crop.

 Keep beefsteak tomato plants disease and pest-free.

Nutrient Availability for beefsteak tomatoes

You will need to replace the soil after it has run out of nutrients. Add some all-purpose vegetable or tomato feed to help the plant grow.

Nutrient Availability for beefsteak tomatoes


Tips to take care of beefsteak tomato.

Here are some tips to take care of beefsteak tomatoes:

  • Choose a sunny spot: Beefsteak tomatoes need at least six hours of sunlight a day to grow and ripen properly. Choose a spot in your garden that gets full sun.
  • Prepare the soil: Beefsteak tomatoes grow best in well-drained soil that is rich in organic matter. Add compost or aged manure to your soil before planting.
  • Plant at the right time: Beefsteak tomatoes should be planted after the danger of frost has passed and when the soil has warmed up to at least 60 degrees Fahrenheit.
  • Water regularly: Beefsteak tomatoes need regular watering, especially during hot, dry weather. Water deeply, once or twice a week, rather than frequent shallow watering.
  • Support the plant: Beefsteak tomatoes are heavy plants that need support to keep them from falling over. Use stakes, cages, or trellises to support the plant as it grows.
  • Pruning: To encourage strong growth and better fruit production, remove the suckers that grow between the main stem and the branches. Also, remove the bottom leaves as the plant grows taller to promote air circulation.
  • Fertilize regularly: Use a balanced fertilizer or compost to feed your beefsteak tomato plant every two to three weeks throughout the growing season.
  • Watch for pests and diseases: Keep an eye out for pests like aphids and diseases like tomato blight. If you spot any problems, treat them immediately to prevent them from spreading.

By following these tips, you can help ensure that your beefsteak tomato plants grow healthy and produce a bountiful harvest of delicious fruit.

To be sure, beefsteak tomatoes are a little more challenging to grow than a few other varieties. They are, nevertheless, manageable for home gardens. Learn how to produce beefsteak tomatoes so you may have the knowledge and confidence to grow your delicious tomatoes.

Why is my elephant ear bulb not growing? Tips to grow elephant ear bulbs

Why are my elephant ear bulbs not growing?

With its vast, broad leaves, the elephant ear bulbs are a one-of-a-kind decorative plant. However, it is susceptible to various growth issues, as are other plants. Sometimes the elephant’s ear bulbs don’t grow. There are no bugs or illnesses harming it; it is just not growing as it should.

Other times, the elephant ear plant’s leaves begin to droop, turn yellow, or develop yellow or brown patches. The decorative plant is essentially unsightly without healthy leaves. So, how would you cope with all of these elephant ear plant growth issues?

Read along to know why your elephant ear bulb is not growing-

Reasons why the Elephant Ear Plant doesn’t grow-

Your elephant ear bulbs will eventually exhibit indications of suffering and will not look good overall. It’s tough to determine the particular problem with this ornamental plant. There are no visible signs of a pest infestation on bulb. There are no signs of a fungal infestation, such as holes in the leaves or stains on the foliage. Here are some instances of these signs:

  • The leaves of the bulb seem stunted and do not grow at a regular rate.
  • The leaves and stems of bulb lack that vibrant color. They instead seem pale.
  • Deformed leaves may also develop and appear on bulb to worsen with time.
  • The stems are wilting and collapsing as a result of the weight of the leaves.
  • Root spots do not diminish over time, even after the plant has been fed.

You must carefully inspect the leaves, stems, and roots with nothing to rely on but the elephant ear plant’s general attitude. Each of the symptoms described above might suggest an illness or poor growing conditions.

Stunted or non-growing leaves indicate nitrogen deficiency in the soil. The essential NPK nutrients, in particular.

Pale leaves indicate a shortage of micronutrients in the soil and suggest that the plant requires more nitrogen. Once every ten days, apply a balanced 10-10-10 fertilizer and watch your elephant ear plant reclaim its former beauty.

These seven minerals, which include iron, zinc, boron, manganese, and copper, are essential for the plant’s overall health. Use plant food supplements in little doses to see if your symptoms improve.

If the leaves are deformed, it might signify a spider mite infestation. The deformation is produced by tiny bugs obstructing the nutrition routes that provide the leaves with moisture and food. Spray the leaves with neem oil or brush them with a cloth soaked in rubbing alcohol to eliminate the pests.

  • Remove any deformed leaves to promote new, healthy growth. Wilting and drooping stems are signs of drought stress. The plant needs more water.
  • Water the soil as soon as possible and regularly.

On the other hand, spots on the roots may indicate that the soil is damp. Root rot is caused by wet soil. Allow the top 2 inches of soil to dry between your daily watering routine.

The Elephant Ear bulb is Not Growing?

Another typical elephant ear bulb growth issue is that the plant suddenly stops growing. The entire bulb plant looks to be frozen in time.

This problem has various reasons:

  • Excessive sun exposure
  • Overwatering
  • Under-watering
  • You placed the pot in an area with insufficient light.
  • That your keeping them too cold.

They are all indications of temperature stress and low humidity levels. Too many elements may compound the situation that the bulbs could have been damaged beyond repair, and you must consider both the environment around these bulbs and the amount of water you provide.

Why your elephant ear bulb not growing?

How to Make Elephant Ears Grow?

Removing the elephant ear from the window side or direct sunlight can help elephant ears grow. Make a curtain to block the light, which ensure shade and reduce the amount of UV radiation the elephant ears receives if the only place for the pot is near a window.

  • Water less often and allow the soil to dry between the routine of elephant ears. Another reason for soggy soil is using clay soil or a container with few or no drainage holes.
  • Water the elephant ear plant regularly, as lack of water causes it to grow slowly.
  • Place the plant in an area with temperatures ranging from 85°F during the day to 60°F at night. The plant will stop growing if the temperature goes below 60 degrees Fahrenheit.

Why Elephant Ear Bulb Plant Leaves Drooping?

The elephant ear plant’s leaves droop when things aren’t going well, such as when it’s stressed. The plant informs you that you need to act quickly and correct things surrounding the pot. The plant may perish if no aid arrives after the leaves wither and drop. So, what’s the source of all of this?

This tension and leaf drooping are mainly caused by unfavorable environmental conditions. There are examples of inadequate irrigation, bugs, sickness, and insufficient or excessive lighting.

Why Elephant Ear Bulb Plant Leaves Drooping

  • Look for signs of moisture in the soil. You may be overwatering the plant if the soil is humid despite the fact that you last watered it few days ago.
  • Drooping leaves may also be caused by under-watering or dry soil; wait until the soil dries out before
  • watering again or remove the plant and repot it in fresh soil. Container soil dries up faster than garden soil.
  • Lower levels of humidity also cause the leaves to droop. This problem is usually resolved by misting twice a week.

Why are Elephant Bulbs Plant Leaves turning yellow?

It is a fact that many people would not maintain the plant in their offices or home spaces if it did not have such beautiful leaves. When the elephant ear plants begin to turn yellow, you realize you have a problem and must act quickly before the plant deteriorates further.

This could be caused by the following:

  • Inadequate moisture, either too much or too little.
  • Constantly dry air surrounding the plant.
  • Excessive or insufficient light.
  • Pests can induce the yellowing of the leaves.

Why are Elephant Ear Bulb Plant Leaves turning yellow?

This is what complicates matters with this plant- there is never a single cause or instance. When it comes to tackling a single problem, you’ll have to go through a long list of possible causes and try out many solutions.

Here are some possible treatments for yellowing leaves.

  • Raise the humidity around the plant by placing a tray filled with water and stones beneath it.
  • Spider mites feed on the juices out of the leaves, turning them yellow. You can use neem oil spray to treat insect infestations. It is a natural pesticide that has no negative impact on the environment or on humans or pets that come into contact with it.

Brown Spots on your Elephant Ear Bulbs

The green leaves of the elephant ear plant may have brown blotches. These patches are an indication of a fungal infection, and you should not ignore them.

Brown Spots on your Elephant Ear Plant Leaves

The most prevalent cause of brown blotches on elephant ear plant leaves rust. This disease infects stressed plants in environments with high temperatures, insufficient sunlight, or high humidity. To solve the problem, work on each issue separately.

  • Maintain a temperature in the room that does not exceed 80 degrees Fahrenheit during the day and does not drop below 55 degrees Fahrenheit at night.
  • Place the plant in an area with enough light. To prevent direct sunlight, place the plant near a north-facing window.
  • Control the humidity surrounding the plant and hold off on misting or turning off the humidifier for a few days until the humidity levels have stabilized.

To sum up, there are a few problems with growing elephant ear bulbs, but it is all worth it once fixed. The bloom of the elephant ear bulb will leave everyone stunned! So, grow elephant ears now.