Container Gardening Basics and Effective Container Gardening Tips to get started

Container Gardening Basics and Effective Container Gardening Tips to get started

Container gardening is a great way to encourage your green thumb to flourish. Without an actual yard, you can start growing your plants such as ornamentals, vegetables, fruit trees, and herbs. This post has the most reliable and important information on container gardening basics that you ought to know to have the best gardening experience. In the coming sections, you will get to know about the benefits of container gardening, what kind of container to use, potting soil, and environmental factors that you need to consider before you begin. Beware! If done incorrectly, there’ll be problems with container gardening, such as losing plants, etc.

Benefits of Container Gardening And How to get started:

Starting your very first container garden is not a difficult thing to do. There are many types of plants that are suited for container gardening thus you have a wide variety of choices on which plants you can grow. Aside from being easy, there are many benefits to why you ought to start container gardening.

  • Fewer risks to soil-borne diseases. Container gardening ensures that your soil does not have any diseases that can affect the growth of plants thus you ensure that your plants will grow strong and healthy. Also, since the plants are separate in their exclusive containers, it is least likely that one diseased plant will contaminate other plants.
  • Easily control weed problems. One of the best things about container gardening is that you can easily remove the weeds from your plants. Moreover, weeds cannot easily take over pots unless you explicitly introduce them thus you can assure that your pots will remain weed-free.
  • Allows you to control the moisture, temperature, and sunlight. Growing a container garden gives you the advantage to control moisture, temperature, and sunlight. For instance, you can move your plants from a shaded area to full sun or you can put a planter coaster underneath the pot to collect water so that the plants have enough moisture to sustain them for a few days.
  • It is easy and can be done by anyone. Don’t have any experience in growing plants? Then container gardening is for you. It is a great place to start your love for gardening.
  • It is the most economical form of gardening. The thing about container gardening is that it is very economical. You don’t need to buy specialized pots because you can use virtually anything for a container such as old buckets, tin cans, car tires, empty cans, and bottled water. All you need to do is to put draining holes at the bottom and fill them with soil to start growing your plants. Aside from being able to use different planters, this type of gardening is also a space-saver. You can do gardening in even the smallest space that you have.
  • Liberate the geography in gardening. Even if you live in the heart of Alaska, you can still grow a cactus garden in your container thus giving you the freedom to liberate geography in gardening. The thing is that you are not limited to growing plants according to what your geography says you can.
  • Influence kids to start gardening. Gardening is a great skill children should learn and the best way to influence kids is to have them start a container garden. Your kids will never look at peas and carrots with disinterest if you have them grow their food inside containers.
  • Helps you outfox garden critters and pests. If your plants are being ravaged by insects and other animals, then container gardening is a great way to outfox them. All you need to do is to move the containers to a place where animals cannot reach them.

There are many benefits why you ought to start your container garden today and above are just some of the basic benefits that you can get from starting your little garden out of pots. Read on to know about how to start your container gardening journey.

1. Choosing the Right Container

Container gardening would not be called such if containers weren’t used. Anything that can hold soil and has drainage holes can be used in container gardening. Containers should also provide adequate space for the roots to grow to give the plants vibrant growth. This section will cover the basics of the different types of containers that you should use in container gardening.

Choices for Container Materials

You can use many things as planters from different kinds of large containers to small ones based on the requirement and are not only restricted to terra cotta pots. The other materials that you can use to grow plants are as follows:

  • Artificial stone pots (Hypertufa): This type of planter is very lightweight and it provides additional beauty to your garden space.
  • Cast cement: You can make your container by using cast cement. Make sure to use an attractive mold to create the cast cement planter.
  • Metal: Metal planters add an attractive design to any container garden. The shiny metal planters make them very posh and clean.
  • Fiberglass: Planters made from fiberglass are lightweight and durable. They can withstand the elements thus they last for a long time.
  • Nylon stockings: Nylon stockings take shape of whatever shape you want them to conform with. Planters made from nylon stockings are great for making hanging container gardens which is very crucial if you want to utilize the vertical spaces in your area.
  • Peat pots: Pots made from peat moss add a great addition to your container garden. They are very attractive and also natural. The peat also slowly decomposes which provides nutrients to plants.
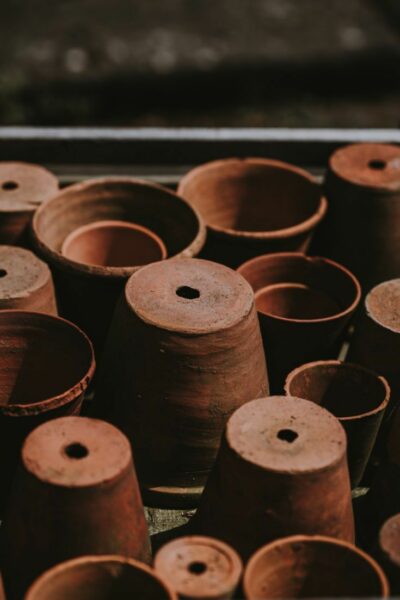
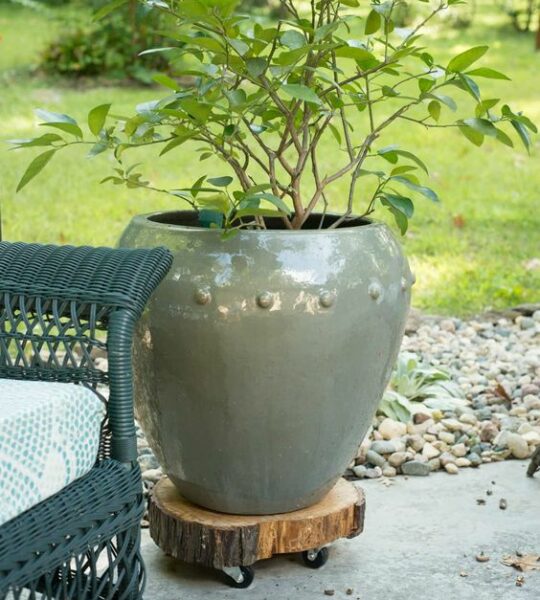
  • Ceramics and pottery: Ceramics and potteries are great container planters that add beauty to your container gardening. They come in different shapes, colors, sizes, and designs that will fit the décor of your home.
  • Stoneware: Stoneware planters add rustic elegance to your container garden as they look very natural. Unfortunately, stoneware planters are quite heavy thus avoid picking big planters if you plan to move your plants from one place to the other.
  • Wood: Wood planters can also be used to grow different plants. Examples of wood planters include boxes, tree bark, or hollowed stumps. This type of planter also decomposes slowly thus releasing the nutrients for the plant’s uptake.
  • Recycled materials: You don’t need to spend a lot of money to start your very own container garden. You can use old boots, wash tubs, furniture, empty bottles, tin cans, wagons, toys, and many others. If you use recycled containers, make sure that you clean them first especially if they used to contain household items like vinegar, sugar, or salt.

Things to Consider When Choosing Containers:

The type of material that you choose for your container gardening. Below are the things that you need to consider when choosing planters for your container gardening.

Is the material porous?

Is the material porous

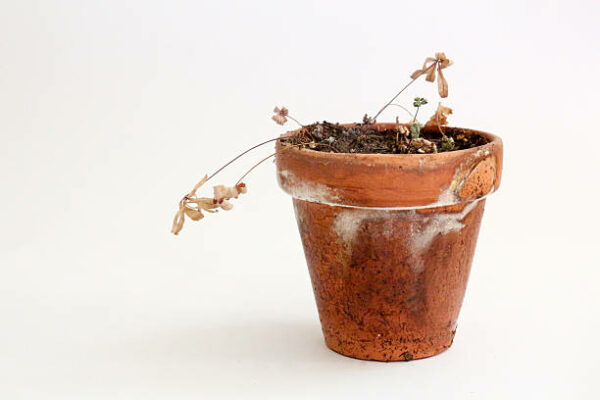
The porosity of the planter will greatly affect the ability of the container to lose water thus affecting the health of your plants. If the material is made from clay, terra cotta, or peat pots, they are very porous thus they tend to lose water fast. If you opt for this container, line it with plastic to make it resistant to water loss.

Is the pot heavy or difficult to move?

Is the pot heavy or difficult to move

The advantage of container gardening is that you have the benefit to move the pots from one place to the other depending upon the requirements of the plants and cleaning purposes. Make sure that you choose planters that are not too heavy.

Will you have enough space in your house for a container garden to grow?

If you don’t have enough space in your house to plant a garden, it should not discourage growing a container garden. Instead, you can opt for a hanging container garden by using hanging baskets, window planters, or a mailbox. If you opt for these planters, make sure that you water them more often as they tend to dry out faster.

Will the materials fluctuate in soil temperature and ruin the plant’s health?

Soil temperature is the most important element that can affect your container garden. For instance, if you use a metal container, the temperature can fluctuate rapidly within the day. On the other hand, choosing planters with dark colors tend to absorb more heat which can kill the roots.

Will the material rot through time?

Will the material rot through time

Planters like peat moss and wood will rot over time. If you don’t want the material to rot fast, buy treated lumber. However, you need to be cautious when using treated lumber because it might contain harmful chemicals that will be absorbed by the plant.

How much will your planters cost?

You might need a lot of planters to start your container garden. Planters do not come cheap even if you decide to buy them in bulk. If you don’t have enough money to spend on planters, you can use recycled containers and decorate them according to the style and look that you want.

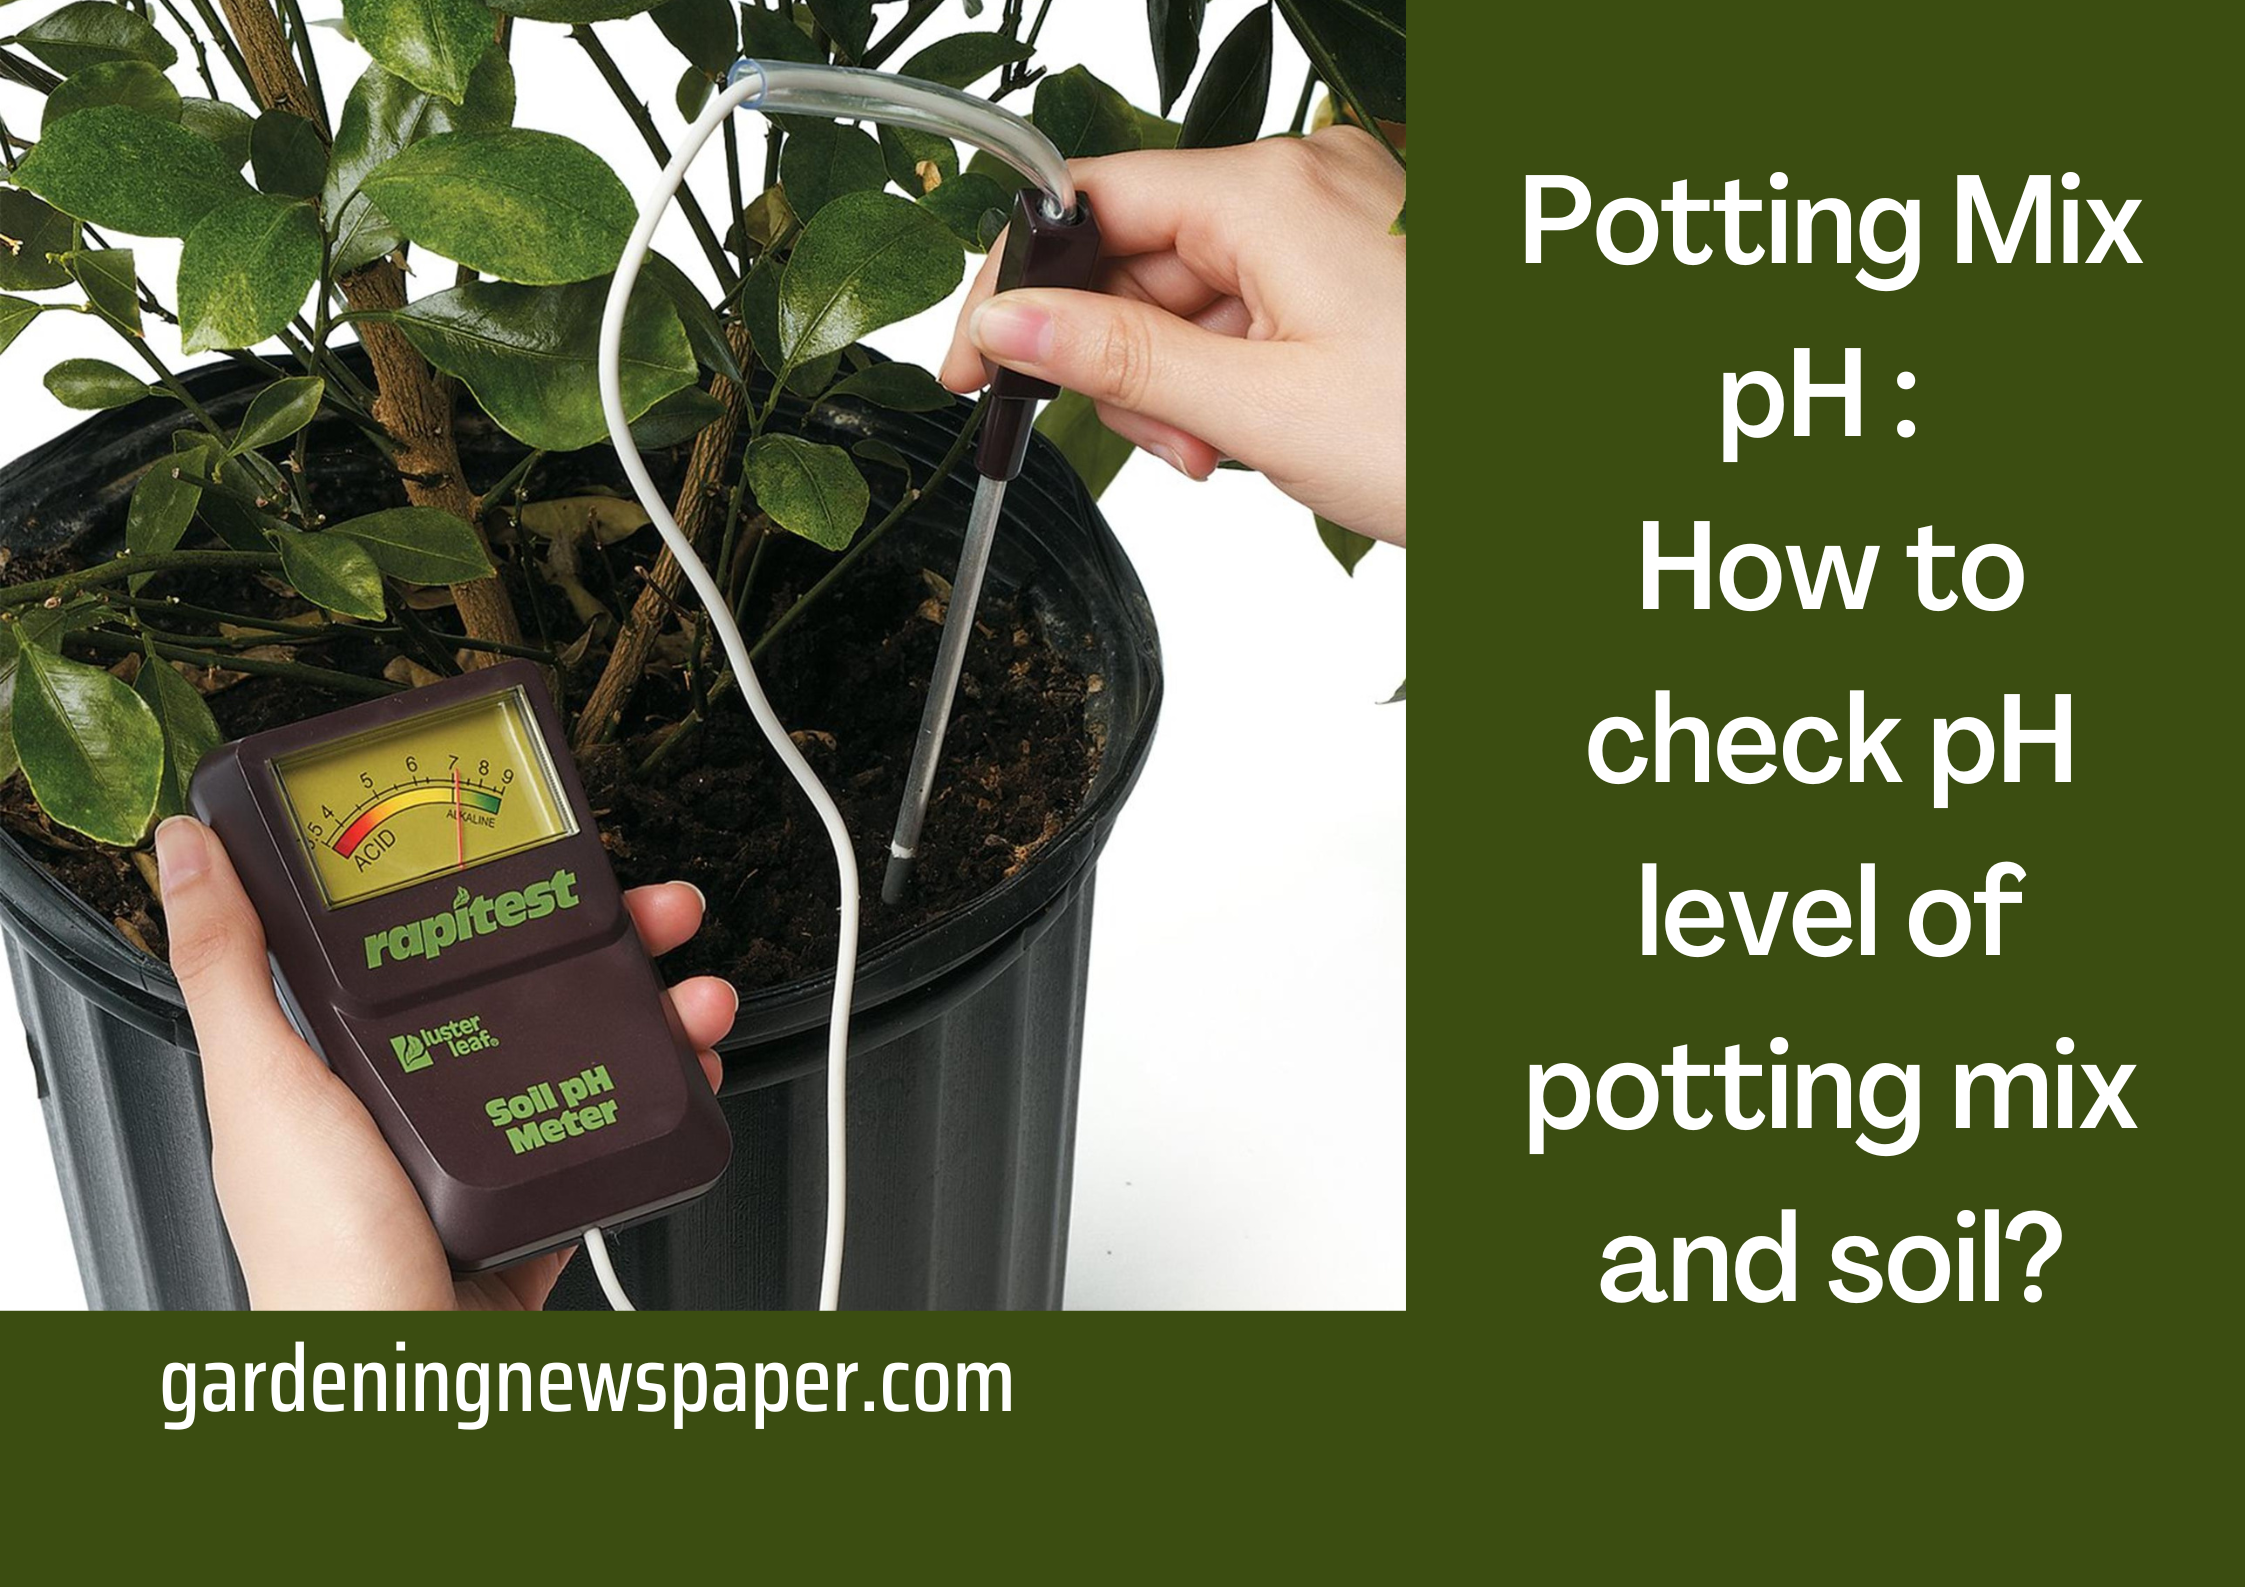
2. Potting Soil and Soil Mixes for Container Gardening

Well-prepared garden soil is crucial for growing plants. However, using ordinary soil is not appropriate for container gardening. Soils for container gardening should be well-draining and aerated but still retain enough moisture for the plants to grow.

  • Various recipes of postings mixes and soils are used in container gardening to ensure proper drainage as well as aeration.
    • Container soils are usually made from peat, bark, vermiculite, coir fiber, and compost.
    • Other materials for the potting soil include perlite and sand.
    • These soils are well draining but they also provide proper aeration to the soil.
  • When filling the pot with the soil do not fill the pot until the top. Make sure that you leave a one-inch space between the top and rim to make water easier and also to prevent the water from running over the edge.
  • Now if you are using a fairly large container, do not fill it with soil otherwise you will have to spend a lot of money.
    • To reduce the cost, you need to add filler at the bottom which includes crushed aluminum cans, packing peanuts, and crushed plastic milk jugs.
    • You can also use organic fillers but they decompose through time.

3. Environmental factors that affect your plants

Environmental factors that affect your plants

Container gardening allows you to control the microenvironment of your garden. Several environmental factors will affect your container garden.
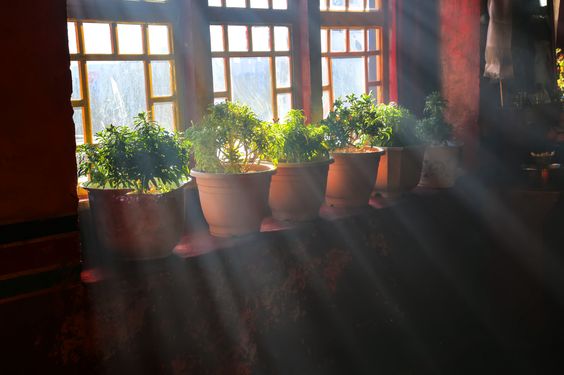
Light

Light and temperature are very important factors that can help you successfully grow plants in containers. The best thing about container gardening is that it offers convenience and portability. If you live in temperate regions, the light conditions change so make sure that you move your plants to get enough sunlight and avoid high temperatures.

Wind

The wind is considered a seasonal problem and if your area suffers from strong winds during the summer, the containers may tumble over especially if they are small. To prevent the wind from toppling over the pots, combine the weight of the container and soil with the upper portions of the plant for stable support. If your plants are blooming or have big leaves, relocate them if there is a strong wind.

Heat Absorption

Too much heat can kill your plants. However, it is important to take note that the type of material of your pot can affect greatly the heat absorption of your plant. If you only have dark-colored plants, you can type Mediterranean plants, herbs, and succulents that can withstand high heat temperatures.

Seasonal Changes

Seasons can affect the growth of your container plants. The best thing about container gardening is that the changes in the season do not have a big impact on the plants as you can relocate your plants to different places in your house where they will be safe.

Do you think keeping our basics strong is extremely important to do anything? Well, in the case of container gardening, we hope this guide with everything basic yet important from picking the right kind of container to understanding how various environmental factors affect your plants, could help you with starting your container gardening journey.

Potting Soil and Potting Mix pH – How to check pH level of potting mix and soil?

Potting Soil and Potting Mix pH – How to check pH level of Potting Soil?

Potting mix PH - How to check pH level of Potting Soil?

Usually, you do not have to worry about the pH balance of your potting mix and that’s a good thing because unnecessarily messing up with the ph balance may affect the overall health of your plant in a bad way or it may even kill the plant. In this article, you are going to learn about the potting mix, the pH of the potting mix, how to check the pH of the soil at home, how to fix the soil’s pH, etc. Happy reading and happy gardening!

Potting Mix Ingredients – What is pH?

Plants are grown in potting soil, also known as potting mix, which is a mixture of materials other than actual soil. Potting soil is the best-growing medium for plants in containers, whether you’re trying to grow some seeds for repotting, using plant cuttings, etc. The most common potting mix ingredients are perlite, peat moss, and compost in a 1:1:2 ratio.

So, what is pH? In layman’s terms, the pH level determines the acidity of potting mix. The pH of potting mix determines the absorption of nutrients by the plants. Sounds too scientific? In the coming sections, you will be able to understand the signs of bad pH and how to fix the levels using different techniques.

0 Most Acidic, 7 Neutral, 14 Most Basic

The plant thrives when pH is between 5.0 and 8.5. If the ph is beyond this range in either direction, the problem occurs. When pH values are lower than 5.0, manganese & aluminum can become toxic to plants. Plants get excess of these liberated nutrients and cannot process them, leading to plant death.

Signs of low pH

  • Yellow spots lead to browning and leaf death.
  • Wilting leaves
  • Stunted growth
  • Blighted leaf tips
  • Yellowing of foliage
  • Other leaf discoloration
  • Poor stem development.

WARNING: Please understand that the above symptoms may also be due to other factors like nutritional deficiency, lack of light, improper watering, etc. So before you start working on identifying and fixing the Ph, do check these factors.

So here’s the top advice, do not worry about the pH balance of your potting mix unless everything else fails.

What causes Low pH?

Several factors drop the ph level of your potting mix and render it acidic. The following are some of the most common factors to consider:

  • Rainfall: Naturally acidic but it has less effect in urban areas so consider yourself lucky if you live in a city. But this does not just happen in one rainy season.
  • Chemical Fertilizers: Especially nitrogen fertilizers that contain ammonia. The biggest culprit.
  • Organic matter: Yes, that’s right, the decomposition of organic matter makes the soil acidic. Always use well-decomposed manures.
  • Treated Water: Treated water may increase the acidity of your potting mix.

How to check pH level?

How to check pH level

You can easily check your soil pH by investing in an easily available device called a pH meter, it’s not very expensive and can save you from a lot of hassles. You can monthly check your potting mix’s ph level if the aforementioned factors are verified by you.

Alkaline and Acidic Potting Soil Recipe – How to fix pH?

In my experience, a good potting mix, timely addition of macro and micronutrients, proper watering, and light can save you from pH-related troubles. But if despite doing everything right your plants are not thriving, please check your potting mix pH and fix it. So how do we FIX it?? There are different methods to make your soil acidic or alkaline based on the needs of the plants that you grow. Interesting isn’t it?

To make the potting soil more alkaline:

To make the potting soil more alkaline

Well, you certainly do not want to make your beautiful Lilacs, exotic brussels sprouts, asparagus, etc unhappy, do you? So to treat these alkaline soil loving plants right, here are some ways to make the soil more alkaline.

1. Mixing Lime: Adding lime to the soil is the most common way to make the soil alkaline. You can add the usual limestone powder or dolomite limestone to the soil and it takes around two months to show the effects completely.

2. Ash of burnt wood: The wood ash can also raise the pH levels of the soil. Wood ash contains large amounts of calcium carbonate and little amounts of Phophoous and potassium which are also important for plants.

3. Powdered Shells: By shells we mean eggs shells, clam shells, oysters, etc. Powder these shells and add the powder to the soil and the pH of the soil is raised!

To make the potting soil more acidic:

To make the potting soil more acidic

There may be two cases where you need to keep your soil more acidic. One, when your soil is excessively alkaline or two, your plants prefer acidic soil. This section will tell you about different ways to keep your soil more acidic. Let’s dive in and learn!

1. Aluminium Sulphate: Using Aluminium sulfate can make your soil more acidic. Use 0.6 pounds of Aluminium Sulphate for 10 sq.ft of soil.

2. Coffee Grounds: Well, coffee grounds work to acidify the soil drastically only when the coffee is full of its contents intact. In other words, used coffee grounds will give very minimal results, therefore, you can use them when there is no need for high levels of acidic peat but your plants call for a little fix in the pH.

3. Peat Moss: Although using peat moss to acidify the soil is a slow process, it is definitely an effective one. Considering the size of the plant, layer the soil with peat moss for about 2 to 3 inches to gradually acidify the soil.

4. Fertilizers with Nitrogen: Using fertilizers with nitrogen as a base is the most effective way to acidify the soil dramatically due to the amount of Ammonium present in them. Since the aftermath of using these fertilizers is drastic, we recommend you go to the nearest gardener or a nursery for the best proportions.

This way you can make the blueberries, magnolias, etc in your garden happy!

Takeaways to maintain the pH of the soil

  • Always use well-decomposed cow manure, vermicompost, and compost. This resists changes to potting mix PH.
  • If you live in areas where rainy seasons are continuous and longer, provide a transparent/translucent cover/shade to your Terrace garden so that they get sufficient light but are protected from excess rainwater.
  • Add Lime. If you detect a low ph, adding lime to your mix helps elevate the ph levels. Loosen the top mix by lightly hoeing for about 4-6 inches and mix the lime powder. Start adding in small quantities first and retake the reading after 3-4 days.
  • When your soil pH level is higher that means it’s more alkaline. Sulfur helps in bringing down the pH level. Add small amounts of sulfur since a larger quantity may kill the plant.

We hope this tiny crash course about the potting mix, potting soil pH, and the techniques you can use to balance the pH levels could help you understand the basics. However, we would suggest you consult the nearest nursery directly for further exploration of the topic if you experience it as a major issue in your garden.

How to rejuvenate old garden soil – While repotting, Old potting mix and more

Rejuvenating potting mix – How to rejuvenate old garden soil

A potting mix will be depleted of nutrients over time, this is a reality that most gardeners don’t realize until their plants stop growing or show poor signs of growth.

But why does potting mix get depleted of nutrients over time?

  • Leeching of nutrients through drainage and continuous rains.
  • Slow release of organic matter through drainage.
  • Plant’s growth, age, and root system.
  • Heavy feeder plants

To understand how plants deplete the potting mix, let’s understand that plants are:

  • Light feeders
  • Medium feeders
  • Heavy feeders

Consumer in place of feeder for easy of understanding that plants that are are heavy consumers deplete the potting mix of nutrients faster than light consumers.

There are 3 ways you can keep your potting mix fertile.

Top up method – How to add nutrients to old potting soil

Just like a prepaid mobile recharge to keep the phone services running, the top-up is probably one of the best methods to keep your potting mix full of nutrients and fertile. How to do that:

  • Prepare a uniform mix of the following items in the given proportions:
    • 500 grams vermicompost
    • 500 grams of cow manure powder
    • 100 grams neem cake powder
    • 100 grams of mustard cake powder
    • 100 grams bone meal powder (only for acidic potting mix)
    • OPTIONAL: 100 grams of wood ash
    • OPTIONAL: Handful of perlite, it won’t hurt to add a bit of drainage and aeration but it is not necessary.
    • OPTIONAL: Handful of cocopeat if your plant needs to retain more water.
  • When you are plant is due for watering, spread a 1-2 inch layer of this mix on the surface of potting mix in your container.
  • Water slowly first only so that the top mix is wet. After you finish watering all containers with this addition. Then water again from the first container but this time do deep watering till the water starts draining out. This is not necessary to do but in my experience, I have noticed that the first round of water settles the mix well on the surface so that when you water again, it gets distributed uniformly.
  • This method works great for perennials and fruit trees.
  • It takes anywhere between a fortnight or month for organic fertilizers to break down and start providing nutrients to plants therefore this is a great slow-release feeding method.
  • This method also helps in mimicking the natural ecosystem in forests where layers of organic matter on the surface are formed over years, proving home to helpful fungi, bacteria, and food for the plant.

Rejuvenate while repotting

When your plant outgrows your container or if the container is broken or when your plant is struggling for space to grow then it is time to repot your plant.

Repotting is a great opportunity to make up for the loss of nutrients in the soil.

There are two ways to re-pot:

  • Repotting with the entire pot ball of the plant: In this method, you extract the plant with the entire mix that has formed the shape of the container over time. This is usually done when you did not expect the plant to outgrow the pot so fast.
    • Make sure the plant is not watered for a day or two.
    • Extract the plant gently by tapping the sides and loosening the mix.
    • Fill the new container with the fresh potting mix, press it to clear air pockets
    • Put the full ball so that the surface of the plant matches the surface of the new container.
    • Fill potting mix across all sides pressing firmly.
    • Water thoroughly.
    • Keep in partial shade for a day or two.
  • Repotting with root pruning and trimming: In this method as the name suggests, you prune the excess roots (mostly the thin fiber-like from the sides) from the plant.
    • The steps are similar to the aforementioned but once the plant is extracted, gently dust off the potting mix from all sides to expose thin fibrous roots.
    • Then using a sharp sterilized scissor trim the roots. To reduce the size of the ball.
    • Don’t do it excessively unless you plan to make a bonsai out of the existing plant.
      If roots are outgrowing the old container from the bottom, you may chop them off too.
    • Get rid of the clay soil as much as possible.
    • Now prepare a liquid mix of 5ml liquid Humic acid + 1 ml of liquid seaweed extract in 1 to 1.5 liter of water and drench the plant after you finish adding the potting mix. This will help the plant recover from the shock, promote faster root growth, and also promotes microbial activity in the mix.

Rejuvenate old potting mix – Rejuvenating old potting soil

Potting mix is a precious commodity in your Terrace garden. When you have a lot of plants this may certainly add to your expenses unless you are making your compost, getting cow manure for free. But whether or not you have a zero-budget garden, it is a good idea to reuse old potting mix after rejuvenating it. But let me tell you that this is a tedious process although the result is rewarding.

How to rejuvenate old potting mix

Before we talk about rejuvenating potting mix, let’s understand how to choose a potting mix for reuse:

  • If your plant suffered through bacterial or fungi infection or was affected by insects in some way, then I would not recommend it for reuse. However you still want to use it, you may have to use it by worm composting[7] according to research at Cornell University (NY USA)
  • Don’t reuse potting mix if you have grown heavy feeders last year. Such potting mix has a higher level of nutrition depletion.
  • Check for Ph levels
  • This works great for vegetables and kitchen gardens.

How to rejuvenate old potting mix: Here is the step-by-step way to rejuvenate your old potting mix:

  • You would need a large plastic sheet, a large container with drainage holes, a trowel, and a rake if possible. Large plastic bags.
  • Spread your mix on the plastic sheet, a rake comes in handy here. Remove pieces of roots any unwanted stones etc. Loosen any clumps that may have formed.
  • Wash your mix: Take a large barrel with drainage holes, covered with a plastic net. Fill it with soil and saturate it with water.
  • Once the water stops draining, pour the potting mix back onto a plastic sheet, spread it, and leave it in the sun till fully dry and fluffy
  • 50/50: Once the mix is dried, take an equal quantity of the fresh potting mix and mix them both.
  • OPTIONAL: To adjust Ph add Neem cake or bone meal powder or lime.
    Put this mix in bags and leave them in dark & dry storage for about 2 weeks to cure and brew.
  • That’s it your rejuvenated potting mix is ready.
  • When you use it to plant, don’t forget to add the Humic + Seaweed mix mentioned while repotting.
  • You may do this process 2 times for your old mix and in some cases maybe 3. After that, your mix loses its ability to recharge itself.

Is potting mix same as soil? Ingredients of potting mix

Is potting mix same as soil? Ingredients of potting mix

When you refer to the soil in gardening it is often a confusion between a potting mix and gardening soil. So what is a potting mix and why it is not soil and it should not be called so?

Plants grow perfectly well in healthy, well-amended garden soil so why can’t we use the same soil in our containers?

  • One reason is drainage, on the ground in a garden bed gravity acts on the soil from deep underground, allowing excess water to drain down and away from plants’ roots. But in a container, the force of gravity can only pull water to the bottom of the container, where it may or may not find a drain hole to escape.
  • At the same time, water is also drawn upward and is held in the soil by capillary action – the same force that pulls water slightly up the straw as it sits in a cup of water. (Remember ground clearance characteristic of a good container?) And the thinner the straw, the higher the water is pulled.
  • Similarly, water gets pulled upward into the pores of soil – particularly in the tiny pores of our clay-heavy soils – where it’s held. So even with a good drain hole, some of the water just won’t be able to escape in a container filled with garden soil. And too much water in the soil for too long can cut off air circulation around the roots, which can stress or even kill a plant.
  • Another reason is contamination of soil by chemicals, sewage, chemical fertilizers, and pesticides. To understand why a potting mix over garden soil is preferable, understand what a potting mix is.

Potting mix

Like soil, potting mix provides support & nutrition for plants but it is not soil. It’s a growth medium formulated specifically to help plants live happily in pots forming a comfortable ecosystem to support their growth.

Instead of garden soil, commercial potting mixes contain a combination of peat moss or coco peat, composted material like vermicompost, tree bark, cow manure, perlite, and vermiculite – and sometimes a few other components, depending on the mix.

Because of these ingredients, a good potting mix holds just the right amount of moisture while letting the excess drain away easily. It also maintains an airy, “fluffy” structure whether wet or dry. Potting mix just makes container life a lot easier for plants.

Soil less potting mix

In layman’s terms, soil-less potting mix (media) is something that does not have dirt/garden soil/mitti as an ingredient.

Advantages of soil-less potting mix over the soil- based

  • Planters with mixes weigh 50-70% lighter than traditional mixes.
  • Plants grow better because its fluffy and loose nature.
  • Roots grow better and faster as they have more breathing space.
  • Potting mix encourages moisture retention and excess water drainage, roots of the plant breath better.
  • Adding periodic manuring or organic additives like bone meal, mustard cake, neem cake, etc. is easy and efficient. You rarely need hoeing. This can mimic the surface of the soil in the forest thus help build a great ecosystem for the plant to grow.
  • Goes without saying that this mix holds nutrition longer than regular soil-based mixed.
  • To some extent, you can be sure that your mix will have lesser fungal, pest, or insect infestation as normal garden soil/dirt may be contaminated.
  • Re-potting becomes easier and efficient.
  • Removal of weed is easier.

Ingredients of potting mix

There are no rules when it comes to creating a potting mix but certain organic ingredients have been in use for such a long time in gardening for their obvious benefits. Let’s understand why I chose these organic ingredients for my potting mix recipe

1. Vermicompost

Vermicompost (vermicompost, vermiculture) is the product of the decomposition process using various species of worms, usually red wigglers, white worms, and other earthworms, to create a mixture of decomposing vegetable or food waste, bedding materials, and vermicast (worm poop).

  • Vermicompost is a great source of organic carbon and other necessary nutrients for plants.
  • You can easily buy vermicompost these days from your local garden store or nursery.
  • You may also use garden compost or homemade compost as well. Homemade compost is a great way to reduce kitchen waste.

2. Cow manure

  • For decades cow manure (gobar khad in Hindi) has been used extensively in Indian farming methods and gardening because of its ease of availability.
  • Cow manure is made up of digested grass and grain. Cow dung is high in organic materials and rich in nutrients. It contains about 3% nitrogen, 2% phosphorus, and 1% potassium (3-2-1 NPK).
  • Cow manure also contains high levels of ammonia and potentially dangerous pathogens. Therefore it must be aged or composted before its use as cow manure fertilizer.
  • Cow manure is an economic and easily available source of organic carbon, organic matter, and other plant nutrients. Which makes it an excellent ingredient for my potting mix.

3. Coco peat

Coco peat, also known as coir pith. coir fiber pith, coir dust, or simply coir, is made from coconut husks, which are byproducts of other industries that use coconuts.

  • Coco peat does not have any nutritional value but it’s completely organic and has great water holding capacity. It also acts as a neutralizer for heavy mediums like vermicomposting and cow manures.
  • Coco peat is used to add further light-ness, water holding capacity, and conditioning to the potting mix.

Commercially available cocopeat blocks have a higher level of salt contains which may affect the quality of your potting mix and therefore subsequently hinder the growth of your plant, therefore before mixing it into your mix, soak cocopeat overnight in a tub or bucket with a hole in it to wash away salts.

4. Perlite/vermiculite

Perlite is the name of a naturally occurring mineral. A type of volcanic glass, created when the volcanic obsidian glass gets saturated with water over a long time. Natural perlite is dark black or grey colored amorphous glass. For use in gardening, the hard mineral glass needs to be processed into a light, white color, that resembles styrofoam, To complete the transformation, crushed perlite needs to be heated quickly to 900 degrees Celsius.

The process leads to the expansion of the crushed pieces of the mineral between 7 and 16 times their original size and volume, creating that lightweight tiny popcorn.

Advantages of using perlite in your potting mix:

  • Perlite retains its shape even when pressed into the soil.
  • It has a neutral pH level
  • It is non-toxic and natural
  • It is super porous and contains pockets of space inside for air. It can retain some amount of water promoting moisture in the mix and while allowing the rest to drain away

Similar to perlite, Vermiculite is a hydrous phyllosilicate mineral that undergoes significant expansion when heated.

Differences between perlite and vermiculite:

  • Both are naturally occurring mineral additives that have many of the same qualities.
  • Both improve soil quality, especially aiding with aeration.
  • Perlite is known to be more effective at aerating soil.
  • Vermiculite is better at retaining moisture.
  • Perlite is somewhat cheaper than vermiculite.

Neem cake powder

Neem cake is organic manure is a bio product obtained in the process of cold pressing of neem tree fruit and kernels, and the solvent extraction process for neem oil cake.

The AZADIRACHTIN content in neem cake organic manure protects plant roots from various fungi & pests and also works as a soil conditioner. Due to this Neem cakes have been reported to have been (a) antifeedant (b) attractant (c) repellent (d) insecticide (e) nematicide (f) growth disruptor and (g) antimicrobial.

Neem cake manure performs the dual function of both fertilizer and pesticides.

Advantages of using Neem Cake Powder in your potting mix:

  • Protects the root from various fungal infections.
  • Neem cake improves the organic matter content of the soil, helping improve soil texture, water retention capacity, and soil aeration for better root development.
  • Neem cake manure can also reduce alkalinity in the soil by producing organic acids when mixed with the soil hence ensure the fertility of the soil. It’s a great acidity enhancer for plants needing acidic soils.

Bone meal powder

Bone meal is a mixture of finely and coarsely ground animal bones and slaughterhouse waste products. Bone meal is primarily used as a source of phosphorus, calcium, and protein.

As a fertilizer, the N-P-K (Nitrogen-Phosphorus-Potassium) ratio of bone meal can vary greatly, depending on the source. From a low of 3-15-0 to as high as 2-22-0. , though some steamed bone meals have N- P-Ks of 1-13-0.

IMPORTANT: According to recent Colorado State University research, plants can only get phosphorus from bone meal if the soil pH is below 7.0 (acidic soil). That is because in alkaline soil high calcium content will bind to phosphorus and create calcium-phosphate that is unavailable to the plant. Therefore adjusting bone meal quantity for potting mix specific to plants is desirable.

Another thing to note is that while buying bone meal as powder, make sure that it is sterilized/steamed. This is important for proper storage and to avoid the development of fungus on the powder itself.

Mustard cake powder

Like Neem Cake, the mustard cake is also a byproduct obtained from mustard seeds after extracting the oil from the seeds. When mixed as an additive to potting mix, it adds to essential both macro-nutrients and micro-nutrients.

Potting mix recipe example

Here’s my tried and tested potting mix recipe.

  • 30% Vermicompost
  • 30% Cow Manure
  • 20% Cocopeat (Washed)
  • 10-15% Perlite/Vermiculite
  • 10% Additive (Mix of neem cake powder + bone-meal powder + mustard cake powder)

Mix all the ingredients and if possible put them in a sealed large barrel or bag and leave them to brew for about a week. This is optional but I have experienced that it gives good results.

IMPORTANT: While this recipe works for a large variety of plants I can’t say that it is a universal mix. For example, some plants need more moisture, while some don’t. Adjustment in cocopeat and/or perlite is advisable for particular plants.

How to measure potting mix proportions

Proportions are as simple as they sound but they may often confuse. Here are two simple methods to get good accurate proportions:

By Weight:

If you have a weighing machine, following a recipe becomes much simple for example 300g vermicompost, 300g cow manure, 200-gram cocopeat, 100gram perlite, 30g+30g+30g (neem cake + bonemeal + mustard cake powder). This would make a 1 kg potting mix.

By size:

Take a small container or mug now measure as 3 containers of vermicompost, 3 containers of cow manure, and so on. Now add a handful of each additive neem cake powder etc in one container. You get the idea. Right? A bit of approximation here but do not worry it will work just fine.

to add bone meal or not…

When I first made this potting mix I added bone meal powder as aforementioned however once I had learned that bone meal is advantageous only when the potting mix is acidic, I stopped adding it to the primary mixture, instead, once my mix was ready and if I am growing any plant that loves acidic mix I add bone meal to that.