Problems with Container Gardening: How to fix various issues with container gardens?

Problems with Container Gardening: How to fix various issues with container gardens?

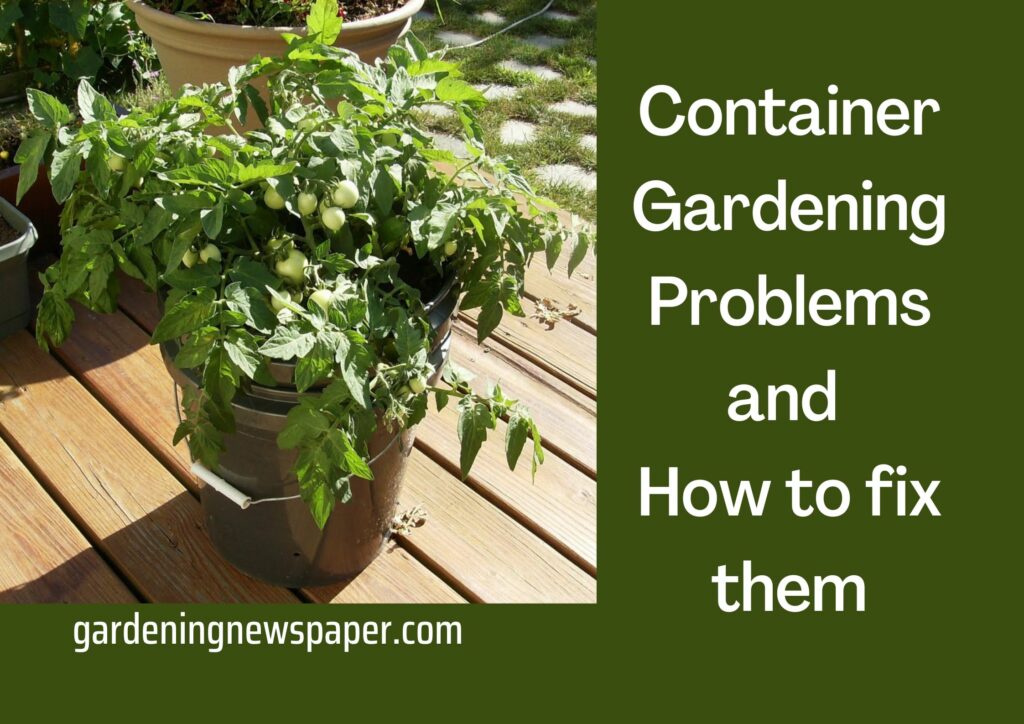
Container gardening, if done incorrectly, may cause you to lose most of your plants. Let’s discuss problems that you will encounter in container gardening and how you can overcome them so that you will become a successful gardener. In this article, we will discuss various issues like various tools that are useful in container gardening, water and soil maintenance, tips for maintaining a disease free container garden, challenges in container gardening, different diseases, and how to fix them. Happy reading and happy gardening to you!

Container Gardening Tools – Things to use for container gardening

Well, gardening is definitely a therapeutic experience. However, container gardening isn’t going to be a cakewalk! To make it easier to an extent, having the right kind of container gardening resources is a must. As a gardening lover, you might already have a basic understanding of different gardening tools, let us understand a few important tools that are especially useful for container gardening.

Planter Caddy

Planter Caddy

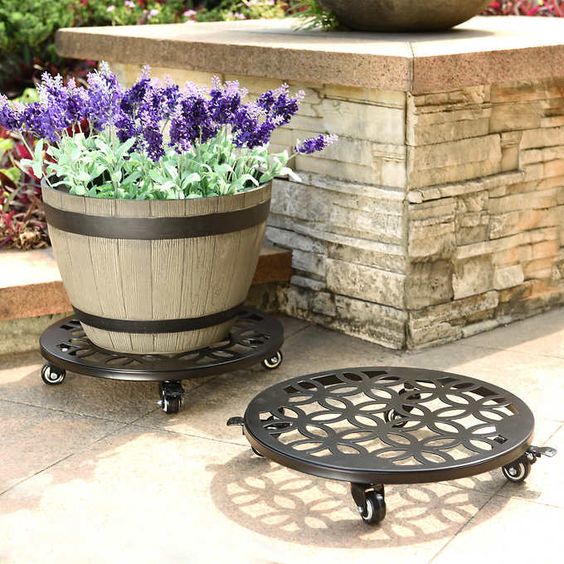
The planter caddy is a savior if you have heavy container plants. These planter caddies come with wheels underneath a circular or rectangular sturdy platform that allows you to place the plant pots on them and move across your home or garden.

Soil Moisture Metre

Soil Moisture Metre

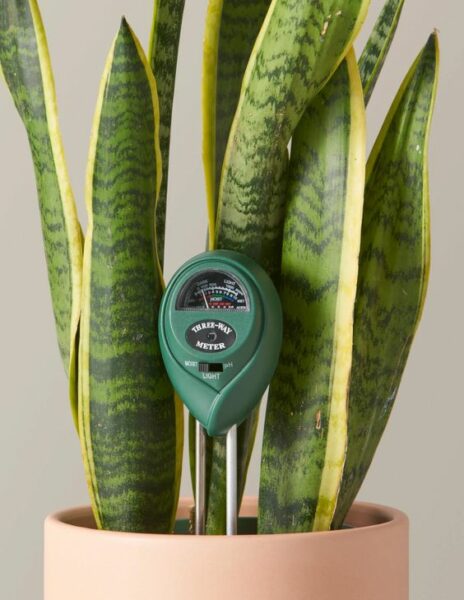
Due to lack of practice or experience, we usually tend to overwater or underwater the plants which may eventually lead to their death. You cannot kill a few plants for the practice of course! So we recommend that you buy yourself a soil moisture meter to save your plants from over-watering or under-watering. This little device will let you know the level of moisture in the soil, and you can water the plants accordingly.

Soil pH Metre

Soil pH Metre

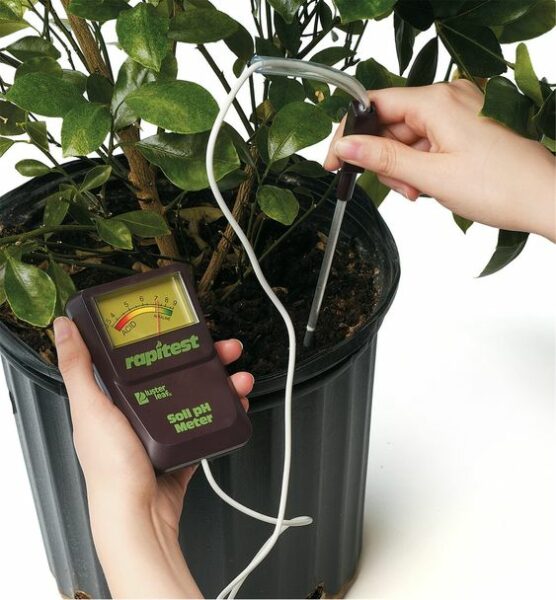
Do you know that there are acidic soil loving plants and alkaline soil loving plants? The pH of the soil determines the acidity or alkalinity of the soil. Okay if you think that’s too much science for you, let’s keep it simple. It is important to understand and maintain the pH levels of the soil to let the plants thrive. And a soil pH meter is the most important device to keep a check on it.

Self Watering Spikes

Self Watering Spikes

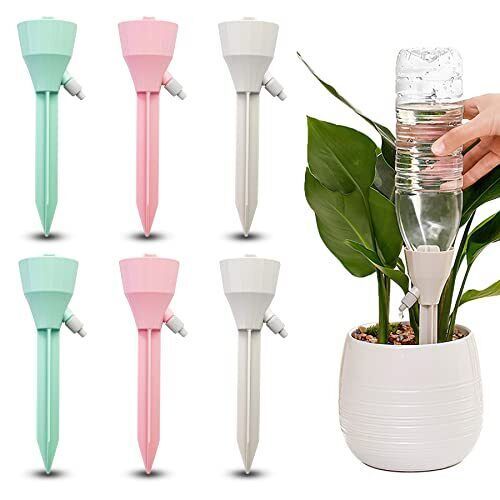
Ever wished for something that is more inexpensive than a fancy drip irrigation setup but something that works almost similarly? If you are someone who travels a lot or forgets to water your plants and feels sad about it later that your plants are wilting, these self-watering spikes are for you. You can use these spikes with a regular water bottle and place the bottle in your pots upside down.

Plant Labels

Plant Labels

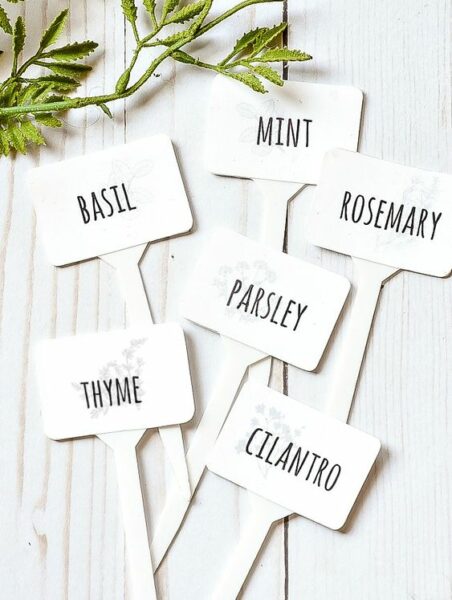
Plant labels? One of the most important tools for container gardening? Well, don’t you think it is cute for you to name your plants and watch them thrive? On a serious note, these plant labels are especially useful when you have different varieties of the same plant as they help you keep a check on your plants in the right way.

Water And Soil Maintenance – How to choose a container for growing plants?

While container gardening is extremely advantageous, maintaining the moisture levels in the different types of plants that you have in your garden is of course a challenge. In the section below, we will be looking into the most reliable and working tips for water and soil maintenance in your container garden.

Water And Soil Maintenance in Container Gardens

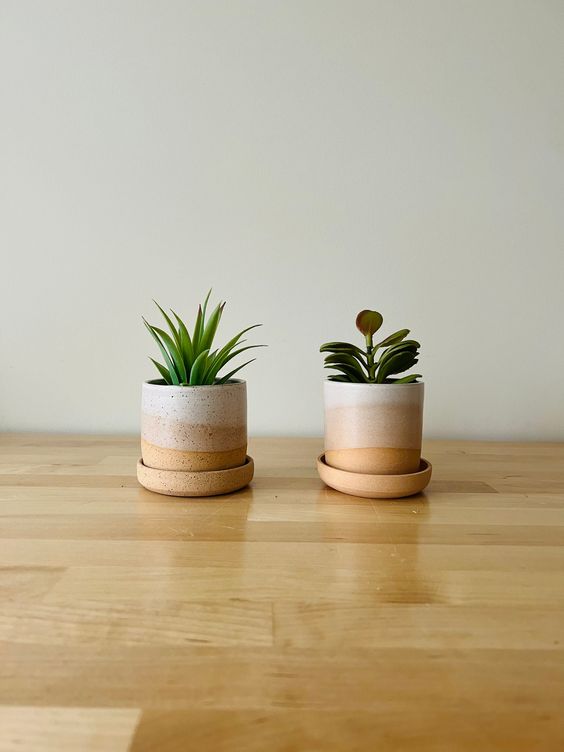
  1. Make sure to use coated ceramic containers or good quality plastic containers over terra cotta or coir baskets that can make your plants go dry quickly.
  2. Use a soil moisture meter at regular intervals to check for moisture levels. Or the easiest way is to test the soil with your finger by sticking it as deep as you can into the soil.
  3. Make sure that the soil in the containers is thoroughly watered. To check if you have done that right, see if the draining holes of the pot are getting rid of excess water.
  4. Do not drench the leaves with water. Make sure to water only the soil and not the foliage.
  5. In some cases, you might not notice that the water is over flown but the soil is not watered properly. Do not let the soil dry completely.
  6. Use the right soil and potting mix as per the plants’ requirements.

Challenges in Maintaining Container Gardening

Challenges in Maintaining Container Gardening

Challenges are everywhere. And your garden maintenance is definitely not an exception. In this section, we will look into some of the most common challenges in maintaining container gardening and ways to deal with them.

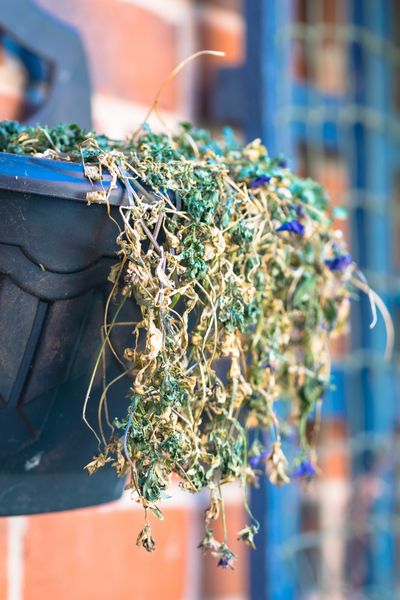
Plants wilt even if you provide them with enough water. Caused by Insufficient aeration and drainage

  • Use a lighter and less compact soil mix.
  • Increase more drainage holes in the pot.
  • Use a soil with higher amount of organic matter.

Leaf edges burn or turn dry or brittle. Caused by High salt content.

  • Leach the container with fresh water at regular intervals until the water drains from the drainage holes.

Plants appear spindly and unproductive. Caused by Too much nitrogen and Not enough light.

  • Apply fertilizer at least once a week or less often and allow the water to drain from the drainage holes.
  • Relocate your plants to an area where they can receive more light.

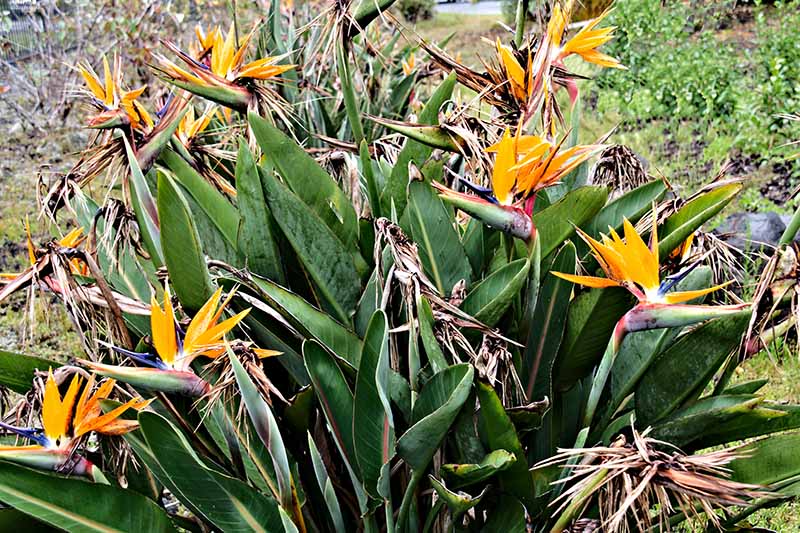
Plants are yellowing from the bottom and leaves lack vigor and color. Caused by Soil not being fertile enough and too much water.

  • Use fertilizers that contain a lot of nutrients.
  • Waterless and check for good drainage

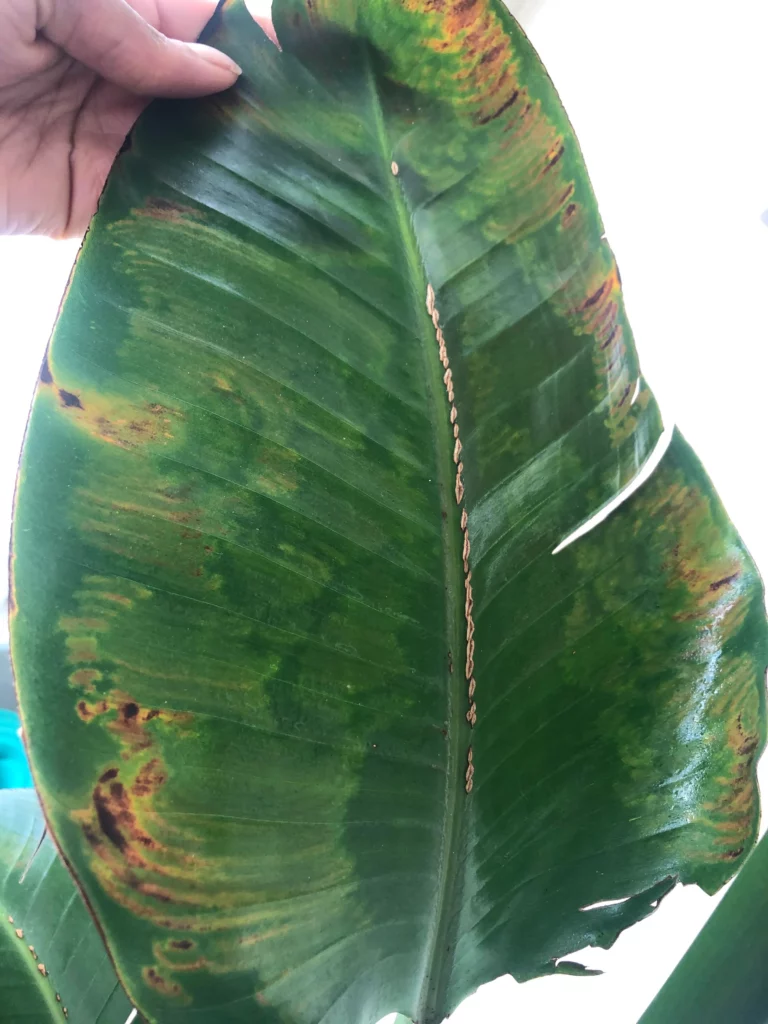
Plants have spots or powdery, rusty, and many old dead leaves. Caused by Low phosphate levels and Grown at a temperature that is too low.

  • Use fertilizers with a higher amount of phosphate.
  • Move your plants to a warmer area.

Best Practices for Disease Free Container Gardens

One of the most neglected container gardening mistakes is, we tend to overlook little things like cleanliness, proper watering, plants’ exposure to light, etc. In this section, we will discuss some of the most important and common container gardening practices that we need to follow for a disease-free container garden.

Maintain the health of your plants

In the case of container gardening, bear in mind that you need to pay attention to the amount of sunlight, the right quantities of fertilizers, and proper watering. Make sure that you are not under watering or over watering the plants.

Burn the infected plants

Find the infected plants in your garden and get rid of them so that they do not contaminate other healthy plants. Make sure to burn them a little away from your garden.

Do not reuse the potting mix 

Do not reuse the potting mix if you do not want diseases in your container garden. This is especially important when the used potting is in contact with disease causing elements like fungus, viruses, etc.

Clean the containers

Make sure to clean the containers thoroughly before planting something in them. Also, it is important to scrape off the lumps of soil and algae, etc. formed due to excess moisture around the containers.

Choose healthy plants when buying

Let’s get back to what’s been taught in the school. Prevention is definitely better than cure! This is true especially when it comes to container gardening. Make sure to pick healthy and disease free plants while buying them.

Clean the garden area at regular intervals 

Cleaning the containers and planting healthy plants isn’t the end of your job. It is extremely important to clean the garden at regular intervals to avoid water stagnation and attracting diseases.

Diseases Common in Container Garden Plants

Botrytis

Container gardening plants are also prone to diseases. This section will discuss the common diseases that affect container garden plants.

Aster yellows

  • Caused by Phytoplasma (a bacteria), aster yellows cause stunting of leaves and the appearance of yellow-green foliage. This type of disease is carried by insects like leaf hoppers thus the disease is spread when insects feed on plants.
  • Destroy the infected plant by uprooting and burning it. The application of insecticides also helps.

Alternaria

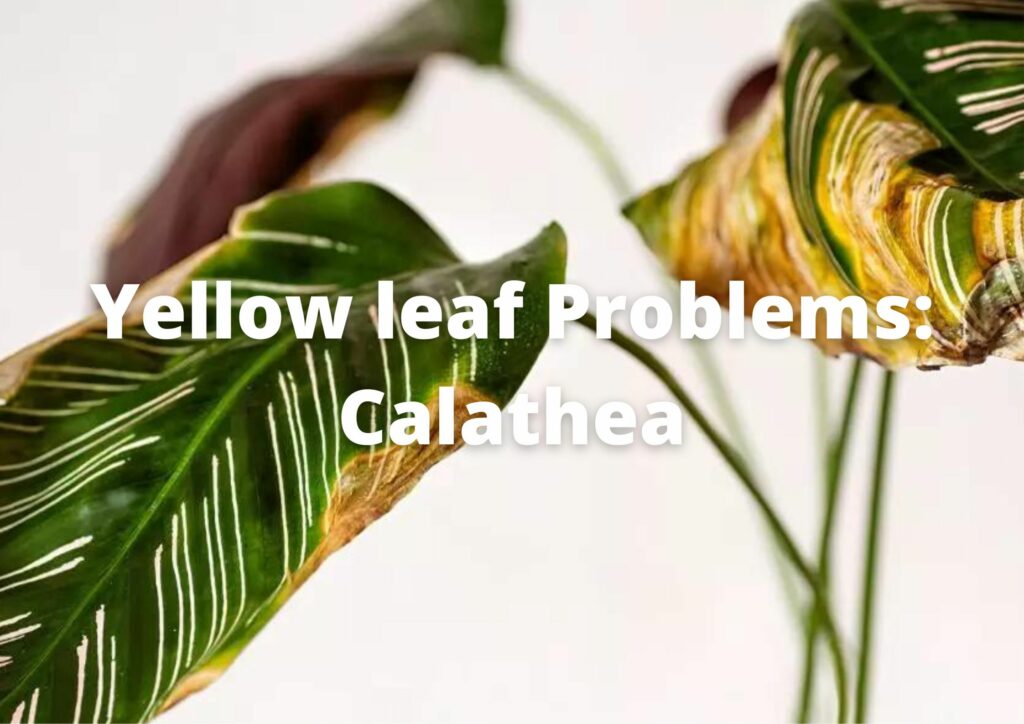
  • Alternaria is a fungal attack common among Calendulas. It causes small red to purple spots that enlarge over time. The spotted leaves eventually turn yellow and drop. The fungal disease is common during the rainy season as fungi require moisture to spore.
  • Practice good sanitation within your garden. Moreover, boost the immune system of your plants by feeding with the right fertilizers.

Anthracnose

  • Anthracnose is another type of fungal infection that causes brown spots on the host plant. The spots can kill the entire leaf if left untreated.
  • The fungus is prolific in environments that are cool and with a lot of moisture thus growing plants in the sun is a great idea to treat container garden plants from anthracnose. You can also remove the affected part provided that you incinerate it to kill the fungus.

Botrytis

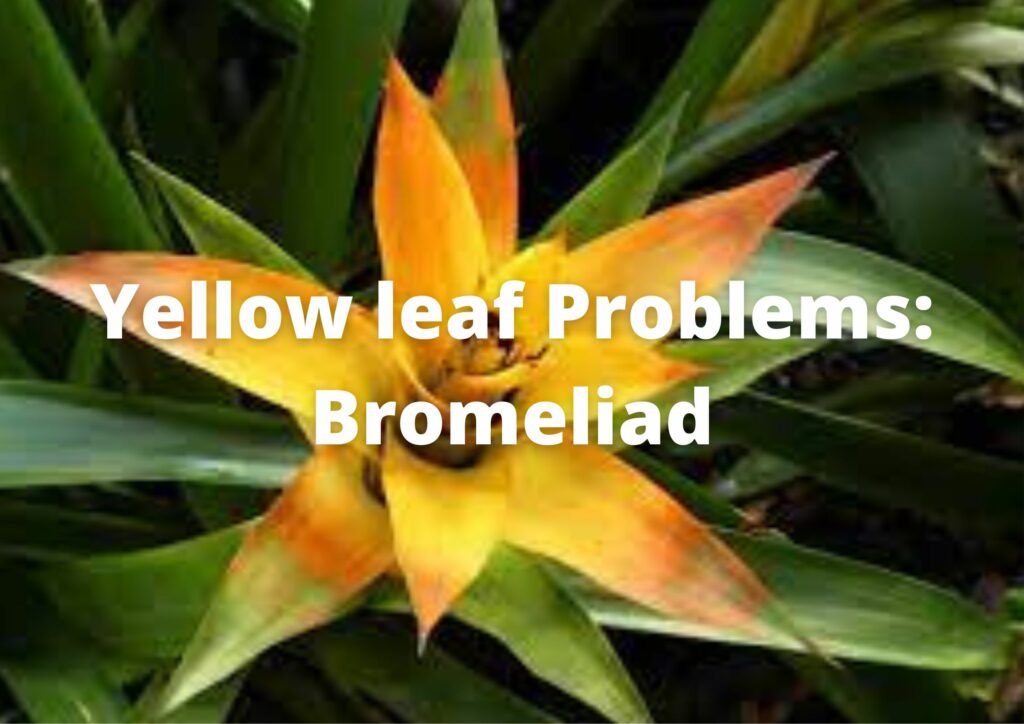
  • Also called Gray Mold, Botrytis is common among tulips and bromeliads. It eventually kills the plants as this is an invasive form of the pathogen for any kind of plant.
  • Implement proper sanitation within your container garden.
  • Make sure that the leaves do not collect moisture to deter the development of Botrytis.
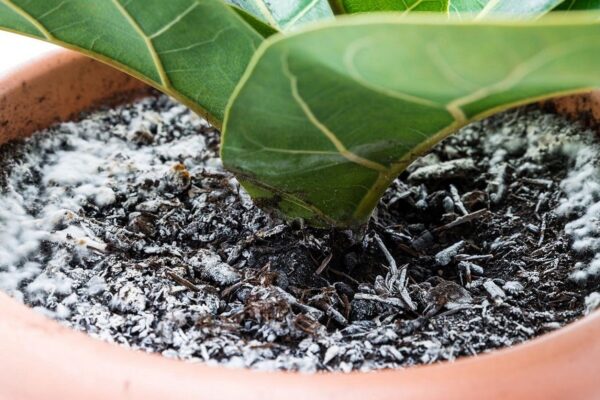
Powdery Mildew

  • The white and powdery growth often affects the leaves, young stems as well as flowers.
  • Make sure that your container plants get proper air circulation to avoid humidity which encourages the growth of powdery mildew. Avoid placing plants that are susceptible to mildew in shaded areas. Also, practice good sanitation practices by removing dead and diseased leaves from the plant.

Root rot

  • Root rot is caused by fungi Pythium and Phytophthora that attach to the base and roots of the plant causing rot. Plants are infected by contaminated soil, water, and tools.
  • Ensure that the soil drains well. Also, avoid overwatering your plants.

Sooty mold

  • Sooty mold is caused by a fungus that is often introduced by the plant from the honeydew excreted by insects like scales and aphids. This particular fungal infection kills the foliage by reducing the access of chlorophyll to light which eventually kills the entire plant.
  • Eliminate the presence of scales or aphids by applying fungicide.

Fusarium wilt

  • Plants infected by Fusarium will show signs of poor health through wilting. The plant then turns yellow, followed by browning, and eventually dies.
  • If the plant shows early signs of wilting, avoid overwatering the plant. If the disease has progressed, uproot the plant and burn the affected plant to prevent the spread of the disease. Do not plant anything on the pot to naturally kill the bacteria as they no longer have food to sustain them.

Aphids

  • Aphids are insects that have sucking mouth parts and they can cause puckering or distortion on the plant tissue. Aphids are also vectors of different viral diseases in plants.
  • Introduce natural insect predators in your gardens such as ladybugs, lacewings, and parasitic wasps.

Mealybugs

  • Mealybugs are insects that are common in container gardens. Their population balloon out of proportion and they inflict damage to the plant while feeding.
  • Manually wash off mealy bugs from the plant by brushing them off or using a Q-tip rubbed in alcohol. Unfortunately, the waxy substance on the exoskeleton of mealy bugs makes them highly difficult to kill using pesticides.

White fly infestation

  • Severe infestation of white flies can cause mottling as well as yellowing of the leaves thus lowering the yields of your plant. This is a great concern for those who do vegetable container gardening.
  • Use a pesticide that is specific to white flies.

Container gardening is a fun and therapeutic activity that everyone can do. It does not limit your ability to grow many things despite the lack of space in your area. The best thing about container gardening is that it is one of the simplest types of gardening that you can do and all there is to get planting materials, some garden tools, a lot of passion for growing those beautiful beings, and watching them thrive!

How do you keep a money tree healthy? When should you braid your money tree?

How do you keep a money tree healthy?

How do you keep a money tree healthy?

The pachira aquatica, also known as the money tree, is a tropical, wetland plant that is native to Central and South America. It can reach heights of six to eight feet indoors, but it can reach over 60 feet in the wild. Surprisingly, the braided trunk that you love isn’t a natural characteristic of the tree. Most money trees are made from multiple plants that had their trunks twisted together during growth.

The money plant, one of the best Feng Shui trees for good energy is believed to bring wealth, luck, and prosperity to its owner. Five shiny green leaves on each stem represent the five elements of balance, earth, fire water wind, metal, and water. Some stems may have six leaves; seven-leaf stems bring luck to your home.

The money tree is of the It’s one of the best indoor trees, and also one of the most versatile indoor plants. The large green leaves and braided trunk make it easy to match with many home styles. Continue reading to plant care tips and tricks that will keep your money tree looking great all year.

Money Tree Care Tips

Where should a money tree be placed?

Where should a money tree be placed?

For a healthy money tree, bright indirect sunlight is the best — it makes it easier to locate the right spot for your plant. As long as there isn’t too much direct sun, a plant stand can be placed in your living room or home office floor. Although your plant might adjust to low light, too much sunlight can quickly scorch it.

What temperature do money trees like?

Your money tree will thrive in an area between 60- and 75 degrees Fahrenheit. Your plant should be kept away from heat, air conditioning vents, and drafty windows and doors.

How often do you water a money tree?

According to Just Add Ice, overwatering money plants is one of the biggest mistakes plant parents make when it comes to plant care. Your money plant should be watered once every two weeks or when the soil volume has reached 50-75% dry. Spring and summer will require watering more often. Make sure your planter is equipped with drainage holes to drain excess water so that the roots don’t sit in it.

To ensure that your tree grows evenly, rotate it every time you water it.

Should I be pruning my money tree?

You can trim your money tree if it is out of control or growing too high or too low for your area. Healthy growth can be promoted by cutting down brown or wilted foliage.

When should you repot a money tree?

It’s best to repot your money tree in the spring. However, you will only need to do this once every two to three years. You can trim the root growth if you wish to continue using the same poter. Remember that money trees like a well-drained potting mix.

Money Tree Plants Common Problems

How do you fix yellow leaves on a money tree?

How do you fix yellow leaves on a money tree?

Yellow leaves: You may have overwatered your plant or the plant is getting too much sunlight. You can try to keep your planter in indirect sunlight or stick to a regular watering schedule.

Why are the leaves falling off my money tree?

Leaf Drop: You’re not watering your plants enough. You should water your plants on a schedule, not waiting until the soil is dry completely. Too much sun, temperature fluctuations, and insect infestations are all possible factors. During growth, some leaf loss can be expected.

How do I know if my money tree has root rot?

Root Rot: Overwatering may cause root rot. Root rot can lead to a loss of leaves, a softening trunk, and unpleasant odors. Act quickly to prevent it from becoming fatal. Repot your plant quickly!

How do I keep bugs out of my money plant?

Insect infestation: Aphids and mealybugs love money trees. You can use warm water and insecticidal soap to get rid of small pests if you spot an infestation. Yellow leaves are a sign that they are present.

How To Braid Your Money Tree – When should you braid your money tree?

When should you braid your money tree?

The trunk of a mature money tree is likely already braided. It’s easy to braid money trees if you have young trees.

  • You need three to six money trees should be healthy and young.
  • A young money tree should have shoots measuring approximately 15 to 16 inches in height.
  • As you would your hair, gently and loosely tie the trunks together.
  • To keep the ends together, use tape or string.
  • Keep going with this process until your money tree is fully grown.

However, it could take several months before your tree can be braided again.

How do you care for a strawflower? Why is my straw flower dying?

How do you care for a strawflower?

Xerochrysum Bracteatum is the botanical name for Strawflowers. However, they were once part of the Helichrysum genus so you might still see them with that name. They get their first half of the botanical name by combining xeros with chrysos, which in Greek means dry and golden. This brings us to everlasting gold, one of the many nicknames for this flower. Read on to know all plant care tips.

How do you care for a strawflower?

  • Because of their straw-like bracts, rigid petals and persistent color, strawflowers are often called everlasting daisies or simply everlasting flowers. They are a popular choice in dried arrangements.
  • These plants can be grown in the same USDA hardiness zones as their native Australian grasslands. You won’t be able keep them alive outside of this range.
  • Their cheerful flowers will brighten up your garden with bright yellows, pinks and reds.
  • They’ll also attract many pollinators.
  • Strawflowers can reach a height anywhere from 1 to 5 ft, with dwarf varieties at either the low or high end. Average plants are around 3 ft tall.
  • The length of the green, grayish, and languid-shaped leaves is approximately 5 inches.
  • Individual blossoms are usually around an inch in diameter. Despite their small size, each blossom will be brightly colored and easily identifiable.
  • Strawflowers can be grown easily, are deer-resistant and are tolerant to high heat. They are a whimsical addition to any garden.

How to grow strawflowers for your garden or landscape

  • Strawflowers are great for areas with limited shade, as they can withstand heat. Because they are available in many bright colors, you will be able to mix and match them depending on the other plants you have.
  • These prolific producers will remain brightly in flower from late spring through the first frost.
  • They are a great transition plant for keeping a wide range of colors in your garden while the spring annuals stop blooming and the late-season bloomers have yet arrived.
  • Staggered heights will fill out a mass planting with a rainbow of colors. However, taller stalks might require more staking. To allow them to grow, leave at least 9 inches between each plant in the garden bed.
  • Strawflowers can grow well in hanging baskets. When positioning multiple different plants for a thriller/spiller/filler arrangement they dutifully perform the roll of filler with an upright flush of blossoms that will cover the soil and give that thriller center stage.
  • Keep in mind that flowers planted in hanging baskets will retain less moisture than plants in the ground and require more frequent watering.
  • Strawflowers are resistant to air pollution so they’re worth considering if you live in an inner-city area.

How to propagate strawflowers

How to propagate strawflowers

Strawflowers thrive when they are propagated from seed. Seeds should be sown at least two months before the last frost. If you don’t live in a warm area, you can start them indoors.

There are two options: wait until the threat of frost is over and then sow seeds directly in your garden beds.

  • To germinate seeds, they should be kept close to the surface. This is to ensure that the light gets through to them.
  • For the first week to 10 days, keep the pots moist until the sprouts begin to grow.
  • To mimic nighttime, these seedlings need 16 hours of light exposure and 8 hours of darkness.
  • To avoid heat damage, such as burn marks, you should raise your indoor grow lights as the seedlings become taller.
  • You should check for roots emerging from the bottoms of smaller pots. Your seedlings may need larger pots for a brief time before they can move outside.
  • You can slowly bring your young plants out into the open, but keep them protected from high winds and intense sunlight until they adjust to their new surroundings.
  • This hardening period is thought to increase cell structure and decrease overall shock.

First, apply a soil conditioner to the top 6-8 inches of soil if you want to plant seeds directly in the garden. Cover the seeds with soil only, ensuring that they are not too close to the surface. A few inches of mulch that is pollinator-friendly is an alternative to retaining moisture and improving soil quality.

Should I deadhead straw flowers?

Should I deadhead straw flowers?

  • Strawflowers are definite candidates for deadheading. You should not allow your flowers to go to seed too early. Instead, you can prune away any dead or dying blooms to encourage the plant to continue producing flowers throughout the season.
  • You can stop deadheading after the season is over. Instead, collect the seeds for next year or let them disperse around the ground.

Strawflower care will not require extensive pruning. If your plant is getting too tall, however, this can be beneficial. This problem can lead to extremely tall plants that have very few leaves at the top of each stem. It is usually caused by them stretching to get adequate sunlight. This can also occur if they don’t get at least moderate pruning.

Do strawflowers need fertilizer?

Strawflowers can be grown without fertilizer, they will still produce beautiful blooms when fed with general food. Slow-release granular fertilizer is also an option. You can also use slow-release granular fertilizer.

They are easy to grow and can withstand everything from urban pollution to soil pH changes and periods of drought. Enjoy the vibrant colors they bring to your yard. Enjoy the joy they bring to your garden. When they are ready, you can cut fresh flowers to make a bouquet for your foyer or as a gift.

How much space do Strawflowers need? Strawflower repotting and container-growing

How much space do Strawflowers need?

You can permanently transplant seedlings and mature plants into containers by choosing a dwarf 12 inch variety. This will ensure that they don’t grow to 5 feet.

Repotting can be made easier by reducing transplant shock. Root disturbance can be minimized by being gentle when removing plants from their original pots to prevent damage to healthy roots. Also, trimming only when necessary and working efficiently to reduce time that roots are exposed.

  • Bury your transplant at the same depth as it was in the original pot.
    • This means that you should dig a hole slightly larger than the root ball and not cover it with too much soil after it is moved.
  • Although it can be tempting just to put as many flowers in a container as possible, proper spacing is essential due to the small space available.
    • Plants that are too crowded will struggle to get nutrients and sunlight.
    • When you mix different types of flowers and plants together, choose varieties with similar soil requirements and maintenance needs.
  • Finally, remember their role as a natural filler plant in the thriller/spiller/filler hanging basket trio.

These same principles apply to larger containers that are at ground level.

Layering plants in different proportions creates an experience three-dimensional that is far superior to a simple bucket.

Strawflower varieties

Hybrid cultivars are primarily distinguished by their flower color and height when it comes to strawflower varieties. You should check the labels to see the species (bracteatum), genus (Xerochrysum), and hybrid identifier (e.g. ‘Copper Red’ or ‘Lemon Princess’). You may also see similar hues in apricot/peach and golden yellow.

There are many shades available for these flowers. Many varieties have been developed by nurseries and seed companies. They can withstand drought, soil conditions, deer, and poor air quality.

Is strawflower toxic to pets and humans?

The good news is that strawflowers are not toxic to humans or animals if they are ingested, especially cats, dogs and horses. They aren’t on any major poisonous plant lists, so they won’t cause serious health problems if swallowed. The most common side effect is temporary gastrointestinal distress, which can manifest as vomiting or diarrhea.

Dogs can’t tell the differences, and most of the time, so can we. Your pets should not be allowed to eat large amounts of plants. They could become addicted and end up suffering tremendously if they do.

Common diseases and pests that affect strawflowers – Why is my straw flower dying?

Why is my straw flower dying?

Strawflowers are generally resistant to pests and disease. But downy mildew is a problem that they may occasionally encounter.

There are two types of downy mildew: Plasmopara Halstedii, and Bremia Lactucae.

However, they all cause the same damage and require the same treatment.

  • Although downy mildew does not look the same as powdery mildew it is still a form of mildew. It requires low temperatures and high humidity to thrive.
  • Sporulation, which is a white or pale purple spot on the undersides of leaves, will help you identify it.
  • The spots may become yellowish-colored blotches at the top of the leaves as the disease progresses.
  • If left untreated, downy mildew may kill plants or cause a more serious problem that can stunt growth and/or lead to malformations and discoloration.

Use of fungicides to treat downy mildew. However, they should not be specifically labeled as strawflowers.

  • Talk to someone at your local garden center to ensure you are purchasing an effective product.
  • Verticillium wilt is a less common fungal infection.
  • It’s caused by Verticillium dahliae, which causes yellowed, and wilting, and usually occurs on one side.
  • It is possible that soil treatments that contain chloropicrin (which gets added to sulfuryl fluoride) can help fight this fungus.

The aster leafhopper is the only insect that can bother Xerochrysum Bracteatum. It transmits the aster yellows virus. Carbaryl is a pesticide that can be used to control them. It can be found in many commercial products. A fine-screened cage is a good option. Also, imidacloprid can be applied to the roots to help.

Organic pest control methods – Homemade organic pest control

Organic pest control methods

I. Daily care

You have a few plants, they are all healthy and blooming or flowering but one fine day, you noticed that some of your plants have started thaveook sad, some has leaves or having cuts, etc when you had a close look you realized that it is infested with a pest. There are probably two things you would do to contain this situation:

Rush to spraying chemical pesticides because saving your plant is your top priority.
The infestation has grown beyond control and you have no option but to amputate your plant’s infected areas and hope that it will recover.

If the first option works, chances are your plant is saved but your plants, its potting mix may have been contaminated by the chemicals that may harm the overall ecosystem of the plant, and worst if it’s an edible plant, all the chemicals will go inside your body.

You understand why we should do organic terrace gardening. A simple but very effective daily ritual is of vital importance for pest management, depending on the size of your terrace garden, this ritual may take from 15 minutes to 1 hour or more for a big terrace garden:

Inspect leaves/fruits/flowers

Things to check on your plant’s leaves:

  • Color: Check if the color of the leaf is unusual or if there are any unusual spots. This is usually a sign of nutrition deficiency but can also be a pest problem.
  • Texture: if leaves have some kind of powdery substance on top chances are it’s a powdery mildew
  • Leaf curling: Pests like aphids, thrips, mites, and whitecurlss cause leaf curl on pepper plants.
  • New shoot and leaves: Most pests prey on new plant growth
  • The underside of the leaves: This is very important as most pests hide below
  • Check the buds for any discoloration: Usually a nutrition problem but can also be a pest issue.

You will be able to control a majority of pests just by inspecting your plant leaves daily. I keep a small bucket of water mixed with neem oil or simply soap-like liquid handwash and handpickand  any known pests drop them into this bucket. Trust me, this can save you from a lot of trouble in the future.

CAUTION: Don’t touch healthy plants or healthy parts of plants with the same hand you used totheyick insects as it may contain eggs and may infect other plants.

Inspect stem/trunk

Some pests are too good at hiding and nature has given them such colors that they can blendthe  themselves with stems and the trunk of the plant to make a perfect hid,eout. For example, mealy healthy-looking healthy- looking stem may have a full colony of mealy bugs underneath.

Inspect dropping of healthy leaves

If a perfectly healthy-looking plant starts dropping leaves without any reason like a natural fall, it could be a fungal infection in the root. This could be a serious problem if left unattended. Check:

  • Imixedhe potting is mix soggy, usually due to poor drainage.
  • If the drainage is blocked
  • Green algae formation on the surface is a sign of water taking too long to drain from the container

Note: Good drainage in a pot and a well-drained potting mix can minimize the above problems to a great extent.

Try the following to improve the situation:

  • Stop watering the plant for a day or so and see if the plant recovers.
  • Take a handful of neem cake powder and spread it on the container surface near the trunk, water lightly.
  • If you have big drainage holes, tilt your container, take an old toothbrush and scrub the plastic net to clear the blockage of holes.
  • If none of the above works, then repotting is your only choice unless you decide to use some chemical fungicide which is not recommended.

II. Weekly care

I’m happily managing my terrace garden which has ornamental, flowering, vegetables, and fruits planted with this weekly ritual. It is super simple and effective but discipline is the key to its success.

Every weekend on Saturday at 5:30 pm, I wear my garden apron, fill my 5-liter sprayer and drench all my plants with this miracle organic pesticide plus fertilizer. Yup, your guess is right, it’s the Neem Oil. If you see the tables below, you will understand why Neem oil.

From the table above it is clear that neem oil makes your plant resistant to pests in many ways, Neem oil exhibit the same properties as neem cake viz. (a) antifeedant (b) attractant (c) repellent (d) insecticide (e) nematicide (f) growth disruptor and (g) antimicrobial.

What all do you need to prepare the Neem Oil Pesticide Spray?

  • Pure neem oil: Pure neem oil solidifies at a colder temperature like coconut oil. With the increase in awareness about neem oil, commercial makers are selling this at a much higher price. Try to source it locally, govt. organic departments selling neem oil and other organic add ons etc.
  • Agriculture grade high-quality Neem oil: If pure neem oil is not available. This is usually available by the name of Neem oil or Neem Oil Concentrate or AZADIRACHTIN. Besides locally sourced pure Neem oil, I have used the following and they all have shown the same results:
  • Water
  • Some herbal handwash liquid only if you are using pure neem oil
  • A spray pump: hand or pressure pump

Neem Oil Pesticide Recipe:

  • Take 5ml of Neem oil
  • OPTIONAL: Take 1 ml of liquid soap ONLY if pure neem oil is used.
  • Mix 1 neem oil (soap liquid if required) with 1 liter of water. You can increase the quantity proportionately for example 25 ml neem oil for 5 liters of water.
  • Mix by shaking the pump container rigorously.
  • Your spray is ready

Neem oil Pesticide Application:

  • Spray during evening hours, I spray between 5-6 pm, usually after the sunsets.
  • Sometimes especially during summer, the days are warm around 5-6 pm, if possible spray later. Hot weather can cause leaf burn.
  • While spraying, drench the whole plant, stem leaves, and underneath the leaves.
  • If you sense rain then postpone the spray to the next day because spraying when the rain is near will wipe all the liquid from the plants.
  • Similarly, avoid spraying on a windy day.

This weekly habit will protect your garden from a majority of pests. The key is discipline.

It is okay, sometimes you are simply not available or have some other priorities that you could not find time to perform this ritual. So what can you do? It’s simple, do it the next day or the next after that. But make sure that you do it and don’t skip it altogether for the week.

Damage control

We all make mistakes and maybe you missed seeing a possible sign of infestation. What to do?

  • Start the spray as soon as you notice the first signs of infestation. If the infestation spread it may take longer to cure. You may also have to cut off infected parts or worst use chemical fertilizers, which I would not recommend.
  • Repeat the treatment after 3-4 days till you see improvement and the infestation is gone.

Beneficial insects

If you want to have some guards doing pest control for you while you are away from your plants, that’s where these beneficial insects come from. They are usually ladybugs, lacewings, predatory stinkbugs, soldier beetles, tachinid flies, parasitic wasps, and many more.

These groups of insects are called predators and parasitoids. They can eat thousands of pests every day.

This is a long-term project to attract these beneficial insects to your garden which is beyond the scope of this book, therefore I encourage you to read Attracting Beneficial Bugs to Your Garden By Jessica Walliser. It is a fantastic book to understand and implement natural pest control in your garden.

Making organic pesticides at home – Homemade organic pest control

I consider neem oil to be the best organic pest control for your terrace garden if done right but there are some other organic do-it-yourself pesticides that I found to be quite useful as well.

Neem & waste decomposer pesticide

A very simple but effective recipe using neem leaves and waste decomposer solution.

Ingredients

  • Neem leaves grind to make 1⁄2 kg paste
  • 4.5 lit WD solution
  • 5-liter water
  • A 10-liter plastic bucket.

Mix all the above thoroughly using a wooden stick and leave the mixture for 3 weeks. You may stir the mixture twice daily but not necessary.

Application: Mix 50 ml of the mixture in 1-liter water and spray to drench the plant on weekly basis or when there is any sign of infestation. For easier spray application, sieve the solution before mixing it with water.

The masala pesticide

I call this one a masala pesticide because this is made using common kitchen vegetables typically used to make sabzi masala.

Ingredients

  • Onions
  • Ginger Root
  • Garlic
  • Hot green chili
  • OPTIONAL: Neem leaves
  • Some herbal liquid soap or hand-wash liquid

Take all the above ingredients in equal quantities or crush them in a mortar & pestle. Boil the ingredients to make a decoction, sieve it, and store it in a plastic bottle.

Note: Instead of making a decoction you may also make it using waste decomposer solutions like neem leaves.

Application: Mix 100 ml of decoction, and 5-10 ml liquid soap in 1-liter water and spray to drench the plant on weekly basis or when there is any sign of infestation.

Fruit fly trap

Fruit flies are responsible for infesting your garden with a variety of pests and diseases. For example, if you have ever seen a maggot inside a fruit, know that fruit flies are responsible for that.

A fruit fly trap is a good and safe way to reduce the number of fruit flies. This method uses a pheromone (a special smell that female flies produce and the male gets attracted to it) to attract the male fruit flies into a trap where they are killed. Even though only the male flies are killed, this makes it more difficult for the females to find a mate to make more maggots.

They are a cheap, chemical-free, and safe tool for pest management especially if you are growing vegetables and fruits.

Sticky trap

Yellow color & blue color is natural attractive colors for small sap-feeding insects like whiteflies, thrips, aphids, leafminers, jassids, and fungus gnats Insects are attracted and try to sit on the trap and due to the gum, they stuck and die in a short time. These traps are usually non-toxic, long-lasting, whether-proof, and eco-friendly.

Customize your pest control routine to fit your needs should you encounter pest problems less frequently, for example, you can do neem oil spray once in 15 days.

Some gardens are more susceptible to pests while others are less. This depends on a lot of factors but you can be sure of one thing where there is a plant chances are there will be pests sooner or later.

Why does my aloe plant not stand up! Aloe vera plant care problems and solutions

Why does my aloe plant not stand up! Aloe vera plant care problems and solutions

Why does my aloe plant not stand up?

This is the perfect houseplant, but if you have Aloe vera plant problems you might be panicking and not know how you can get it back on track. Aloe vera plants that are healthy have beautiful shades of mid-green and long, sculptural foliage. They can be used indoors or outdoors depending on the climate.

Aloes generally require little maintenance. However, if you notice brownish leaf tips, drooping, or any other signs that your plant is unhappy, it’s best to act quickly.

To enjoy the amazing succulents’ benefits, it is important to understand how to take care of Aloe vera plants. Garden experts and horticulturalists share their most common problems and tips on how to avoid them.

Caring for houseplants is about getting the water and light levels right. Certain plants will be more obvious than others when they are indicating an imbalance. Your aloe vera’s leaves should feel stiff and a little swollen. To avoid problems with your aloe vera, you should give it more water.

Sun exposure and light levels

Our Aloes love the sun, no matter if they are kept in an indoor or outdoor plant. They don’t like to be scorched. Place your Aloe Vera indoors, indirect sunlight or semi-shade. When aloe vera is taken out in the summer, it can cause sun scorch. Aloe vera can be grown indoors.

Although explains that potted Aloe veras can handle stints outside. Your aloe vera can be placed outside during the summer if it is in a sunny, warm spot. It is important to bring it inside when the weather turns colder.

Overwatering – Pictures of overwatered aloe plant

You may notice the stem of your plant becoming soft. As the cells absorb water, Aloe plants can develop blisters on their leaves. You will likely also notice a swamp-like smell if you take the plant out of its pot. If the roots are rotting, you can examine them. Pictures of overwatered aloe plant.

The biggest mistake that people make when caring for aloe vera plants is overwatering them, or not letting the soil dry out completely inbetween waterings. This is because winter water doesn’t evaporate nearly as fast.

  • Water-stressed succulents can lead to disaster. Aloe veras are not fond of wet feet, as is the case with all succulents. They prefer a well-drained, loose soil that is not kept moist. The plant should dry completely before being watered again. Otherwise, it can become rotted.
  • If you overwater it, the leaves can turn a paler shade and may begin to split from all the liquid in them. This is because aloe veras are unable to regulate their water intake. They don’t know when it’s time to stop drinking.
  • You might also notice brown spots or marks around the base of the leaves. The ends of the leaves could turn brown or yellow. The roots may eventually cause the plant to pull out of its pot. If you feel the plants have been given too much water, you can lift them up and ensure they are not in direct contact with water. Allow the soil to dry.

Underwatering Aloe

There are other signs of underwatering. When aloe vera plants are in trouble, they often turn a brownish-auburn color. This is an aloe vera plant survival strategy. It pulls back the photosynthesis chemical chlorophyll from the plant in order to conserve energy. This happens often in high summer in the Arabian Peninsula, where these plants are found. When water levels are normal, the green color should return.

Pot size and Pot type

  • Aloe vera plants are often sold in plastic pots. However, a natural material would be more appealing. It’s okay to store your aloe vera plant in a plastic container with drainage holes in an outer decorative pot as long as it is not sitting in water.
  • A terracotta container is a better choice because it allows the soil to breathe. A terracotta container helps prevent soil from getting too wet by allowing excess moisture to seep through the sides.
  • You choose a large pot. ‘Aloe Vera thrives in larger pots and loves spreading and growing, so if moving it out of its original pot, pick a pot that is three times as large as the root ball.

Nutrient Levels

  • Aloes do not require a lot of nutrients so it is a good idea to use special compost such as Miracle Gro Cactus or Bonsai peat-free Compost.
  • Shop-bought plants often arrive in poor compost. When you receive a new aloe vera, gently tip it out of the pot to see what its potting mix looks like.
  • Peaty compost is often used for house plants. This retains water. Aloe vera is a water-retaining, free-draining soil.
  • You can repot your house plants in either a specially-formulated succulent fertilizer (described above) or your own mix of three parts peat-free and one-part horticultural grit (opens in new window).
  • Use builder’s soil if there is no grit. However, it can be dangerous and can cause damage to your plants.
  • You cover the soil with grit, pebbles, and rocks to create an aloe vera environment. This will help prevent the soil from rotting.

How to get rid of pests on aloe vera plant?

Indoor Aloe veras are susceptible to pests and insects, but it is more common for plants that grow outside.

  • The Mealy bugs nest between the leaves and in the top of the rosette. They can then appear as white fluffiness.
  • They will need to be removed from the outer, dry leaves in order to prevent them from hiding under.
  • Aphids can also be found in flower spikes. However, you can easily blast them off with a hose.
  • Scale insects are another pest that can harm aloe veras. They look like tiny greenish-yellow circles and turn brown as they age, much like scabs. Scale insects won’t harm your plant but can make it look unattractive so wipe them off with an old towel.

To remove bugs from your aloe vera outdoor plant, you can either buy it as a concentrated or ready-to-use spray.

Aloe vera plant turning brown and soft?

Aloe vera is normally a vibrant, greenish hue. However, it’s possible for the color to change. The leaves may become yellow, mushy, or brown if they have been neglected. Yellowing leaves could also indicate that the plant doesn’t get enough sunlight.

  • Overwatering is the most common problem.
    • Overwatering your Aloe plants can cause them to die. Before watering, let the soil dry completely.
    • Brown spots and lesions can be signs of overwatering. Brown tips around the base can also indicate this.
    • Don’t leave the plant in water and allow it to dry before watering again.
    • You can also repot it by cutting away any rotten areas.
  • Sun scorch is another problem that can occur to Aloes. This is when the leaves turn red. When Aloe vera is exposed to direct sunlight during summer, it can cause this problem. Aloe vera can be grown indoors.

Brown dry tips on aloe vera plant – Should I cut the brown tips off my aloe plant?

Brown spots and lesions can be signs of overwatering. Brown tips around the base can also indicate this. He advises that you don’t leave the plant in water and allow it to dry before watering again. You can also repot it by cutting away any rotten areas.

So, should you cut the brown tips off my aloe plant? There are many reasons your Aloe vera might have brown tips.

  • If the brown tips are due to a fungal disease, you should cut them off with a pair of secateurs. This will allow you to see the extent of the damage.
  • If it is only for aesthetic purposes, you can snip off the tip, but the leaf will not grow back to its original point. It will callus over.

Don’t forget to use the gel-like flesh for cooling sunburns and soothing insect bites.

Even if your Aloe vera has started to rot from overwatering, it can still be saved.

  • The rosette should be left in dry conditions for at least a few days so that the stem can callous (seal).
  • After that, repot it in a new container of succulent compost. Although it may seem extreme, you have nothing to lose.

If your aloe vera plant is in pain, it’s best to revive it. You might even find that your plant grows stronger and is more vibrant.

Will bird of paradise leaves uncurl? – Bird of Paradise leaves curling and turning yellow!

Bird of Paradise leaves curling and turning yellow!

What to do if your bird of paradise is yellowing?

The bird of paradise is an eye-catching tropical plant that can be grown indoors and outdoors. Bird of paradise is one the rarest plants that American growers have access to these days. Bird of paradise can be planted in the garden by a few gardeners, but most gardeners keep them indoors or on patios. Sometimes they can develop yellow leaves despite all your efforts. This could be due to poor lighting, pests, or watering. Find out how to save your yellowing plants, curling leaves and plant care tips.

What causes yellowing leaves on a Bird of Paradise plant?

While there are many problems with bird of paradise plants, yellowing leaves are one of the most common. These conditions are usually caused by poor growing conditions. Let’s find out what you can do to keep your bird of paradise plant happy and healthy, to see if the bird of paradise leaves uncurl.

Lighting

Bird of paradise plants thrives in full sun, not light shade. It can be difficult to provide enough light for the bird of paradise plant when it is moved indoors. This can lead to yellowish leaves.

  • If your indoor plant is yellowing, you can increase its light level by placing a full spectrum fluorescent lamp directly on top of it or moving it to brighter rooms.
  • Be careful not to place any plant too close to a window that receives high levels of direct sunlight as the ultraviolet rays can cause damage to delicate leaf tissue.

Watering

Inadequate watering can also lead to the yellowing of bird of paradise leaves. Bird of paradise plants can’t be left dry like other plants. They are extremely sensitive to being too wet or too dry. The plant can be sensitive to changes in moisture for the first six months after it is planted or repotted.

However, you can help reduce this by placing a mulch layer of 2 to 3 inches (5-8 cm) around the plant. You can slow down drying time and retain moisture by mulching the plant. To prevent stem rot, make sure that the mulch doesn’t touch the stem.

Pests

Although major pests are rare, they can occasionally occur on indoor bird-of-paradise plants. If plants spend their summer outdoors, they will be more susceptible. More about bird of paradise pests and diseases. Some of these pests can cause yellowing, such as:

Aphids

The hallmark sign of yellowing leaves is a leaf that has become sticky and becomes whole or in patches. Aphids can also attract ants. To drown aphids, spray the plant’s undersides with water from a garden sprayer. Spray your plants daily for at least two weeks.

Scale

Scale bugs, like aphids, can cause yellowing in many patterns and leave a sticky residue. Scale bugs are not as easily identifiable as aphids because they hide behind thick protective shells. They look more like tiny cankers or unusual growths on plants. These can be treated most effectively with imidacloprid or neem oil. However, neonicotinoids should only be used in the evenings and in the prescribed doses.

Whiteflies

Whiteflies, another sap-feeding insect that is similar to scale and aphids, are the most visible of all. There is no way to know if you have moth-like, small white insects under your plant’s yellowing foliage. These offenders are very vulnerable to drowning and should be sprayed with water every other day.

Opogona crown borer

Crown borer is a term that refers to small holes or cracks in your bird of paradise’s crown and base leaves. You can’t do much if the plant is yellowing.

Bird Of Paradise Leaf Curl: Why do Bird Of Paradise leaves curl?

Bird of Paradise is one of those plants that combines fantasy and spectacle. This plant stands out because of its brilliant colors, uncanny resemblance, and huge, massive leaves. Bird of paradise may curl leaves in unfavorable places and conditions. Bird of paradise leaves can curl for many reasons. These are some of the reasons bird of paradise leaves curl.

Why do Bird of Paradise Leaves Curl

  • Bird of paradise can be found as a tree that is 5-30 feet tall (1.5-9m). There are many varieties, but all have large paddle-shaped leaves.
  • They start as curled tubes and then curve outwards from the main body. While the leaves become more elongated as they age, older foliage may still have some curves at its edges.
  • Bird of Paradise is a tropical tree with 18-inch (46cm) leaves. The average length of the leaves is 18 inches (46 cm). They grow from the main crown in a cluster.
  • Bird of paradise leaves will have some leaf curl, but this is not unusual.

Cultural causes of leaves curling on Bird of Paradise plant

The bird of heaven is suitable for USDA hardiness zones 10, and 11. Although it is not hardy in zone 9, it can be grown in a pot in cooler areas in the summer as long as it is moved indoors before it gets too cold.

  • The leaves tend to be thin around the edges.
  • They can also become brittle in high winds and with repeated bruising.

Leaf curl can occur in bird of paradise under the wrong conditions from a variety of factors. The new plants will need to be watered well before they can grow. Otherwise, their older leaves will curl up in protest. The leaves will curl inward when exposed to cold temperatures. Bird of paradise will curl leaves if it has poor soil or a low pH.

Bird of Paradise: Leaves Curling up – Pests and Disease:

Bird of Paradise plants are often attacked by a variety of pests. Scale and mites are responsible for curling and malformed leaves. Chaetanaphothrips Signipennis is a type of thrip that can be found on birds of paradise plants. It also causes leaves to curl. While some fungal diseases can be found in bird of paradise, they don’t cause leaf curling. Environmental reasons are more common.

Curling Leaves Indoors for Bird of Paradise

The containerized bird of paradise plants need to be repotted every couple of years, or whenever they become pot bound. To help replenish nutrients, container plants need new soil. You must also give your plant enough space to grow.

Root bound plants can prevent the plant from absorbing nutrients and moisture. This can lead to curled leaves on birds of paradise. The plant should not be placed near a drafty window. It will also affect its leaf health if the container is allowed to dry out too long. Although leaves may curl after transplants, they will recover in a few days.

Bird Of Paradise: Bird Of Paradise is Cold Hardy

The bird of paradise is a unique plant because of its majestic fan-shaped leaves and crane-headed blooms. Bird of paradise is it cold-hardy? Many varieties can be grown in USDA zones 10-12, and sometimes even zone 9, with protection. For the best bird of paradise winter care, it is important that the plant be placed in a suitable location at planting.

Bird of paradise freeze damage may be milder than winter burnt leaves. However, trunk and stem freezes can cause more severe problems. These tips can help protect your bird of heaven from freezing and help you heal bird of paradise plant freeze damage. Continue reading to find out more.

Bird of Paradise is Cold Hardy?

  • Bird of Paradise can withstand temperatures up to 24°F (-4 C). This tropical wonder, a South African native and closely related to bananas is susceptible to freezing damage even in warm areas where it is regularly planted.
  • Although these tropical plants can withstand cold temperatures, freezes can cause damage to the broad, thin leaves.
  • Deep cold temperatures can also cause damage to the root zone. An extra thick layer of mulch, between 2 and 3 inches (5 to 7.5cm) is recommended.
  • A thick layer of organic mulch around the bird of paradise’s root zone can protect it from freezing.

To prevent rotting, leave a few inches of mulch around the trunk. Dig in at least 6 inches (15cm) of organic matter or rich compost when you plant your tree. To help regulate heat and juice the soil, dig in deep. This also increases soil porosity to improve drainage.

Bird of Paradise plant freeze damage

The leaves will show the first signs. The leaves become brownish-yellow and tattered at the ends. These will eventually die back and can be removed.

  • Bird of paradise freeze damage can cause brown to black stems, limpness, and soft spots on the trunk. This is a sign of almost fatal injury.
  • For such plants, the best thing is to give them proper care and wait for their recovery.
  • Lightly damaged plants can be cut to the point where the stem meets the trunk.
  • When removing damaged leaves, be careful not to damage the trunk.

Will bird of paradise leaves uncurl?

With good care, the plant will begin to uncurl new leaves after a few seasons. How to Protect Bird of Paradise From Freezing. The best way to enjoy these flowers is to think before planting. Consider soil texture, your growing season, and freeze points. Bird of paradise plant freeze injury is preventable in many cases. If the plant freezes, it should not be planted on a hillside or in a microclimate on your land.

Mulching is an important part of bird of paradise winter care. But so is the place where it is planted. You should choose a sunny but protected location that is near enough to other plants to create a barrier. This will prevent winter problems even in the deepest freezes.

Bird Of Paradise pests and diseases – How to get rid of scale on bird of paradise?

Bird Of Paradise pests and diseases – How to get rid of scale on bird of paradise?

Bird of Paradise (Strelitzia), is an indoor houseplant that is dramatic and has striking flowers. It is easy to maintain if you have the right conditions. Sometimes, however, fungal bird-of-paradise leaf spot can develop if conditions aren’t right. Let’s examine what causes different bird of paradise pests and diseases, and what you can do about bird of paradise leaves turning yellow, leaf spot, fungus and scales on indoor bird-of-paradise plants.

Bird Of Paradise Fungus – Controlling Leaf Spot On Indoor Bird Of Paradise

About Strelitzia Fungal Leaf Spot

The bird of paradise fungal infection is most common when there is too many moisture levels. It rarely causes long-term damage to plants. This bird of paradise houseplant fungal infection can be prevented by proper cultural practices and sanitation.

The leaves’ spots will measure between 0.1 and 2 centimeters in size. The spots can be shaped in a circular or irregular fashion. The fungal spots usually have a darker gray color on the inside and a darker, or even black, outside. They can also appear brownish or yellowish.

Bird of Paradise Fungus

Control Fungus on Plants that have been infected are more likely to lose their leaves. Catching the disease early is key to successful treatment. Strelitzia fungal leaves spot should be treated immediately. Also, you’ll want to get rid of any fallen leaves. The disease can be spread by allowing infected leaves to get wet.

  • You can use a fungicide to treat fungal leaf spots.
    • You can either use neem oil or another fungicidal spray to treat your plant. To ensure that the treatment doesn’t damage the leaves, it is a good idea to spray only a portion of your plant before you start spraying the rest. If everything is fine, spray the entire plant.
  • Good cultural practices can help prevent fungal leaf spots and other diseases.
    • Make sure to remove any dead leaves from the plant and the soil. Good air circulation is important. Avoid overhead watering and don’t let the leaves sit for too long.

Bird Of Paradise Plant Bugs – How to Manage Insect Pests on Bird Of Paradise

Bird of Paradise Plants are infested by Insect Pests

Bird of paradise plants are generally pest-free. Bird of paradise bugs can still be found, but they are not uncommon. Meatybugs and scale are the most frequent pests that attack bird of paradise plants. Scale is a hard brown spot on the stems or undersides of the leaves. The leaves are covered in white fuzz from mealybugs.

Other bugs that attack birds of paradise plants are caterpillars and snails. In late summer, leaf borers can be seen attacking flower bracts. Aphids can sometimes be a problem, and they can often be seen naked. Aphids can be seen on plants, as well as being visible from the outside.

Hand Control of Bird of Paradise Pests – How to get rid of scale on bird of paradise?

Large bird of paradise pests such as caterpillars or snails can be removed by hand. With a steady stream of water, you can knock the aphids off the plants. You can remove scale and mealybugs with rubbing alcohol. These pests can be treated with an insecticide, or with a horticultural oils. Systemic insecticides are insecticides that are absorbed through the roots and circulated throughout the plant.

Bird Of Paradise Disease Treatments – How to Control Bird Of Paradise Plant Diseases

Common Strelitzia Diseases

Bird of Paradise Diseases are rare and far between. However, this does not mean that the plant is immune to disease.

  • Root rot is the most common disease. Root rot is a disease that occurs when roots are left in water or soil for too long.
    • It can be prevented by letting the soil dry between waterings. Root rot is actually a fungus transmitted on seeds. The University of Hawaii at Manoa suggests that you soak the seeds in water for one day, then rinse them with 135°F (57 C) water for half an hour. This should kill the fungus. This is an easier method to treat bird of paradise diseases since most gardeners don’t start from seeds.
  • Leaf blight is another disease that affects bird of paradise plants. It is a common reason for ailing bird-of-paradise plants. The symptoms include white spots on the leaves, surrounded by a ring of different shades of green.
    • The most common treatment for leaf blight is to apply fungicide to soil.
  • Bacterial disease causes leaves to turn yellow or light green and then wilt and fall off. This can usually be avoided by keeping the soil well-drained. It can also be treated with a fungicide.

How to care for Rubber plant – Common Problems with Rubber Tree Plants

How to care for Rubber plant – Common Problems with Rubber Tree Plants

How to keep your Rubber Tree Plant looking its best indoors Here’s how to take care of this low-maintenance plant with these plant care tips.

The rubber tree plant is also known as ficus elastica. It is native to Southeast Asia and Indonesia. This popular tree is ideal for indoors. It has oval-shaped, shiny leaves with a dark green color. The houseplant is a fast-growing that can grow to 6-10 feet indoors. This height makes it easy to make a statement in any space. It’s best to buy them young to make sure they adapt quickly to indoor environments.

They can tolerate a variety of conditions and are able to bounce back quickly if they’re neglected.

Latex in the sap of rubber tree plants can cause poisonous reactions in pets and humans. When handling rubber tree plants, it is important to use gardening gloves. If any sap gets on your pets or you, wash the area immediately.

Tips for Caring for Rubber Tree Plants

Watering

It is important to avoid letting your rubber plant sit in water. This can cause root rot. Watering is dependent on the speed at which the soil dries in your house, so make sure to check it every few days. Once the soil has dried, water can be applied to the plant. Depending on the season, you might be watering your plant as frequently as once every three days or as little as once every eight days. When the air is dry, misting the leaves can also be a good idea.

Sunlight

For rubber plants, bright indirect light is the best. You can place one next to a window that allows sunlight in.

Fertilizer

This easy-to-care-for plant receives high phosphorus fertilizer during the growing season to encourage healthy root growth.

Common Problems with Rubber Tree Plants

  • Curling leaves: Too much or too little water.
  • Brown leaves: It is possible that your plant has become too cold.
  • Leaf drop: Because of insufficient light, cold drafts, and pests such as mealybugs or spider mites.
  • Sap: The milky sap of the rubber plant contains a compound called caoutchouc that can trigger allergic reactions. It can also cause poisoning in animals and people. Keep them out of reach of children.
  • Dust: Satch suggests wiping off dusty leaves using a dampened cloth or paper towel. He adds that you can dry wipe the leaves before using wet wiping to avoid any dust gunk.

Repotting rubber tree plants

Rubber plants don’t like being rootbound, so it will eventually be necessary to repot them. Purchase the plant in a greenhouse container.

  • To allow the roots to grow, repot the pot in a pot that’s 1-2 inches larger.
  • The roots also support the shoots! Within two weeks of the acquisition, you should repot it.
  • Repot the plant as it grows until its height is approximately 2-3 times that of the pot.

Yellow leaves problems: How to fix yellow leaves on plants

Yellow leaves problems: How to fix yellow leaves on plants

There are many reasons yellow leaves can appear on plants. Your green plants may have received too much sunlight or not enough. Might even have fallen prey to garden pests and too many cold drafts. There are many possible causes. It can be difficult to determine why your plant is yellowing. Different plant types may have different meanings.

For example, Aloe vera, a popular houseplant, develops yellow leaves when it is stressed or doesn’t follow a set schedule for waterings. Bromeliads and burros’ tails get yellow leaves when they are exposed to direct sunlight for too long. Calathea, however, gets yellow leaves due to a variety of factors: mis-watering or overwatering, underwatering, mis-watering withholding light, excessive exposure to light, drying out, and even, as some have suggested, being vexatious. While there are different reasons for different plants’ leaves to turn yellow, here are some for your understanding.

Improper watering or poor drainage

Yellow leaves are often caused by water issues. Roots can’t breathe in wet soil. Roots become suffocated, stop receiving the nutrients and water they need and shut down. Similar effects can be seen when plants are underwatered or in drought. Plants can’t absorb essential nutrients if they don’t have enough water. This results in yellow leaves.

  • Porous and well-draining soil is the best way to fix or prevent water problems.
  • Containers should have good drainage holes.
  • Saucers should be kept dry.
  • Avoid planting in areas where rainwater and irrigation accumulate in your landscape.
  • To improve the soil structure and drainage, you can incorporate organic matter such as compost into your soil.

Give soil the “finger-test” before you water. Place your index finger about a meter into the soil. Water should only be applied when the soil feels dry. Water thoroughly and deeply. Wait a few days if the soil feels dry and cool. Before you water again, let the soil dry slightly.

Suffocated Roots

Root damage can occur in many ways. Roots can become ineffective at delivering what your plants need. Compacted roots can occur when container plants outgrow the pots. Compacted soil in landscapes can block water, oxygen, and nutrient movement. These conditions can cause root problems and yellow leaves.

  • You can check the containers for any damaged or compressed roots by gently removing your plant from its pot. You’ll also be able to see the soil moisture.
  • Healthy roots will be whitish-yellow. Rotting roots are foul-smelling.
  • Roots that are diseased or rotten should be removed.
  • Compaction can be caused by pruning unhealthy roots.
  • Once the roots are removed, repot them in a larger container that has well-draining soil.

Landscape plantings can improve soil compaction by watering your lawn. Your planting areas should include organic matter and organic mulch. Garden gypsum can increase soil compaction in heavy clay soils and keep the leaves green.

Right soil

Your yellowing leaves may not be due to soil pH if you are growing container plants and using premium fertilizers. If your problem is with landscape plants, however, soil pH could be the answer.

The soil pH can influence whether plants have access to nutrients. As soil pH changes, so does the availability of nutrients. Most plants, including lawngrasses, thrive in soil pH between 6.0 and 7.0. Acid-loving Plants such as rhododendrons and blueberries, prefer soil with a pH of 4.5 to 6.0.

Some nutrients are less accessible to plants if the soil pH is lower than or higher than their optimal range. Even though nutrients may be present, they are not available to plants. Until pH issues are resolved, leaves will turn yellow.

The simple soil test determines the pH of your soil and gives other useful information. Many testing labs will also recommend soil amendments that can restore pH balance. When this happens, nutrients are made available again and green leaves return to normal.

Less nutrient soil

Yellow leaves can occur in areas where the soil pH is optimal. This could indicate a nutrient deficiency. Some nutrients are highly mobile. For example, nitrogen moves easily through soil and then leaches out. If soil nitrogen is not regularly replenished through fertilizer application, nitrogen deficiencies can turn lawns or plant leaves yellowish-pale green.

Proper fertilization and premium food products can be helpful if you suspect that you have nutrient deficiencies. The county extension agent will be able to provide information about the exact nutrients. Common deficiencies 1 can be identified by identifying which leaves turn yellow first. This will help you identify the cause.

  • Yellowing due to a lack of nitrogen The yellowing of inner leaves, especially older ones, is the first. As the yellowing progresses, it spreads outward and eventually reaches young leaves.
  • Potassium deficiency is a condition where the leaf edges turn brightly yellow but the inner leaves remain green. The symptoms are more severe in older leaves, as the leaf edges turn brown quickly.
  • Magnesium deficiencies manifest as yellow spots between the leaf veins of older leaves. As yellow moves away from the leaf center, veins remain green. The leaf edges become yellowed last.
    Iron deficiency can also be seen as yellowing in leaf veins. However, it affects young leaves first on the tops of plants and at branch tips.
  • The newest leaves are yellowed by a sulfur deficiency.
  • Complex relationships exist between nutrients in soils and plants. Low potassium can make iron less accessible. However, excess potassium can cause deficiencies in other nutrients. Proper fertilization is crucial for keeping your plants free of yellow leaves.

African violets

This houseplant is a tropical-loving plant and should avoid conditions such as “cold drafts”, too much sun or pests. Yellow leaves often indicate that you need to replicate the plant’s tropical origins using warm humid air and indirect lighting.

  • African violets love shade. Too much sun can cause damage to the leaves. If you notice yellow patches on your plant’s leaves, or dry edges it could be sunburnt.
  • Yellow spots on African violets leaves could be a sign of poor watering practices.
  • You should water the plants less often.

Air plants

Yellow leaves can be found on air plants. This should be addressed immediately. Yellow leaves can be a sign of excessive light or too wetness. These plants do not require the same amount of water as other houseplants. They get their moisture from the air and don’t need to be watered. Allow your air plants to dry completely after watering them. There should be no standing water and keep them out of direct sunlight.

  • Let your air plant dry out if you have overwatered it.
  • Mini portable fans are recommended by air plant experts to remove excess water from your plant’s leaves during waterings.

Aloe vera

Aloe vera is resistant to change in its environment. Water only when the soil has dried and to keep your watering schedule consistent. Aloe vera, a succulent, prefers to be watered in dry, arid areas.

  • Succulents need lightweight, sandy soil that dries quickly.
  • Avoid poor soil choices for aloe veras and a pot that isn’t suitable for its needs.
  • Most plants require pots that have good drainage.
  • If your aloe vera has not been placed in the correct soil or pot, repot it.

Bromeliad

Bromeliads’ leaf colors can vary greatly so you should not be looking for a specific color but rather a change in color. Yellow leaves can be a sign of a disease, but not a diagnosis. In the case, a bromeliad Guzmania has yellow leaves.

  • If your bromeliad’s bracts become papery with yellow tips and are not in direct sunlight, move it.
  • Even a yellow bromeliad leaf can be spotted as a sick one. It fades, you can see it.
  • Get that tropical beauty out of the direct sunlight. It’s getting sunburned.

Burro’s tail

Yellow leaves on the burro’s tail indicate excessive light exposure. Keep light bright but indirect. It is possible to save plants with yellow leaves, but you need to address them early so that they can recover. Move your plant from a “hot, bright windowsill.”

  • Make sure you find the right balance. As they struggle to get enough light, some plants can become yellow.
  • Indirect light doesn’t mean a dark corner–brighten it up! It is less likely that you can save the leaf.
  • Sometimes, you may need to cut off the yellow leaf from the plant to remove it. This will allow you invest your energy to keep the still-green plants thriving.

Calathea

Calathea’s yellow leaves can be caused by “overwatering” or “just being irritated. Calathea is not known for its easygoing nature, but for its beautiful appearance.

Calathea might need more attention than other plants. You might want to do some research before you bring it into your home.

Plants facing aphids and other problems

Aphids and other problems facing plants

The grass was green until the cool-down of this week. It has been hot and humid, with plenty of rain, since then. e In full bloom is the ancient peegee-hydrangea shrub at our corner. In backyards and at markets, sweet corn, tomatoes, and melons are all in harvest mode. Summer is full of energy.

Northeast Ohio is home to many flower planters. Calla lilies and petunias as well as creeping daisies and begonias are on display along the streets of cities. Even tiny mini-hydrangeas can be found. They are quite beautiful despite the summer heat that discourages many gardeners. City gardeners deserve kudos; enjoy shopping, dining, and exercising.

1. Oleander aphids (Aphis neri).

What are oleander aphids eating? Oleanders and their relatives are the main food source for oleander aphids. This is why Ohio gardens are so important. These aphids can only be fed by members of the Apocynaceae family (dogbane). This includes the perennial groundcover Vinca Minor and its associated annual genus Catharanthus. There are many colorful cultivars.

  • These insects also eat Amsonia and, according to recent DNA evidence, milkweeds. They have been reclassified as Asclepiadaceae.
  • This familial host range of oleander-aphids has always been an example of how insects coevolved with their host plants. It can even be used to inform us about the relatedness of plants (e.g. the folding in of milkweeds within the Apocynaceae).
  • The oleander aphid, which is black-antennaed, on Gomphocarpus milkweeds at Wooster. The aphids suck the sap and then exude sticky sugary honeydew that can sometimes be colonized by mold fungi.
  • You’ll not see oleander-aphids in serious plant health issues. They are unlikely to pose a threat to monarchs by removing their host plants. This may not always be the case and pestilence can be seen in different places. However, I believe that monarchs and milkweeds should not be afraid of the aphid.

2. How do you see a problem with a plant?

Cankered areas on a maple tree and dogwood, the “late coming”, of flowers, and the mosaic-like yellowing of some leaves in my Pawpaw patch.

Botryosphaeria canker

  • The Botryosphaeria canker (discolored, dead, and inwardly oriented areas of bark) that appear on yellow-twigged shrub dogwoods are caused by the Botryosphaeria fungal infection. It can be very damaging to the area of the plant where the canker is located.
  • Pruning is the only way to get rid of the canker, especially if it extends all the way around the stem. However, pruning would effectively kill the plant.
  • Cactus. Its spring dieback to the ground was mistaken for the loss of the scion.

Rejuvenation pruning

  • The tree is pruned to a few inches above ground each fall. This is called rejuvenation pruning.
  • The tree should not be grafted as it will grow on its own roots and would soon flower.

3. Yellowing and mosaic blotching

The third problem is still unresolved. It involves yellowing and mosaic blotching. Although the mosaic pattern of yellow and green looked like a viral infection in plants. It was strange: Some parts of the plant’s foliage were completely unsymptomatic while others were severely affected. There was no rhyme or reason to this pattern.

Plant viral testing should not be routinely performed if the virus is unknown.

Plants have different diagnoses, prognoses, and levels of uncertainty. The problems that plants have and how they are able to shed light on them in your yard might suggest that not all problems with plants, such as politics, are global and minor. Some problems are actually specific to the plant concerned. For example, giant redwoods in California ( SequoiadendronGiganteum). They are endangered despite their beauty and irreplaceable status in the national consciousness.