Why is my elephant ear plant turning yellow?

Why is my elephant ear plant turning yellow?

Why is my elephant ear plant turning yellow?

What is the reason my elephant ear plant leaves turning yellow? What should I do? The better news is that the maximum reasons why this happens are quite typical and nothing to worry about. Some reasons are simpler to heal than others. In this article, you can know the reason and cure for your elephant ear plant.

Elephant ear plants indoors (Colocasia) are certainly fascinating plants. Their name came from their tall stems and big leaves and giving them an exquisite look. Plus, their deep, gorgeous green color is sure to please the eye. Maintaining an elephant ear plant gives real pleasure both indoors and outdoors. It is also a great choice for beginning gardeners who want a focal point in their home or garden, as the plant is quite easy to look for.

It may be cause for alarm if you see that the leaves of your cherished plant are becoming yellow or brown. To stop future harm to your plant, it’s critical to determine the underlying cause of this, which can happen for a number of different causes. It is advisable to look into the particular needs of your plant species in order to solve the problem.

You will learn about eight possible reasons why elephant ear plants may yellow in this article.

Here are some reasons for elephant ear plants turn into yellow leaves.

Due to the biological life cycle

  • This is a normal reason and usually occurs due to the seasonal cycle nothing to worry about. When it gets cold, the plants prepare for dormancy.
  • In such cases, it’s a good idea to prune the yellowed leaves to make room for new growth in the spring. Plants with large leaves turn yellow in late fall. Some plants, like hosta, have large leaves that make them appear yellower than they actually are. Given the natural life cycle of plants, there is not much to do as that is plant life.
  • Due to lack of humidity.
  • If they’re watered inconsistently.
  • An imbalance in light to water ratio.
  • That’s a good reason for the relief. Just making sure the plants are at the right temperature when they transition to dormancy can really make a difference when they come back in the spring. Recommended to cover it with mulch if you have it. This will protect the plant from harsh winter temperatures.

Here are some reasons for elephant ear plant turn into yellow foliage

Due to sunlight

  • In keeping with the temperature, you should know that this particular plant likes warmth. Direct sunlight is not recommended for these plants. Colocasia prefers filtered light coming from the penumbra.
  • Colocasia shows yellowish leaves earlier because they are light-sensitive. This way you can get the temperature you need to grow without the risk of burning your leaves. Keep in mind that if the leaves of the plant are brown and have a crunchy texture, they are probably in the wrong place and should be moved as soon as possible.
  • Plants may also become yellow if they are kept in an environment with too much shadow. Since sunshine is essential for photosynthesis, the process by which plants make food, keeping plants in a gloomy environment without exposing them to regular sunlight can be hazardous. Lack of sunshine can starve plants, which will eventually result in lower leaves that become discolored and yellow and eventually fall off the plant.
  • This indicates that the plants are not getting enough sunlight. You can see that the yellowest areas are in the areas with the least amount of sunlight. You can give your plants a boost by placing them in the right place in your garden or home.

Soil requirement for elephant ears

  • Haven’t watered yet but be aware that poor soil conditions can cause discoloration. As mentioned above, the soil used should be porous and well-drained to avoid moisture from watering. Crumbly clay should work well.
  • Avoid rocky soils as this can damage the plant’s tubers. Additionally, a good soil pH is important for Colocasia. These plants prefer acidic soil with a pH of 5.5-6.5. Exceeding that can adversely affect plant health and cause yellowing and browning.
  • Plant nutrition is significantly influenced by the pH of the soil. Plants cultivated in soil with an incorrect pH level won’t thrive, even with fertiliser. You can use a soil test kit to find out your soil’s pH level, and it might also offer recommendations for bringing it closer to the optimal range.
  • To ensure that plants receive the proper nourishment, soil must also be improved with organic matter, such as fertilizer and compost. Poor soil quality can cause plant starvation and yellowing if there is insufficient organic matter in the soil.

Soil requirement for elephant ear

Proper fertilizing usage

  • Overfeeding elephant ear plants can also cause the leaves to turn yellow. Elephant ears are generally a powerful bait, so this can shock you.
  • This can cause problems that manifest themselves as leaf discoloration. We recommend using a water-soluble fertilizer that is high in nitrogen and stimulates leaf production and growth.
  • You should apply fertilizer only once a month don’t exceed it. Applying more frequently increases the risk of over-fertilization, which can lead to yellow leaves. Nitrogen deficiency can also cause leaf discoloration. But it usually gives different results. Old leaves may turn yellow, but young leaves are very bright green.

Proper fertilizing usage

Give proper nutrition.

  • The main problem that causes plants to discolor is a lack of nutrients. As mentioned earlier, this can be caused by inadequate sunlight, inadequate watering, and unfavorable soil conditions.
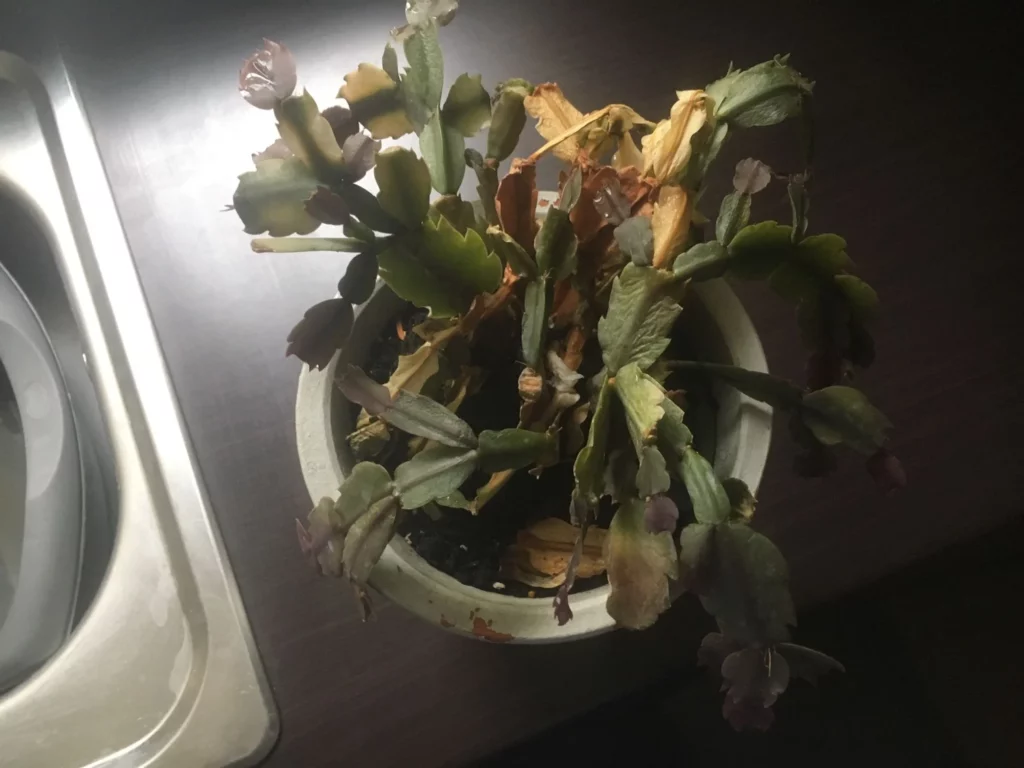
  • Nutrient deficiencies are detrimental to the health of all living things, and elephant ear plants are no exception. Nutrient deficiencies can be recognized by yellow leaf tissue and green veins. You’ll also notice that the top leaves turn yellow first.
  • Too little fertilizer is easily remedied by caring for the plants with plant fertilizer. However, it is important to follow the package instructions whenever possible.
  • Too much fertilizer can also burn plants and cause discoloration, so follow directions carefully. If you want to keep Colocasia as a houseplant, buy fertilizer for houseplants and fertilizer for spring and summer.

Root deterioration

  • Root damage can also lead to discoloration. Pots too small, shovels too rough, or even root rot. Dense roots develop as your plant grows beyond the pot it lives in.
  • Elephant Year plants tend to grow beyond the pot fairly quickly. This inhibits the movement of oxygen, water, and nutrients, which can cause leaves to turn yellow or drop off.
  • Looking at the bottom tray of the plant can help determine if the plant is growing out of its pot. When the roots come out, it’s time to change the pot. This will make the plants healthy again. Make sure to check the roots often as the plants grow, as they may need to be checked fairly often to make sure they have enough space.
  • With sideways plantings, you can prevent root damage, just make sure that the plant gets well-aerated soil. Well-drained soil, both indoors and outdoors, will prevent root compaction.
  • Pay attention to the color when looking at the roots of the plant. Pale, white, yellow is the original color of a healthy root. Dark roots often indicate rot, especially if they smell bad. In that case, unfortunately, it’s time to ditch the plant and start over.

How to stop elephant ear leaves turning yellow?

There could be a number of reasons and issue why your elephant ear plant is turning yellow. Overwatering or inadequate drainage is one of the main culprits. The roots may rot in perpetually wet soil, turning the plant yellow and making it wilt. Make sure your plant receives water only until the top inch of soil feels dry to the touch, and check that the pot has drainage holes so that any extra water can drain.

Lack of nutrition may also be the cause of fading elephant ear leaves. Make sure you are using a high-quality fertiliser with the right ratio of nutrients since elephant ear plants need fertilisation to develop and thrive. Avoid overfertilizing as this can also result in yellowing and other issues.

Elephant ear plants also require direct, strong light to survive. Your plant may begin to discolor and weaken if it doesn’t receive enough light. Try relocating it somewhere brighter but stay out of direct sunlight to prevent scorching the leaves.

Tips for growing elephant ear

Elephant ear plants are tropical plants known for their large, heart-shaped leaves. They can add a tropical feel to any garden or indoor space. Here are some tips for growing elephant ear plants:

  • Soil: Elephant ear plants prefer rich, well-draining soil that have good moisture but not waterlogged. You can add compost or other organic matter to the soil to improve its fertility and drainage.
  • Light: Elephant ear plants prefer bright, indirect light. They can be grown indoors near a window that receives filtered light or outdoors in a partially shaded area.
  • Watering: Elephant ear plants require regular watering to keep the soil moist but not waterlogged. You should water them when the top inch of soil feels dry to the touch.
  • Fertilizer: Elephant ear plants benefit from regular fertilization during the growing season. You can use a balanced fertilizer or one that is high in nitrogen to promote leaf growth.
  • Temperature and humidity: Elephant ear plants thrive in warm, humid environments. They should be kept in temperatures between 65-80°F (18-27°C) and in a location with high humidity.
  • Propagation: Elephant ear plants can be propagated by dividing the rhizomes, which are underground stems. Wait until the plant has finished its growing season before dividing the rhizomes and planting them in separate pots or locations.
  • Pests and diseases: Elephant ear plants can be prone to spider mites, mealybugs, and other pests. Keep an eye out for any signs of infestation and treat with insecticidal soap or neem oil. Overwatering can also lead to root rot, so make sure the soil is well-draining and not too wet.

How to take care of elephant ear plant leaves?

Improving the quality of elephant ear plant leaves is an important aspect of growing these plants. Here are some tips for caring for elephant ear plant leaves:

  • Clean the leaves: Elephant ear plant leaves can accumulate dust and dirt, which can interfere with their ability to photosynthesize. Wipe the leaves with a damp cloth or sponge to keep them clean.
  • Prune damaged or yellow leaves: If you notice any yellow leaves or damaged leaves on your elephant ear plant, prune them off with a clean, sharp pair of scissors or shears. This will help redirect the plant’s energy towards healthy leaves.
  • Support large leaves: As elephant ear plant leaves can grow quite large, they may need support to avoid bending or breaking. Use stakes or plant ties to support the leaves as needed.
  • Provide adequate light: Elephant ear plants require bright, indirect light to grow healthy leaves. If the plant is not receiving enough light, its leaves may become smaller or turn yellow.
  • Monitor humidity levels: Elephant ear plants thrive in high humidity environments. If the air in your home or growing space is dry, consider using a humidifier or placing a tray of water near the plant to increase humidity levels.
  • Water correctly: Overwatering or underwatering can cause problems with elephant ear plant leaves. Water the plant thoroughly when the top inch of soil is dry, but make sure not to let the soil become waterlogged.
  • Fertilize regularly: Elephant ear plants benefit from regular fertilization during the growing season. Use a balanced fertilizer or one high in nitrogen to promote leaf growth. Follow the instructions on the fertilizer packaging for best results.

Conclusion for elephant ear turning yellow.

In conclusion, if the leaves of your ear plants turning into yellow is one of the issues for you then it is because of many reasons such as root damage, over-watering, full sunlight, and improper nutrition. Follow the remedies of this article on the basis of your problem.

What temperature is frost for plants: Protecting plants to freeze in frost temperatures

What temperature is frost for plants?

What temperature is frost for plants

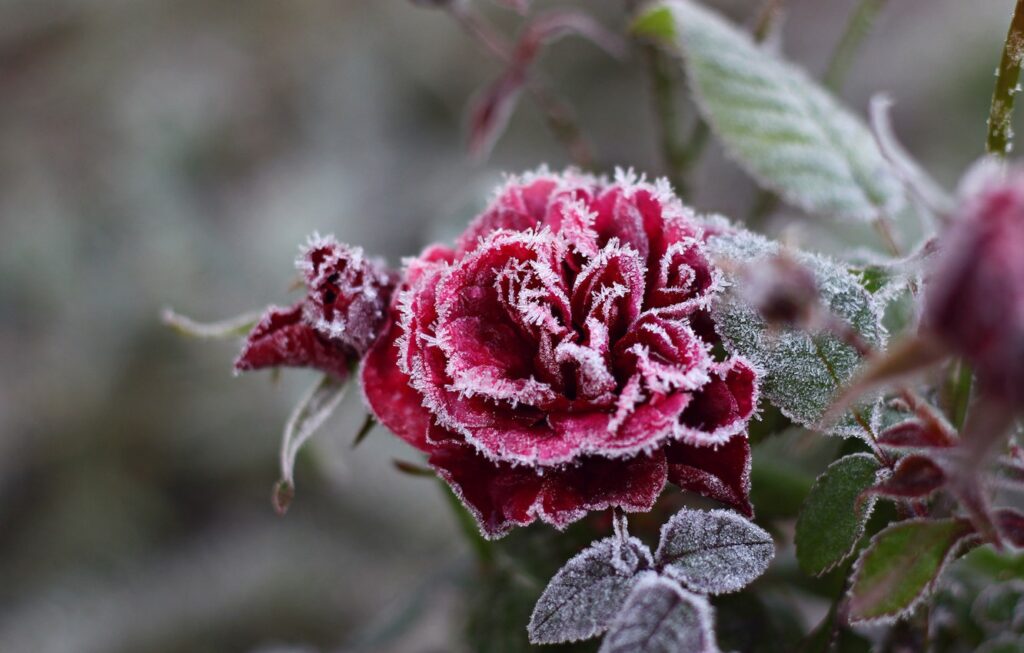
“FROST” is predominantly ice crystals that develop when ice crystals form on the outside of your plant. It forms when the moistness in the air and converted to ice without first becoming mist.

In our middle school these phenomena of gaseous interconverting into solid or ice crystals without becoming liquid. Some factors are noteworthy for evolving it.

Firstly, the temperature of the atmosphere has to fall between 36- and 32 degrees Fahrenheit. The moisture of the air converts into ice crystals, so there has to be a little breezy. It usually occurs on clear nights.

Our hardiest and coldest plants can withstand frost without the help of a gardener as they are natural health survival. Most of the sensitive plants, valuable summer produce vegetables such as tomatoes, peppers, and squash, can thrive at this temperature with the help of a gardener.

To shield your outdoor plants from cold temperatures while gardening, learning to anticipate when requirements for frost strike the area and what safeguards to take is useful.

How to Protect Them from Frost and Avoid the Freeze?

1. The potted plant should be kept inside at room temperature.

When it is in the forecast or you predict frost, at dusk you have to move your potted plants and hanging baskets indoors.

Plants in pots are more in danger or susceptible to harm because they aren’t benefited from the insulating capacities of the ground soil like in-ground plants are.

Roots of potted plants are exposed to colder temperature and at that temperature frost occurs. Although they have threats, extreme survival of these plants saves them.

Gardeners have to choose a place that isn’t too warm because sudden shifts in temperature can shock plants.  A place in your garage shed or cellar can be used as a shelter for plants.

Examine plants thoroughly for pests and diseases before fetching them inside your home. Keep plants separated from your houseplants to discourage the potential spread of insects.

Once the threat of frost has passed from the air, transport all plants back outside first thing in the morning.

How to Protect Plants from Frost

2. Shield them with coverings like plant frost cloth.

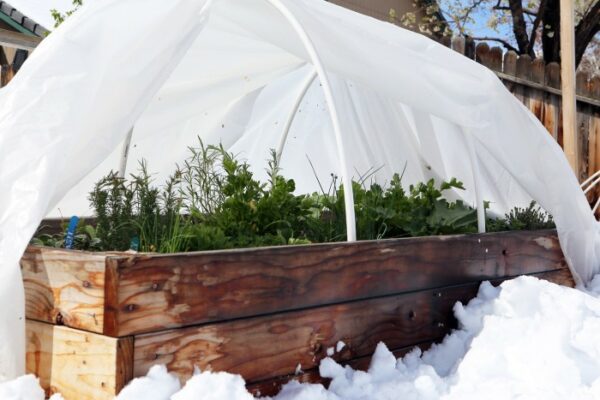
To protect a larger group of plants, simply wrap them with coverings like bed sheets, towels, or drop cloths.

Before applying the plant frost cloth, place some stakes around the plant so that the plant is in warm weather. Let the material drape over the plants to the mud line. Do not tie around the stem or stem of the plant.

Tie them together to prevent heat from the earth from reaching your plants. For even more resistance, consider adding a final layer of plastic.

No part of the plastic cover should come into contact with plant vegetation, as plastic can interfere with plants.

Weigh down the corners and boundaries with heavy stones or bricks to prevent the coverings from blowing away in the night. The next day the first task of the gardener should remove the covers of plants.

How to Protect Plants from Frost - shield plants with coverings

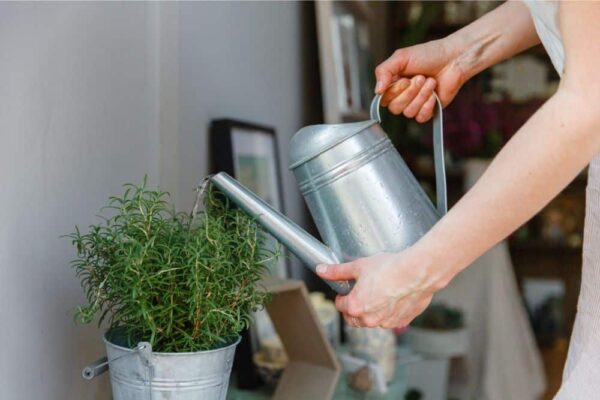
3. Watering them in the afternoon

It appears counterintuitive because it can hold the soil moist can aid protect plants from freezing weather.

Damp soil has an insulating result, which emits warmth upward come nightfall.

If you water your plants before the cold wind blows, do so at the meridian, when the temperature is still slightly warm.

4. Adding a dense layer of mulch

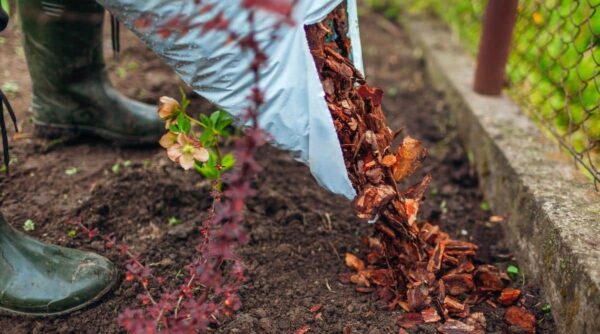
When it’s freezing, you should add a layer of mulch to your garden beds. It will help shield the soil from impulsive swings in temperature.

  • Utilize straw, wood chips, dry leaves, or precisely just a heap of leaves. It provides necessary insulation for the plant’s root system below ground.
  • Heavy mulch 3 to 6 inches deep to create a good barrier.
  • Leave one or two openings around the central stem to allow heat from the soil to reach the plants.
  • Mulching your green beds is one of the best things you can do to keep them low maintenance. But be sure to remove some of the defensive mulch when the weather warms up.

5. Soil perfect to use as frost resistant

The kind of soil your garden is thriving in also influences the quantity of dampness it maintains. Profound, loose, heavy, productive soil discharges more moisture into the air than sandy, nutrient-poor soil.

The more humid the air is, the better elevated the moisture point will be, and less frost can form on those plants. The mulched plants are more likely to become frosted since the mulch holds moisture and heat released from the soil and heats up the surrounding air.

6. Comprehend the behavior of plants in garden.

The plant itself defines its probability of harm. Immature plants or those still growing are most susceptible. Especially the new growth plants are in danger. The toleration against frost tends to be more elevated in the plants with deep maroon leaves and such leaves can absorb and controls heat.

Soft-leaf plants also can retain their warmness. Hardy or frost-resistant plants expose less portion of their leaves to chilling and drying winds.

In what temperatures frost can damage a plant?

Plants can endure a huge variety of temperature ranges, however, there are particular threshold temperatures that should be met earlier than they may develop and flourish. Frost is the maximum not unusual place form of plant harm that takes place at temperatures below 32 stages Fahrenheit.

Plants will develop naturally withinside the low-temperature sector as much as 32 stages Fahrenheit, however, beneath this temperature it can also arise on stems or leaves in bloodless climates.

Should you cowl flora at 39 stages? Are forty stages too bloodless for flowers?

When plants are exposed to frost, the temperature can damage the plant completely. The damage can deviate from browning leaves and drying out the plant to killing the tender plants completely.

  • Understanding how to inform in case your plant has hoar destroyed is essential if you want to keep away from unnecessary waste of time and money.
  • The leaves may be brown and there may be masses of lifeless or loss of life leaves in addition to stems.
  • The plant could have a great yellowing or browning color. If you detect those symptoms, they perhaps had been killed because of frost.
  • For interior plants, it’s an exceptional test of the leaves for frost harm inside. To do this, you need to use your arms softly to push down at the pinnacle of the leaves and experience any raised regions or bumps. For a door plant, it’s simpler to look if the leaves are frosted.

To do this, sincerely have a take a monitor how a whole lot of water you spot popping out of in which stems meet leaves.

Here are a few florae that need not be blanketed with the aid of using frost protection:

Here are a few florae that need not be blanketed with the aid of using frost protection:

Frost is an herbal phenomenon that takes place all through wintry weather. Rhododendron, Petunias, and snapdragons are some frost-resistant varieties.

It generally determines flora due to low temperatures. Its injures flora, which may be devastating to the general fitness of the tender plants.

Some people suppose that if they spray water on the frosty leaves, they may clean the frost and kill it.
Nonetheless, that is a wrong practice and can even induce extra troubles than it solves.

Frost is a form of ice that administrators and accumulates on flora and shrubs all through the bloodless wintry weather months.

More frequently than now that no longer, it’s now simply the leaves of plants that get frosted, however, the flowers, stems, trunks, or maybe the roots.

Key Takeaways

Climate change induces several differences in the physical conditions, such as plants and leaves. The natural environment and local climate extremes influence flowers and plants. The anticipated growth in frost events drives sense in plant replica and plant structure vegetation.

Plant life’s ability to avoid frost is dependent on the timing of its development and reproduction on the same hand for survival gardening, off-grid method is also useful.

In this article, we have evaluated the impact of frosts on plants and flowers, how the frost is damaging the roots, and tips on how to protect them from frost.

After that, we have to predict frost occurrence to take standards to save plants. The prediction of hoar frost events comprises a complicated decision study that employs conditional possibility and economists.

Growing Zucchini in 5 Gallon Buckets – Complete Guide to Grow Zucchini

Growing Zucchini in 5 Gallon Buckets – Complete Guide to Grow Zucchini

Growing Zucchini in 5 Gallon Buckets

Zucchini roots are deep and require a container that is at least 16 inches deep and 12 inches wide. Therefore, a five gallon bucket is a good choice as it meets these needs.

It is recommended growing zucchini in 5 gallon buckets. If you try to grow too many plants together, they will compete for nutrients and resources that will stunt their growth. Lightweight, durable, and inexpensive.

The plastic bucket also doesn’t lose moisture as quickly as things like terracotta. Zucchini is an excellent vegetable to grow for gardeners in small spaces and a great plant to grow in a 5-gallon bucket. But that doesn’t mean the plant can’t take advantage of gardeners’ support. If you’re thinking about growing zucchini, give it a go.

Growing zucchini in 5 gallon buckets

Growing Zucchini in containers

  • Container gardening or cultivating plants in containers or buckets is on the rise these days. It allows you to grow a wide variety of vegetables and fruits in a small space and gives you some control over your plant’s environment. Giving them the right amount of sunlight, protecting them from frigid winters, etc. can help them grow.
  • After all, zucchini can be planted in a 5-gallon bucket as long as it gives it what it needs to grow and produce it. Finally, you can customize or paint the container to blend in with the landscape or show your artistic skills and creativity. Sprinkle it, decorate it, and enjoy it as it is. Before planting zucchini, always use a “clean” 5-gallon bucket or a bucket that has not been used to store chemicals or toxic substances.

Growing Zucchini in containers

When and How to Plant Zucchinis in Gallon Bucket with Soil?

  • The best time to plant zucchini is spring when temperatures are consistently warm. Specifically, zucchini seeds need at least 70 degrees Fahrenheit to germinate and germinate. If you have the opportunity, especially if you’re new to container gardening or growing zucchini, choose compact, easy-to-grow strains such as Jackpot or Eight Ball. Zucchini seeds are planted 2.5 cm deep and watered immediately.
  • Seeds germinate in 5-10 days, and real leaves emerge a week later. It’s important to keep the soil moist, but not too wet. Spray or water can be used from below to prevent seeds from getting buried or washed away. When the seedlings are about 20-25 cm long, select the strongest and healthiest seedlings and discard the rest.
  • A good rule of thumb is to plant 1-3 zucchini seedlings about 3-5 inches apart per 5-gallon bucket. The recommended medium is potting soil mixed with organic matter such as fine bark, peat, and compost. You have to use sand or vermiculite to make well-drained and aerated soil. It is not recommended to use pure garden soil as it is compact and transmits pests and unwanted organisms.

When and How to Plant Zucchini in Containers
How to Care for Zucchini?

  • A 5-gallon bucket needs at least 6 hours of direct sunlight exposure. Moreover, regular watering is required, especially in hot weather or during the summer. You must keep the soil moist to stave off root rot and other diseases, but you must be careful not to overwater the plant. Feel the soil’s surface to see if it needs to be watered. If it’s too moist, you can usually leave it for a day or two. To ensure that it can be harvested when it’s ready, it should now be carefully monitored.
  • When the zucchini reaches 5 to 7 inches long and dark green in color, it is typically ready to be picked. When it is set, use sharp scissors or pruning shears to cut the stem just an inch or two away from the person. It is not advisable to handle or turn it because doing so will definitely ruin it.

What You Need to Grow Zucchini in a 5-Gallon Bucket?

There are a few things you need to start planting zucchini. Here’s a list of what you’ll need to grow this delicious vegetable.

  • 5 Gallon Buckets – The number of buckets you need depends on how much zucchini you plan to grow.
  • Planting Medium – Regular soil does not work well when growing zucchini in containers. Instead, you want a mixture of peat, compost, perlite, and fine bark.
  • Watering Method – Whether you water your zucchini with a watering can, hose, or some other method, you should have a suitable watering method for your plants.
  • Seeds – Requires 1-6 seeds per bucket.
  • Fertilizer or Compost – You need something to keep the soil rich in nutrients.
  • Support – Not all zucchini plants need support. However, when deciding which zucchini variety needs support, something like a tomato cage will work.

Best Zucchini Varieties to Grow in 5 Gallon Buckets

There are several varieties of zucchini that can be grown in buckets. Let’s take a glance at some of these different varieties.

Geode

Geode Zucchini are small, round, light green zucchini that are perfect for stuffing. This plant grows only 1.5 feet tall and takes only 41 to 50 days to mature.

Best Zucchini Varieties to Grow in 5 Gallon Buckets
Eight Balls

Eight Ball Zucchini are round and dark green. It itself is only 3 inches and the plant grows 24 to 30 inches. This zucchini takes 55 days to mature.


Silverbush

This is an attractive striped zucchini. It got its name from its beautiful silver-green leaves. These zucchinis are best harvested when they are 6 to 8 inches or less in length.

Buckingham Patio

The Buckingham Patio zucchini is a variety made for containers. The peel is golden. This type of zucchini is best harvested when it is 6 to 7 inches long.

Container Care

  • Water plants well, but do not overwater. In the heat of summer, potted plants dry out faster than soil, so check the container daily. Poke your finger into the soil and water it when it is about 2cm dry.
  • You should use drip irrigation here so that you can be assured of watering and nutrients also.
  • Once the flowers have bloomed, fertilize again. Apply a 10-10-10 (NPK) fertilizer every two weeks according to the manufacturer’s instructions.
  • Instead of the granular fertilizer originally used, use a liquid fertilizer that can be applied with a watering can or sprayer so as not to disturb the roots and flowers of the plant. For more, you can use diluted fish emulsion and spray it on the leaves of the plant. Soft sunlight is shining in the background.
  • Harvest when the fruit is about half its ripe size – This depends on the species of zucchini. This will encourage the plant to continue growing and producing more fruit. In my opinion, young zucchini is the most delicious. If left on the plant for too long, the skin and seeds of the fruit will begin to harden and the overall taste will be poor. As the plant grows, it can have problems.

Common Zucchini Plants Diseases

There are only a handful of diseases to watch out for but remember to check your plants regularly to avoid problems.

Zucchini Plant Bacterial Wilt

Zucchini Plant Bacterial Wilt

  • Bacterial species Erwinia Tracheophyta cause this bacterial wilt, cucumber beetles are responsible for the transmission of this virus, so the first line of defense is to keep these pests away. The first thing you’ll notice is that the plants will begin to die.
  • Once the plant has it, there’s not much you can do. Do not destroy the zucchini plant, use it for composting. We may face this problem next year as well. You also need to disinfect the pots and pour potting soil. You should start next year with new soil.

Blossom End Rot in Zucchini

Blossom End Rot in Zucchini

  • Uneven watering and calcium deficiency cause blossoms to end rot. Common in tomatoes, you’ll know it’s there when the fruit turns into a dark, pitted ulcer.
  • Ensures consistent and adequate amounts of water as plants grow. There is no cure for this disease, and adding calcium to the soil will not cure it once it occurs. increase.
  • The disease usually occurs during the rainy season at the end of summer, when powdery mildew flourishes in this weather, resulting in hot and humid weather.
  • Twice a week, you should spray the plants with equal amounts of milk and water and a few drops of dish soap. You can also spray neem oil twice a week or use an organic fungicide containing potassium bicarbonate.

Growing zucchini in 5 gallon bucket conclusion

You can grow zucchini by following these tips and the gardeners can get benefit by growing zuccini as well as it can grow in limited space.

Jade Plant Turning Red or Jade Plants Leaves Turning Red And Soft

Jade Plant Turning Red or Jade Plants Leaves Turning Red And Soft

Jade Plant Turning Red

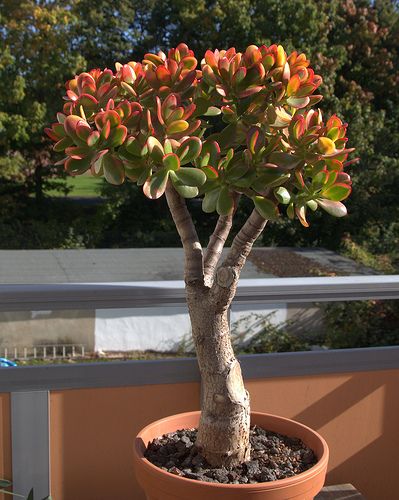
Jade plants (Crassula ovata) are among the easiest to mature and hardiest houseplants, creating them an excellent choice for the beginner or inert indoor gardener. However, if you begin to see your jade plant turning red, you may wonder what is wrong with it and what you ought to do to fix the problem.

Don’t you worry! We are here with an article to share about various factors that affect the color of your jade plants along with what you need to do to fix the problem. This post also includes information on different varieties of Jade plants and some basic guidelines on how to care for your jade plants. Happy reading!

Your jade plant leaves turning red, is it good or bad?

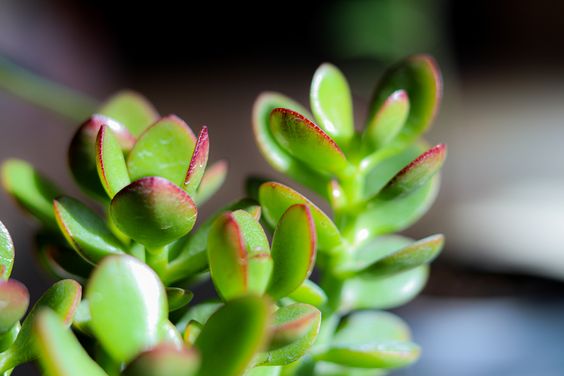
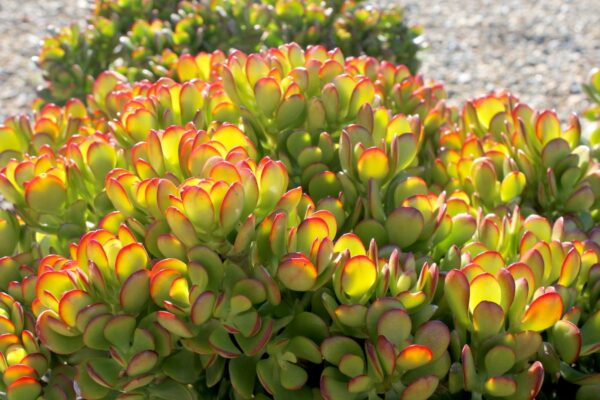
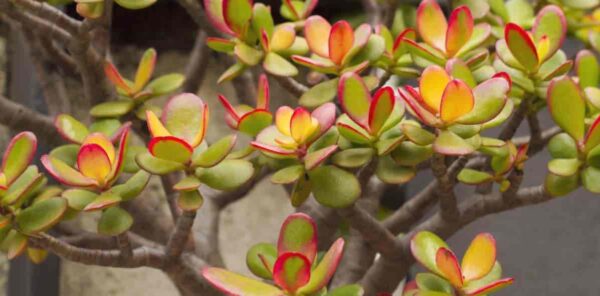
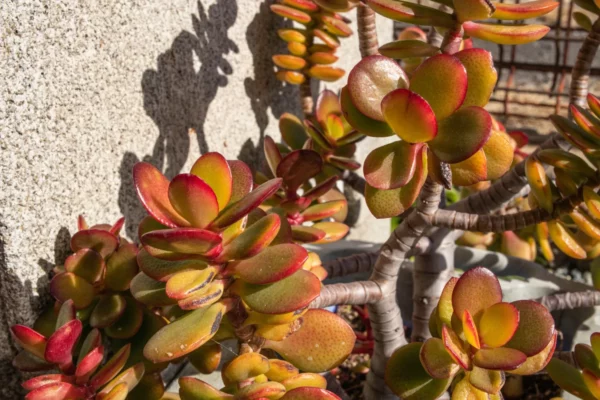
There are roughly 200 species of Crassula or jade plants. Many of them have inherently reddened tips, like the golden jade tree. This plant has almost lime-green leaves adorned with reddish edges. Other varieties could be Botany Bay, Harbor Lights, Silver Dollar jade, or Silver Jade.

Many other types commonly have a red border on the leaves. So if the jade plant turns red, examine for the variety and see if it is characteristic of the plant. A jade plant with red edges is not necessarily bad and may be part of the color of the plant’s leaves.

jade plant leaves turning red

Varieties of Red Jade Plants

A red jade plant doesn’t necessarily mean that there is something to worry about it. In fact, it is typically an alluring quality that many people appreciate. This discoloration has a natural cause.

Some jade plant varieties are naturally red on the leaves and margins, and other bright colors are also attractive. Below are some of the considerably familiar types.

Sunset jade – inherently bright yellow foliage with pink or red trim.

Crosby’s compact – old leaves are green or yellowish with red trims, while fresh leaves are colorful red throughout.

Gollum (aka hobbit) – long, thin, finger-like foliage with bright red fringes on top.

California red tip – this type has large, thick, dark green leaves with red pinpoints.

Tricolour – variegated leaves of pink, white, and green with bright reddish hues.

Crassula-ovata red varieties

More about Red Jade Plants

You can control the amount of red that the leaves of a jade plant developed by controlling the amount of light, water, and nutrients they receive. However, if you want your jade leaves to remain glossy and dark green, there is nothing wrong with that. This is accomplished by growing them under specific conditions as mentioned below.

  • Maximum Greenness: Grow in fertile, well-drained potting soil, fertilize monthly with a semi-strength houseplant fertilizer, and place jade in moderate indirect light. Set it in water when the soil is dry.
  • Reddish Leaf Tips: Grow in rich, well-drained potting soil or a low-fertility cactus mix and place in partial sun. Decrease the frequency of watering the jade plant.
  • Maximum Redness: To keep the jade plant leaves red, consider growing them in less fertile soil and placing them in direct sunlight all day long. The more sunlight and less fertile soil, the redder the leaves. Keeping the soil dry for a long time also promotes the reddening of the leaves.

Underwatering can turn jade plant leaves red and soft

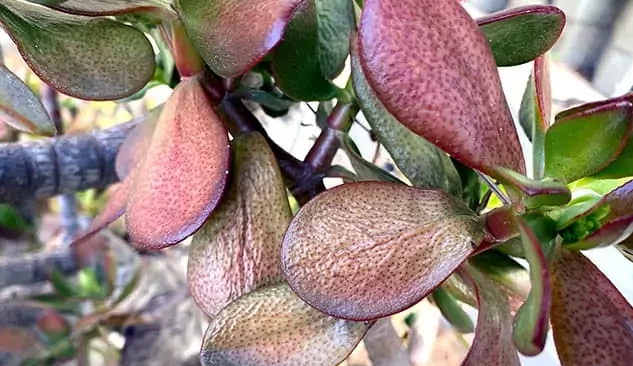
If Jade leaves turn red and become soft or wrinkled, it is probably due to a deficiency of water. With intense dehydration, they often darken and become burgundy or almost purple. Water it carefully and deeply, within a few days leaves should expand back within a few days. If you watered regularly, scan the stem to avoid rotting. Jade plant leaves turn red and soft when they are dry.

Underwatered jade plant leaves can turn soft and red

Why does my jade plant have a red spot on it?

Pest infestation is one of the main reasons for the small red spots or spots on the leaves. Examine them carefully for indications of damage and treat the disorder instantly before it can spread.

Jade turns Red and then Brown

If jade plants turn red and then brown, there is probably a sunburn or you place it in intense amounts of direct sun. This is very common when you take a houseplant outside or a plant that is in shade to full sun. It takes time to get used to the strong rays. So move the plant to a shady spot and give it several weeks to get used to the sun.

jade-plant-leaves-turning-brown

My jade plant turning brown and dry

If red leaves are blistered, cracked, or have brown spots, it’s probably due to too much sun exposure. To avoid burning, move it to the shade and acclimatize slowly for several weeks in the sun.

Jade Plant Leaves turning red and falling off

  • It is familiar for jade to drop dead or otherwise injured leaves and this can happen for other concerns listed above. But when it begins to drop full red leaves, it’s usually due to overwatering.
  • Make sure the soil is absolutely dry before watering again. I also urge using a soil moisture meter so you can hold the perfect amount.

Why is my jade plant turning yellow and red?

The Jade varieties need plenty of direct sunlight to keep their color. Otherwise, the decorative color will fade. Here is a list of factors other than sunlight affecting the color of your jade plants.

  1. Too Much Moisture
  2. Too Much Nutrient Supply
  3. Pest Infestation
  4. Overfertilization
  5. Spider mite pests can also cause yellow leaves.

Under fertilization and its effects on Jade Plant Leaves

  • If you don’t like the redness of the leaves and haven’t been fertilizing your plants, it may be time to start. It should (if the plants are well watered and don’t get a lot of sun exposure)
  • Now you know what’s causing it. You can determine if the plant is healthy if it likes red if you want to keep it and adjust your plant care according to your answers to these questions.

For little fertilization jade can turn into red also

Jade Plants turning Red under Natural Conditions

Extreme environments are not necessarily bad for the jade plant. It should be remembered that jade is a succulent plant that grows in dry, barren areas where most plants cannot survive.

These harsh conditions usually include intense sunlight, heat, soil fertility, and lack of water. Jade Plants look and perform their best when they are not pampered, and it’s perfectly normal to turn a reddish hue. It’s time to put on your detective hat and pay attention to environmental changes that are occurring.

Most likely, your jade is suffering from one or more of the following conditions that promote redness:

  • Jade that gets an excessive amount of sunlight turns red.
  • Jade leaves can turn red when it is very hot or cold, like in summer and winter. By reducing the frequency of watering, jade plants lose some of their dark green hues and change colors, including red.
  • Jade plants may be red because they grow in poor soil and are under-fertilized. If your jade leaves have turned a reddish color, but they look healthy and growing well, don’t worry.
  • It survives in nature and thrives in less-than-ideal conditions where water and nutrients are paramount. One of the elements of these naturally occurring changes is jade with reddish leaves.

jade-plant-leaves-turning-yellow

Basic Care for jade plants

  • Jade is one of the lowest-maintenance houseplants and requires minimal care for healthy growth. They are not picky about soil and fertility, as long as they are well-drained.
  • Watering is only necessary when the top few inches of soil are dry, as plants will rot and die if grown in damp conditions or overwatered.
  • In terms of light conditions, jade plants do well in all areas from full sun to moderately indirect light, and if the indoor temperature is comfortable, jade plants will be comfortable.

We hope this post could help you understand different factors affecting the color of the jade plants and what you can do about them.
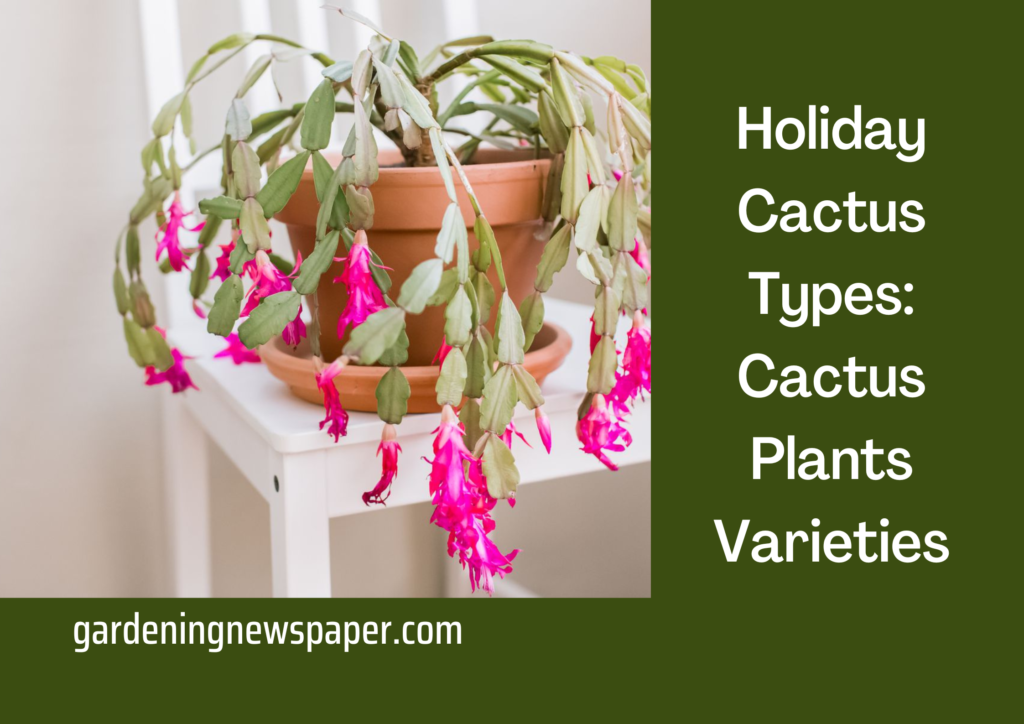
Holiday Cactus Types: Cactus Plants Varieties

Holiday Cactus Types: Cactus Plants Varieties

Holiday Cactus Types: Cactus Plants Varieties

Cacti are a fun and festive addition to any home, especially around the holidays. While they’re not as commonly seen as other houseplants, they still offer a unique and beautiful way to decorate. In this blog post, we’ll explore the different varieties of holiday cacti and provide tips for growing and caring for these festive plants. Read on to learn more!

Overview of Holiday Cactus Types

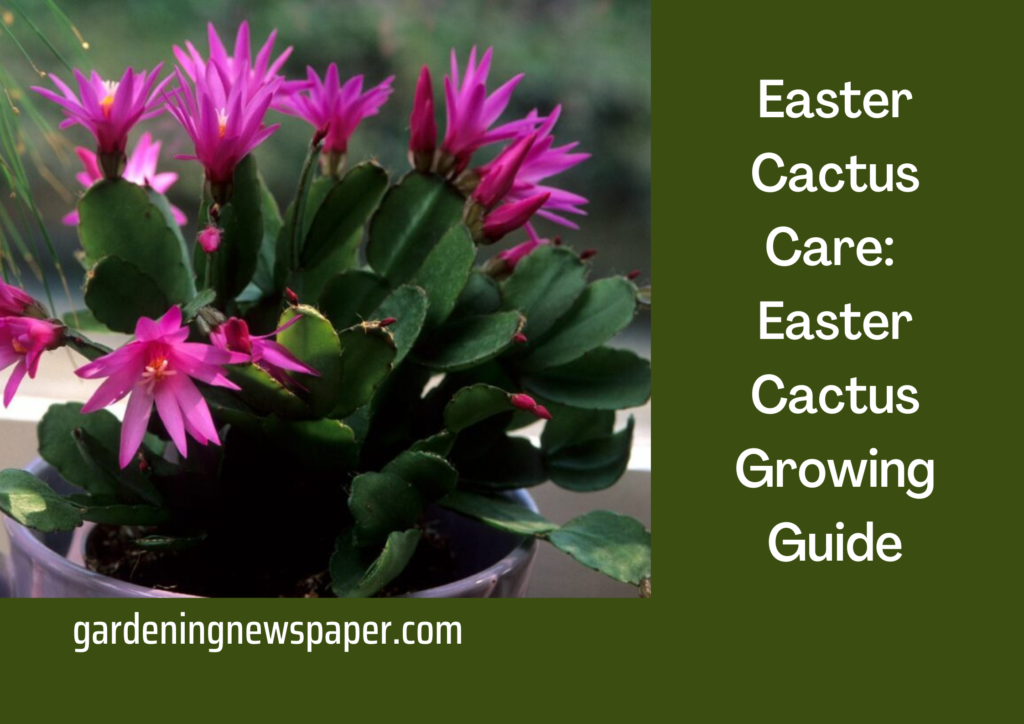
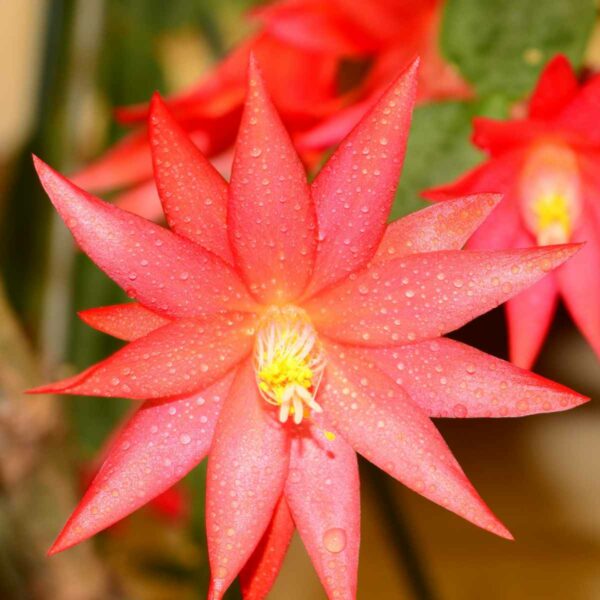
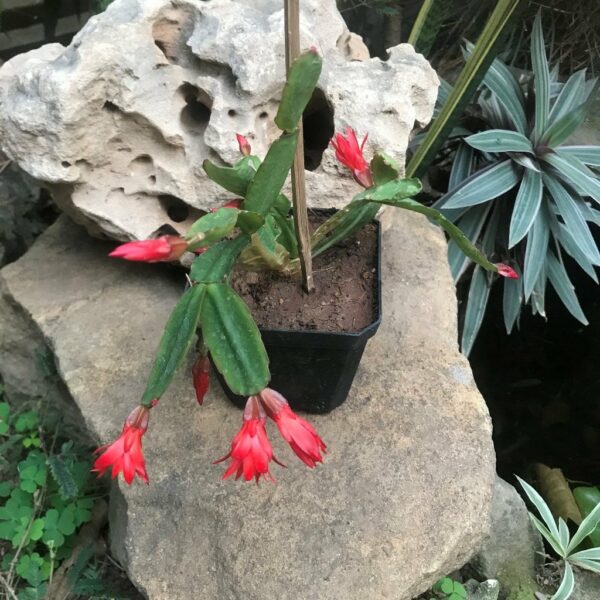
Holiday cactus is a family of plants that includes Easter, Thanksgiving, and Christmas cactus. All of these plants are native to South America and are easy to care for houseplants. The Easter cactus, formally known as Hatiora gaertneri, is a flowering cactus with bright pink, red, or white flowers. It blooms from late winter to early spring and is a very popular choice for holiday decorations.

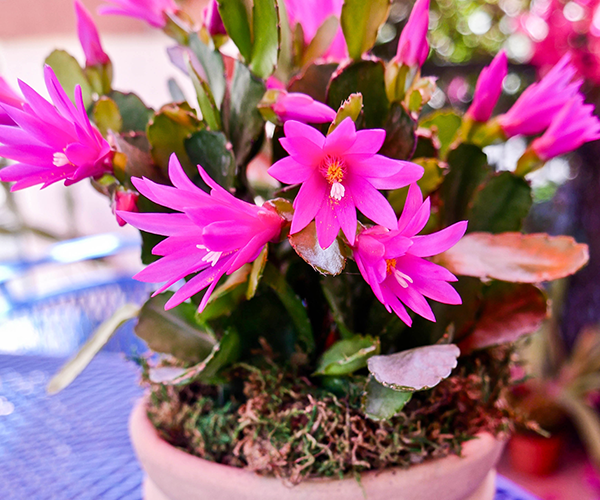
The Thanksgiving cactus is known as Schlumbergera truncata and has dainty, star-shaped pink or white blooms. It flowers from October to January and is often used in dried floral arrangements. Christmas Cactus, also known as Schlumbergera bridgesii, has bright red and white blooms that can be seen in November or December. All of these holiday cacti are low-maintenance plants that make for great houseplants or festive decorations around the holiday season.

Easter cactus is the most common type of holiday cactus, with its bright pink or white flowers blooming in springtime. It prefers cooler temperatures and more humidity than other types of holiday cactus, so it’s best to keep it away from direct sunlight and dry air.

Additionally, the Christmas cactus is another popular type of holiday cactus. This festive flower is known for its long blooms that start in the winter and typically reach their peak during the Christmas season. Unlike the Easter cactus, it prefers bright, indirect sunlight and drier air. The Thanksgiving cactus is also common in homes during the holiday season, and it blooms typically two weeks before Thanksgiving with its deep pink petals. Its requirements are similar to the Christmas cactus and are a great addition to any home during this special time of year.

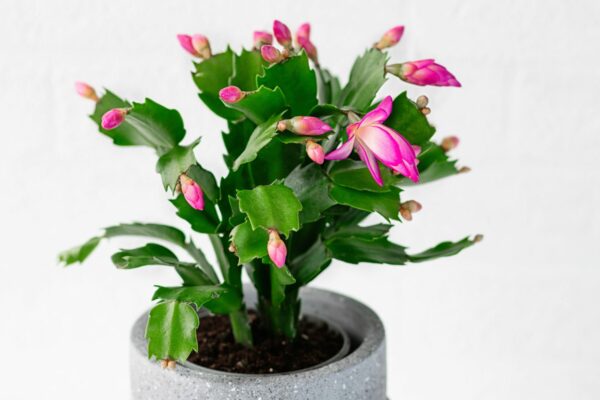
Thanksgiving Cactus

Thanksgiving Cactus

The thanksgiving cacti is a type of cactus that blooms around the Thanksgiving holiday. There are two types of thanksgiving cacti: the Schlumbergera truncata and the Rhipsalis pilocarpa.

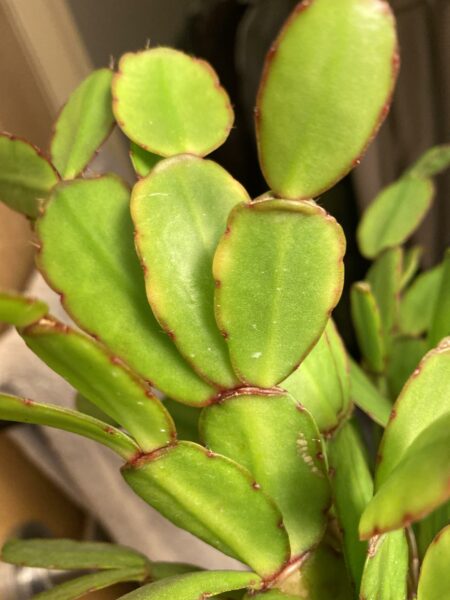
The Schlumbergera truncata, also known as the false Christmas cactus, is native to Brazil. It has thin, flat, green stems and small, white flowers. The Rhipsalis pilocarpa, on the other hand, is native to Mexico and has thicker, curved stems with pink or white flowers.

If you’re looking for a festive addition to your holiday decorations, consider adding a thanksgiving cactus to your home. These beautiful plants are relatively easy to care for and will bloom year after year.

What Are Some Species of Thanksgiving Cactus?

The Thanksgiving cactus is a well-liked indoor plant that produces stunning, vibrant blooms in the late fall, right before Thanksgiving. The Thanksgiving cactus’ most prevalent species are:

Schlumbergera truncata

Often referred to as the “real” Thanksgiving cactus, this species features pointed, claw-shaped segments with pink, red, purple, and white blooms.

Schlumbergera russelliana

Due to the fact that this species blooms a few weeks later than the Thanksgiving cactus, it is frequently referred to as the “Christmas cactus.” It comes in pink, red, orange, and white hues and features segments with rounded, smooth edges.

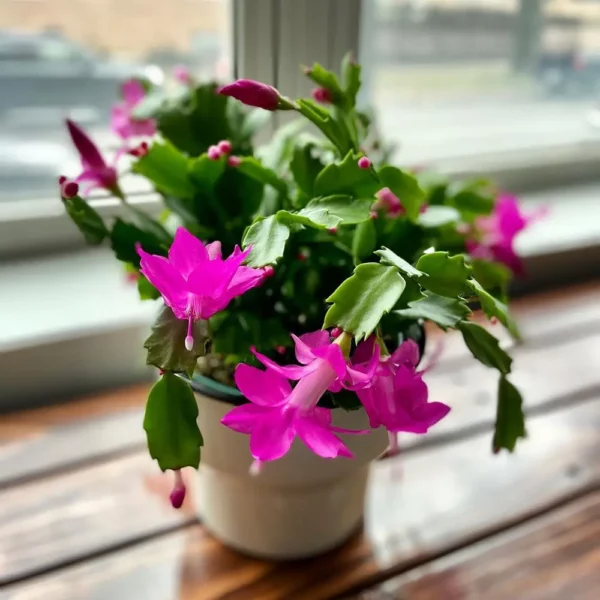
Christmas Cactus
Christmas Cactus

Christmas cacti are beautiful and easy-to-care-for plants that bloom indoors during the winter months. While there are many holiday cactus types, Christmas cacti are among the most popular.

Christmas cacti are actually a group of three closely related species: Schlumbergera truncata, Schlumbergera russelliana, and Schlumbergera xbuckleyi. All three are native to Brazil and belong to the genus Schlumbergera, which includes about 20 species of cacti.

Christmas cacti are known for their colorful flowers, which can be pink, red, white, or purple. They typically bloom in December, hence their common name.

These cacti are relatively easy to care for. They prefer bright, indirect light and should be allowed to dry out between watering. Overwatering can lead to root rot, so it’s best to err on the side of underwatering.

If you’re looking for a festive plant to spruce up your home this winter, a Christmas cactus may be a perfect choice!

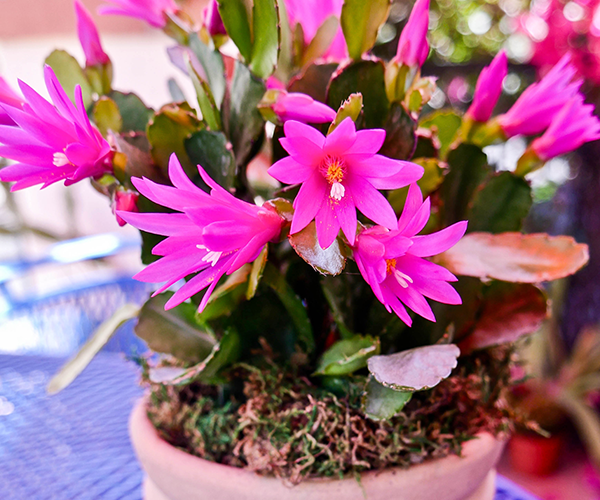
Easter Cactus

Easter Cacti

Easter cacti are a type of cactus that blooms around the Easter holiday. They are native to Brazil and are related to the Thanksgiving cactus. Easter cacti have become popular holiday plants in recent years.

There are two main types of Easter cacti, the Rhipsalidopsis gaertneri and the Schlumbergera truncata. The Rhipsalidopsis gaertneri is the most common type of Easter cactus. It has long, arching stems and pink, red, or white flowers. The Schlumbergera truncata is a smaller Easter cactus with shorter, more compact stems. It typically has red or purple flowers.

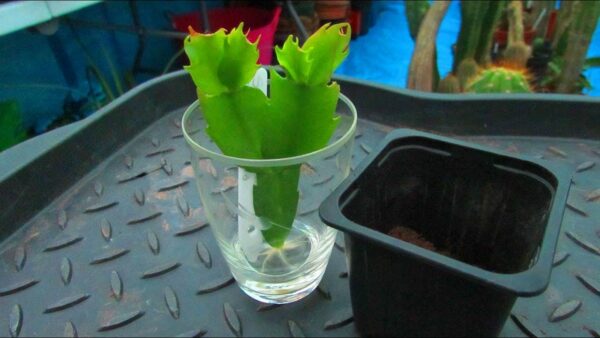
Easter cacti are easy to care for and can be propagated from stem cuttings. They should be allowed to dry out between watering and should be fertilized monthly during the growing season. Easter cacti can be put outdoors in the summer but should be brought indoors before the first frost.

If you are looking for a festive plant to add to your home for Easter, consider an Easter cactus!

Tips for Growing and Caring for Holiday Cacti

Holiday cacti, like Thanksgiving and Easter cacti, are popular houseplants because they are low-maintenance and easy to care for. To keep them thriving, however, it is important to provide them with the right environment; this means making sure they get the right amount of light, water and fertilizer.

One of the most popular holiday cacti is the Christmas cactus, which is known for its bright pink and red blooms. The Christmas cactus should be placed in an area with lots of indirect sunlight and watered once per week, or when the soil has dried out. It also benefits from fertilizer during the blooming season, which typically occurs between November and April. With the right amount of care and attention, a Christmas cactus can add a festive touch of beauty to any home.

For best results, place holiday cacti in bright but indirect sunlight; if grown indoors, a south-facing window is ideal. When it comes to watering, these plants should be kept evenly moist but not saturated; this can be achieved by allowing the top inch of soil to dry out before watering again.

Lastly, fertilize your holiday cactus every two weeks during their active growing season (typically April through September). A balanced liquid fertilizer applied at half strength is recommended for optimal growth and flowering potential Thus, christmas cactus should be fertilized every two weeks during their active growing period (April through September).

To ensure christmas cactus are healthy and reach their full growth and flowering potential, it is best to use a balanced liquid fertilizer at half strength. With regular fertilization and the right care, christmas cactus can bring lasting holiday cheer for years to come.

Common Problems to Look Out for When Growing Holiday Cactus Varieties

Common Problems to Look Out for When Growing Holiday Cactus Varieties

When growing a holiday cactus, it is important to look out for common problems that may arise. One of these problems is overwatering, as too much water can lead to root rot and propagate fungal diseases.

Amongst the most popular types of holiday cacti are the christmas cactus, which is a seasonal bloomer that is easy to care for. It produces a multi-colored display of flowers in shades of red, purple, orange and white. To ensure christmas cactus blooms for the holiday season, ensure that it is not watered too often and provide adequate light. Additionally, christmas cacti should be kept out of direct sunlight and will thrive best in temperatures between 65°F-75°F. With proper care, the christmas cactus can offer an attractive holiday display for many years.

As holiday cacti are native to tropical climates, they require consistently warm temperatures to thrive. It is important to keep the temperature of your home between 65°F and 75°F, and keep your plant away from any cold drafts or air conditioning vents. Among the popular holiday cacti varieties are the easter cactus, which blooms between March and April and produces pink, yellow, purple, or red flowers.

Easter cactus prefers light shade and warm temperatures and should be kept slightly moist at all times for optimal growth. To ensure proper blooming for the easter cactus, place it in a sunny window with indirect sunlight for several hours a day. In addition to the easter cactus, there are several other types of holiday cacti that require similar care and attention. With the right conditions, your plant can bring color and life to your home throughout the year.

To Conclude

While holiday cacti may not be as popular as other houseplants, they are a unique and festive way to decorate your home. With proper care and maintenance, these plants can thrive for years to come and offer beautiful blooms when in season. No matter what variety you choose, a holiday cactus can help bring some holiday cheer to any home.

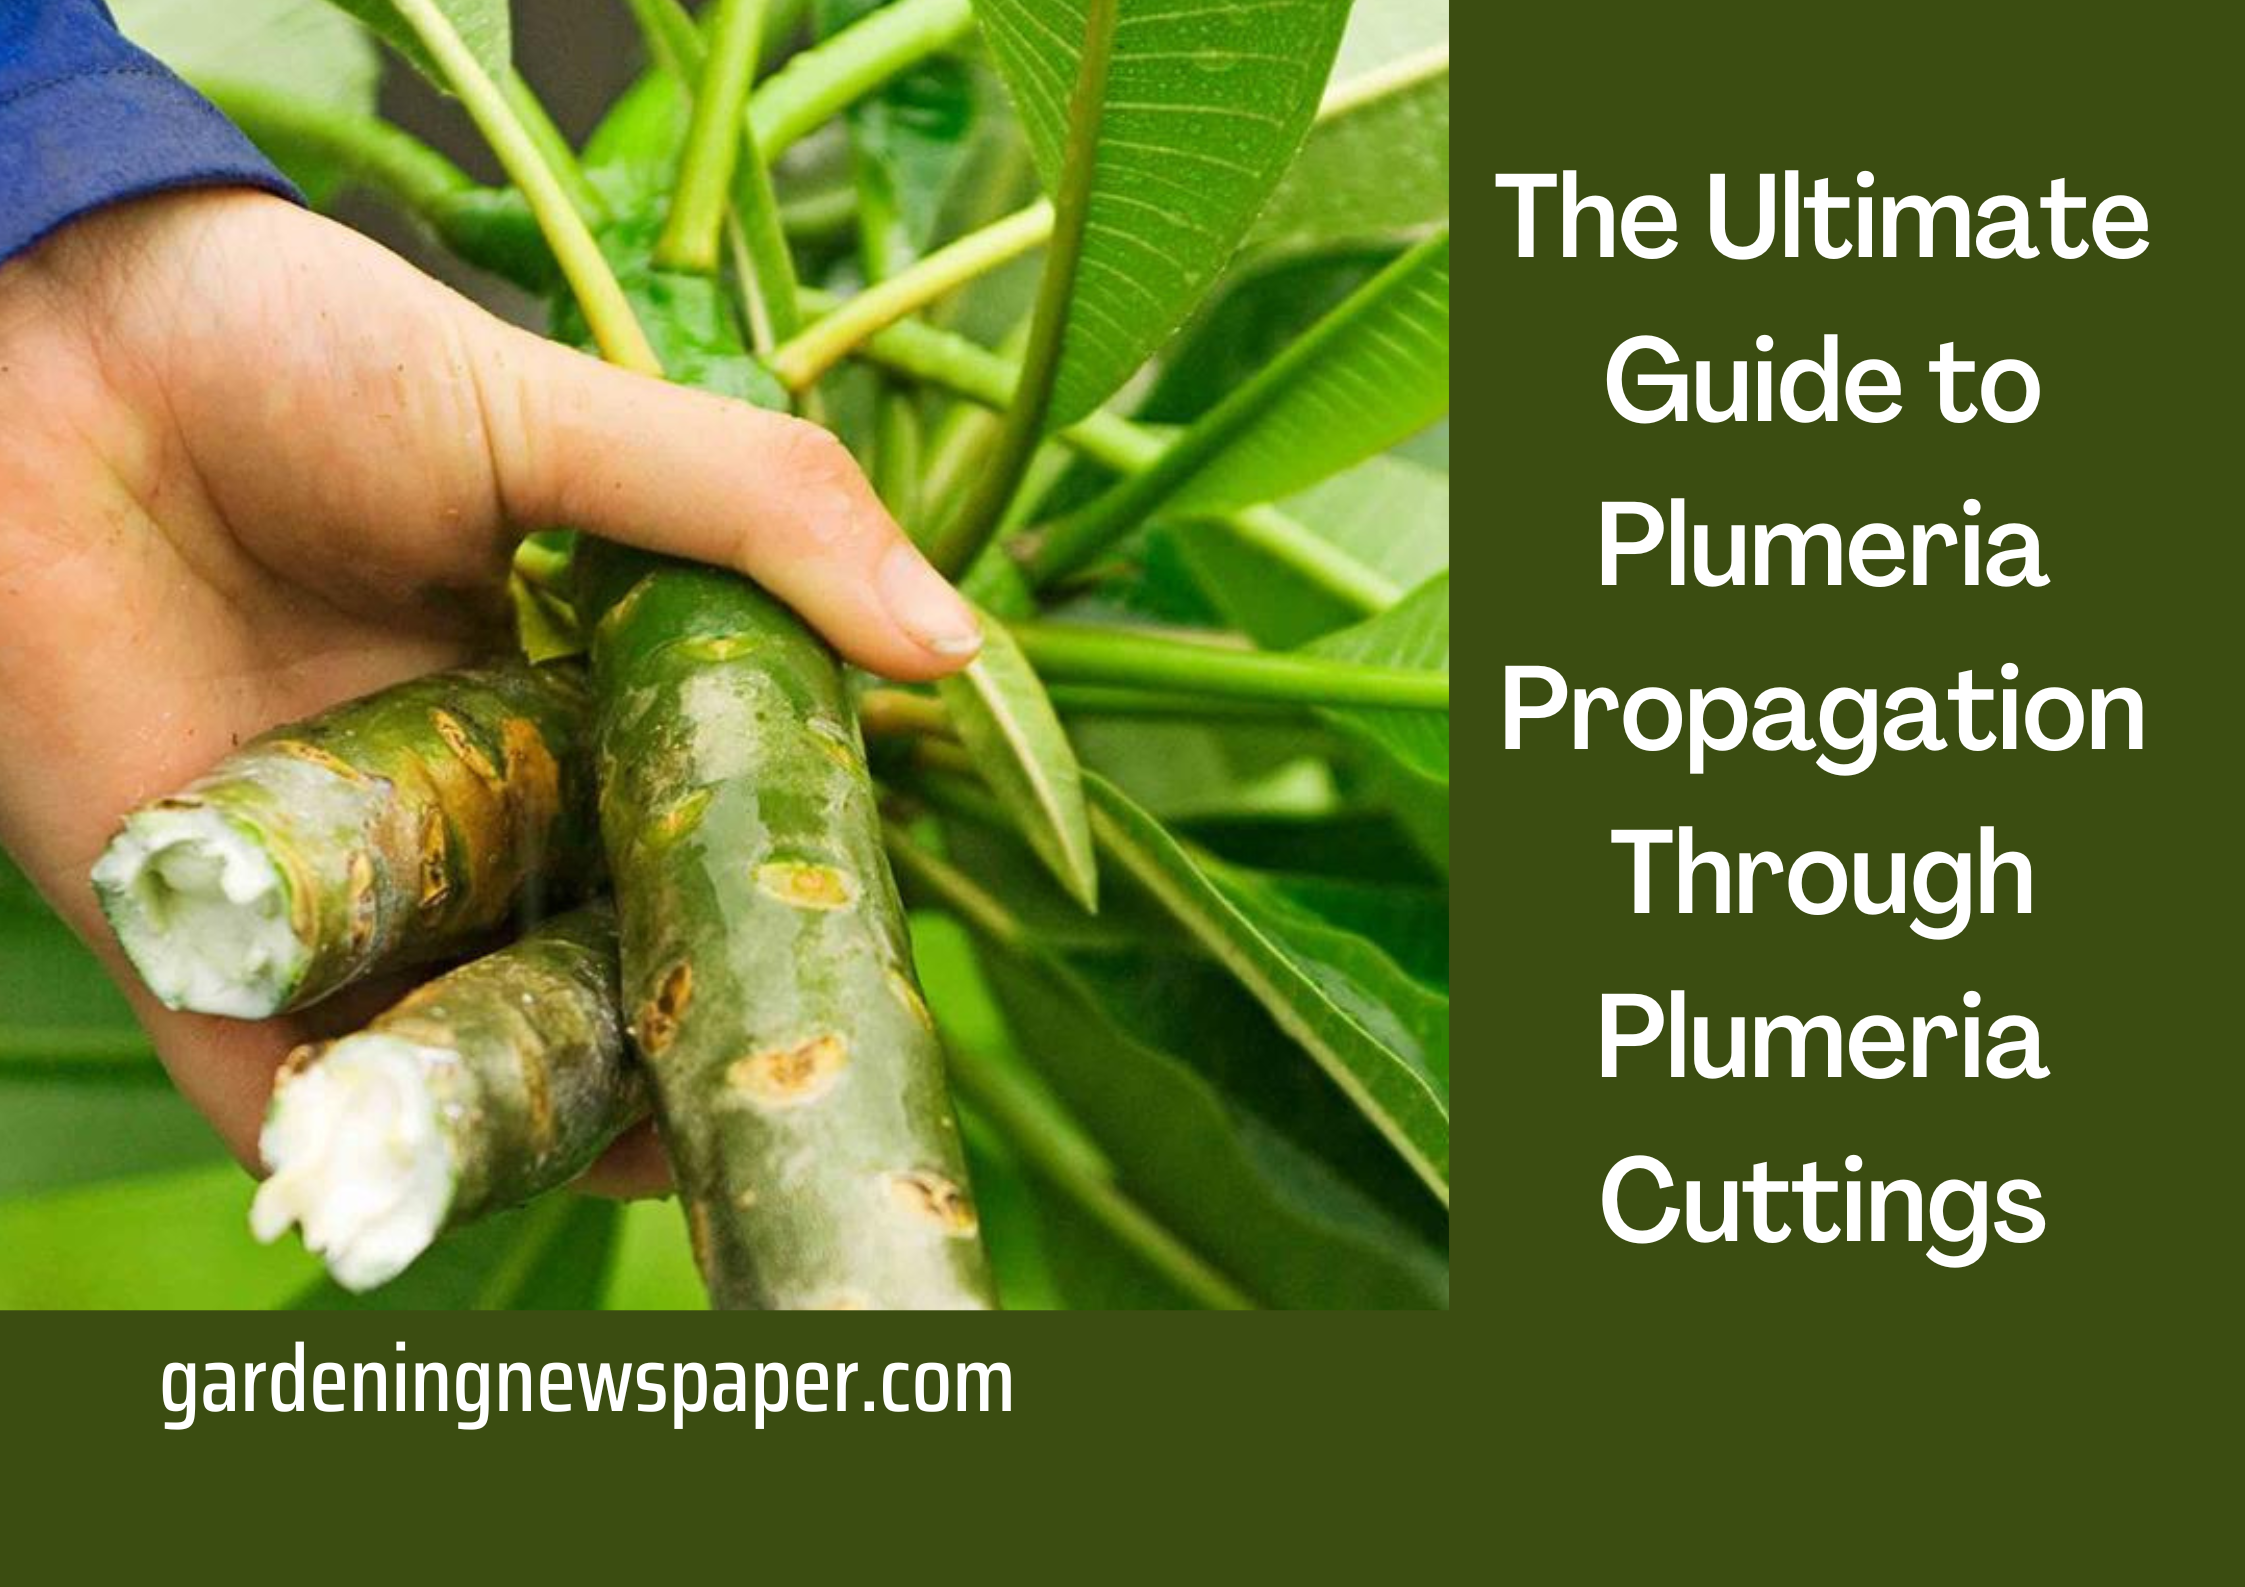
The Ultimate Guide to Plumeria Propagation Through Plumeria Cuttings

The Ultimate Guide to Plumeria Propagation Through Plumeria Cuttings

The Ultimate Guide to Plumeria Propagation Through Plumeria Cuttings

Plumeria plants are some of the most beautiful and unique plants that you can find. Propagating them can help you get more of these amazing plants, and it can also be a fun and rewarding project. Here, we’ll provide you with a step-by-step guide to propagating plumeria plants, so you can enjoy their beauty for years to come!

Understanding the Basics of Plumeria Propagation

In order to ensure the successful propagation of plumeria plants, it is important to understand the basics of propagation. To begin, you’ll need two things: a healthy, mature plumeria cutting and some patience! These plants can be easily propagated by rooting the cuttings in water or directly in the soil. Once your cuttings are planted in either a container or ground bed, they should root within four to eight weeks. Taking care to ensure they are watered regularly and under the right conditions, you will soon be well on your way to creating a beautiful plumeria garden!

This includes understanding the ideal climate for growing plumeria plants, the right soil and fertilizer requirements, and how to properly prune and propagate new cuttings Again when it comes to successful plumeria propagation, knowledge is power. Understanding the right climate conditions, soil requirements, and how to properly prune and propagate new cuttings is key. Armed with this knowledge and skill, you can confidently grow your own plumeria plants!

Preparing for Successful Plumeria Propagation

Preparing for Successful Plumeria Propagation

Preparing for successful plumeria propagation starts with knowing the basics and making sure you have the right supplies.

This includes having a pot that’s appropriate for the propagated plants, as well as soil and rooting hormones. Don’t forget to give your propagated plumeria some well-deserved love and attention, otherwise, they may never reach their desired flowering potential. With a little bit of extra effort, your propagation will be blooming in no time! Be sure to water regularly and apply the rooting hormone as directed. With the right tools, a bit of dedication, and some patience, you will soon be basking in the beauty of your very own propagated plumeria!

Once you’ve gathered all of your supplies, you can then move on to preparing your cutting for propagation. This involves trimming off any damaged leaves and stems, and sterilizing the knife or shears used to make the cut. Dipping the cutting into a rooting hormone before planting it in your container with soil.

With a bit of careful preparation and TLC, you’ll be rewarded with some beautiful plumeria plants in no time!

What is Root Plumeria and Rooting Plumeria

What is Root Plumeria and Rooting Plumeria

Most people think that propagating plumeria is difficult. However, with a little know-how and the right tools, it can be easy to root plumeria. In this article, we will cover everything you need to know about propagating plumeria, from finding the right plumeria cutting to taking care of your new plumeria plant.

When it comes to propagating plumeria, the most important thing is to find a healthy cutting. The cutting should be at least six inches long and should have two or three leaves. Once you have found a suitable cutting, you will need to prepare it for propagation. To do this, you will need to strip the leaves from the bottom half of the cutting.

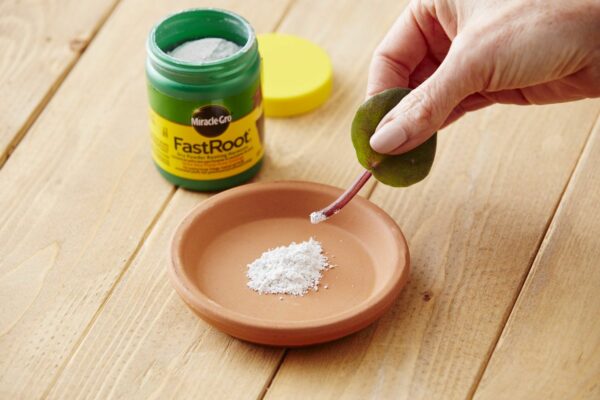
Next, you will need to dip the stripped portion of the cutting in the rooting hormone. Rooting hormone will help the cutting to develop roots more quickly. Once the hormone has been applied, you can plant the cutting in a pot filled with a well-draining potting mix.

Be sure to keep the potting mix moist but not wet. You can do this by placing the pot in a tray of water and allowing the potting mix to absorb the water from the bottom. After a few weeks, you should see roots developing on your cutting. Once the roots are several inches long, you can transplant your new plumeria plant into a larger pot or into your garden.
Cutting Propagation: Grow Plumeria

Cutting Propagation

Plumeria, also called Frangipani, is a tropical tree that produces beautiful, fragrant flowers. They are native to Central America, Mexico, and the Caribbean, but can be grown in any frost-free climate.

Plumeria is easy to grow from cuttings. The best time to take cuttings is in the spring or early summer when the weather is warm and the plants are actively growing.

  • To take a cutting, use a sharp knife or pruning shears to remove a stem with at least two leaves from the parent plant. The cutting should be about 6-8 inches long.
  • Remove the lower leaves from the cutting, leaving only the top two leaves. Dip the base of the cutting into rooting hormone powder or gel.
  • Place the cutting in a pot filled with a well-drained potting mix. Water the soil around the cutting, then place the pot in a warm, sunny location.
  • Keep the soil moist but not soggy, and in 4-6 weeks the cutting will have roots and new growth. Once the roots are established, you can plant the cutting in a larger pot or in your garden.

The Steps to Propagate Plumeria Plants Through Plumeria Cuttings

Propagating new plumeria plants is an easy way to increase the number of plants in your collection; the process requires a few simple steps. First, you need to carefully choose healthy and mature stems from the existing plant. It’s best to do this in April or May to ensure that the cuts heal quickly. Then, you want to cut them at a 45-degree angle just below a node—a spot where leaves and branches attach themselves to the stem—using sharp garden shears or pruning snips. Finally, let the cutting dry out for 24 hours before putting it in soil with an ample amount of drainage and warmth. Before you know it, you’ll have a beautiful new plumeria ready to join your collection!

1. Plumeria Cutting

Obtain a cutting from an existing plant that has at least three nodes and cut the stem into small segments, each with at least two nodes. This is the foundation of your plumeria propagation journey! The cutting should then be placed in a pot with moist soil and a little fertilizer to give it a boost. To ensure successful propagation, make sure the pot is well-draining and ensure the soil stays consistently moist. Once your cutting has developed roots, try propagating even more cuttings – you can never have too many plumeria plants!

2. Soil Requirements

Select a well-draining potting soil and fill the pot so that the nodes of the cuttings are just below the surface of the soil. After this, all you need to do is add water and wait for the magic to happen! With a little bit of luck, your cuttings will soon start developing roots and your own plumeria plants will be ready for propagation. Who knows, with a little bit of practice you might even become an expert in plumeria propagation!

3. Root Growth

After planting, make sure to water thoroughly, ensuring that all of the soil is saturated – this will help promote root growth and prevent wilting in your new cuttings. Plumeria propagation can be a great activity for gardening enthusiasts and novice gardeners alike! Not only is it an easy and fun way to add more plumeria to your garden, but it’s also cost-effective and a great way to get your horticulture on! Once you’ve planted your plumeria cuttings, make sure to give them ample water and plenty of sun, and soon enough you’ll be able to enjoy the beautiful blooms that come with proper plumeria propagation.

4. Light and Temperature

Place your newly propagated plants in a sunny location and keep them consistently moist while they establish themselves and take root – you should see signs of new growth within weeks! Meanwhile, have patience, as plumeria propagation can take some time. With the right conditions, your hard work will pay off and you’ll be rewarded with beautiful, fragrant blooms in no time. Don’t forget to keep your newly propagated plants in a sunny location and keep them consistently moist for the best results. Good luck!

Maintaining Your Plumerias After Propagated

After the plumeria cutting has grown roots, it is important to provide adequate water and light for optimal growth.

Watering the plant deeply once a week should be enough unless there is an extended period of hot or dry weather. Giving your plumeria too much water can actually be more damaging than not enough. Ensure to gauge the temperature, humidity, and your soil quality to ensure it doesn’t become over-saturated. Of course, light is also essential for success in plumeria propagation. Plenty of bright light is needed as this helps the plumeria cutting to adapt more readily and thrive. And there you have it – an easy guide to ensuring that your plumeria cutting enjoys a successful growth phase!

Providing appropriate sunlight exposure is key. Your newly propagated plumeria should be placed in an area that receives full sun for most of the day. This will ensure that the plumeria stays healthy and blooms successfully when it is ready to flower. It is essential to remember that your new plants will need plenty of sunshine and a warm temperature in order to thrive. Take the time to research the best location for your plant, as well as the food and water needs of the plumeria.

With the right materials and a bit of patience, propagating your plumeria plants is a straightforward process. Not only will it provide you with more of these beautiful plants, but it can also be a great way to connect with nature and take care of something that is truly your own. So get out there and give it a try!

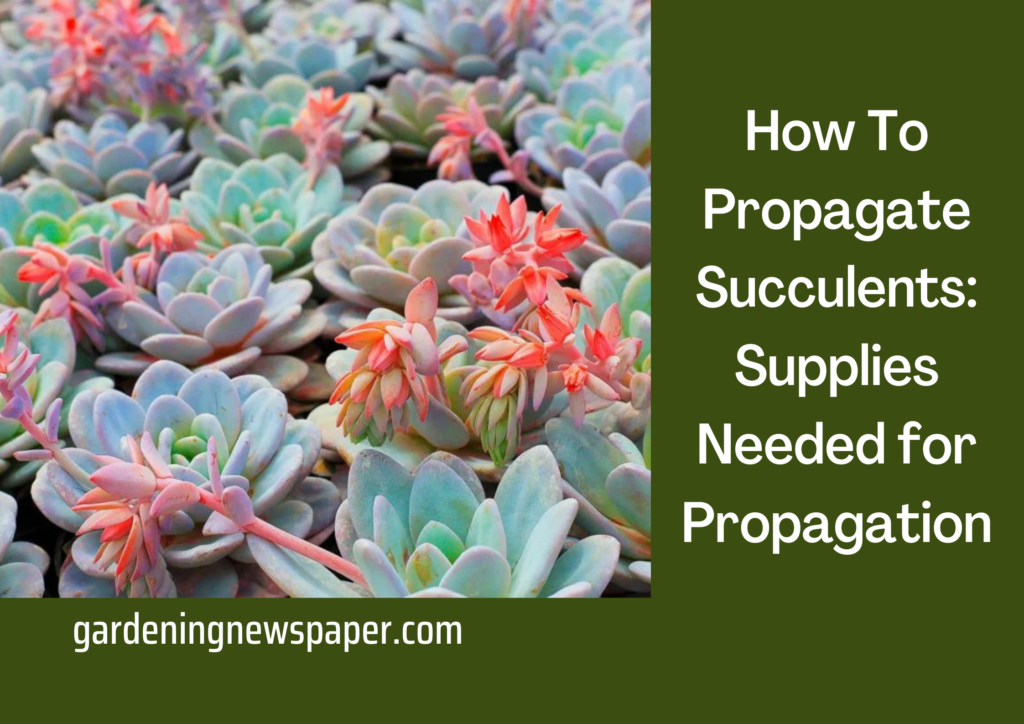
How To Propagate Succulents

How To Propagate Succulents

Succulents are a popular choice for both outdoor and indoor gardening because of their distinctive beauty and simple maintenance needs. But did you know that you can easily propagate succulents at home with minimal effort? In this blog post, we’ll go over the basics of succulent propagation so you can easily increase the number of succulent plants in your collection. So, continue reading!

How To Propagate Succulents

Understanding Succulent Propagation

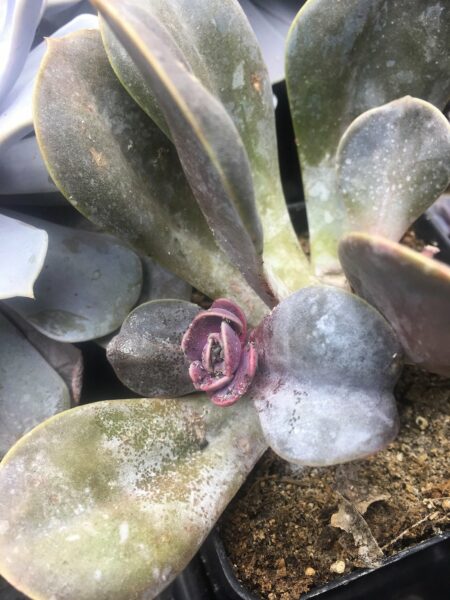
Propagating succulents is a great way to get more of these beautiful, easy-care plants for your home. Propagation by offsets is perhaps the easiest, most convenient method of getting new plants. Simply pinch off an offset – a small plant that has developed from the main plant – and pot it up, and you’ll soon have a brand-new succulent to enjoy! Propagate away and soon you’ll have enough of these trendy and low-maintenance plants to fill your entire home with!

To propagate succulents, it’s important to understand the key steps: division, cuttings, and leaf propagation. For anyone interested in becoming a succulent-growing pro, mastering these techniques is essential. Division involves splitting apart a single plant into multiple plants; cuttings are pieces of the stem or leaf from an existing parent plant; leaf propagation involves rooting the leaves of a succulent in soil or water Similarly, propagation by stem cuttings is another way to propagate succulents.

In this method, you would take a piece of the stem from the existing parent plant and place it in a soil mixture suitable for succulents. The stem will then take root and form new plants. Propagation by stem cuttings is a great option for those wanting to fill their space with more succulents quickly and easily!

Supplies Needed for Propagation

To propagate succulents, you will need the following supplies: rooting hormone, a sterile knife or scissors, well-draining soil, and a container for planting. Succulent propagation is an easy and effective way to increase the collection of your favorite plants.

Once you have your supplies gathered, cut off a leaf from the succulent parent plant and ensure it has some stem attached. Then use the knife or scissors to create a shallow groove in the stem for the rooting hormone to adhere to before placing the leaf in soil and watering lightly Again, propagation by stem cuttings is a fun and easy way to propagate succulents! With some basic supplies, a little bit of patience, and the right technique, you’ll be on your way to growing your own succulent garden in no time.

The process is simple – just make sure to cut off a leaf from the parent plant with some stem attached, groove it with the knife or scissors, dip it in rooting hormone, and place it in soil and water lightly. With a little TLC, you’ll be well on your way to having more succulents!

How to Propagate Succulents?

How to Propagate Succulents

Propagating succulents is an easy way to increase the number of plants in your collection without having to purchase additional ones. If you’re ready to dive into the fascinating world of succulent propagation, then read on! Propagating succulents will introduce you to a whole new level of understanding of these unique and hardy plants.

You’ll learn how to take cuttings, create clones of your favorite plants, and provide plant care for them as they grow. With just a little bit of patience and perseverance, you can be on your way to building a stunning succulent collection in no time at all!

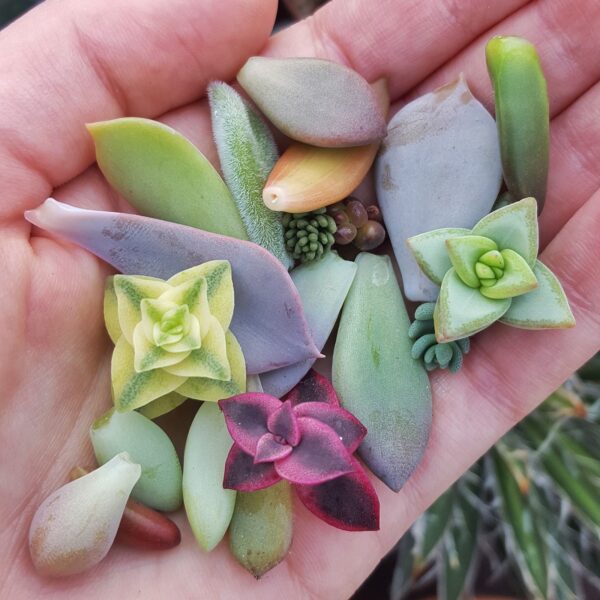
What are succulent leaves?

What are succulent leaves?

When learning how to propagate succulents, it is important to know the different types of leaves succulents have. There are three types of succulent leaves:

  1. Thick, fresh leaves store energy as well as water. The most prevalent kind of succulent leaves is often green or blue-green in color.
  2. Thin, papery leaves are common on cacti but are less frequent than thick, meaty leaves. They collect solar energy from the sun’s beams.
  3. Non-fleshy or papery succulent leaves, that look hairy or spiky and help keep the plant safe.

Rooting hormone

Rooting hormone

When it comes to propagating succulents, the rooting hormone is essential. This helpful product can be found at most nurseries or garden centers, and it’s very easy to use. Simply dip the cutting into the hormone, then plant it in the soil. Within a few weeks, you’ll see new growth emerging from the succulent.

Propagation by stem cuttings

Propagation by stem cuttings

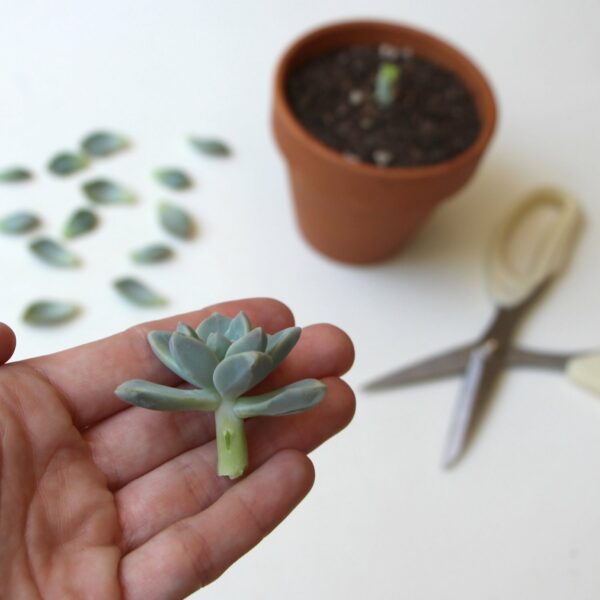
The best way to propagate succulents is by stem cuttings. First, take a sharp knife or pair of scissors and cut a piece of stem from the mother plant. Cut just below a node, which is the point on the stem where a leaf is attached. Make sure to make your cut at an angle so that more surface area is exposed. This will help the cutting to form roots more easily.

Next, remove the leaves from the lower half of the cutting. Again, this will help the cutting to form roots more easily. Finally, allow the cutting to callous over for a few days before potting it up in a well-draining succulent potting mix.

Be sure to keep your cutting moist but not wet during this rooting period. Once roots have formed, you can treat your new succulent plant just like any other. Allow the soil to dry out completely between waterings and give it plenty of bright light. With a little patience, you’ll soon have a whole collection of succulents propagated from stem cuttings!

Propagation by leaves cutting

Propagation by leaves cutting

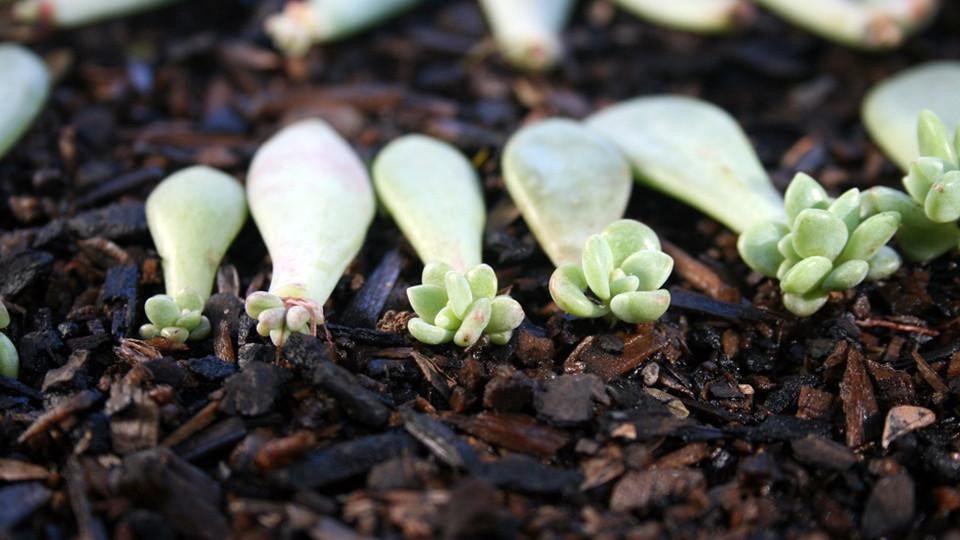
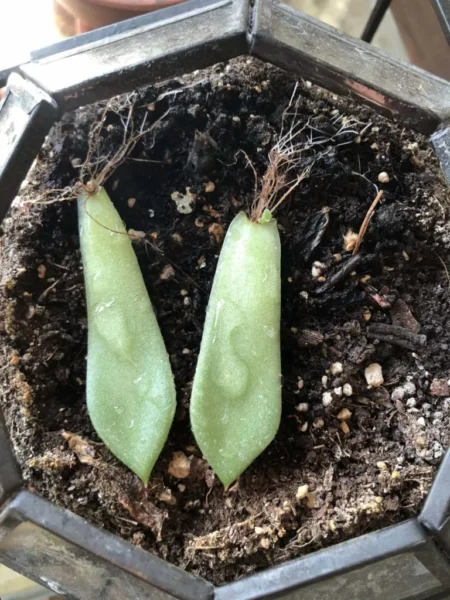
One of the most common ways to propagate succulents is by leaf cuttings. This is a simple process that just about anyone can do with success. All you need is a sharp knife or scissors, a pot or container filled with well-draining soil, and of course, a healthy succulent plant.

To start, carefully remove a leaf from the mother plant. It is important to make sure that the leaf is free of any pests or diseases. Once you have a healthy leaf, use your knife or scissors to cut the leaf into smaller pieces. Each piece should have at least one healthy-looking stem with some leaves attached.

Next, plant the leaf cuttings in your pot or container filled with well-draining soil. Make sure that the leaves are not touching each other and that they are pointing up. Water the soil until it is evenly moist and place the pot in a bright location but out of direct sunlight.

Within a few weeks, you should see new growth appearing on the leaf cuttings. Once the new plants are big enough, you can carefully transplant them into pots of their own.

In conclusion, succulent propagating is a relatively easy process that can be done by stem or leaf cuttings. Once you have your cuttings, simply pot them up in well-draining soil and water regularly. With a little patience, you’ll soon have a whole new batch of succulents to enjoy!

Troubleshooting Common Problems

Troubleshooting Common Problems

Common problems with succulent propagating can include browning or wilting leaves, an accumulation of pests, or a lack of root growth. If succulents are wilting or browning, the most likely cause is overwatering. Make sure to reduce the frequency of waterings and allow the soil to dry out completely between waterings.

As an alternative, if pests are present, they can be in the form of tiny worms or aphids, eliminate the by enhancing airflow around the succulent and washing it with warm water.

Last but not least, you may check for roots by gently pulling on the stem and see if they are there. If not, try repotting in new soil and make sure the soil is well-drained. Succulent propagation, meantime, is one of the most satisfying gardening activities.

Propagation by stem cuttings is a great way to increase the number of succulents in your collection.

To sum up, propagating succulents can be a great and easy way to increase the number of succulent plants you have in your collection. With just a few simple steps, you can easily propagate your succulents with minimal effort and get some beautiful new additions to your garden. So why not give it a try? Your succulents will thank you!

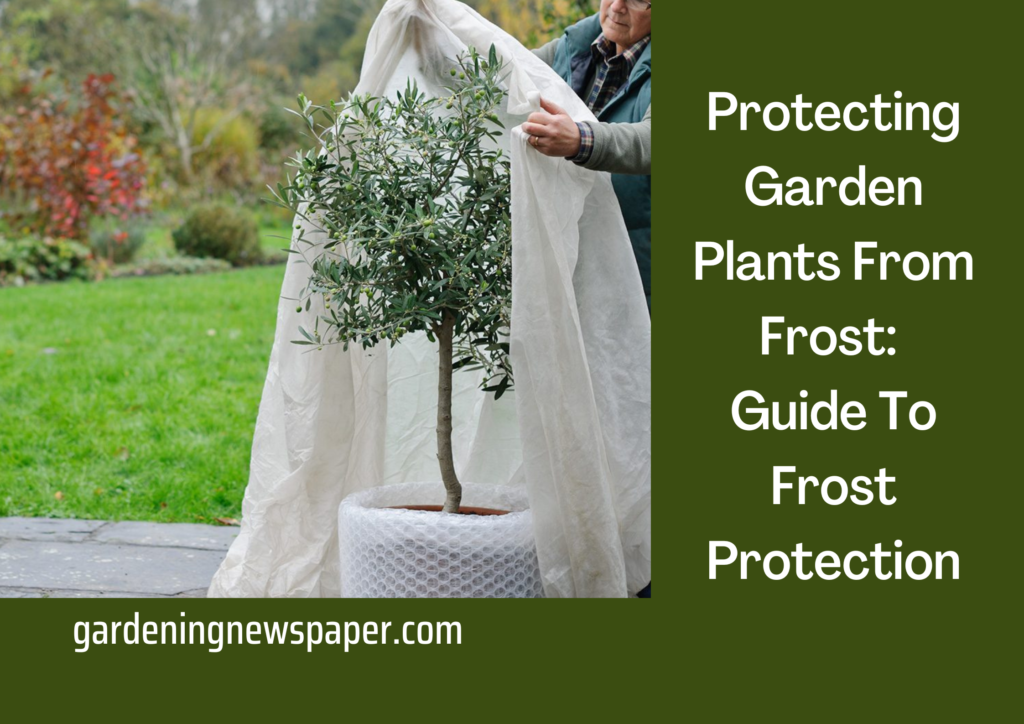
Protecting Garden Plants From Frost

Protecting Garden Plants From Frost

Protecting Garden Plants From Frost

Despite the cold temperatures and shorter days of winter, you can still extend your growing season and save your plants from freezing temperatures and frost. In this blog post, we will discuss several strategies and tips for extending your growing season and saving your plants from frost. Read on to learn more!

Understanding Frost

Understanding Frost

Understanding frost is key to saving plants from it. Frost can be characterized by temperatures below 32 degrees F and the formation of ice crystals on surfaces, which can damage plants. Many plants are highly susceptible to frost damage and have a difficult time adapting to cold temperatures. To help your plants from frost, cover your plants with a frost blanket or polyester sheet at night.

Doing so prevents the formation of ice crystals on the surface of plants and helps keep them protected during cold nights from frost. Additionally, watering your plant in the evening can help insulate the soil and reduce the chance of frost damage. Finally, be sure to choose hardier varieties of plants that are more resistant to frost damage when planning your yard. With these practices in mind, you can ensure that your garden is protected from damaging frost.

Frost blanket

When trying to protect plants from frost, it’s important to pay attention to forecasted temperatures and cover or move vulnerable plants indoors if necessary. Next, there are multiple methods to protect plants from frost. One way is to keep an eye on the forecast and take precautionary steps, such as moving vulnerable plants indoors or covering them with a frost blanket if necessary.

However, it should be noted that some plants may not survive even with the use of protective measures against frost. Therefore, it is important to familiarize oneself with their plant’s hardiness zone and choose plants that can withstand potential frost conditions.

Frost Protection: Preventing Frost Damage

Saving your plant from frost damage requires being proactive – start by covering vulnerable plants with a frost cloth, which insulates them from frosty temperatures. This protective layer creates a microclimate around your plants that can reduce the risk of frost damage while still allowing air and light to reach them.

Preventing Frost Damage

Additionally, make sure to water your plants for protection in the late afternoon before the temperature drops, as moist soil is better able to resist damaging frost. If possible, move the delicate or frost-sensitive plants indoors for the chillier months. These strategies will help prevent damage from frost and allow you to enjoy your garden all year round.

Also, you should strategically utilize pruning to reduce the amount of surface area exposed to the cold, making it easier for the plant to stay warm and avoid frost. Pruning away some of the foliage and thinning out the branches help plants to retain heat even during cold and frosty weather.

Additionally, adding a thick layer of mulch around the plant to protect plants can also help keep them warm. The mulch helps insulate the plant by providing an extra layer of protection from cold temperatures. Lastly, if necessary, use special frost covers to further protect your garden plants from frost.

mulching for frost protection

Utilizing mulch is another great approach to saving your garden plants from freezing frost damage – as mulch helps insulate the soil and retain heat, creating a buffer between your plants and cold temperatures Meanwhile, utilizing mulch is a great approach to saving plants from freezing frost damage. Mulch acts as an insulator for the soil, helping to retain heat and create a buffer between the cold temperatures and plants. This simple step can help to save plants from facing severe freezing frost damage in cold weather.

Extending Your Growing Season to Protect Plants

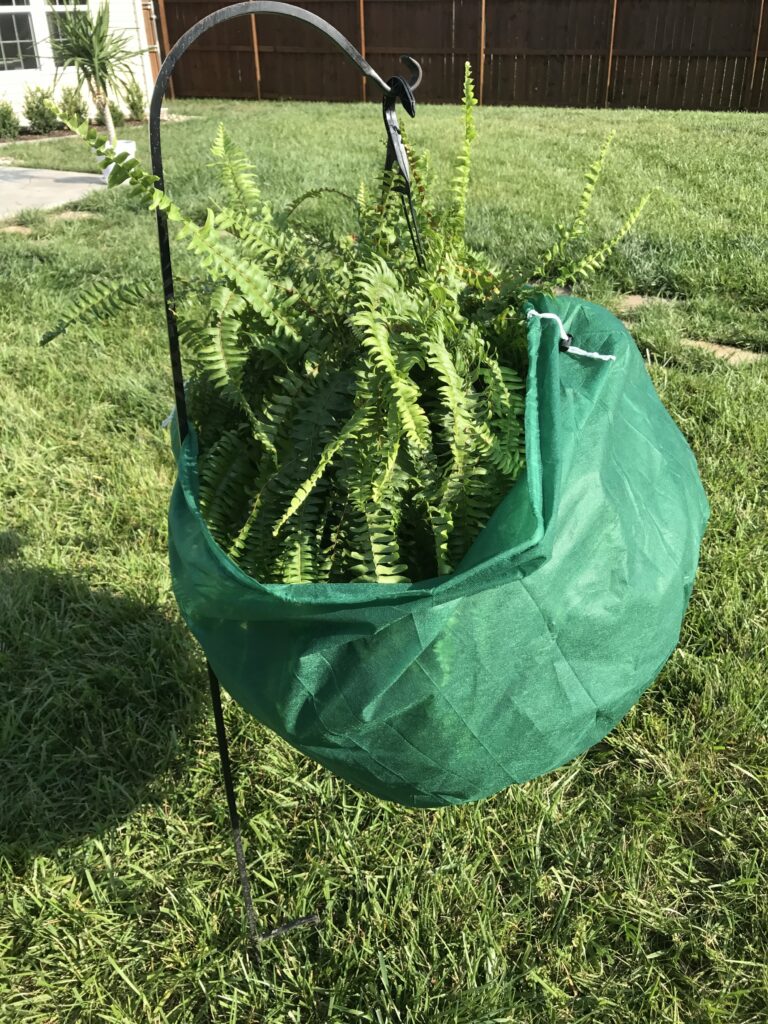
One way to extend your growing season is to protect garden plants from unexpected freezing frost by creating a sheltered environment using an outdoor plant cover. This can easily be accomplished with a few simple tools such as plant covers, cloches, and row covers made of breathable fabric. Plant covers are very useful for protecting individual plants in the garden from frost.

Extending Your Growing Season to Protect Plants

A simple and easy way to do this is to use a lightweight frost cloth, which will cover the plants and retain warmth during cold weather. Frost cloth is an effective way to protect plants from freezing frost when temperatures drop in your home. It can be laid over plants to create a protective barrier against the cold, trapping heat and allowing for continued growth.

The lightweight fabric is breathable and allows for air circulation, preventing condensation and providing ample ventilation for plants. Additionally, frost cloths can be easily removed during warmer temperatures without harming the trees beneath. Protecting garden plants from frost does not have to be expensive or complicated—a lightweight frost cloth can provide an effective solution with minimal effort.

plant covers

Plant covers can also be used to protect young plants from the harsh sun or wind in your home, so they can grow stronger and faster during the extended growing season Thus in this view, using protective covers for your sensitive garden plants and vegetables is a great way to ensure that you maximize your growing season.

Protecting the trees from frost and harsh sun or wind will allow them to grow stronger and faster, increasing their chance of survival. It is important to remember that covering your plants to avoid frost can make a huge difference in the quality and yield of the garden.

Building a Protect Layer for Your Plants

Making a layer of protection for your plants is one of the greatest strategies to keep your vegetable gardens safe from frost. This will assist maintain the soil temperature constant and protect them from harsh temperatures. A layer of insulation can be created by wrapping plants in a frost blanket to help keep them warm. Move containerized plants to sheltered spaces, such as a porch or garage.

Use items like horticultural fleece, bubble wrap, old blankets, sheets, and even cardboard boxes to cover your plants over the winter to create this protective barrier. The most suggested materials are bubble wrap and horticultural fleece because they are made to shield plants from frost. Make sure the materials are fastened so that high gusts won’t blow them away.

Building a Protect Layer for Your Plants

Old blankets and sheets provide additional insulation, and cardboard boxes should be used in conjunction with other objects to keep your plants from becoming frozen. Using these items to protect your garden plants from frost can ensure their survival throughout the chilly winter air months.

If you use the proper coverings and take them off when the temperature rises, your plants will get the right quantity of sunlight and ventilation and will be protected against frost. It’s also essential to check on your plants frequently to make sure they are adequately protected throughout the cold air to avoid frost. If you carry out these simple tasks, your cherished garden plants will be more likely to survive the winter cold air.

Final Say

In conclusion, extending your growing season and protecting your garden from frost and cold temperatures is possible by using a combination of strategies and ideas. One of those ideas includes using garden covers and other frost protection methods to keep them safe during chilly winter nights. It is also important to choose varieties of greens as a sign that are well-suited to your climate and planting zone to avoid frost. With these tips in mind, you can enjoy a longer growing season and continue to watch your garden flourish throughout the winter months.

Thanksgiving Cactus Care: A Guide To Thanksgiving Cactus Growing

Thanksgiving Cactus Care: A Guide To Thanksgiving Cactus Growing

Thanksgiving Cactus Care: A Guide To Thanksgiving Cactus Growing

We all love that Thanksgiving cactus that blooms each year, but caring for it can be tricky. If you want your Thanksgiving cactus to bloom and thrive, then you need to provide it with the right environment and care. In this blog post, we’ll cover everything you need to know about caring for your Thanksgiving cactus. So read on to get started with caring tips for this holiday cactus variety!

What is a Thanksgiving Cactus?

What is a Thanksgiving Cactus?

A Thanksgiving Cactus is a type of cactus that typically blooms around the Thanksgiving holiday, giving it its name. This plant is actually part of the Schlumbergera family but is often mistaken for Christmas cacti which belong to a different family. Caring for a Thanksgiving Cactus includes providing the right light, water, and temperature. The Thanksgiving Cacti prefer indirect, filtered sunlight or bright fluorescent lighting.

It needs to be watered when the soil is dry but avoid over-watering to prevent rot. This plant requires temperatures between 65-75 °F and appreciates higher humidity levels if possible. With proper care, your Thanksgiving Cactus will provide beautiful blooms that last up until the New Year — it’s a great way to celebrate all through November and December!

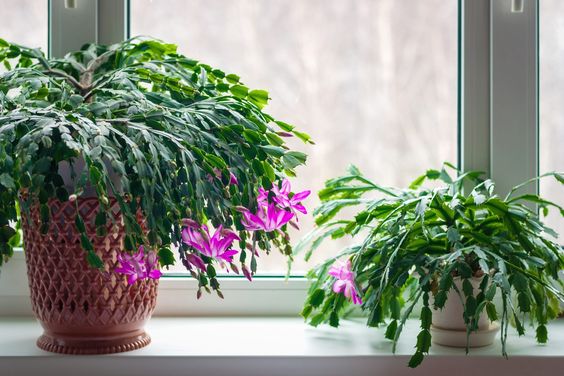
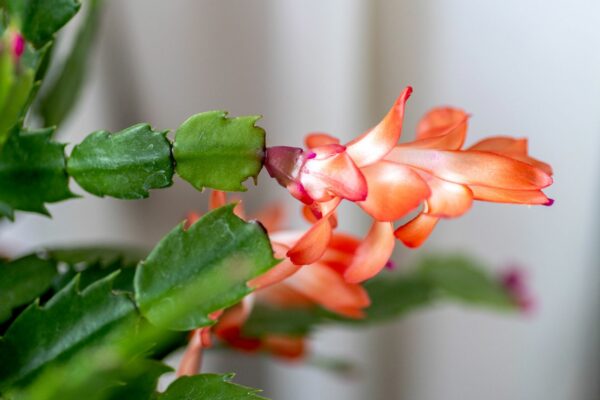
The Thanksgiving Cacti are known for their unique foliage, featuring segmented leaves and serrated edges. The flowers themselves can be found in a variety of colors such as pink, white, and purple. These flowers will last up to 3 weeks if properly cared for! However, proper care is essential to ensure that your Thanksgiving Cactus flourishes and produces brightly colored blooms throughout the season.

This lovely plant requires bright light, warm temperatures, adequate water, and fertilizer for optimum growth and health. Additionally, ensure that the plant does not experience any extreme temperatures or dry environments as this can lead to stunted growth. With regular monitoring, the Thanksgiving Cactus can bloom in vibrant colors over a long period of time.

Growing Cactus Plant: How to Water and Fertilize a Thanksgiving Cactus

watering thanks giving cactus

Watering a Thanksgiving Cactus requires specific attention to the amount of water used and how often it is given. It’s important to use lukewarm water so that it doesn’t shock the plant, and make sure that you let the soil dry out between watering cycles. This is an important part of the Thanksgiving Cactus regime, as over-watering can cause root rot and other issues.

To ensure that the Thanksgiving Cactus gets the right amount of water, it’s best to check the soil regularly for moisture content and water only when it feels dry. Additionally, be sure to not leave any standing water in the pot or tray for more than five minutes, as this can lead to root problems as well. With the right amount of attention and care, you can keep your Thanksgiving Cactus healthy and happy!

Fertilizing a Thanksgiving Cacti can be done with a liquid fertilizer or you can use a granulated slow-release fertilizer. It should be done in the early spring and then again in late summer for optimal growth and blooming potential. When choosing a fertilizer, be sure to get one that is specifically designed for cacti and other succulents. Make sure to follow the instructions on the label for mixing and frequency of application. During the winter, the Thanksgiving Cactus should not be fertilized due to its dormancy cycle.

When fertilizing, make sure to dilute the fertilizer and only give it once every 6 weeks during the growing season. Doing so will ensure that your growing thanksgiving cactus receives all of the nutrients it needs without being exposed to too much and risking serious root burn.

Pruning, Caring, and Repotting Tips For Thanksgiving Cacti

Pruning and repotting is an important parts of keeping your Thanksgiving cacti healthy and happy. When pruning, make sure to not remove more than one-third of the plant at a time, as this can weaken it. An easy way to tell if the cactus needs pruning or repotting is to take a look at its roots. If the roots are tightly coiled in the pot, you may need to move them into a larger pot with fresh soil.

In the early spring when new growth is starting, pruning should be carried out using clean, sharp scissors or shears. Always make clean cuts when removing any dead branches or leaves to prevent any jagged edges from attracting bacteria or fungus. Your Thanksgiving cactus will flourish and add delight and beauty to your house with the right care and attention.

Use a pot that is a little bit bigger than the existing pot for repotting your Thanksgiving cactus. In order for the roots to have easy access to oxygen, you need also to make sure that the soil has sufficient drainage and is thoroughly aerated. Additionally, be sure to utilize potting soil that is designed especially for succulents and cacti. Avoid overwatering when you water because this might lead to root rot.

Finally, gloves must be worn in order to protect your hands from the plant’s sharp spines. Additionally, to make a nice, even cut when pruning, use a pair of scissors or shears. You can make sure that your plant keeps thriving by following the correct procedures for Thanksgiving cactus care.

Common Care Mistakes to Avoid In Cactus Care

Common Care Mistakes to Avoid In Cactus Care

One of the most common care mistakes for Thanksgiving Cacti is over-watering. As it prefers a dryer environment, it’s important to allow the soil to completely dry between watering cycles. Water lightly and only when the soil is dry, allowing the water to fully saturate it. During spring and summer, when the cactus is actively growing, it needs more frequent watering.

Providing too much shade is another mistake to avoid. Thanksgiving Cacti need at least 4 hours of direct sunlight each day. Although they can tolerate up to 8 hours if kept in a well-ventilated area. During the summer, place the cactus outdoors in a sunny location. Keep it in a sheltered area away from strong winds. 

Watering your Thanksgiving Cacti should be done when the soil is dry to the touch; water them thoroughly and allow them to drain. Fertilize your cacti twice a month with a balanced liquid fertilizer or once a year with a controlled-release fertilizer. By following these helpful tips for thanksgiving cacti care, you can ensure your cacti stay healthy and vibrant for years to come.

Lastly, when it comes to repotting, be sure not to do so leads to root rot and fungus growth. Repotting should be done only when the roots have outgrown their current pot and the soil has begun to break down. Furthermore, it is important to remember that repotting should only be done when absolutely necessary. Too frequent repotting can lead to root rot and fungal growth and should be avoided. Therefore, it should only be done when the size of the root system has outgrown its current pot or when the soil has begun to break down.

Thanksgiving Christmas Cactus

The Thanksgiving Christmas cactus, also known as Schlumbergera truncata, is a popular houseplant that blooms around the holidays. The plant is native to the rainforests of Brazil but is widely grown in many parts of the world.

The Thanksgiving Christmas cactus gets its name because it typically blooms around the Thanksgiving and Christmas holidays in the Northern Hemisphere. The plant has flat, segmented stems that grow in a pendulous fashion, and it produces large, colorful flowers at the ends of its stems.

The flowers of the Thanksgiving Christmas cactus can be white, pink, red, orange, or purple, and they usually last for several weeks. The plant prefers bright, indirect light and well-draining soil, and it should be watered when the top inch of soil feels dry to the touch.

With proper care, the Thanksgiving Christmas cactus can be a beautiful addition to any home during the holiday season.

Final Say

Caring for your Thanksgiving cactus can be an enjoyable experience if you are knowledgeable about how to care for it. The key to success is providing the plant with the right environment and care. By following the tips in this blog post, you will give your Thanksgiving cactus the best chance at thriving and producing beautiful blooms each year. With proper care, your Thanksgiving cactus will be a staple in your home for years to come!

Easter Cactus Care: Easter Cactus Growing Guide

Easter Cactus Care: Easter Cactus Growing Guide

Easter Cactus Care: Easter Cactus Growing Guide

A succulent that is incredibly simple to grow is the Easter cactus. It does, however, need a little bit more maintenance than other native US cacti species. This post will cover every stage of caring for Easter cacti, from planting to harvest.

Therefore, whether you already own an easter cactus or are considering purchasing one, we will teach you everything you need to know about caring for this holiday cactus variety. I’ll go over everything you need to know to maintain the health and happiness of your easter cactus, from watering to fertilizing.

Where to Place Your Easter Cactus

Where to Place Your Easter Cactus

There are a few things to think about when deciding where to put your Easter cactus. First of all, these cacti prefer direct, bright light. Cacti will not bloom as profusely, but they can survive lower light levels. Second, they prefer a dry environment, so wait until the soil is fully dry in between waterings. Third, they prefer a cool environment, so avoid placing them in a heated environment.

Ideally, your Easter cactus should be placed in a window that faces south or west. It will also work if you have a window that faces east and is well-lit. Just be sure to shield the foliage of your Cactus from the intense afternoon sun.

You can put your Easter cactus under fluorescent lights if your house doesn’t have any windows with natural light. The light fixture should be positioned about 12 inches above the plant, and it should be left on for 12 to 16 hours per day.

Easter Cacti Care: Watering and Fertilizing

Watering and Fertilizing easter cactus

The gorgeous Easter cactus (Rhipsalidopsis gaertneri) blooms in the late winter or early spring. Beautiful flowers in colors pink, red, and white are produced when it blooms.

Being a succulent, the Easter cactus doesn’t require a lot of water for growing. In actuality, a plant may suffer from having too much water. When the soil feels dry to the touch, water the cactus. Use a pot with drainage holes or fill the bottom of the pot with gravel to ensure drainage.

  • Every two weeks, fertilize your Easter cactus with a balanced fertilizer of 10-10-10. Apply the fertilizer at half the suggested strength and be sure to adhere to the instructions on the fertilizer container.
  • Easter cactus thrives in direct, bright light. The leaves will begin to turn red if the plant is exposed to direct sunshine. The plant won’t blossom if it receives too much shadow.
  • Keep the plant dry and cool (between 50- and 60 degrees Fahrenheit) during the fall and winter to promote blooming. To achieve this, keep the plant away from heat sources, and water it less frequently. When you notice buds growing in the spring, boost watering and relocate the plant to a warmer area.

With proper care, your Easter cactus will bloom year after year.

Pruning and Propagation for Schlumbergera Gaertneri or Easter Cactus

Pruning and Propagation for Schlumbergera Gaertneri or Easter Cactus

The Easter cactus (Rhipsalidopsis gaertneri) is a beautiful houseplant that produces dazzling blooms in shades of pink, red, or white. This popular plant is closely related to the Christmas cactus and shares many of the same similar requirements.

Easter cacti are native to Brazil and thrive in humid conditions. They are commonly grown as houseplants and do best in bright, indirect light. Easter cacti can be tricky to grow, but with a little patience and the right conditions, they will reward you with years of beautiful blooms.

The key to successful Easter cactus care is understanding the plant’s natural growth cycle. Easter cacti bloom best when they are allowed to rest for at least two months before being watered and fertilized again. This resting period mimics the plant’s natural dormancy period and encourages abundant blooming.

  • To promote healthy growth and prevent your Easter cactus from becoming leggy, it’s important to prune the plant regularly. You can prune your Easter cactus anytime it is not actively blooming.
  • Use sharp, clean pruning shears to remove any dead or damaged stems. You can also trim back leggy stems to encourage compact, bushy growth.
  • Easter cacti can be propagated from stem cuttings taken from good plants. To take a cutting, use sharp, clean pruning shears to cut a 3-4 inch (7.6-10 cm) piece from a good stem.
  • Allow the cutting to callus for a few days before planting it in a well-draining cactus potting mix container in your home. Water the soil and place the pot in a warm, sunny location.
  • Keep the soil moist but not soggy until the cutting has rooted, which can take several weeks.

Common Problems Faced by Easter Cactus

Common Problems Faced by Easter Cactus

Easter cacti are beautiful, long-lasting plants that are easy to care for in your home. However, they can sometimes experience problems. Here are some of the most common problems with Easter cacti and how to solve them.

  1. Yellowing leaves. This is usually a sign of too much water. Allow the soil to dry out completely before watering again.
  2. Browning leaves. This is usually a sign of too little water. Water more frequently, making sure the soil is evenly moist.
  3. Soft or mushy stems. This is usually a sign of too much water. Allow the soil to dry out completely before watering again. If the problem persists, try using a well-draining potting mix.
  4. Drooping stems. This is usually a sign of too little water. Water more frequently, making sure the soil is evenly moist. If the problem persists, try moving the plant to a brighter location.
  5. Slow growth. This is normal, especially in the winter months. Easter cacti need very little water during the winter, so be sure not to overwater.
  6. Brown spots on the stems. This is usually a sign of sunburn. Move the plant to a shadier location in your home and make sure it is not in direct sunlight for long periods of time.
  7. White powdery substance on the leaves. This is powdery mildew and is caused by too much moisture on the leaves. Allow the plant to dry out completely and increase air circulation around the plant.

Fertilizing Grow Guide for Easter Cactus

Fertilizing Grow Guide for Easter Cactus

The Easter cactus, Schlumbergera truncata, is a special kind of cactus that blooms during the Easter season. This cactus is easy to care for and only needs to be fertilized once a month.

  • To fertilize your Easter cactus, use a water-soluble 20-20-20 fertilizer. Sprinkle the fertilizer over the soil and then water the plant well. You can also feed your cacti with an organic fertilizer such as fish emulsion or worm castings. Once a year, in the spring, you can give your cactus a complete fertilizer such as 10-10-10.
  • Easter cacti need bright, indirect sunlight. If you have a sunny window, place the cacti in it. If you don’t have a sunny window, place the cactus near a bright lamp.
  • In the summer, when the weather is hot and your cacti are in bloom, you can place them outdoors in a shady spot. Make sure to bring the cactus indoors before the weather turns cold in the fall.
  • Water your Easter cacti when the soil feels dry to the touch. Don’t water the cactus every day; once a week is often enough.

Repotting the Easter Cactus

Repotting the Easter Cactus

Easter cacti (schlumbergera gaertneri) are known for their beautiful blooms that appear in shades of pink, red, and white. These lovely plants are native to Brazil and thrive in humid, warm climates. If you live in a cooler climate, you can still enjoy an Easter cactus by growing cactus indoors.

  • Easter cacti are relatively easy to look for, but they do need to be repotted every two to three years. When repotting an Easter cactus, be sure to use a well-draining potting mix and a pot that is only slightly larger than the existing one. This will help to prevent the roots from rotting.
  • When you are ready to repot your Easter cacti, carefully remove the cactus from its current pot. Gently loosen the roots and remove any dead or decaying roots. Place the plant in its new pot and fill in around the roots with potting mix. Water the plant well and place it in a bright, filtered light location.
  • Easter cacti are beautiful plants that make wonderful additions to any indoor garden. By repotting cactus every few years, you can keep them blooming for many years to come.

In conclusion, Easter cactus are easy to care for so long as you remember to repot them every few years and give them plenty of bright, filtered light. By following these simple tips, you can enjoy their beautiful blooms for many years to come.