Low maintenance perennials for shade: Plants that bring beauty

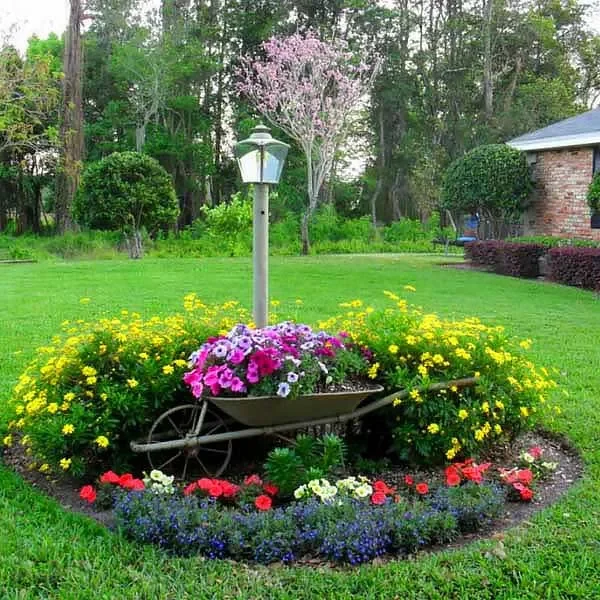
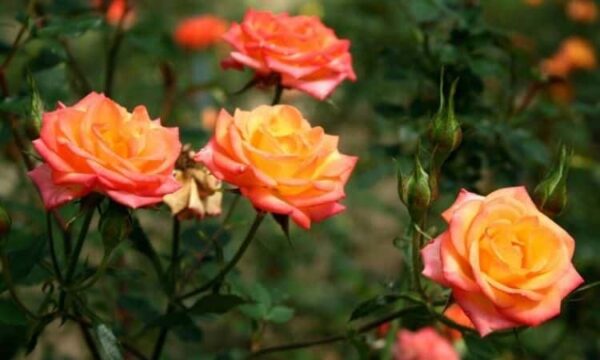
Low shade perennial flowers that bring beauty

Low maintenance perennials for shade: Plants that bring beauty

To make the most of the garden space, it would make sense to grow a wide variety of plants and arrange them as thoughtfully as possible. This requires knowing the individual needs of each species and grouping them according to their needs. You simply cannot place hardy, sun-loving plants next to those with very sensitive, flammable leaves.

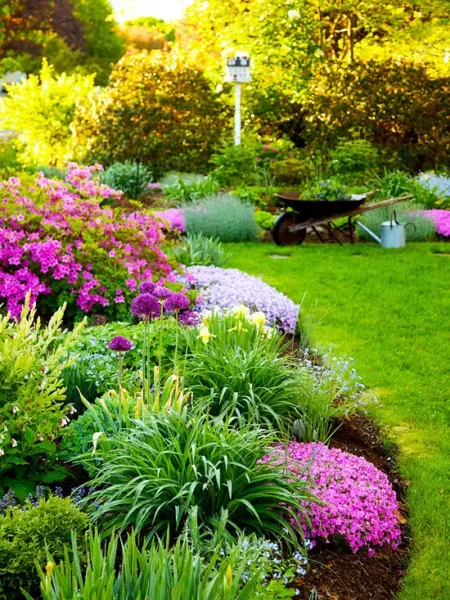
When grouping plants, always consider their needs for light, water, soil, and nutrients. Carefree perennials are great additions to any garden because they can last for years. Although all of them require a certain amount of light to photosynthesize, some can do well in low light. Many are also low maintenance because they can be left outside home for the winter, don’t require frequent pruning, and are unlikely to spread out of control. Continue reading this blog to know more.

Growing plants in shady areas can be quite difficult for beginning gardeners. Steaming times can be delayed in the shade, low lighting can prevent flowering, air temperature can be significantly lower, and low UV light can promote the spread of pathogens. The best shade plants are hardy, low-maintenance species whose leaves live to brighten the area.

Low shaded perennials bring beauty to your garden

Plants that are easy to grow in your shade:

Here are some low-maintenance plants for shade:

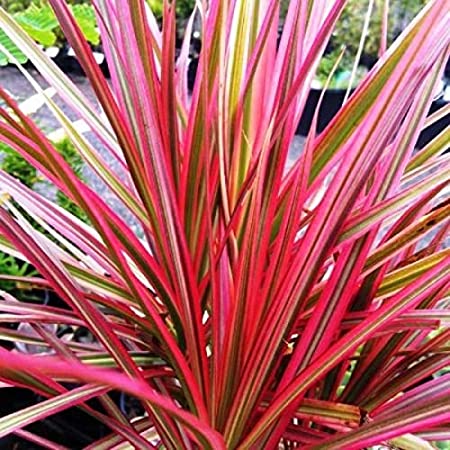
1. Abelia grandiflora

  • This plant Abelia comes in a variety of sizes, from 2-3 feet to 5-6 feet.
  • This plant is hardy, and you can handle it very easily as they don’t need some extra requirements in soil or etc.
  • Some varieties of the plant have leaves that transform hues, first copper pink and then to bright green, while others have variegated green leaves that add visual appeal throughout the growing season.
  • Later in the summer, small trumpet-shaped flowers appear in white, pink, yellow, or lavender, depending on the variety of the plant. Despite its small nature, this genus is durable and adaptable.

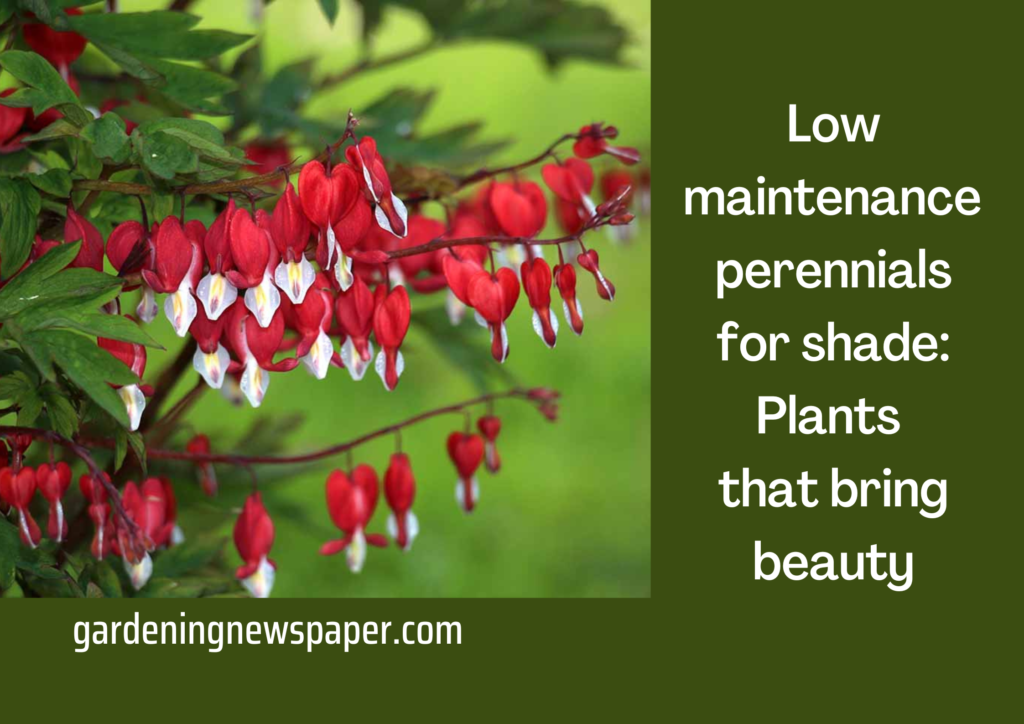
2. Lamprocapnos spectabilis (bleeding heart)

  • Varieties The bright flowers of the bleeding-heart plant appear in early spring.
  • They are most suitable for growing in shade. This bloody heart signifies love. Few shade flowers can compete with the old-fashioned bleeding corundum, as the heart-shaped flowers grow arching from the ferny leaves.
  • Bleeding Heart has varieties of white to pink. After flowering, this plant dies in summer. Bleeding hearts grow beautifully in the woods with other shade-loving plants. 3 feet high and wide; this varies from 1-1.5 feet tall and wide.
  • Alba, White Old Fashioned, and Snow blow are suitable for your garden.
  • Generally, bleeding heart plants (Lamprocapnos spectabilis) die after one-time flowering. Dicentra eximia, also called bordered bleeding hearts, bloom for a long time and do not go dormant.

3. Columbine

  • Columbine flowers brighten any shady garden and are a welcome sign of spring.
  • They usually bloom in very early spring, with a flowering window of two to three weeks.
  • Columbines blossom in winter but they don’t like summer. These perennials are very short-lived but can produce a lot of seeds and by taking the necessary care you can grow them next year.
  • This genus has unique flowers and Gardeners know this plant for its attractive flowers.
    Its unique flowers attract hummingbirds and have very different shapes.
  • lightly shaded areas suitable for this plant and are drought-tolerant once established.
  • These are beautifully planted in rock gardens with other shade perennials. Green Apple and Munstead White are great for your garden.

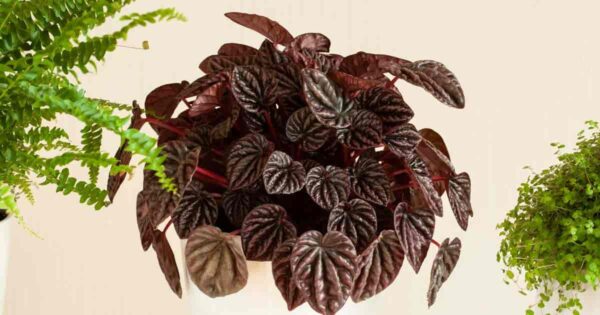
4. Tricyrtis hirta (Toad Lily)

  • Toad Lily can enhance or give an elegant look to your garden.
  • These are very easy to grow, and they blossom with very attractive flowers and can outlook the orchids as well.
  • Many blossoms with purple or blue hue flowers.
  • Growing Conditions: Full shade in evenly moist, well-drained soil is necessary for these plants. They can grow up to 2 feet tall zones.: White Towers bear white flowers which are very popular among gardeners.

5. Honeysuckle

  • It is astounding that honeysuckle is not popular and commonly planted although it is easy to care for.
  • Only 3 to 5 feet tall and wide, it is very much suitable for gardener lovers.
  • Leaves remain bright green, rusty or maroon throughout the season, depending on the variety selected. It gets its name from the small yellow tubular flowers that attract pollinators from late summer to fall. Deer tends to bypass it.

6. Hemerocallis (Daylily)

  • One perennial that has worked very well for me is the daylily. Like hosts, they die back in the fall, so they are easy to clean. Their flowering period is short, but the blooms are abundant and vigorous.
  • We have divided these daylilies a few times and moved some to the front garden. These are Stella D’oro, the most common variety.

7. Agastache urticifolia

  • Bottlebrush-like flower spikes make this low-maintenance perennial an ideal and astounding addition to the landscape. Giant hyssop grows 2 to 3 feet tall.
  •  Bunch of flowers rising above modest green leaves.
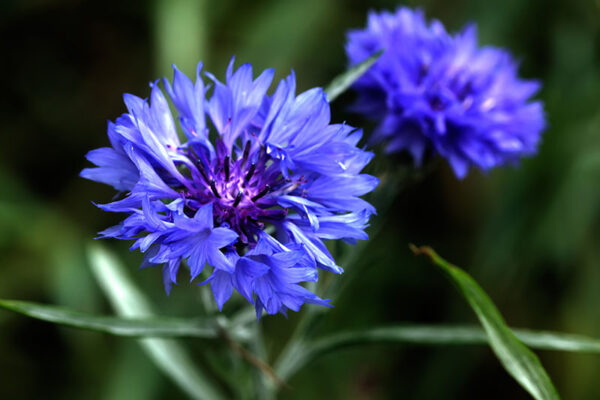
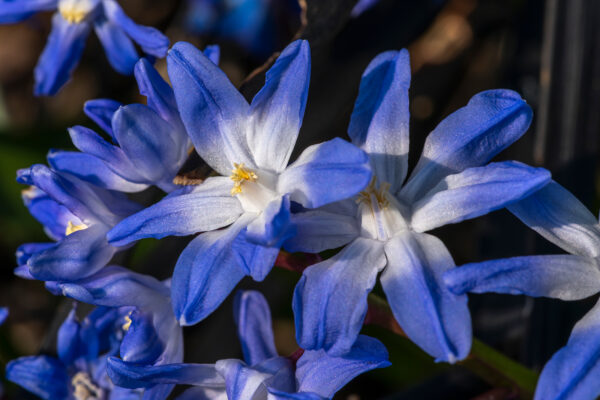
  • In addition to giving a wonderful color, the leaves smell wonderfully like aniseed when crushed. Hyssop blossoms in many varieties including blue, and pink hues.
  • It forms small colonies on its own, and although it is not an aggressive breeder, it must be tamed a little every year, so that it does not disappear.

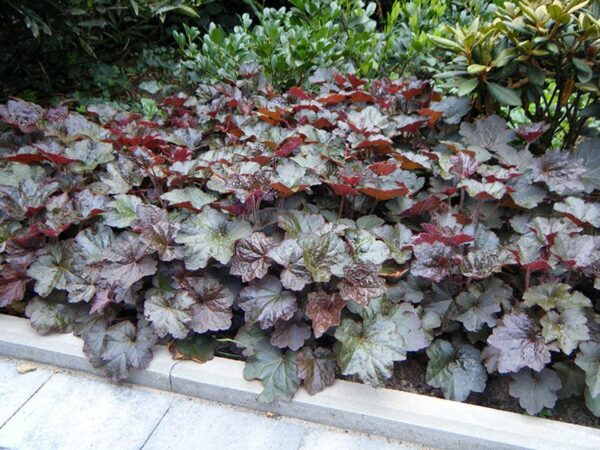
Some tips related to gardening low shade perennials.

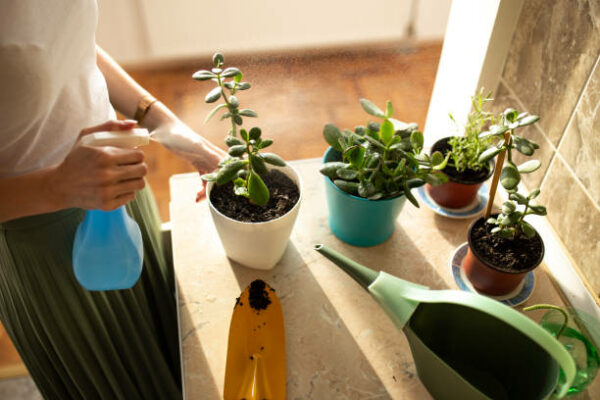
Watering tips for gardeners

Install drip irrigation or an automatic watering system. Avoid sprinklers as they are inefficient and waste a lot of water. If you pay for water, that’s a big deal. Also, sprinklers water from above, which leaves wet leaves and invites pests and diseases. Watering on the ground is the best scenario.

Care little and check the virus or pesticide attacks.

Schedule regular inspections of the landscape and plants. You have to check regularly for pests, it can deteriorate the situation of your plants. You have to do this checking at least once in a week. Also, well-drained soil, size of pot, bloom time is also important to check.

Spotting problem early is important, so things don’t need maintenance. If problems are allowed to fester, they will get worse and take more time to deal with.

Mulch addition to safeguarding the plant.

Mulch around plants to reduce weed growth and increase water retention. A 2- to 3-inch layer of mulch will prevent water from evaporating quickly, which means you won’t need to water as often.

Can you grow a beautiful or eye catchy garden in shady places?

Many people are discouraged from gardening because they don’t have any space, or the available space is shady. They believe that because there is less sunlight, there is less chance to grow a garden. This concept of gardening is not true at all. Shade gardens can be easier to maintain and also have some remarkable advantages over normal gardening which get enough sunlight.

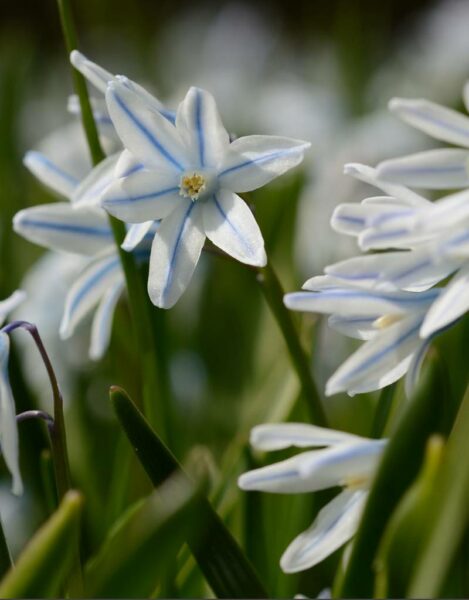
White is a color that will amplify your garden to a new level, it can give wonderful look to brighten up your shady flower garden. White signifies peace which takes us to peaceful but a beautiful world. It will help to calm your mental stress as well.

In conclusion, the low shading perennials plants grow very easily, and they can enhance the beauty of your garden immensely. They are a bit expensive as well but it’s worth your time and money. You need to care about pests and viruses once or twice a week at least. Don’t worry about sunlight or shortage of a place.
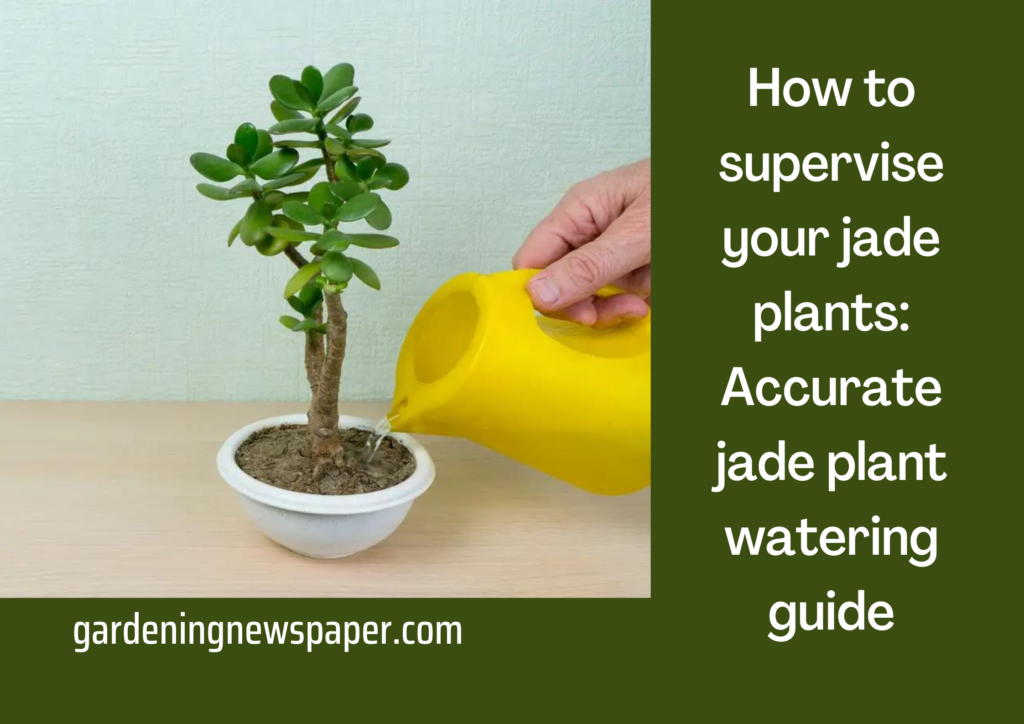
Problems with Self Watering Pots: Save Plants from Self-Watering Pots

Problems with Self Watering Pots: Save Plants from Self-Watering Pots

“Self-watering” containers are another option for container gardening. Instead of drainage holes in the bottom, these bins have overflow holes on one side. The growing medium is placed on a perforated platform just above the reservoir. Plant roots extend into the water through the medium. In most cases, water is drawn into the medium from a reservoir.

These containers can be considered a hybrid of hydroponics (plant roots growing in nutrient-rich water) and traditional container gardening. Automatic watering containers help conserve water and nutrients and allow you to ignore containers for days.

Problems with Self Watering Pots: Save Plants from Self-Watering Pots

The simplest application is to place a saucer under the pot. Excess water is either sucked into the media or drawn up by the roots reaching the saucer. Many commercial models are available, or you can create your own.

When you buy an automatic watering pot, it usually comes with a grow bed, water container, potting soil and a wicking system. Auto-watering pots use this wicking system to distribute the perfect amount of water to keep plants moist.

The plant roots in auto-watering pots absorb water and keep the roots well-watered. uptakes additional water from the soil to maintain a constant moisture level. With this bottom-up irrigation system, you only need to keep the reservoir filled with water throughout the growing season.

Problems with self-watering pots


Why are watering pots bad? Problems you face in watering pot:

Potential mosquito breeding grounds

The main problem or cons with using automatic watering pots is that they can be mosquito breeding grounds. This is due to the drainage holes that allow water to accumulate in the reservoir. Due to watering planters work, water retained in the reservoir is the perfect place for mosquitoes to lay their eggs because the water is stagnant.

In most cases, mosquito eggs can hatch within 28 hours, and the constant high humidity in the pot facilitates mosquito breeding. This problem tends to be more severe if you live in a warm and humid country.

self-watering pots are Potential mosquito breeding grounds

Self-watering pots are not ideal for every plant.

Some plants aren’t suitable for self-watering pots and these types of plants favor well-draining soil. These plants include cacti and succulents. If plants such as succulents are provided with continuous watering, they can die due to root deterioration.

This is because succulents and cacti are native to desert environments, and they will need to dry out in between watering sessions. Hence, self-watering pots won’t work for plants such as cacti and succulents.

Can damage plant roots.

Normally, most plants like to spread their roots and watering pots’ top disadvantage includes damaging roots. Therefore, their roots can push out in any direction, including the ground. There is an automatic watering planter under the flowerpot.

Now when the roots branch in the pot of the watering planter, water overflows in the roots. When plant roots land in clean water, the lack of oxygen limits plant growth, and this is the reason for watering pots’ bad working style.

Can attract algal and fungal gnats.

The constant soil moisture due to water supplied by the automatic watering planter can make plants susceptible to algal and fungal gnats. Therefore, algae may thrive or grow due to excess moisture in the soil. The presence of algae can be a problem as it greatly affects plant growth by competing for water and nutrients. There is a fungal gnat, an insect the size of a fruit fly that usually looks like a mosquito.

Fungus gnats usually infest most houseplants. These fungal gnats are attracted to the moisture present in the soil and tend to lay their eggs in organic matter on the soil surface. In as little as a week, the eggs hatch into larvae, which burrow into the ground where the fungus grows. and eat decaying plants.

Self-watering pots are a bit expensive

Of course, it’s more economical to buy standard planters. Automatic watering pots are more complicated to initially set up and require a few additional parts to run efficiently. Prices vary entirely depending on the size and style you choose. One way to look at it is: Automatic watering pots help you save money on your water bill and eliminate the need to run to the store to replace dry or over-watered plants.

Self-watering pots are a bit expensive

The pots are not for watering outdoor plants.

Plants need oxygen to live, but they should not risk death to get it. Keeping plants outdoors exposes them to all kinds of weather conditions and, conversely, risks overwatering, starvation, and freezing. Automatic watering pots are equipped with overflow holes, which do not help the plants during heavy rains. They will keep your plants hydrated regardless of humidity, so you have a responsibility to protect them.

On the other hand, if a plant is exposed to direct sunlight, it will not even be able to retain moisture in the soil. The potting soil will dry out completely, the water in the reservoir will evaporate, and the sub-irrigation system will inevitably fail. It is harmful to plant health. In low temperatures, the water in the reservoir can freeze and it can harm the plant. If the necessary precautions are not taken, the water in the tank will freeze, causing the compartment to swell, bend, warp, or crack.

Causes toxic mineral deposits.

Minerals that are not absorbed by plants dissolve in water to form soluble salts. Their high concentration in water is due to the need to add water-soluble fertilizers to the potting soil when caring for plants to ensure better quality and provide nutritious nutrition to the plants. Evaporation causes residual minerals and salts to gradually accumulate on the surface and become toxic.

As a result, the leaves of the plant begin to fall off, wither and change color. Left untreated, the sediment will eventually kill your plant. Although more information can be found online about preventing salt build-up, there remains a long-term complication associated with automatic watering containers.

A common misconception among new plant parents is that you can fill a reservoir with water and leave it there. You need to understand your plant’s needs and monitor, assess, and provide suitable soil. Automatic watering does not mean filling the reservoir and then walking away.

What are watering pots top benefits?

Time saver

Consider the environmental cons of self-watering planters. These devices are designed to save water and dispense the right amount at the right time. Using automatic watering can save you time using sprinklers and hoses. If you’re a chronic waterer, a self-watering pot will definitely be a great garden companion for you.

Auto Watering Planters Work and Come in a Variety of Styles As

Auto Watering containers become trendier, and manufacturers are finding new ways to let gardeners express their style, also it can avoid self-watering planters’ problems. There are simple pots, large planters, whole wall elements, or flower boxes in black, white, or concrete. Once you’ve decided which plants to put in your automatic watering pot and where to store them, choose the best pot for the job.

The planter is environment friendly.

Environmentally Friendly: Consider the environmental benefits of the Automatic Watering Pot. With an automatic watering pot, you spend less time with sprinklers and hoses. If you are a chronic waterer, a self-watering pot will definitely make a great garden companion for you.

Some benefits of the self-watering pots

The Self Watering Pots offers great benefits and convenience for busy people. Before heading to the nursery, however, you should research the target plants for the pot. If the plant doesn’t mind constantly moist soil and doesn’t form extensive roots, you can start using watering pots, final results depend on your needs.

Why is my elephant ear plant turning yellow?

Why is my elephant ear plant turning yellow?

Why is my elephant ear plant turning yellow?

What is the reason my elephant ear plant leaves turning yellow? What should I do? The better news is that the maximum reasons why this happens are quite typical and nothing to worry about. Some reasons are simpler to heal than others. In this article, you can know the reason and cure for your elephant ear plant.

Elephant ear plants indoors (Colocasia) are certainly fascinating plants. Their name came from their tall stems and big leaves and giving them an exquisite look. Plus, their deep, gorgeous green color is sure to please the eye. Maintaining an elephant ear plant gives real pleasure both indoors and outdoors. It is also a great choice for beginning gardeners who want a focal point in their home or garden, as the plant is quite easy to look for.

It may be cause for alarm if you see that the leaves of your cherished plant are becoming yellow or brown. To stop future harm to your plant, it’s critical to determine the underlying cause of this, which can happen for a number of different causes. It is advisable to look into the particular needs of your plant species in order to solve the problem.

You will learn about eight possible reasons why elephant ear plants may yellow in this article.

Here are some reasons for elephant ear plants turn into yellow leaves.

Due to the biological life cycle

  • This is a normal reason and usually occurs due to the seasonal cycle nothing to worry about. When it gets cold, the plants prepare for dormancy.
  • In such cases, it’s a good idea to prune the yellowed leaves to make room for new growth in the spring. Plants with large leaves turn yellow in late fall. Some plants, like hosta, have large leaves that make them appear yellower than they actually are. Given the natural life cycle of plants, there is not much to do as that is plant life.
  • Due to lack of humidity.
  • If they’re watered inconsistently.
  • An imbalance in light to water ratio.
  • That’s a good reason for the relief. Just making sure the plants are at the right temperature when they transition to dormancy can really make a difference when they come back in the spring. Recommended to cover it with mulch if you have it. This will protect the plant from harsh winter temperatures.

Here are some reasons for elephant ear plant turn into yellow foliage

Due to sunlight

  • In keeping with the temperature, you should know that this particular plant likes warmth. Direct sunlight is not recommended for these plants. Colocasia prefers filtered light coming from the penumbra.
  • Colocasia shows yellowish leaves earlier because they are light-sensitive. This way you can get the temperature you need to grow without the risk of burning your leaves. Keep in mind that if the leaves of the plant are brown and have a crunchy texture, they are probably in the wrong place and should be moved as soon as possible.
  • Plants may also become yellow if they are kept in an environment with too much shadow. Since sunshine is essential for photosynthesis, the process by which plants make food, keeping plants in a gloomy environment without exposing them to regular sunlight can be hazardous. Lack of sunshine can starve plants, which will eventually result in lower leaves that become discolored and yellow and eventually fall off the plant.
  • This indicates that the plants are not getting enough sunlight. You can see that the yellowest areas are in the areas with the least amount of sunlight. You can give your plants a boost by placing them in the right place in your garden or home.

Soil requirement for elephant ears

  • Haven’t watered yet but be aware that poor soil conditions can cause discoloration. As mentioned above, the soil used should be porous and well-drained to avoid moisture from watering. Crumbly clay should work well.
  • Avoid rocky soils as this can damage the plant’s tubers. Additionally, a good soil pH is important for Colocasia. These plants prefer acidic soil with a pH of 5.5-6.5. Exceeding that can adversely affect plant health and cause yellowing and browning.
  • Plant nutrition is significantly influenced by the pH of the soil. Plants cultivated in soil with an incorrect pH level won’t thrive, even with fertiliser. You can use a soil test kit to find out your soil’s pH level, and it might also offer recommendations for bringing it closer to the optimal range.
  • To ensure that plants receive the proper nourishment, soil must also be improved with organic matter, such as fertilizer and compost. Poor soil quality can cause plant starvation and yellowing if there is insufficient organic matter in the soil.

Soil requirement for elephant ear

Proper fertilizing usage

  • Overfeeding elephant ear plants can also cause the leaves to turn yellow. Elephant ears are generally a powerful bait, so this can shock you.
  • This can cause problems that manifest themselves as leaf discoloration. We recommend using a water-soluble fertilizer that is high in nitrogen and stimulates leaf production and growth.
  • You should apply fertilizer only once a month don’t exceed it. Applying more frequently increases the risk of over-fertilization, which can lead to yellow leaves. Nitrogen deficiency can also cause leaf discoloration. But it usually gives different results. Old leaves may turn yellow, but young leaves are very bright green.

Proper fertilizing usage

Give proper nutrition.

  • The main problem that causes plants to discolor is a lack of nutrients. As mentioned earlier, this can be caused by inadequate sunlight, inadequate watering, and unfavorable soil conditions.
  • Nutrient deficiencies are detrimental to the health of all living things, and elephant ear plants are no exception. Nutrient deficiencies can be recognized by yellow leaf tissue and green veins. You’ll also notice that the top leaves turn yellow first.
  • Too little fertilizer is easily remedied by caring for the plants with plant fertilizer. However, it is important to follow the package instructions whenever possible.
  • Too much fertilizer can also burn plants and cause discoloration, so follow directions carefully. If you want to keep Colocasia as a houseplant, buy fertilizer for houseplants and fertilizer for spring and summer.

Root deterioration

  • Root damage can also lead to discoloration. Pots too small, shovels too rough, or even root rot. Dense roots develop as your plant grows beyond the pot it lives in.
  • Elephant Year plants tend to grow beyond the pot fairly quickly. This inhibits the movement of oxygen, water, and nutrients, which can cause leaves to turn yellow or drop off.
  • Looking at the bottom tray of the plant can help determine if the plant is growing out of its pot. When the roots come out, it’s time to change the pot. This will make the plants healthy again. Make sure to check the roots often as the plants grow, as they may need to be checked fairly often to make sure they have enough space.
  • With sideways plantings, you can prevent root damage, just make sure that the plant gets well-aerated soil. Well-drained soil, both indoors and outdoors, will prevent root compaction.
  • Pay attention to the color when looking at the roots of the plant. Pale, white, yellow is the original color of a healthy root. Dark roots often indicate rot, especially if they smell bad. In that case, unfortunately, it’s time to ditch the plant and start over.

How to stop elephant ear leaves turning yellow?

There could be a number of reasons and issue why your elephant ear plant is turning yellow. Overwatering or inadequate drainage is one of the main culprits. The roots may rot in perpetually wet soil, turning the plant yellow and making it wilt. Make sure your plant receives water only until the top inch of soil feels dry to the touch, and check that the pot has drainage holes so that any extra water can drain.

Lack of nutrition may also be the cause of fading elephant ear leaves. Make sure you are using a high-quality fertiliser with the right ratio of nutrients since elephant ear plants need fertilisation to develop and thrive. Avoid overfertilizing as this can also result in yellowing and other issues.

Elephant ear plants also require direct, strong light to survive. Your plant may begin to discolor and weaken if it doesn’t receive enough light. Try relocating it somewhere brighter but stay out of direct sunlight to prevent scorching the leaves.

Tips for growing elephant ear

Elephant ear plants are tropical plants known for their large, heart-shaped leaves. They can add a tropical feel to any garden or indoor space. Here are some tips for growing elephant ear plants:

  • Soil: Elephant ear plants prefer rich, well-draining soil that have good moisture but not waterlogged. You can add compost or other organic matter to the soil to improve its fertility and drainage.
  • Light: Elephant ear plants prefer bright, indirect light. They can be grown indoors near a window that receives filtered light or outdoors in a partially shaded area.
  • Watering: Elephant ear plants require regular watering to keep the soil moist but not waterlogged. You should water them when the top inch of soil feels dry to the touch.
  • Fertilizer: Elephant ear plants benefit from regular fertilization during the growing season. You can use a balanced fertilizer or one that is high in nitrogen to promote leaf growth.
  • Temperature and humidity: Elephant ear plants thrive in warm, humid environments. They should be kept in temperatures between 65-80°F (18-27°C) and in a location with high humidity.
  • Propagation: Elephant ear plants can be propagated by dividing the rhizomes, which are underground stems. Wait until the plant has finished its growing season before dividing the rhizomes and planting them in separate pots or locations.
  • Pests and diseases: Elephant ear plants can be prone to spider mites, mealybugs, and other pests. Keep an eye out for any signs of infestation and treat with insecticidal soap or neem oil. Overwatering can also lead to root rot, so make sure the soil is well-draining and not too wet.

How to take care of elephant ear plant leaves?

Improving the quality of elephant ear plant leaves is an important aspect of growing these plants. Here are some tips for caring for elephant ear plant leaves:

  • Clean the leaves: Elephant ear plant leaves can accumulate dust and dirt, which can interfere with their ability to photosynthesize. Wipe the leaves with a damp cloth or sponge to keep them clean.
  • Prune damaged or yellow leaves: If you notice any yellow leaves or damaged leaves on your elephant ear plant, prune them off with a clean, sharp pair of scissors or shears. This will help redirect the plant’s energy towards healthy leaves.
  • Support large leaves: As elephant ear plant leaves can grow quite large, they may need support to avoid bending or breaking. Use stakes or plant ties to support the leaves as needed.
  • Provide adequate light: Elephant ear plants require bright, indirect light to grow healthy leaves. If the plant is not receiving enough light, its leaves may become smaller or turn yellow.
  • Monitor humidity levels: Elephant ear plants thrive in high humidity environments. If the air in your home or growing space is dry, consider using a humidifier or placing a tray of water near the plant to increase humidity levels.
  • Water correctly: Overwatering or underwatering can cause problems with elephant ear plant leaves. Water the plant thoroughly when the top inch of soil is dry, but make sure not to let the soil become waterlogged.
  • Fertilize regularly: Elephant ear plants benefit from regular fertilization during the growing season. Use a balanced fertilizer or one high in nitrogen to promote leaf growth. Follow the instructions on the fertilizer packaging for best results.

Conclusion for elephant ear turning yellow.

In conclusion, if the leaves of your ear plants turning into yellow is one of the issues for you then it is because of many reasons such as root damage, over-watering, full sunlight, and improper nutrition. Follow the remedies of this article on the basis of your problem.

Red Leaves Indoor Plants – Red House Plants

Red Leaves Indoor Plants – Red House Plants

Red Leaves Indoor Plants

Without relying on bright blossoms, red flowers add an unexpected rush of color to your house with their speckled, striped, variegated, or mottled leaves.

You will fall in love with these red foliage houseplants after reading this article and want one in every corner of your personal space because they are so silent. There are many unique houseplants with red leaves that you might add to your indoor garden if you enjoy the color red. Without relying on bright blossoms, red flowers add an unexpected rush of color to your house with their speckled, striped, variegated, or mottled leaves.

There are numerous houseplants with vivid red leaves that you may rely on for your indoor gardening and if you love the color red.

These are some lovely indoor plants with vivid red foliage to bring color into your space. If they are given adequate nutrition and protection from frost, several of these plants can be grown outside.

Red Leaves Indoor plants - Red house plants

Each new houseplant gardening series might provide difficulties, particularly when trying to choose a plant that will live longer than others. Your indoor lawn undoubtedly needs a houseplant with vivid pink foliage or a couple pink leaf variegation plants in your collection.

What is the challenge?

One of the main challenges while looking for a houseplant with vivid pink leaves for gardening is figuring out as to what kind of houseplant you need and then searching at your neighborhood nursery. For instance, you might desire something low maintenance and alternatively, you should look for a spot in your house that will improve the aesthetic of the area.

Its entrancing beauty is undoubtedly one of the essential components of any indoor gardening. This assortment of attractive and red-leafed houseplants for indoor gardening is hand-selected as a result.

Red dotted variagated plant

Some red-leaf plant names and these features are discussed below.

Aglaonema red leaves houseplants

  • Scientific Name: Aglaonema Commutatum
  • Plant Type: Perennial herb
  • Geographic source: Asian Subtropics and Tropics
  • Plant Size: 36 cm
  • Water Needs: Moderate
  • Sun Exposure: Partial Shade

The leaves of these plants have an ovate form with a red and pink center with inexperienced splotches giving a manner to clean inexperienced edges. This flora additionally made NASA’s listing of air-purifying flora via way of means of scrubbing benzene and formaldehyde toxins. These red indoor plants amplify your house garden.

As with the alternative cultivars, select a vibrant room without direct sunlight. All those florae grow on wet soil that drains well and avoid letting the temperature drop beneath 65ºF.

Aglaonema

Bush on Fire Red Leaves Plant

  • Scientific Name: Codiaeum Variegatum
  • Plant type: Codiaeum Variegatum
  • Bush on Fire needs bright sun, but the direct sun only in the morning.
  • Botanical Type: Evergreen shrub
  • Origin: Indonesia, Malaysia, Australia, Western Pacific Islands. These crotons grow well in bright sun and shade.
  • Well-drained soil is suitable for these plants. Keep the soil moist, but do not hold water to prevent root rot.

Bush on Fire

  Florida Red Ruffles indoors plant

  • Caladium Bicolor’ Florida Red Ruffles’ produces bright beautiful pink leaves with wavy edges and a skinny band of inexperienced across the edge.
  • Plant type: Caladium Bicolor
  • Plant: Tropical Perennial plant
  • Geographic Origin: Latin America
  • Water Needs: Average to Heavy
  • Sunlight requires bright Sun/Shade

The red leaves Florida Red Ruffles has a lance-fashioned leaf with a beautiful bright color of pink withinside the center and inexperienced across the edges and these plants can tolerate precise daylight.

Water these houseplants regularly, however, it doesn’t need the soil to be wet constantly because it can cause root rot if you water excessively. Required well-draining soil with good nutrients alongside a pot that lets in for good enough drainage. These plants like the soil to dry out after watering.

Caladium Bicolor

Red polka dot plant

  • Plant type: Hypoestes phyllostachya
  • Height and Width: 1 ft
  • This plant will grow if you don’t get a lot of sunlight indoors.
  • These polka dot plants do well in shady zones and the bright red dots on the leaves will add tint to your interior plants.
  • This polka dot plant needs sunlight periodically for a richer red shade.

Red polka-dot-plant

Caladium Bicolor ‘Red Flash’ foliage

  • Caladium Bicolor ‘Red Flash’ is an erect Caladium with dark green leaves and centered with a
    shiny red-pink dot.
  • Plant type: Caladium Bicolor
  • indoor plant: Bulbous
  • Geographic Origin: America
  • Water: Average to Heavy
  • Partial Sun or Shade is needed.

Helps the red flash stand out in a pattern of giant heart-shaped leaves with veins. The leaves are red in the middle and mottled with red and pink until the edges turn completely olive green. Direct sunlight exposure causes the leaf of these houseplants to deteriorate. These plants help to brighten up the dimly lit areas of the room and well-drained soil is required for this type of plant. However, these plants do not like the soil to dry out between waterings.

Caladium Bicolor 'Red Flash'

Black Star or Nerve Plant house plants

  • The Nerve Plant has dark green leaves with reddish veins.
  • Botanical Name: Fittonia albivenis
  • Plant type: Perennial plant
  • Origin of indoor plant: Brazil, Bolivia, Colombia, Ecuador, Peru
  • Water Requirement: Moderate to Heavy
  • Sun Exposure: Partial/Total Shade

Evergreen variegated leaves and dark red veins of these houseplants create their distinctive appearance and these plants grow taller than other plants. These plants love high humidity while bright up the shady corners of your home. Water it regularly to keep it from drying out. Use loamy soil rich in organic matter for good drainage.

Black Star or Nerve Plant

Coleus indoor plant

  • Botanical Name: Solenostemon
  • Plant height: 1-3 feet / 1-2 feet Available in shades such as red, magenta, and pink, the leaves of the coleus plants bring color to your home.
  • Growing tips for indoor plants: These houseplants thrive better in bright sun exposure to partial shade.
  • Flourishes in well-drained, damp potting soil.

Coleus

Flamingo Lily indoor plant

  • Plant type: Anthurium Andreanum
  • Height and Width: 1-2 ft / 1 ft
  • The bright colored, waxy red leaves of the flamingo lily, or anthurium, provide a nice contrast to the green foliage. It counted in the NASA clean air study for purifying harmful air impurities such as formaldehyde, toluene, ammonia, and xylene.
  • Bright sun and direct sunlight exposure are harmful to them.

Flamingo Lily

Red tradescantia

  • Plant type: Tradescantia zebrina ‘Purpusii’
  • These evergreen perennial plants create an amazing ground cover and climbing plants in frost-free climates.
  • These plants have stunning purple-green leaves and rose-pink tri-petals.
  • In mild atmospheres, it is a garden adornment, grown as a border and also used in beds and pots.
  • This plant raised indoors as a houseplant also needs bright, indirect light and does not tolerate cold well.
  • Their bright flowers open singly to conserve energy, usually in the morning, and usually close in the afternoon sun, and required well-draining soil.
  • On cloudy days, they can remain open, but this species requires a lot of light and pruning for the best results.
  • These plants belonging to the genus Tradescantia were until recently known as “traveling Jews”. Garden World no longer uses this name due to its historical use to support anti-Semitic stereotypes.

Red tradescantia

Red-Edge Dracaena

  • Plant type: Dracaena Marginata ‘Red-Edge’
  • Height & Width: 5 feet / 2-3 feet
  • Beautiful bright fringe of reddish-green leaves that completely fills the foliage.  This is a plant with very beautiful and unique foliage and is also on NASA’s list of the best air-purifying houseplants.
  • Care Tips: plants don’t mind bright sun or shade, and the soil type well-draining.

Red-Edge Dracaena

Peperomia caperata

  • These plants come in a wide range of colors and patterns, including beautiful shades of red.
  • Some peperomias are red on the underside, while others are dark purple all over. The color combinations of these plants are varied and perfect for your home.
  • Peperomia is a great houseplant as it can be relied upon in low-light environments. The humidity is high, so hanging it near a damp place in your house, will help this plant thrive.
  • A well-draining soil size is required for this house plant. High humidity in your house can cause the soil to dry longer and can lead to overwatering if you’re not careful. Peperomia caperata

Heuchera micrantha

  • Heuchera plants, also known as coral bells, are a type of plant that comes in a variety of colors, including stunning deep reddish-purple hues in leaves.
  • Heuchera has a paper-thin edge that easily curls inward and looks beautiful on a windowsill. Heuchera prefers moist, well-drained soil, and darker heucheras tolerate more sunlight than lighter ones.
  • You have to keep the heuchera moist by watering it at least once a week and making sure the soil underneath is still moist.
  • Heuchera micrantha plants produce beautiful bright white flowers from early spring to early summer so these blossoms are excellent for decoration and add magnificence to your garden..

Heuchera micrantha

House plants add the vitality and color needed to any space. Also, finding a houseplant that blends well with your home decor is important and we hope our list of Red Leaf Houseplants will help you narrow down your search. This article provides information about the water, moisture, and light requirements of these red-leaf houseplants so we are sure these vibrant plants will thrive in your space well.

Indoor or red indoor plant foliage’s very much attractive and is the definition of beautiful indoor plants because the red foliage of these indoor plants or red houseplants is very eye catchy and easy to maintain as well.

These red leaves plant is attractive and has general growing conditions full to partial sun exposure and soil-type well-draining are better for these house plants. The polka dot plants are notable species.

The USDA growing zone is 8 to 10 or 10 to 12 for these red leaves plants.

Some growing tips are added as well in this article for these 12 red foliage plants. They bloom beautifully and seasonally, and you should keep the soil nutrient rich. If you cultivate these indoor plants in pots, then you have to choose big-size containers. We have added beautiful pictures to this article so that you can honor the enchanting beauty of your house plants as well.

Conclusion

Red-leafed indoor plants are a typical and attractive addition to any home. There are many different varieties of these plants including the classic, red-veined prayer plant to the striking red-pink hues of the nerve plant. The intensity of the anthocyanin pigments, which are principally responsible for the red color of leaves, can also vary with light, temperature, and humidity.

Red leaves are undeniably striking, but it’s important to remember that they contribute very little to a plant’s overall health and upkeep. For red-leaved species to flourish inside, they require regular fertilizer, adequate hydration, and the correct amount of light. Knowing the specific needs of your selected plant species is also essential to ensuring that you can provide them with the greatest care.

Backyard Flower Garden Ideas – Flower Bed Gardening Ideas

Backyard Flower Garden Ideas – Flower Bed Gardening Ideas

Backyard Flower Garden Ideas

The backyard flower garden is a natural extension of the living space. It’s usually more colorful, relaxed, and fun. The possibilities are limited only by your landscape, and your creative flair. This article guarantees a simple and fashionable plan for a flower garden or raised garden bed for your backyard.

Garden string lights for backyard lighting with beautiful flowering plants help to establish the scene around the outdoor venue, or perhaps a backyard garden oasis of relaxation and calm. Plants can include creativity in your backyard and brighten up your little home.

Some gardening ideas for your backyard flower beds

The round gardening ideas

Round small flower garden beds idea with a recycled wheelbarrow. The highlight of this garden of small flowers is an old metal cart in which you can place the highlight of your flower types.
You can put violets or other colorful plants.

The idea of planting flowers with a curve or wavy edge

Also, wavy edges contain beautiful flower garden ideas. Mulching is essential; it holds the weeds together and retains moisture. Use geometry to create contrast or complement. Plants chosen mostly in similar tones – such as lavender, light purple, and fuchsia – offer a soothing combination to your home.

curvy garden idea

Plans to create a beautiful flower bed

Firstly review your whole garden and determine its size. The size of your home yard has a crucial role in deciding which sort of renovation is suitable for you. If you have an undersized garden, you should plan to cultivate smaller flowers such as lavender and petunias to make the space seem bigger. Pink and purple create a beautiful variety when set side by side in a corner. In addition, frames with diverse heights form a wonderful effect.

Create flower garden paths

Flower garden paths have a thorough selection that must be made to provide the magnificence of the whole place. For example, a large home garden should be spread out with a curved path. This causes the whole place to look smaller. Therefore, you will never get tired of just looking at it. You can also use cement pieces with stones in the spacing and sides.

Selection of Flowers –

Flowers are the most crucial element of a beautiful garden plan. They should be properly designated to enhance the aesthetic significance of the garden rather than detract from its looks.

Seasons

Different blooms flourish in different seasons and different conditions, so you should pick ones that thrive year-round or some evergreen beds.

Adding Garden Accessories

Ponds are a great assortment with flower gardens. They assure a natural outcome that improves the aesthetic value of the entire living environment. However, for a small home garden, it may not be a good choice, as ponds and waterfalls make it look even smaller. Alternatively, add a small fireplace in the corner encircled by short, brightly colored flowers. You can change these gardening ideas according to your choice.

Care

Once you have successfully developed a beautiful flower garden, it is very essential to maintain its beauty for as long as possible. This includes cleaning dead leaves, trimming dead leaves and flowers, watering plants, and weeding. These criteria will ensure healthy flower blossoming and enhance the overall appeal of your home garden.

Some flowers you can add to your raised garden bed

Bachelor’s button plants :

It brings an enchanting beauty to your garden. These delicately perfumed and cheerful flower beds seem like mini-carnations. It is the perfect addition to any home garden. Very hardy plant and easy to take care of.

bachelor’s button flower

Hyacinth flowers planting:

Hyacinthus is a small type but bulbous perennial and gives flowers in spring. They are aromatic flowering plants grouped in the family Asparagaceae. These are typically known as hyacinths. Decor your raised bed garden with these blossoms.

Hyacinth flowers

Meadow flowers planting

This flower lives for a very short time and is typically found in multi colorful. Many people love to raise Meadow Flowers in their garden bed idea. They function best in poor soils but it does not suggest that they will not flourish in better soil.

Once they are installed and properly supervised they can be left to develop out for the entire summer and then cut in early autumn. This decreases the managing time. The blossoms are engaging and beneficial to butterflies. It can bring more of them to your home garden over the summer.

Meadow flowers

Vintage-colored rose bush plants

With such a soft color it can soothe your mind with its fragrance. It is a very good choice for decor purposes as well This flower adds a new level of beauty to your large flower garden. This addition can make your garden unique and attractive.

Vintage colored rose bush

Poppy flower (especially red variety)

The familiar name poppy flowers direct to many species in at least 12 distinct genera. They’re in the subfamily Papaveroideae, and these plants are organized under the family Papaveraceae. Despite the confusing genetic lineage, poppy blossoms are well-known to most people, and they can recognize by their paper-like flower beds. Poppy flower colors vary from white to vivid reds and oranges. There are cream, yellow, blue, and purple poppies also present in nature. You can add this to your flower garden design.

Poppy flower

Lavender flowers

Lavender flowers are commonly grown in home gardens for their aromatic leaves and attractive blossoms. The plants are widely planted for their essential oils, which are used as scent variety. The dried blossoms, for example, are used in sachets as a substitute for perfume for their soothing scent.

Lavender sometimes also adds flavor to drinks and sweets and has several uses in herbal medicine. Include this in your garden plans.

lavender-flowers
Fuchsia flowers

Gorgeous and benign, fuchsia flowers come in thousands of types and shades, and their multicolored feature flowers hang beautifully in baskets, planters, and pots. Native to Central and South America, wild fuchsia cultivates so many in the Andes, where the air is cool and humid.

Fuchsia creates dozens of brightly colored, hanging, teardrop-shaped, single or double flower beds that can soothe your mind in leisure time. Fuchsia is a very fetching flower and it looks better in hanging baskets, this perennial flower bed seems elegant drooping blossoms dangling like crystals from a lavish chandelier. It also brings beauty to the outdoor and home gardens also.

fuchsia-flowers

Advantages of landscaping home garden in a container:

The backyard landscaping garden is the only space in your place where you can soothe your feelings and console your body and soul. You can even create a gazebo in your garden to sit and esteem the beauty of your garden. You can adorn your garden with affordable backyard landscaping ideas using some of the following points.

  1. You have presumably bypassed using pesticides, insecticides, or fertilizers when cultivating your plant. By boosting our knowledge of organic farming in our gardens, we can consume more proportional, locally produced, low-carbon foods. It is also environmentally amicable.
  2.  Cultivating fruits and vegetables is an excellent way to have a positive impact on the surroundings and preserve bees. Bees pollinate most fruits and are therefore essential to the world’s food reserve. However, bees have been lowering worldwide in contemporary decades for a variety of explanations including air differentia, chemicals and fertilizers. A landscaping garden is a great practice to entice bees and other pollinators by producing vegetables and flowers. If you are searching for great backyard decorating ideas that will make your garden appealing and worthwhile, this is one option.
  3. landscaping home gardening is not the only mode a garden idea can profit the environment. Plants absorb carbon dioxide from the air that donates to climate change and recasts it into oxygen that shields the existing planet. So it’s always reasonable to showcase plants from all over the world. Gardening diminishes air pollution by lowering the amount of food that must be transported long reaches by truck or aircraft.
  4.  Everyone is satisfied with planning, planting, and tending to a home garden. If you have a ravishing backyard or looking for undersized backyard garden ideas to spend some quiet, cozy time with yourself or your family, this could be the immaculate pastime. Gardening concurrently has several benefits, including devising healthy eating and exercise practices, connecting with family, and lessening stress. If you live in an urban area and don’t have a garden, consider indoor landscaping ideas or help with a neighborhood garden.

Conclusion

This raised flower bed planting project or garden idea is essential and crucial for your home garden, the recipes we discussed are very practical and if you follow them, you will see the changes. The view of your outdoor garden or container garden can soothe your mind and gives you eternal peace. Decore your flower gardens with curved paths with stones. We have used some flower bed and garden beds above. It’s completely up to your decorating sense, do whatever makes you happy and create your world with your imagination. From this article, you can save time because you get detailed information here. You can share this article with Facebook or other social media so that it can help others also,

How to supervise your jade plants: Accurate jade plant watering guide

How to supervise your jade plants: Accurate jade plant watering guide

How to supervise your jade plants

Appropriately watering jade plants is a big discomfort point for many people and maximum gardeners get asked about it all the time. How to Water Jade Plants like all succulents, jade plants are drought tolerant, making them great for busy people who constantly forget to water.

This attribute permits them to endure in natural dry and dry habitats. However, it becomes very susceptible to overwatering, eventually directing to root rot and death. The good news is that if you follow the instructions in this article and how to water your jade plants, they will flourish and amplify your house’s magnificence.

jade plant

How to supervise jade plant water

  • Proper watering of jade plants is very important.
  • Inappropriate watering is the biggest concern most people encounter with jade plants.
  • In spring and summer, when the plant is vigorously thriving, it requires more water than the other times of the year. Water the jade plant intensely (meaning the entire soil is well moistened, not just the surface), wait until the soil is nearly dry, and then water again.
  • This implies that you’ll be watering once a year or once a month – it all depends on how quickly the soil in the area you’re cultivating the plant dries out.

watering-jade-plants

  • It may go inactive and slow growth or stop altogether.
  • You don’t require much water during this time. You should water less repeatedly than in spring and summer so that the soil dries out completely between waterings.
  • Large species of jades may not demand water vastly, it requires one or two-time watering during their dormant period. Jade is susceptible to salt in tap water, so use purified or filtered water if tap water is not ideal.
  • If the plant begins to drop leaves, if the leaves start wrinkling, or if brown spots appear on the jade leaves, this is a signal that the plant ought to hold more water.
  • If the leaves are muddy and damp, the plant is accumulating too much water.

Watering jade plants

Jade plants don’t require much water and most of the time they do much better if kept dry. According to expert’s opinion, overhydration is the number one reason for the jade plants dying and this is the main reason for most problems people have. It may appear counterintuitive, but it’s better to stay in the water than risk over-watering your crassula. But of course, giving them the ideal amount of hydration will make them healthier.

How can I tell if my jade plant requires water?

There are several approaches to telling if your jade needs water. The best practice is to inspect your current moisture level. To do this, poke your finger into the soil to a depth of at least 2.5 cm. If the soil feels damp, don’t water it. Or, even better, use a moisture meter to make it more manageable.

The second method to acknowledge this is if the leaves feel soft or start to shrink instead of being stiff and plump.

how often water-jade-plant

How often to water your jade plants

  • The exact frequency of watering your jade plants depends on many factors, including whether you are indoors or outdoors.
  • Humidity, sunlight, temperature, size, and time of year are necessary aspects influencing the accurate watering of jade. A moisture meter will tell you when your jade needs water and when not.
  • Small jade dries faster than large jade. So if you’re in pots that are 6 inches or smaller, check weekly.
  • Larger potted plants can be checked monthly. Once established in the ground, rain alone is usually sufficient. How to Water Jade Trees

As mentioned above, jade trees don’t need much water, so don’t overdo it. The exact amount needed depends on size and environment. The precise amount required relies on size and environment. So there isn’t an average or specified portion I can advise you.

Major symptoms of overwatering soil of the jade plant

In my experience, Some major indications of overwatering jade are: Sometimes the symptoms are so subtle that you don’t realize you’re over-watering until it’s too late.

The main signs of overwatering jade are:

  • Leaves turning yellow Drooping stems
  • Seemingly healthy leaves starting to fall off entire branches
  • falling Dead leaves not straightening after watering
  • Main stems with very soft or waterlogged

Overwater jade plant worry can lead you to water your plant less, but don’t let the soil dry out so much that it starts peeling off the sides of the pot.

Note that if you see any of the following signs, it may be due to previous overhydration. So always make certain that deficiency of water is a problem.

The main symptoms of dehydration in jade are: Tender leaves and stems Leaves or stems shrinking Leaves turning brown and dry Dead leaves falling off plants Wrinkled leaves beginning to turn red or purple.

Jade-Plant-from-Root-Rot-symptoms

Seasonal jade plants water requirement

In general, the jade plant should be watered more often in spring and summer than in autumn and winter. This is because they are semi-dormant freezing or cooler months of the year and favour drier circumstances.

Water Jade Plants in Summer

During the hot, sunny summer months, water evaporates from the soil very fast. It is also the most vigorous growth stage in summer. This implies more water is required during the warmest months of the year. Check back more often to make sure your jade plant getting water adequately.

Watering Jade Plants in Winter

Because they are semi-dormant in winter, they can endure much longer without moisture. For this cause, the jade plant is at increased risk of overwatering in winter. So alter your routine to dry them out even more.

Water Jade Plants in Summer

Plant jade plants in water

  • By using well-sterilized scissors, cut a 4 to 6-inch branch from a fertilized, healthy jade plant, leaving the top pair of foliage unchanged. Dry the cut on a clean surface to form a callus and decline the possibility of root rot.
  • Once the cut ends are calloused, immerse them in a 3- to 4-inch clear jar of clean, purified water.
  • Use a toothpick to hold the cut edge in place so the leaves do not get wet.
  • Place the plant in bright, filtered sunlight. You have to change the water twice a week unless new roots are coming out of the stem.
  • Adequate roots will emerge from the stem in 4 to 5 weeks. After that, you can start planting jade in a large container of soil or water. You can also cultivate Portulacaria afra (dwarf jade or jade baby plant) this way.

Additional facts

What kind of potting soil does your jade grow in?

  • Cultivate jade in well-draining potting soil. Cactus or succulent soil works best.
  • Jade grown in well-drained potting soil will need water faster than jade grown in “heavy” soil.
  • If you’re growing jade outside in pots, watering every 10-14 days should be sufficient.
  • Leaves should be plump.
  • Water when the leaves are a little thin and start to wrinkle. Do not pot over.
  • Before planting jade plants in new containers, keep in mind that jade likes its roots to be a little stiff.

Make sure the pots have holes for a good drainage system. Place enough drainage material such as sand in the bottom of the container. This will support keeping excess water away from the roots. Too much dampness or water can cause root rot.

Blue Spring Flowers for a Beautiful Garden

Blue Spring Flowers for a Beautiful Garden

Blue Spring Flowers for a Beautiful Garden

Nothing denotes the end of winter and amplifies your garden’s beauty like a cheery spring flower. From the first snowdrops and daffodils to primroses and hellebores, gardeners use spring flowers as an expression of spring to estimate the days until the temperatures raise again and they can spend leisure time in their gardens.

They are also necessary for pollinators. Many pollinators, such as bumblebees and butterflies hibernate and depend on spring flowers to assist them with nectar and pollen when they emerge from dormancy or hibernation. Nectar from spring flowers provides pollinators energy to fly and discover a mate or nest area, while pollen from spring flowers encourages bumblebees to start laying eggs for the next generation of bumblebees.

In early spring culture, everything in the garden awakes from its dormant condition. Early spring flowers also emerge and look very pleasant. They are in full bloom from late March to early April, but it mostly depends on weather conditions.

Are you just commencing your blue flower gardening experience and want to know what flowers to plant in spring? We’ve organized some spring plant concepts for you. It is easy to thrive and does not demand much attention, but simple care is needed to thrive as a healthy individual.

Selecting Spring Flowers

When selecting spring flowers, it’s essential to consider where you’ll grow them. Most thrive best in the sun or partial shade the sun heats the soil in which they develop, so they will bloom sooner if grown in a bright location. Also, evaluate whether you’re cultivating flowers in pots or on the ground and whether you need a temporary or permanent collection.

They are often associated with distinguishing symbolism. Tulips are a sign of hope and prosperity. The seeds of most spring flowers designate change, opening up to new opportunities and beginning a new chapter.

Note that many of the early spring blue flowering plants are bulbs that must be planted in the fall to flower the following spring.

Glory-Of-The-Snow (Chionodoxa)

Glory-Of-The-Snow

  • Generally known as Blue Glory of the Snow (Chionodoxa)
  • Sun, Partial Shade is good for this type.
  • It gives a flower in early spring.
  • Color: Blue Chionodoxa is an easy-to-grow bulbous plant native to the mountains of Turkey.
    Plant bulbs in clusters of 5 to 7 in well-drained soil under trees or shrubs so that flowers bloom before green leaves appear in spring.
  • If planting in a lawn, do not trim until the leaves are dead or rejuvenate the bulbs for next year.
  • The glory of the snow is generally not influenced by diseases. This plant is also pest resistant and repels deer and rodents.

Proposed variety:

  • Chionodoxa luciliae
    It blooms star-shaped blue flowers with a thin center.
  • Chionodoxa forbesii ‘Blue Giant'(some varieties)
    The flowers are blue with white centers.

Siberian Squill (Scilla Siberica)

Siberian Squill

  • Siberian Squill (Scilla Siberica) generally gives flowers in a blue shade.
  • Sun, partial sun exposure is good, or shade.
  • Flowering time: Early spring
  • Flower color: Cobalt blue
  • Siberian Squill gives flowers that are like small bell-shaped blue flowers blooms in early spring.
  • They cultivate in the wild under deciduous trees and bushes.
  • Can also be cultivated in lawns where grassy foliage has turned yellow by the time it requires to be mowed.
  • This carefree plant should be uprooted after flowering to discourage unwanted self-seeding and reproduction.
  • Scilla is deer-repellent and rodent-resistant.

Hyacinth

Hyacinth

  • Full sun, and partial shade are better for this plant.
  • Flowering span: early spring
  • Flower hue: blue, pink, white, yellow
  • Hyacinth bulbs bloom in blue color with a pleasant scent that spreads throughout the garden, and they are repelling deer and vermin.
  • For the best perception of fragrance and beauty, plant them in front of perennial boundaries or near pathways.
  • You may require staking the flowers with thin bamboo sticks, but if cultivated as directed the flowers will hold each other.
  • With proper treatment and care, hyacinths also survive as annuals. If you allow the leaves to die off naturally, the bulbs will flower next year. However, the blossoms are shorter and differently shaped.

Varieties which are recommended to plant.

  • Delft Blue
  • Royal Navy Double

Iris Reticulata

Iris Reticulata

  • Iris reticulata generally gives flowers in a blue shade.
  • Full sun, and half shade are good for this plant.
  • It gives flowers in early spring.
  • Flower color: Bright cobalt blue with yellow center White marking
  • Many gardeners prefer brighter ones. Iris Reticulata blossoms in early spring. These little plants emit soothing fragrances and give visual enjoyment.
  • Grassy foliage should be removed when the plant turns brown after flowering. Iris reticulata slowly naturalizes over the years.

Some varieties of Iris reticulata

  • Harmony
  • Alida dwarf
  • Frank Elder

Anemone Blanda blue

Anemone Blanda blue

  • Blue daisy flowers bloom in early spring.
  • Charming Grecian Windflower likes moist, well-drained, fertile soil and it is best if you planted it on the front edge where the pretty flowers are visible.
  • This plant grows wild each year and covers the ground with beautiful blue flowers until it dies.
  • Does not affected by rabbits and deer because of its scent.
  • Some parts of the plant are poisonous to humans and pets, so you have to pay attention to this matter.

Puschkinia Libanotica (Striped Squill)

Puschkinia Libanotica (Striped Squill)

  • White and blue Puschkinia flowers give distinctive look to your garden. It thrives well with other spring-blooming plants.
  • White flowers with blue stripes or full blue flowers. In both chances, the blossoms are aromatic and very appropriate for rock gardens.
  • Deer don’t like pushkinia because of its strong scent.

Hepatica (Hepatica nobilis)

Hepatica

  • Blue Hepatica nobilis Flower
  • Partial to full shade is better for this plant.
  • Flowering period: Early spring to mid-spring
  • Flower color: Blue, white or pink Small blue wildflowers cover the ground in early spring.
  • Evergreen foliage with light blue, lavender, pink, or white flowers.
  • It is very easy to grow, and it emits a very fresh and delicate spring scent.
  • Rainy days can prevent flowers from fully opening, but half-opened flowers are also bright spots in the garden.

Primula

Primula

  • Primula ‘zebra blue’
  • Partial to full shade is better for this plant.
  • Flowering Period: Late winter to early spring to late spring
  • It gives flowers in blue shades with white stripes. They are often fragrant with a bright yellow center.
  • These plants require humus-rich soil to thrive well.
  • This long bloomer looks great under shrubs, roses, and in containers from winter to spring. It goes dormant during the hot summer months but blooms again in the fall.
  • Deer and rabbits are not attracted to this plant.

Recommended species:

  • Bellarina Cobalt Blue’
  • ‘Zebra Blue’ has blue and white striped flowers with a yellow center.

Pansy

Pansy

  • Annual in most areas, short-lived perennials this plant thrives well in winters, but they also grow in summers but are not too hot.
  • Sun, partial shade growing environment.
  • Blooming Period: Spring, Autumn
  • Flower Color: Blue and most other colors
  • Pansies are bright little flowers of stunningly beautiful blue and light blue.
  • Pansies spring-flowering plants will bloom all winter but will become dormant as temperatures rise in late spring. After that, it should be replaced with a more heat-tolerant annual.
  • Pansies should be watered regularly every three weeks and fertilized with a water-soluble low nitrogen fertilizer.

Pansy Varieties:

  • ‘Blue and Purple Rain’
  • “Delta Marina”

Sweet Pea Bulbs

Sweet Pea Bulbs

  • Botanical name: Lathyrus odoratus
  • Sweet Pea comes found in beautiful sky blue flower shades and emits a soothing fragrance which is often used in perfume making.
  • Requires Soil type: Good Drainage with better nutrients in the soil.
  • Full sun growing exposure is good for this type.
  • Sweet Pea plant is a blue-flowering plant that sprouts slowly, causing it a bit more challenging to grow. They are very sturdy when grown.

Veronica

Veronica

  • Veronica, also known as speedwell. It is a perennial with long spikes of small petals. It rises up to 3 feet tall and is 2-18 inches long flower that grows from spring to fall.
  • Require Soil type: Good Drainage soil.
  • Full Sun/Partial shade growing zones are needed for this type of plant.
  • These annuals are effortless to grow and will attach butterflies and hummingbirds to frequent your garden.
  • Some parts of the plant are poisonous to humans and pets, so you have to pay attention to this matter.

Which blue flower plants bloom in spring while gardening?

There are many different types of blue flowers that bloom in the spring. Here are some examples:

  • Bluebells (Hyacinthoides non-scripta): These delicate flowers are native to Europe and produce clusters of bell-shaped blue flowers in early spring.
  • Grape hyacinth (Muscari armeniacum): These small, bulbous plants produce spikes of tiny, bell-shaped blue flowers in early to mid-spring.
  • Forget-me-nots (Myosotis spp.): These small, dainty flowers produce clusters of tiny blue flowers with yellow centers in mid-spring.
  • Siberian squill (Scilla siberica): These small, bulbous plants produce clusters of blue, star-shaped flowers in early to mid-spring.
  • Glory of the snow (Chionodoxa spp.): These small, bulbous plants produce clusters of star-shaped blue flowers in early to mid-spring.
  • Bluebells of Scotland (Campanula rotundifolia): These wildflowers produce delicate, bell-shaped blue flowers on tall stems in mid to late spring.
  • Virginia Bluebells (Mertensia virginica): These native wildflowers produce clusters of pink buds that open to reveal beautiful blue flowers in mid-spring.

What temperature is frost for plants: Protecting plants to freeze in frost temperatures

What temperature is frost for plants?

What temperature is frost for plants

“FROST” is predominantly ice crystals that develop when ice crystals form on the outside of your plant. It forms when the moistness in the air and converted to ice without first becoming mist.

In our middle school these phenomena of gaseous interconverting into solid or ice crystals without becoming liquid. Some factors are noteworthy for evolving it.

Firstly, the temperature of the atmosphere has to fall between 36- and 32 degrees Fahrenheit. The moisture of the air converts into ice crystals, so there has to be a little breezy. It usually occurs on clear nights.

Our hardiest and coldest plants can withstand frost without the help of a gardener as they are natural health survival. Most of the sensitive plants, valuable summer produce vegetables such as tomatoes, peppers, and squash, can thrive at this temperature with the help of a gardener.

To shield your outdoor plants from cold temperatures while gardening, learning to anticipate when requirements for frost strike the area and what safeguards to take is useful.

How to Protect Them from Frost and Avoid the Freeze?

1. The potted plant should be kept inside at room temperature.

When it is in the forecast or you predict frost, at dusk you have to move your potted plants and hanging baskets indoors.

Plants in pots are more in danger or susceptible to harm because they aren’t benefited from the insulating capacities of the ground soil like in-ground plants are.

Roots of potted plants are exposed to colder temperature and at that temperature frost occurs. Although they have threats, extreme survival of these plants saves them.

Gardeners have to choose a place that isn’t too warm because sudden shifts in temperature can shock plants.  A place in your garage shed or cellar can be used as a shelter for plants.

Examine plants thoroughly for pests and diseases before fetching them inside your home. Keep plants separated from your houseplants to discourage the potential spread of insects.

Once the threat of frost has passed from the air, transport all plants back outside first thing in the morning.

How to Protect Plants from Frost

2. Shield them with coverings like plant frost cloth.

To protect a larger group of plants, simply wrap them with coverings like bed sheets, towels, or drop cloths.

Before applying the plant frost cloth, place some stakes around the plant so that the plant is in warm weather. Let the material drape over the plants to the mud line. Do not tie around the stem or stem of the plant.

Tie them together to prevent heat from the earth from reaching your plants. For even more resistance, consider adding a final layer of plastic.

No part of the plastic cover should come into contact with plant vegetation, as plastic can interfere with plants.

Weigh down the corners and boundaries with heavy stones or bricks to prevent the coverings from blowing away in the night. The next day the first task of the gardener should remove the covers of plants.

How to Protect Plants from Frost - shield plants with coverings

3. Watering them in the afternoon

It appears counterintuitive because it can hold the soil moist can aid protect plants from freezing weather.

Damp soil has an insulating result, which emits warmth upward come nightfall.

If you water your plants before the cold wind blows, do so at the meridian, when the temperature is still slightly warm.

4. Adding a dense layer of mulch

When it’s freezing, you should add a layer of mulch to your garden beds. It will help shield the soil from impulsive swings in temperature.

  • Utilize straw, wood chips, dry leaves, or precisely just a heap of leaves. It provides necessary insulation for the plant’s root system below ground.
  • Heavy mulch 3 to 6 inches deep to create a good barrier.
  • Leave one or two openings around the central stem to allow heat from the soil to reach the plants.
  • Mulching your green beds is one of the best things you can do to keep them low maintenance. But be sure to remove some of the defensive mulch when the weather warms up.

5. Soil perfect to use as frost resistant

The kind of soil your garden is thriving in also influences the quantity of dampness it maintains. Profound, loose, heavy, productive soil discharges more moisture into the air than sandy, nutrient-poor soil.

The more humid the air is, the better elevated the moisture point will be, and less frost can form on those plants. The mulched plants are more likely to become frosted since the mulch holds moisture and heat released from the soil and heats up the surrounding air.

6. Comprehend the behavior of plants in garden.

The plant itself defines its probability of harm. Immature plants or those still growing are most susceptible. Especially the new growth plants are in danger. The toleration against frost tends to be more elevated in the plants with deep maroon leaves and such leaves can absorb and controls heat.

Soft-leaf plants also can retain their warmness. Hardy or frost-resistant plants expose less portion of their leaves to chilling and drying winds.

In what temperatures frost can damage a plant?

Plants can endure a huge variety of temperature ranges, however, there are particular threshold temperatures that should be met earlier than they may develop and flourish. Frost is the maximum not unusual place form of plant harm that takes place at temperatures below 32 stages Fahrenheit.

Plants will develop naturally withinside the low-temperature sector as much as 32 stages Fahrenheit, however, beneath this temperature it can also arise on stems or leaves in bloodless climates.

Should you cowl flora at 39 stages? Are forty stages too bloodless for flowers?

When plants are exposed to frost, the temperature can damage the plant completely. The damage can deviate from browning leaves and drying out the plant to killing the tender plants completely.

  • Understanding how to inform in case your plant has hoar destroyed is essential if you want to keep away from unnecessary waste of time and money.
  • The leaves may be brown and there may be masses of lifeless or loss of life leaves in addition to stems.
  • The plant could have a great yellowing or browning color. If you detect those symptoms, they perhaps had been killed because of frost.
  • For interior plants, it’s an exceptional test of the leaves for frost harm inside. To do this, you need to use your arms softly to push down at the pinnacle of the leaves and experience any raised regions or bumps. For a door plant, it’s simpler to look if the leaves are frosted.

To do this, sincerely have a take a monitor how a whole lot of water you spot popping out of in which stems meet leaves.

Here are a few florae that need not be blanketed with the aid of using frost protection:

Here are a few florae that need not be blanketed with the aid of using frost protection:

Frost is an herbal phenomenon that takes place all through wintry weather. Rhododendron, Petunias, and snapdragons are some frost-resistant varieties.

It generally determines flora due to low temperatures. Its injures flora, which may be devastating to the general fitness of the tender plants.

Some people suppose that if they spray water on the frosty leaves, they may clean the frost and kill it.
Nonetheless, that is a wrong practice and can even induce extra troubles than it solves.

Frost is a form of ice that administrators and accumulates on flora and shrubs all through the bloodless wintry weather months.

More frequently than now that no longer, it’s now simply the leaves of plants that get frosted, however, the flowers, stems, trunks, or maybe the roots.

Key Takeaways

Climate change induces several differences in the physical conditions, such as plants and leaves. The natural environment and local climate extremes influence flowers and plants. The anticipated growth in frost events drives sense in plant replica and plant structure vegetation.

Plant life’s ability to avoid frost is dependent on the timing of its development and reproduction on the same hand for survival gardening, off-grid method is also useful.

In this article, we have evaluated the impact of frosts on plants and flowers, how the frost is damaging the roots, and tips on how to protect them from frost.

After that, we have to predict frost occurrence to take standards to save plants. The prediction of hoar frost events comprises a complicated decision study that employs conditional possibility and economists.

Will baking soda make hydrangeas pink: Baking Soda for Hydrangeas

Will baking soda make hydrangea pink?

Will baking soda make hydrangea pink

Pink Hydrangea is not a miracle is a chemistry that brings beauty to gardening. Hydrangeas are a beautiful plant with many tints of pink and white. These are widely known as hortensia. Hydrangeas are exceptional performers and add a spectacular asset to the garden. Hydrangeas have the potential to change hue depending on the condition of the soil.

So, the common question amongst gardeners is whether baking soda helps transpose the color of hydrangeas to pink or not. The answer is yes and no because it needs both acid and alkaline to thrive which means they are most likely not like the presence of baking soda.

The pH of the soil determines flower pigment- particularly whether or not the hydrangeas are taking up aluminum from the soil. The pink color indicates the plant is getting aluminum and the blue indicates it isn’t.

Gardeners can control the color by altering the ph so it is useful to add baking soda as baking soda is the most cost-effective way to turn your hydrangeas in pink color.

Will baking soda make hydrangeas pink?
How Does Baking Soda Good for Hydrangeas?

The question is baking soda good for hydrangeas has these answers:

  • Baking soda is sodium bicarbonate. It’s used in so many different ways in gardening, and also used in industrial applications. It’s a naturally occurring substance, which indicates it’s safe to use in both organic and non-organic gardens.
  • A simple and quick way to check the pH level of garden soil is through the soil test kit. If the soil pH level is below 5.5, then it is acidic. If the pH level is at or above 7, then the soil is alkaline and perfect for growing pink hydrangeas.
  • After a soil test is done, gardeners know how important pH is to the health of the plants. That’s the reason a gardener is advised always plant in acidic soil and add lime if he is in an alkaline environment. So, sodium bicarbonate is added to water to change the pH level.
  • It also causes the carbon dioxide in water to escape. This makes the water less acidic, which is why baking soda is used as a pH buffer. If you have soil with a high pH (above 6.5), baking soda will help to lower the pH level.
  • If the soil has a pH of 6.0 or lowers that means the soil is acidic and it helps to induce blue or lavender-blue hydrangea. Alkaline soil, with a pH above 7.0, facilitates pinks and reds. When a pH is between 6 and 7, the blossoms turn purple or bluish pink.

What Is Appropriate Soil for Hydrangeas?

Hydrangeas love acidic soil. They prefer soils with high amounts of compost, decomposed leaves, and aged manure. However, their soil also has a high pH level of between 5.5 and 6.2. Baking soda can’t help soil with a high pH level.

That’s why a gardener is supposed to improve the acidity of the soil. Adding compost, aged manure, or additives like sulfur improves the acidity of the soil which helps to change the hue of the Hydrangea flower.

What Is Hydrangea Soil?

Baking Soda for Hydrangeas

So, by adding baking soda, hydrangeas can get help to lower the pH level in soil with a high pH level. And that’s exactly what a gardener wants to do for enhancing the beauty of the flower. If the soil has a high pH level, one will be able to plant more types of flowers in one’s garden and even grow citrus trees.

In organic gardens plants, baking soda can be safely used. It is sodium bicarbonate, and plants cannot be harmed in any manner by it. Baking soda enhances the pH buffering properties of soil by causing the release of carbon dioxide from the soil and can change hydrangea color easily.

The Pros to Add Baking Soda to Change Hydrangea Color.

  • Baking soda is the most cost-effective way to grow pink hydrangeas and baking soda is the secret of it.
  • It works well to bring down soil pH levels and can be a fantastic remedy for acidic soil.
  • The irrigation system is easily expanded by it.
  • Baking soda changes the pH buffer in both organic and inorganic gardening.
  • It can be used to enhance soil structure by increasing its porosity and aeration.
  • Both soil sanitizer and plant fertilizer can be made from it.
  • It can also be used to eliminate unpleasant smells from one’s backyard.
  • The carpets and floors in your house can also be cleaned using it.
  • Every non-organic garden can use baking soda or NaHCO3 without risk.
  • Obtaining a reasonably priced new garden might be beneficial.
  • You may find it beneficial to stay away from rotten tomato odor.

The Cons of Using Baking Soda

It is caustic, which means it will burn the skin if it gets on the gardeners.

  • Baking soda is alkaline and is not a natural soil amendment that can be made so it can leave behind a sour smell.
  • It can cause soil to become alkaline, leaving it harder to grow vegetables and flowers.
  • It only works on hard, compacted soils. If you don’t rinse off the baking soda, it can stain your driveway.
  • NaHCO3 or baking soda must use carefully. It can damage some plants if used too often. It may be harmful to animals.

Make sure to mix the baking soda (1 tablespoon) well and evenly distributed it through the soil before bedding in the plant. Adding baking soda to the soil around the hydrangea will give the roots the protection they need from the winter temperatures as well as the summer ones.

Because hydrangeas are such large plants the roots often battle to provide enough moisture for the leaves, so keeping them cool and moist ensures that the plant survives both hot and cold temperatures.

The Pros and Cons of Using Baking Soda on your hydrangeas

Baking Soda on hydrangeas

It does take time to change the ph. level of the soil from 3 to 8 months. Adding excessive baking soda for a long time may damage the soil so gardeners have to keep patience as a substitute he can use garden lime as well which will help the blossoms to become pink.

Maintaining consistent pink blossoms will demand standard applications of baking soda, so it’s a suitable idea to add the baking soda with the fertilizer. When hydrangea flowers turn pink, they won’t change color, so gardeners have to wait until the following year to see a different tint resulting from the efforts to modify soil pH.

In Conclusion, Baking soda can be a helpful addition to your hydrangea fertilizer regimen. It can help to lower the pH level in your soil and make it more acidic, which is what hydrangeas are looking for. Also, baking soda will make hydrangeas pink.

Baking soda is also a good soil sterilizer and odor eliminator, so used as unwanted smells is a problem.

It uses to disinfect home floors, so it is a helpful addition to the backyard fertilizer regimen.

But baking soda should use with caution and moderation, as it is not a natural additive and can harm your plants if used too frequently.

It uses in moderation, as it damages some soil types. Baking soda is an inexpensive and easy-to-find addition to your hydrangea fertilizer regimen, so it can be a great way to get a new garden.

Growing Onions in 5 Gallon Buckets – Complete Guide to Grow Onions in Bucket.

Growing Onions in 5 Gallon Buckets – Complete Guide to Grow Onions in Bucket

Growing Onions in 5 Gallon Buckets

Sandwiches, salads, soups, and other dishes can all benefit from the simple and extremely easy addition of onions. Also, there are numerous types of onions, including red, yellow, and white, and those with hot and sweet stems.

Of course, there are green onions, which give the meal flavor and color. For both rookie and seasoned gardeners, growing onions is enjoyable. Many people think homegrown onions in a 5-gallon bucket taste better than store-bought ones.

Some gardeners have asked me if they can grow onions in 5-gallon buckets.

If you’re wondering if you can grow onions in a 5-gallon bucket while living in an urban area, the answer is unquestionable yes. To make room for the bulb’s subsurface root system to expand. Likewise, provided the bucket is at least 10 inches deep, you may grow onions in 5 gallon buckets.

How many onions grow in a 5-gallon bucket?

How many onions grow in a 5-gallon bucket

Within each bulbous plant, there is only one bulb. The good news is that six to eight bulbous plants can fit in a five-gallon bucket. It gets even better by making the most of the available space in your bucket.

Some things need to be taken care of.

  • Selection of container: The soil depth of bulb containers should be at least 10 inches. The diameter can be as large as it fits but remember that each bulb needs about 3 inches of space to grow in container gardening.
  • A 5-gallon bucket is perfect for growing 6 or 8 bulbs.
  • A large planter box or even a container works well.
  • Make sure your tank has good drainage holes and try to raise it slightly off the ground.

The proper soil for onion in gardens

Container-grown onions do best in well-drained clay soil in pots with a slightly acidic to neutral pH. Before planting or growing, enrich the soil with plenty of mature compost and a balanced fertilizer to grow onions indoors.

How many onions grow in a 5-gallon bucket?Proper watering

The onion needs about 1-2 cups of water per week. Be sure to check the soil because bulb plants often look healthy even though they need water. If using soil, the onion plant doesn’t need as much water. However, they should be checked regularly and watered, if necessary, especially during hot and dry periods. Review the dampness by sticking your finger into the soil from time to time. If you don’t feel moisture after that, it’s time to water.

Choosing a proper container

  • Choosing the appropriate container can make a significant difference in growth. Like a root, an onion needs a lot of room to grow. But they don’t require as much space as people think. The actual onion you consume takes up most of the space.
  • In addition, the root system is relatively shallow. At 10 inches depth, bulbs can grow as large as possible without worrying about overcrowding. Depth is the most important factor, so please get as wide a container as you want. Using regular 5-gallon buckets is an excellent choice for these homegrown plants.
  • A standard hardware store 5-gallon bucket can grow 6-8 bulb plants. Plastic containers are light, durable, compact, and easy to carry with a handle. Take a few buckets and you can get a whole crop without taking up a lot of space. Other containers also work suitable for onion harvest.
  • Onion family plants do well in pots, bed-like containers, or terracotta pots. You can even use hanging plants or simple containers so that onions grow well in a bucket. Just make sure it’s 10 inches deep and the pot will work just fine.

Before you start planting onions, you need to make some preparations

Before you start planting onions, you need to make some preparations.

  • 5-gallon buckets are convenient but not suitable for container growing. So, it has to be rebuilt a bit. First, we need to make drainage holes. If you plant an onion directly in a bucket, water will collect at the bottom.
  • This can create a fungal problem. Use the drill to make a hole in the bottom of the bucket. Make sure the auger you use is large enough to allow the water to seep in while keeping the soil contained.
  • Place the drainage holes evenly around the perimeter of the pot. Also, some holes should be placed near the center. The goal here is to make sure there are no places for water to pool. We want all your tub bulbous plants to get the same amount of drainage capacity.
  • Most 5-gallon plastic buckets have a reinforced rim. This is great for carrying heavy loads, but not so good for gardening. Place the bucket directly on the ground and this reinforced rim will prevent water from leaking.
  • The easiest way is to use some pavers to grow onions. Arrange them so that they do not block the holes and you are ready to go. Many stores also sell risers that fit in 5-gallon buckets of onions.

Fertilization Methods for Onion Plants

  • Despite the shallow root system, onions are heavy in nutrients. Plants use the nutrients in the soil as much as possible. Fertilization helps improve soil quality and promotes the rapid growth of plants.
  • Onion needs all three major nutrients. These include nitrogen, potassium, and phosphorus. Plants take up moderate amounts of nitrogen. But they are higher in potassium and phosphorus. In general, standard nitrogen formulations work well. A 10-10-10 organic fertilizer works best.
  • We recommend using nitrate-based formulas rather than sulfate-based formulas, as sulfates tend to make the resulting crop sharper. If you want sweet and tangy onion, you need to do this, use nitrate-based fertilizers. Side-feed the bulbs with a water-soluble fertilizer about three weeks after planting. Additional applications can then be applied every time in 2-3 weeks during the growing season. This step will help a lot to plant onion sets.

Fertilization Methods for Onion Plants

How to Harvest Onions?

  • After treating the plants for about 90 days in a bucket, the bulbs are ready to be enjoyed in bucket. But you have to harvest them at the right time. Therefore, it is necessary to rely on the appearance of the culm.
  • Onions are usually ready when the stems begin to dry and turn yellow. They will fall over, indicating the onion is ready. To harvest, simply pull out the vegetables with a stick. Shake the onion well to remove any dirt and set aside. Don’t cut the tip of onion sets yet! It takes about 7-10 days for the onions to harden.
  • The aging process helps lock in and develop flavors. When you pull the vegetable out of the ground for the first time, you will notice that it has thin skin and thick flesh. Vegetables are very delicate at this point.

How much sunlight do onions need?

How much sunlight do onions need

Bulbs still need plenty of sunlight while growing underground in buckets indoor. These plants need full sun every day. It is not a plant to put on a windowsill or in the shade. Place the pot on the south side of your home so the plant can enjoy the sun from dusk to dawn. To grow large, healthy onions, it is important to choose varieties suitable for the indoor region. There are 3 types of onions to choose from. The difference between these categories has to do with the amount of daily sun you need.

Short Day Onions

Short Day Onions require medium sunlight for maximum performance. These plants should be taken daily for 10-12 hours. They thrive best in the South, where the days are slightly shorter. North can grow short-day onions with a long day. But you end up with a smaller bulb. In addition, plants can start flowering much earlier. Common varieties include Southern Bell and White Bermuda.

Long Day Bulbs

Long Day Bulbs are ideal for Northern gardens with long days. These strains require 14 hours of sunlight per day. Anything else and pears will not form properly. There are varieties of long-day onions such as Yellow Sweet Spanish and Ring Master. Chunichi Onions, these varieties are intermediate between long-day and short-day onions. Ideal for the Midwest and the Middle East, these bulbs require 12-14 hours of sunlight per day for bulb formation.

What are good companion plants for growing onions?

Onions are a popular vegetable crop that can benefit from growing companion planting. Growing some good companion plants can help repel pests or attract beneficial insects, while others can improve soil health and nutrient availability. One good companion plant for growing onions is garlic, which can help deter onion flies and other pests that feed on alliums.

Another helpful companion is chamomile, which can attract hoverflies that prey on aphids and other harmful insects. Additionally, growing beans or peas near onions can improve soil fertility by fixing nitrogen.

Marigolds can also be useful as they have been known to repel nematodes, which can damage onion roots. Overall, planting a variety of companion plants alongside onions can help support their growth and health, while also creating a diverse and thriving garden ecosystem.

Are carrots and potatoes good companion to plant onion sets?

Indeed, onions and potatoes make good gardening partners for planting onions.

Because their roots are at various depths, onions and carrots complement one another well. Carrots have longer roots than onions, which have shallower roots. As a result, they won’t have to compete with one another for the same soil nutrients as they develop together.

Also, a wonderful companion plant for onions is potatoes. By generating a smell that is repulsive to these pests, they can assist in warding off insects that can attack onions, such as onion flies. Furthermore, because potatoes require different nutrients than onions, they can assist maintain a balance in the soil’s nutrient levels.

Conclusion

In a 5-gallon bucket, grow onions at home in an affordable and efficient manner. Maintaining proper soil drainage, providing enough sunlight, and watering frequently are the keys to growing onions successfully in a bucket. With the right care and attention, onions may be grown in a 5-gallon bucket and will produce a sizable crop. Whether you have a small balcony or a large backyard, growing onions in a bucket is an excellent way to enjoy fresh, home-grown vegetables. Why not start growing onions and observe the consequences for yourself?