Backyard Flower Garden Ideas – Flower Bed Gardening Ideas

Backyard Flower Garden Ideas – Flower Bed Gardening Ideas

Backyard Flower Garden Ideas

The backyard flower garden is a natural extension of the living space. It’s usually more colorful, relaxed, and fun. The possibilities are limited only by your landscape, and your creative flair. This article guarantees a simple and fashionable plan for a flower garden or raised garden bed for your backyard.

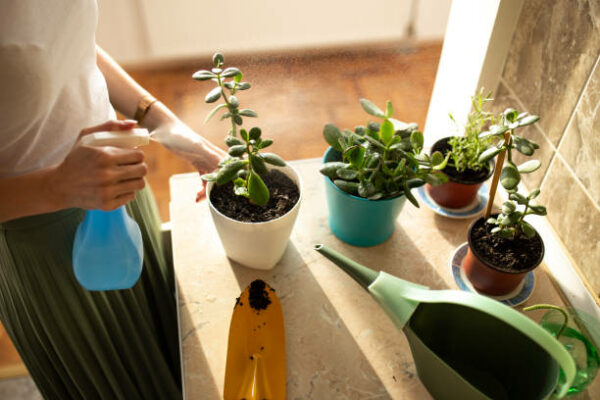
Garden string lights for backyard lighting with beautiful flowering plants help to establish the scene around the outdoor venue, or perhaps a backyard garden oasis of relaxation and calm. Plants can include creativity in your backyard and brighten up your little home.

Some gardening ideas for your backyard flower beds

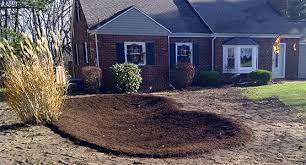
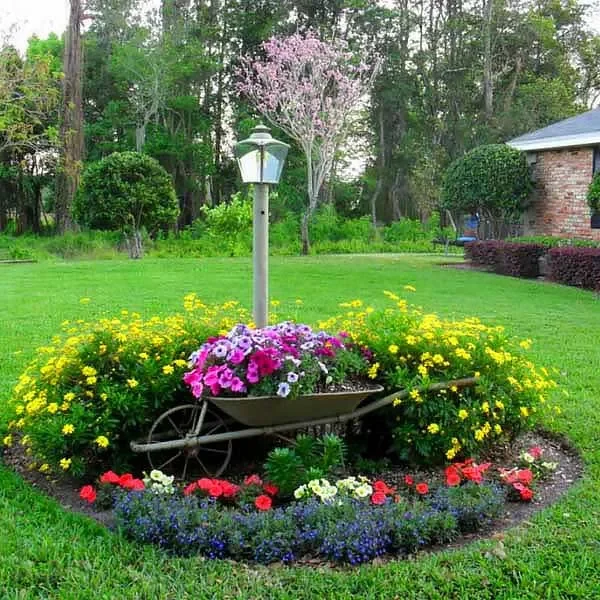
The round gardening ideas

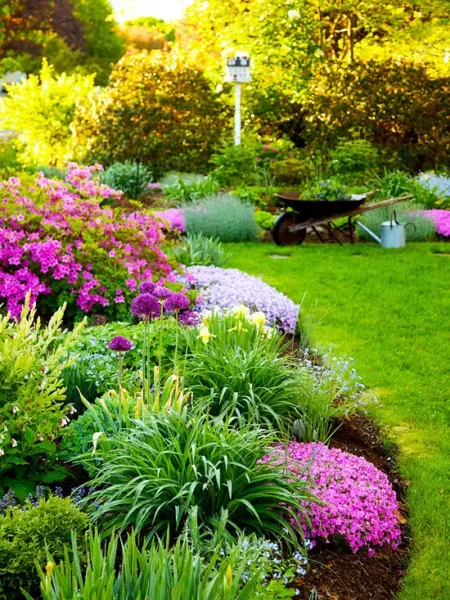
Round small flower garden beds idea with a recycled wheelbarrow. The highlight of this garden of small flowers is an old metal cart in which you can place the highlight of your flower types.
You can put violets or other colorful plants.

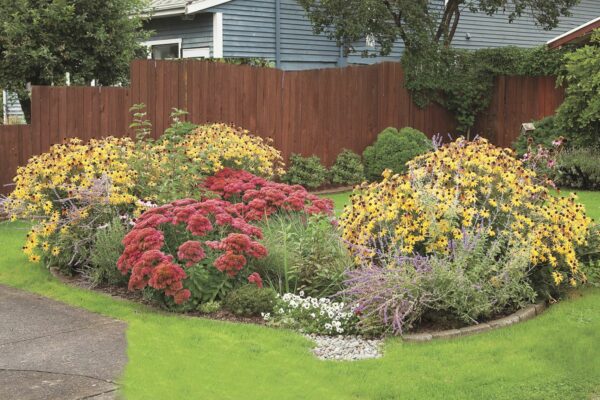
The idea of planting flowers with a curve or wavy edge

Also, wavy edges contain beautiful flower garden ideas. Mulching is essential; it holds the weeds together and retains moisture. Use geometry to create contrast or complement. Plants chosen mostly in similar tones – such as lavender, light purple, and fuchsia – offer a soothing combination to your home.

curvy garden idea

Plans to create a beautiful flower bed

Firstly review your whole garden and determine its size. The size of your home yard has a crucial role in deciding which sort of renovation is suitable for you. If you have an undersized garden, you should plan to cultivate smaller flowers such as lavender and petunias to make the space seem bigger. Pink and purple create a beautiful variety when set side by side in a corner. In addition, frames with diverse heights form a wonderful effect.

Create flower garden paths

Flower garden paths have a thorough selection that must be made to provide the magnificence of the whole place. For example, a large home garden should be spread out with a curved path. This causes the whole place to look smaller. Therefore, you will never get tired of just looking at it. You can also use cement pieces with stones in the spacing and sides.

Selection of Flowers –

Flowers are the most crucial element of a beautiful garden plan. They should be properly designated to enhance the aesthetic significance of the garden rather than detract from its looks.

Seasons

Different blooms flourish in different seasons and different conditions, so you should pick ones that thrive year-round or some evergreen beds.

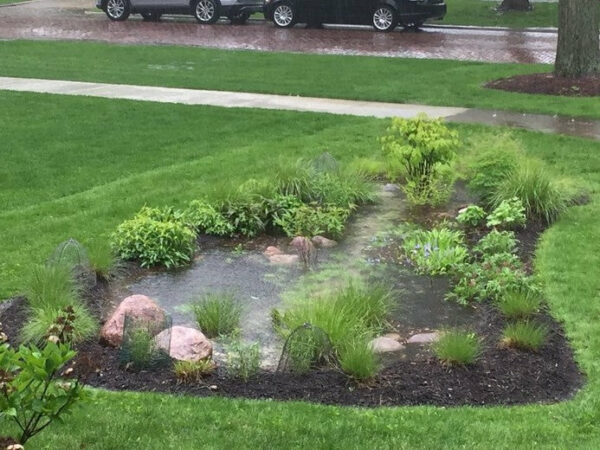
Adding Garden Accessories

Ponds are a great assortment with flower gardens. They assure a natural outcome that improves the aesthetic value of the entire living environment. However, for a small home garden, it may not be a good choice, as ponds and waterfalls make it look even smaller. Alternatively, add a small fireplace in the corner encircled by short, brightly colored flowers. You can change these gardening ideas according to your choice.
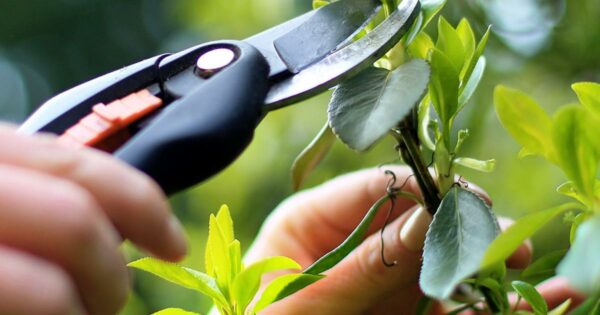
Care

Once you have successfully developed a beautiful flower garden, it is very essential to maintain its beauty for as long as possible. This includes cleaning dead leaves, trimming dead leaves and flowers, watering plants, and weeding. These criteria will ensure healthy flower blossoming and enhance the overall appeal of your home garden.

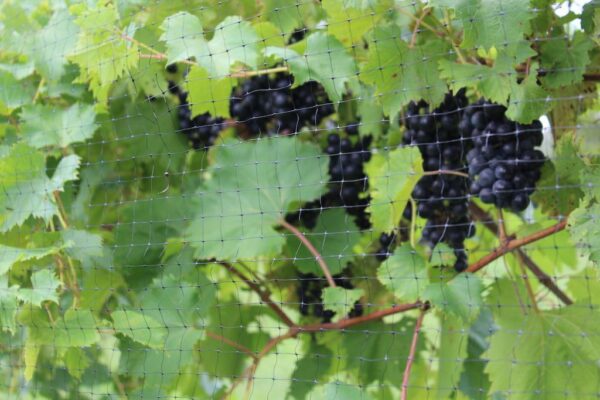
Some flowers you can add to your raised garden bed

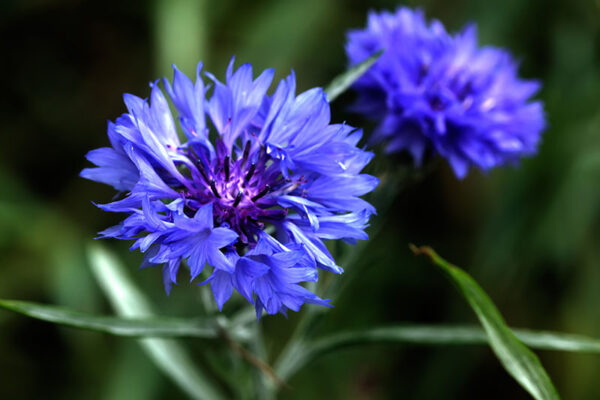
Bachelor’s button plants :

It brings an enchanting beauty to your garden. These delicately perfumed and cheerful flower beds seem like mini-carnations. It is the perfect addition to any home garden. Very hardy plant and easy to take care of.

bachelor’s button flower

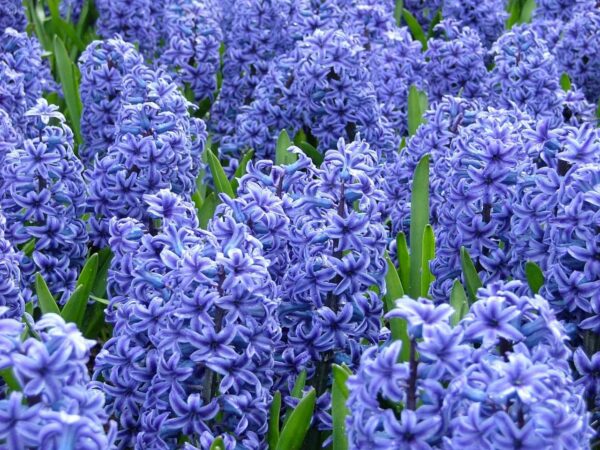
Hyacinth flowers planting:

Hyacinthus is a small type but bulbous perennial and gives flowers in spring. They are aromatic flowering plants grouped in the family Asparagaceae. These are typically known as hyacinths. Decor your raised bed garden with these blossoms.

Hyacinth flowers

Meadow flowers planting

This flower lives for a very short time and is typically found in multi colorful. Many people love to raise Meadow Flowers in their garden bed idea. They function best in poor soils but it does not suggest that they will not flourish in better soil.

Once they are installed and properly supervised they can be left to develop out for the entire summer and then cut in early autumn. This decreases the managing time. The blossoms are engaging and beneficial to butterflies. It can bring more of them to your home garden over the summer.

Meadow flowers

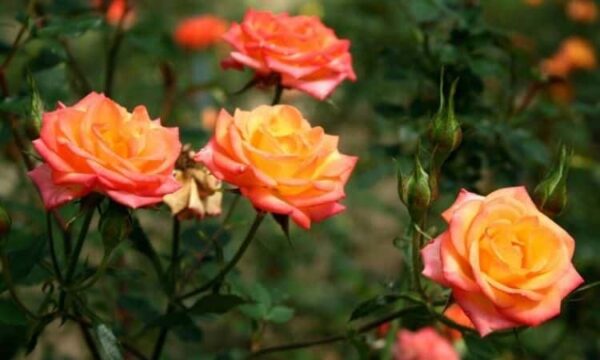
Vintage-colored rose bush plants

With such a soft color it can soothe your mind with its fragrance. It is a very good choice for decor purposes as well This flower adds a new level of beauty to your large flower garden. This addition can make your garden unique and attractive.

Vintage colored rose bush

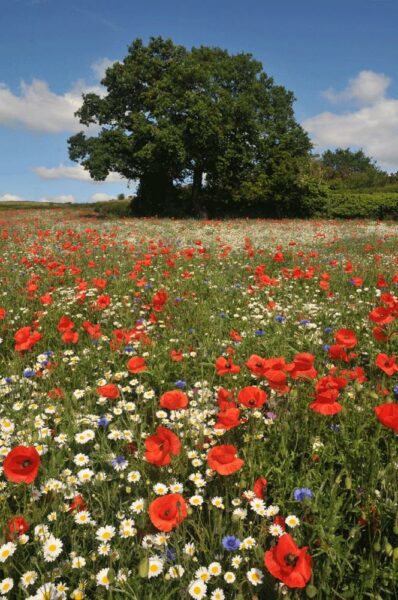
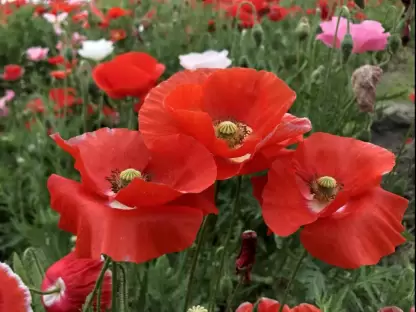
Poppy flower (especially red variety)

The familiar name poppy flowers direct to many species in at least 12 distinct genera. They’re in the subfamily Papaveroideae, and these plants are organized under the family Papaveraceae. Despite the confusing genetic lineage, poppy blossoms are well-known to most people, and they can recognize by their paper-like flower beds. Poppy flower colors vary from white to vivid reds and oranges. There are cream, yellow, blue, and purple poppies also present in nature. You can add this to your flower garden design.
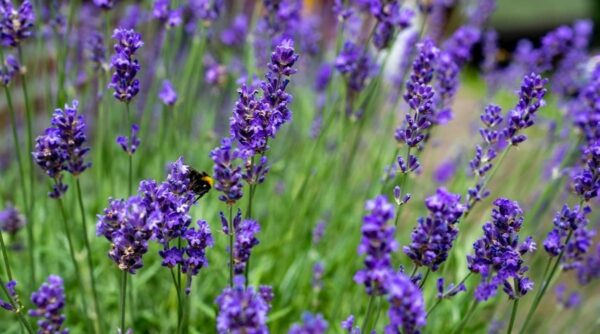
Poppy flower

Lavender flowers

Lavender flowers are commonly grown in home gardens for their aromatic leaves and attractive blossoms. The plants are widely planted for their essential oils, which are used as scent variety. The dried blossoms, for example, are used in sachets as a substitute for perfume for their soothing scent.

Lavender sometimes also adds flavor to drinks and sweets and has several uses in herbal medicine. Include this in your garden plans.
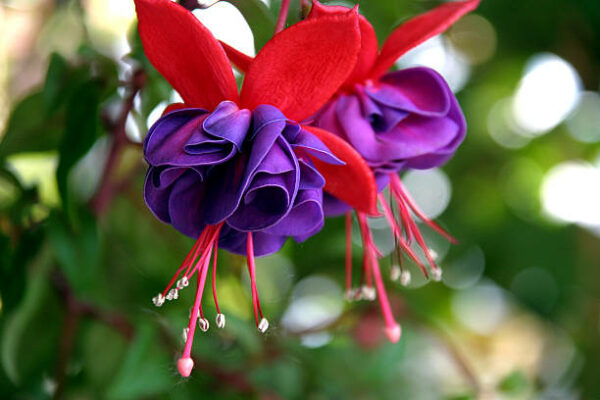
lavender-flowers
Fuchsia flowers

Gorgeous and benign, fuchsia flowers come in thousands of types and shades, and their multicolored feature flowers hang beautifully in baskets, planters, and pots. Native to Central and South America, wild fuchsia cultivates so many in the Andes, where the air is cool and humid.

Fuchsia creates dozens of brightly colored, hanging, teardrop-shaped, single or double flower beds that can soothe your mind in leisure time. Fuchsia is a very fetching flower and it looks better in hanging baskets, this perennial flower bed seems elegant drooping blossoms dangling like crystals from a lavish chandelier. It also brings beauty to the outdoor and home gardens also.

fuchsia-flowers

Advantages of landscaping home garden in a container:

The backyard landscaping garden is the only space in your place where you can soothe your feelings and console your body and soul. You can even create a gazebo in your garden to sit and esteem the beauty of your garden. You can adorn your garden with affordable backyard landscaping ideas using some of the following points.

  1. You have presumably bypassed using pesticides, insecticides, or fertilizers when cultivating your plant. By boosting our knowledge of organic farming in our gardens, we can consume more proportional, locally produced, low-carbon foods. It is also environmentally amicable.
  2.  Cultivating fruits and vegetables is an excellent way to have a positive impact on the surroundings and preserve bees. Bees pollinate most fruits and are therefore essential to the world’s food reserve. However, bees have been lowering worldwide in contemporary decades for a variety of explanations including air differentia, chemicals and fertilizers. A landscaping garden is a great practice to entice bees and other pollinators by producing vegetables and flowers. If you are searching for great backyard decorating ideas that will make your garden appealing and worthwhile, this is one option.
  3. landscaping home gardening is not the only mode a garden idea can profit the environment. Plants absorb carbon dioxide from the air that donates to climate change and recasts it into oxygen that shields the existing planet. So it’s always reasonable to showcase plants from all over the world. Gardening diminishes air pollution by lowering the amount of food that must be transported long reaches by truck or aircraft.
  4.  Everyone is satisfied with planning, planting, and tending to a home garden. If you have a ravishing backyard or looking for undersized backyard garden ideas to spend some quiet, cozy time with yourself or your family, this could be the immaculate pastime. Gardening concurrently has several benefits, including devising healthy eating and exercise practices, connecting with family, and lessening stress. If you live in an urban area and don’t have a garden, consider indoor landscaping ideas or help with a neighborhood garden.

Conclusion

This raised flower bed planting project or garden idea is essential and crucial for your home garden, the recipes we discussed are very practical and if you follow them, you will see the changes. The view of your outdoor garden or container garden can soothe your mind and gives you eternal peace. Decore your flower gardens with curved paths with stones. We have used some flower bed and garden beds above. It’s completely up to your decorating sense, do whatever makes you happy and create your world with your imagination. From this article, you can save time because you get detailed information here. You can share this article with Facebook or other social media so that it can help others also,

How to supervise your jade plants: Accurate jade plant watering guide

How to supervise your jade plants: Accurate jade plant watering guide

How to supervise your jade plants

Appropriately watering jade plants is a big discomfort point for many people and maximum gardeners get asked about it all the time. How to Water Jade Plants like all succulents, jade plants are drought tolerant, making them great for busy people who constantly forget to water.

This attribute permits them to endure in natural dry and dry habitats. However, it becomes very susceptible to overwatering, eventually directing to root rot and death. The good news is that if you follow the instructions in this article and how to water your jade plants, they will flourish and amplify your house’s magnificence.

jade plant

How to supervise jade plant water

  • Proper watering of jade plants is very important.
  • Inappropriate watering is the biggest concern most people encounter with jade plants.
  • In spring and summer, when the plant is vigorously thriving, it requires more water than the other times of the year. Water the jade plant intensely (meaning the entire soil is well moistened, not just the surface), wait until the soil is nearly dry, and then water again.
  • This implies that you’ll be watering once a year or once a month – it all depends on how quickly the soil in the area you’re cultivating the plant dries out.

watering-jade-plants

  • It may go inactive and slow growth or stop altogether.
  • You don’t require much water during this time. You should water less repeatedly than in spring and summer so that the soil dries out completely between waterings.
  • Large species of jades may not demand water vastly, it requires one or two-time watering during their dormant period. Jade is susceptible to salt in tap water, so use purified or filtered water if tap water is not ideal.
  • If the plant begins to drop leaves, if the leaves start wrinkling, or if brown spots appear on the jade leaves, this is a signal that the plant ought to hold more water.
  • If the leaves are muddy and damp, the plant is accumulating too much water.

Watering jade plants

Jade plants don’t require much water and most of the time they do much better if kept dry. According to expert’s opinion, overhydration is the number one reason for the jade plants dying and this is the main reason for most problems people have. It may appear counterintuitive, but it’s better to stay in the water than risk over-watering your crassula. But of course, giving them the ideal amount of hydration will make them healthier.

How can I tell if my jade plant requires water?

There are several approaches to telling if your jade needs water. The best practice is to inspect your current moisture level. To do this, poke your finger into the soil to a depth of at least 2.5 cm. If the soil feels damp, don’t water it. Or, even better, use a moisture meter to make it more manageable.

The second method to acknowledge this is if the leaves feel soft or start to shrink instead of being stiff and plump.

how often water-jade-plant

How often to water your jade plants

  • The exact frequency of watering your jade plants depends on many factors, including whether you are indoors or outdoors.
  • Humidity, sunlight, temperature, size, and time of year are necessary aspects influencing the accurate watering of jade. A moisture meter will tell you when your jade needs water and when not.
  • Small jade dries faster than large jade. So if you’re in pots that are 6 inches or smaller, check weekly.
  • Larger potted plants can be checked monthly. Once established in the ground, rain alone is usually sufficient. How to Water Jade Trees

As mentioned above, jade trees don’t need much water, so don’t overdo it. The exact amount needed depends on size and environment. The precise amount required relies on size and environment. So there isn’t an average or specified portion I can advise you.

Major symptoms of overwatering soil of the jade plant

In my experience, Some major indications of overwatering jade are: Sometimes the symptoms are so subtle that you don’t realize you’re over-watering until it’s too late.

The main signs of overwatering jade are:

  • Leaves turning yellow Drooping stems
  • Seemingly healthy leaves starting to fall off entire branches
  • falling Dead leaves not straightening after watering
  • Main stems with very soft or waterlogged

Overwater jade plant worry can lead you to water your plant less, but don’t let the soil dry out so much that it starts peeling off the sides of the pot.

Note that if you see any of the following signs, it may be due to previous overhydration. So always make certain that deficiency of water is a problem.

The main symptoms of dehydration in jade are: Tender leaves and stems Leaves or stems shrinking Leaves turning brown and dry Dead leaves falling off plants Wrinkled leaves beginning to turn red or purple.

Jade-Plant-from-Root-Rot-symptoms

Seasonal jade plants water requirement

In general, the jade plant should be watered more often in spring and summer than in autumn and winter. This is because they are semi-dormant freezing or cooler months of the year and favour drier circumstances.

Water Jade Plants in Summer

During the hot, sunny summer months, water evaporates from the soil very fast. It is also the most vigorous growth stage in summer. This implies more water is required during the warmest months of the year. Check back more often to make sure your jade plant getting water adequately.

Watering Jade Plants in Winter

Because they are semi-dormant in winter, they can endure much longer without moisture. For this cause, the jade plant is at increased risk of overwatering in winter. So alter your routine to dry them out even more.

Water Jade Plants in Summer

Plant jade plants in water

  • By using well-sterilized scissors, cut a 4 to 6-inch branch from a fertilized, healthy jade plant, leaving the top pair of foliage unchanged. Dry the cut on a clean surface to form a callus and decline the possibility of root rot.
  • Once the cut ends are calloused, immerse them in a 3- to 4-inch clear jar of clean, purified water.
  • Use a toothpick to hold the cut edge in place so the leaves do not get wet.
  • Place the plant in bright, filtered sunlight. You have to change the water twice a week unless new roots are coming out of the stem.
  • Adequate roots will emerge from the stem in 4 to 5 weeks. After that, you can start planting jade in a large container of soil or water. You can also cultivate Portulacaria afra (dwarf jade or jade baby plant) this way.

Additional facts

What kind of potting soil does your jade grow in?

  • Cultivate jade in well-draining potting soil. Cactus or succulent soil works best.
  • Jade grown in well-drained potting soil will need water faster than jade grown in “heavy” soil.
  • If you’re growing jade outside in pots, watering every 10-14 days should be sufficient.
  • Leaves should be plump.
  • Water when the leaves are a little thin and start to wrinkle. Do not pot over.
  • Before planting jade plants in new containers, keep in mind that jade likes its roots to be a little stiff.

Make sure the pots have holes for a good drainage system. Place enough drainage material such as sand in the bottom of the container. This will support keeping excess water away from the roots. Too much dampness or water can cause root rot.

Blue Spring Flowers for a Beautiful Garden

Blue Spring Flowers for a Beautiful Garden

Blue Spring Flowers for a Beautiful Garden

Nothing denotes the end of winter and amplifies your garden’s beauty like a cheery spring flower. From the first snowdrops and daffodils to primroses and hellebores, gardeners use spring flowers as an expression of spring to estimate the days until the temperatures raise again and they can spend leisure time in their gardens.

They are also necessary for pollinators. Many pollinators, such as bumblebees and butterflies hibernate and depend on spring flowers to assist them with nectar and pollen when they emerge from dormancy or hibernation. Nectar from spring flowers provides pollinators energy to fly and discover a mate or nest area, while pollen from spring flowers encourages bumblebees to start laying eggs for the next generation of bumblebees.

In early spring culture, everything in the garden awakes from its dormant condition. Early spring flowers also emerge and look very pleasant. They are in full bloom from late March to early April, but it mostly depends on weather conditions.

Are you just commencing your blue flower gardening experience and want to know what flowers to plant in spring? We’ve organized some spring plant concepts for you. It is easy to thrive and does not demand much attention, but simple care is needed to thrive as a healthy individual.

Selecting Spring Flowers

When selecting spring flowers, it’s essential to consider where you’ll grow them. Most thrive best in the sun or partial shade the sun heats the soil in which they develop, so they will bloom sooner if grown in a bright location. Also, evaluate whether you’re cultivating flowers in pots or on the ground and whether you need a temporary or permanent collection.

They are often associated with distinguishing symbolism. Tulips are a sign of hope and prosperity. The seeds of most spring flowers designate change, opening up to new opportunities and beginning a new chapter.

Note that many of the early spring blue flowering plants are bulbs that must be planted in the fall to flower the following spring.

Glory-Of-The-Snow (Chionodoxa)

Glory-Of-The-Snow

  • Generally known as Blue Glory of the Snow (Chionodoxa)
  • Sun, Partial Shade is good for this type.
  • It gives a flower in early spring.
  • Color: Blue Chionodoxa is an easy-to-grow bulbous plant native to the mountains of Turkey.
    Plant bulbs in clusters of 5 to 7 in well-drained soil under trees or shrubs so that flowers bloom before green leaves appear in spring.
  • If planting in a lawn, do not trim until the leaves are dead or rejuvenate the bulbs for next year.
  • The glory of the snow is generally not influenced by diseases. This plant is also pest resistant and repels deer and rodents.

Proposed variety:

  • Chionodoxa luciliae
    It blooms star-shaped blue flowers with a thin center.
  • Chionodoxa forbesii ‘Blue Giant'(some varieties)
    The flowers are blue with white centers.

Siberian Squill (Scilla Siberica)

Siberian Squill

  • Siberian Squill (Scilla Siberica) generally gives flowers in a blue shade.
  • Sun, partial sun exposure is good, or shade.
  • Flowering time: Early spring
  • Flower color: Cobalt blue
  • Siberian Squill gives flowers that are like small bell-shaped blue flowers blooms in early spring.
  • They cultivate in the wild under deciduous trees and bushes.
  • Can also be cultivated in lawns where grassy foliage has turned yellow by the time it requires to be mowed.
  • This carefree plant should be uprooted after flowering to discourage unwanted self-seeding and reproduction.
  • Scilla is deer-repellent and rodent-resistant.

Hyacinth

Hyacinth

  • Full sun, and partial shade are better for this plant.
  • Flowering span: early spring
  • Flower hue: blue, pink, white, yellow
  • Hyacinth bulbs bloom in blue color with a pleasant scent that spreads throughout the garden, and they are repelling deer and vermin.
  • For the best perception of fragrance and beauty, plant them in front of perennial boundaries or near pathways.
  • You may require staking the flowers with thin bamboo sticks, but if cultivated as directed the flowers will hold each other.
  • With proper treatment and care, hyacinths also survive as annuals. If you allow the leaves to die off naturally, the bulbs will flower next year. However, the blossoms are shorter and differently shaped.

Varieties which are recommended to plant.

  • Delft Blue
  • Royal Navy Double

Iris Reticulata

Iris Reticulata

  • Iris reticulata generally gives flowers in a blue shade.
  • Full sun, and half shade are good for this plant.
  • It gives flowers in early spring.
  • Flower color: Bright cobalt blue with yellow center White marking
  • Many gardeners prefer brighter ones. Iris Reticulata blossoms in early spring. These little plants emit soothing fragrances and give visual enjoyment.
  • Grassy foliage should be removed when the plant turns brown after flowering. Iris reticulata slowly naturalizes over the years.

Some varieties of Iris reticulata

  • Harmony
  • Alida dwarf
  • Frank Elder

Anemone Blanda blue

Anemone Blanda blue

  • Blue daisy flowers bloom in early spring.
  • Charming Grecian Windflower likes moist, well-drained, fertile soil and it is best if you planted it on the front edge where the pretty flowers are visible.
  • This plant grows wild each year and covers the ground with beautiful blue flowers until it dies.
  • Does not affected by rabbits and deer because of its scent.
  • Some parts of the plant are poisonous to humans and pets, so you have to pay attention to this matter.

Puschkinia Libanotica (Striped Squill)

Puschkinia Libanotica (Striped Squill)

  • White and blue Puschkinia flowers give distinctive look to your garden. It thrives well with other spring-blooming plants.
  • White flowers with blue stripes or full blue flowers. In both chances, the blossoms are aromatic and very appropriate for rock gardens.
  • Deer don’t like pushkinia because of its strong scent.

Hepatica (Hepatica nobilis)

Hepatica

  • Blue Hepatica nobilis Flower
  • Partial to full shade is better for this plant.
  • Flowering period: Early spring to mid-spring
  • Flower color: Blue, white or pink Small blue wildflowers cover the ground in early spring.
  • Evergreen foliage with light blue, lavender, pink, or white flowers.
  • It is very easy to grow, and it emits a very fresh and delicate spring scent.
  • Rainy days can prevent flowers from fully opening, but half-opened flowers are also bright spots in the garden.

Primula

Primula

  • Primula ‘zebra blue’
  • Partial to full shade is better for this plant.
  • Flowering Period: Late winter to early spring to late spring
  • It gives flowers in blue shades with white stripes. They are often fragrant with a bright yellow center.
  • These plants require humus-rich soil to thrive well.
  • This long bloomer looks great under shrubs, roses, and in containers from winter to spring. It goes dormant during the hot summer months but blooms again in the fall.
  • Deer and rabbits are not attracted to this plant.

Recommended species:

  • Bellarina Cobalt Blue’
  • ‘Zebra Blue’ has blue and white striped flowers with a yellow center.

Pansy

Pansy

  • Annual in most areas, short-lived perennials this plant thrives well in winters, but they also grow in summers but are not too hot.
  • Sun, partial shade growing environment.
  • Blooming Period: Spring, Autumn
  • Flower Color: Blue and most other colors
  • Pansies are bright little flowers of stunningly beautiful blue and light blue.
  • Pansies spring-flowering plants will bloom all winter but will become dormant as temperatures rise in late spring. After that, it should be replaced with a more heat-tolerant annual.
  • Pansies should be watered regularly every three weeks and fertilized with a water-soluble low nitrogen fertilizer.

Pansy Varieties:

  • ‘Blue and Purple Rain’
  • “Delta Marina”

Sweet Pea Bulbs

Sweet Pea Bulbs

  • Botanical name: Lathyrus odoratus
  • Sweet Pea comes found in beautiful sky blue flower shades and emits a soothing fragrance which is often used in perfume making.
  • Requires Soil type: Good Drainage with better nutrients in the soil.
  • Full sun growing exposure is good for this type.
  • Sweet Pea plant is a blue-flowering plant that sprouts slowly, causing it a bit more challenging to grow. They are very sturdy when grown.

Veronica

Veronica

  • Veronica, also known as speedwell. It is a perennial with long spikes of small petals. It rises up to 3 feet tall and is 2-18 inches long flower that grows from spring to fall.
  • Require Soil type: Good Drainage soil.
  • Full Sun/Partial shade growing zones are needed for this type of plant.
  • These annuals are effortless to grow and will attach butterflies and hummingbirds to frequent your garden.
  • Some parts of the plant are poisonous to humans and pets, so you have to pay attention to this matter.

Which blue flower plants bloom in spring while gardening?

There are many different types of blue flowers that bloom in the spring. Here are some examples:

  • Bluebells (Hyacinthoides non-scripta): These delicate flowers are native to Europe and produce clusters of bell-shaped blue flowers in early spring.
  • Grape hyacinth (Muscari armeniacum): These small, bulbous plants produce spikes of tiny, bell-shaped blue flowers in early to mid-spring.
  • Forget-me-nots (Myosotis spp.): These small, dainty flowers produce clusters of tiny blue flowers with yellow centers in mid-spring.
  • Siberian squill (Scilla siberica): These small, bulbous plants produce clusters of blue, star-shaped flowers in early to mid-spring.
  • Glory of the snow (Chionodoxa spp.): These small, bulbous plants produce clusters of star-shaped blue flowers in early to mid-spring.
  • Bluebells of Scotland (Campanula rotundifolia): These wildflowers produce delicate, bell-shaped blue flowers on tall stems in mid to late spring.
  • Virginia Bluebells (Mertensia virginica): These native wildflowers produce clusters of pink buds that open to reveal beautiful blue flowers in mid-spring.

Handbook of Best Manure Fork and Pitch Fork

Handbook of Best Manure Fork and Pitch Fork

Handbook of Best Manure Fork and Pitch Fork

A garden fork might resemble the fork the farmer in “American Gothic” was carrying. The task of loading loose hay into a cart or out of a haystack is one that is not performed frequently, even though this equipment is a depiction of farm life. Home gardeners employ phosphoric acid, which is something I think is essential.

The four prongs of a phosphorous fork are considerably heavier than those of a fork. When it is created properly, it is a sturdy tool designed to handle the soil and rocks it holds without bending.

It is better than a spade for breaking up thick soil patches to enhance them and for pre-loosening soil that you can subsequently shovel out because it penetrates the ground more easily.

Resistant, uninteresting grassroots give way and can then be entirely removed. As the spade prods the ground, dandelions are pulled. For maximum results when extracting root vegetables like carrots, use a fork, or a similar implement with flattened prongs.

A fork resembles a spade but has thinner, curved prongs for shaking. It has a maximum of three and a maximum of twelve branches. Gardeners love it for lifting compost by turning the pile, as well as for moving mulch from the pile to wheelbarrows and into the garden bed, even though it is intended for cleaning stalls and other agricultural activities.

It is a lifting instrument, nevertheless, and it is more powerful than a fork. The term is ambiguous because it is frequently used to refer to compost forks, stable forks, tin forks, and scoop forks.

Handling manure fork

The purpose of the manure fork is to pick up solid bits of manure from even finer stuff, like wood shavings, so that the waste can return to the box.

A huge, heavy implement called a pitchfork was created to work and aerate the soil. Its weight is advantageous because gravity handles the majority of the job.

The top-rated manure forks.

Heavy-duty Manure Fork (Saddlery forever fork)

The Saddlery Forever Fork weighs less than standard manure forks.

It also includes a number of difficult-to-spill times. The Dover fork, made of aluminum not steel, is a durable and lightweight mud fork. It serves as a good illustration of a plastic manure fork.

UV stabilizers provide the tines remarkable durability. The tines are shielded from damage and breaking by UV stabilizers. It is often referred to as a “horse dung fork” since it is the perfect fork for your livestock, particularly horse manure.

It also aids in impact protection for users hands. As a result, it can protect your shoulders and wrists even when working for extended periods of time. Bring gloves, though, as the metal handles might feel frigid in the winter.

Advantages

Durable, Lightweight, Easy to use.

Disadvantages

The times are not made for positive pressure and are expensive.

Heavy-duty Manure Fork (TRUPER 30323 pro)

TRUPER 30323 pro manure fork is designed specifically for lifting horse manure, this long, lightweight fork makes the job easier. Strong and lightweight, it will last for years.

Pros

The grips on this fork are made to be fantastic for lifting and tilting and are cushioned so you can use them for prolonged periods of time. Your hands won’t be harmed or develop blisters.

The forged head is extremely powerful and won’t break or twist your tines. Forged Head with a Rivet for Potency. The head is kept in place and firmly fastened to the body thanks to the rivets that fasten it to the handle.

This manure fork’s long, extremely light fiberglass handle can be used for extended periods of time without becoming fatigued.

With a lifetime warranty –

The manufacturer is so confident in this product that it comes with a lifetime warranty in case of any defects or issues.

Cons

The tines can bend when lifting very heavy loads. This manure fork is not used for very heavy loads. Failure to do so may bend the tines.


The Forged Manure Fork

This manure fork is better for transferring manure, straw, wood chips, and mulch, this fork is very sturdy and sturdy. Made from high-quality materials, it serves its purpose and is designed to last. It is also used for moving muck also.

Pros

The hardwood handle is very strong and sturdy. The handle of this fork is hardwood. It’s not the lightest, but it should withstand all forms of abuse and last for years.

Padded handle for ease – the handle of this forged manure work has an extra-large padded grasp that shields your hands from injuries and blisters also allowing you to utilize it for a long duration of time without blisters or chafing.

Durable Super Strong Tine – Forged tines made of hardened steel so the tine won’t bend or break under pressure.

Smooth and Balanced – The long handle is cumbersome but very comfortable to use as long as it’s balanced against the weight of the head. This fork is just a suitable combination of weight and balance.

Cons

Handling padding is more perishable material than the handle and may not last as long as the fork itself.

 LITTLE GIANT DuraFork

Little Giant is the best manure fork. It is a type of stall fork. This is a unique fork, primarily because of its polycarbonate construction.

Another distinguishing feature of this manure fork is its durability. Thoughtfully designed, you can use it for a long time.

It is also easy to clean and available in blue, black, red, green, and pink.

Pros

  • Easy to store.
  • Has eyelets for hanging.
  • Has riveted handles.

Cons

  • Wooden handles of the manure fork can break.
  • Expensive

Manure fork metal (Ergieshovel)

The Ergieshovel is an innovative manure fork that makes your work on the farm easier. It comes in black and orange and has a raked design. You will have no problems using it because it has a large handle to help you control the fork and it is useful for horse manure also.

This manure fork is also lightweight, so you can shovel manure easily. Thanks to the additional handle, which helps to absorb the severe impact on the back, you strain your back and work longer. This is an appropriate addition to your wish list of mini manure.

Pros

  • Easy to store.
  • Sturdy design

Cons

  • Does not hit the bottom with a shovel.

ERGIESHOVEL ERG-MCKS22 22 Tine

Best manure fork for sand paddocks

Most of the horses and donkeys are kept in sand paddocks. Gardeners’ favorite for sand is the simple plastic rakes which are usually found in markets. In fact, gardeners commonly have a good reserve around them. Gardeners preserve one in their space, one in the wheelbarrow for manure, and one in the hay barn to pick up surplus hay that falls (they feed the goats).

Not suitable for hard ground or mud. Trying to pick up wet, saturated manure can break the tines.
Prongs can break when hit by rocks or hard objects. The good news is that you can purchase replacement heads. In all honesty, even if you break a prong or two, it works fine most of the time.

The reason gardeners don’t buy Wave forks is that forks are more expensive to buy and replacement whole heads for regular plastic compost forks are only a few bucks cheaper than replacement fork tines for Wave forks in most cases. If you want to see the shaft fork, there is abundantly available in the market.

Best manure fork or pitchfork for the grass or rock paddocks

For grass or rock paddocks (including paddocks with gravel areas)

Gardeners prefer manure forks with metal teeth. It’s expensive, but if you take care of it, it will last a long time. Since the tines are metal, they can flex, but they infrequently break. The metal rake always demanded substituting the handle before substituting the head. If you hold a combination of barns and only require one solution, this is the manure fork. It is tough enough in a rocky paddock and won’t break if caught in the grass.

Desired manure fork head

Gardeners desired a forkhead that thwarts manure from sliding off the fork, so the body is easily attached to an existing fork for convenience and efficiency. These forkheads are tines. it is uniquely angled for this more manageable manure dumping and less spillage. Basket construction and Angled tips are the main characteristics of this type of manure fork head.

Conclusion

You have to choose good manure forks according to your needs. Above we discussed a handful of manure forks, and a few of them are budget-friendly.

If you’re looking for good manure forks, you’ve come to the right place. In this detailed review, we look at the best manure forks on the market. A good manure fork makes it easy to pick up animal poop, clean the stable and lift manure.

However, choosing the right manure fork can be overwhelming, especially if it’s your first time. A rough idea of ​​what to look for will help you make the right choice. Their features and benefits help you make an informed purchasing decision, so you get your money’s worth.

Selecting or Composing Jade Plant Soil and Potting Soil

Selecting or Composing Jade Plant Soil and Potting Soil

Selecting or Composing Jade Plant Soil and Potting Soil

The jade species (Crassula ovata, C. argentea, C. portulaca), another name is the money or friendship plant, and identified for its fleshy oval green leaves, bunches of white flowers, and unique attractive feature of this plant. Although it is achievable to cultivate jade plants outdoors to USDA hardiness zone 10, they can be grown anywhere as houseplants and look like bonsai trees. Select or prepare the right soil moisture level. It is the key to avoiding problems such as root rot.

Required soil for jade plants

Required soil for jade plants.

The only fundamental soil requirement for jade plants is that the soil drains fast. you should use a soil blend that drains evenly and thoroughly. Aboriginal to South Africa, jade is adapted to blossom in rocky and sandy soils with low fertility. Jade cultivates to be top-heavy, and its shallow roots make it prone to overturning. Little heavier soils with more organic matter anchor jade plants satisfactorily. Jade can thrive in acidic or slightly alkaline soils, but if the soil pH is too low or high, it may be nutrient-insufficient so it can suffer from toxicity.

Suitable potting soil

Suitable potting soil

The mixture of nursery potting mixes for cacti or succulents is naturally suitable for use with jade, but plants may satisfy with the addition of a small amount of organic matter. Adequate soil for jade is a mixture of normal soil with peat moss, one-part organic matter, and one-part coarse sand. Jade requires a mix that is well-drained and aerated (the roots need to breathe). If jade is tended in a bonsai style, appropriate growing media include one-part organic material such as coir or peat moss, one-part persecuted cinder or pumice stone, and one-part pressed quartz, decayed granite, or comparable material.

How to make plant soil jade

How to make plant soil jade

Study this article if you desire to make your own potting soil. There are many saleable branded options on the market today, but it’s usually more affordable to make your own. Commercially available potting soil mixes designated for use with cacti or succulents are generally appropriate for jade plants. Besides, you have total control over what goes in and can accurately measure and mix to your desired texture. Some listed recipes and instructions.

Jade plant soil mix recipe

  • A list of what you require for jade plant soil.
  • To estimate the soil mix, the gardener uses a 1-gallon bucket. However, you can use measuring cups, large spoons, scoops, or whatever you have on hand.
  • 3 parts potting soil 2 parts coarse sand (or substitute lawn or poultry sand) 1 part perlite (or substitute pumice stone).

Mixing soil procedure

Mixing soil procedure

  • Pour all ingredients into a bucket or saucepan.
  • Then swirl well with a ladle or shovel until all ingredients are evenly mixed. Can be used instantly or stored in an airtight bucket with a lid.

Growing jade plants in gravel

Jade plants can flourish in gravel and it is very typical for soils in their natural habitat to be gravel. Thick gravel is not appropriate for use in containers, but small pieces can be mixed with potting compost to improve drainage.

Can I plant jade plants in ordinary soil?

Planting jade in regular potting soil may work, but it is not the best alternative. All Purpose mixture retains too much water and can evolve over-moistened very easily. Instead, it is recommended to purchase a succulent cactus mix.

Can I use compost with plant soil mix for jade?

It is not recommended to use compost on jade plants. It retains too much moisture and doesn’t drain fast enough. Rather, look for gritty, sandy mixes.

Is sand appropriate for jade?

Sand is appropriate for jade plants. This is because the soil drains quickly. Be cautious to use coarse sand, not very fine sand.

Is peat moss adequate for jade plants?

Peat moss is naturally not suitable for jade because it contains too much moisture. When it comes to jade potting soil, it is very significant to use the right mixture. Desiring the right potting medium can prevent many common problems and maximize your chances of success.

Can cactus or orchid soil be mixed with jade plants?

Cactus or succulent soil is a suitable base for jade, but it’s worth determining that the plants in the plant do not thrive in the same way. Jade plants are hybrids between succulents and small shrubs. As such, jade plants commonly grow in the form of miniature trees. The Cactus soil mixture is ​​very fluffy. However, due to the way jade is cultivated, these combinations do not supply enough support for the woody stems. To solve this, you can mix it in houseplant compost. This adds additional support to the soil while providing a well-drained quality also. Orchid Mix is ​​not appropriate for jade plants. This is because orchid mixes can vary considerably in terms of drainage levels, with some orchids requiring more water in the soil than others. This can conclude that some orchid soil mixtures are too dense for jade plants.

Can cactus or orchid soil be mixed with jade plants

Soil Concerns when Repotting or Propagating

Repotting or propagating jade plants is a great time to restore the soil texture. In new pots, use a well-drained growing medium with an accurate pH. The most suitable time to repot is early spring. Repotting jades every few years should be sufficient. After repotting the jade plant, wait about a week before watering.

Common Signs that you are using improper Soil Mix for Jade Plants

Setting jade in dense soil will induce extreme moisture and water retention. This can direct to some health problems. The following manifestation may suggest a problem with soil requirements in your jade plant. , or the plant may not be in the best place to grow. This is no co-occurrence.

Common Signs that you are using improper Soil Mix for Jade Plants

Soil’s Role in Plant Growth and Health

So why is the right type of soil necessary for plant development?
Plants absorb most of what they need to prevail from the soil through their root system. These paramount resources comprise nutrients, oxygen and water. The right type of soil supplies a safe place for the roots to anchor the plant to the ground. Various plant types have little different soil preferences, so it’s significant to know the type of soil your plant requires. This permits us to provide optimal essentials for plant development and growth. Most jade cultivars are susceptible to health problems, pests and diseases, and physical injury if soil parameters are not correct.

When should you repot my jades?

Jade plant can be root bound. This circumstance won’t last forever, but you can stay until the plant’s stems and leaves look too heavy for the pot before assuming a larger home for your jade plant. Plants can stay in pots for up to a year or even two years before needing a new, larger container. Always use a pot approximately the same size as the source to avoid shocking the roots. For example, you can repot a -inch pot into a 5-inch or 6-inch pot, but not larger.

Even if the plant doesn’t need repotting to move it to a larger container, it’s wise to repot it in the same pot as a fresh new batch of potting soil to replenish the nutrients the plant grows naturally over time. maybe. their soil. This should do every six months to a year, depending on how quickly the plants grow and absorb nutrients from the soil.

Repotting jade plant

Nourishing your jade with the perfect growing medium will permit you to appreciate these amazing succulents for years. Jade plants require well-drained soil while supplying adequate aeration for their roots. Give your time to the soil mix and observe it flourish.

How to build a rain garden and make it beautiful: A Comprehensive Guide

How to build a rain garden and make it beautiful: A Comprehensive Guide

How to build a rain garden and make it beautiful

When heavy rainfall strikes a typical home in many communities, water rushes from downspouts across pesticide- and fertilizer-treated lawns and into greasy streets, eventually taking its contaminants with it. By building a rain garden, you can divert gutter water into an attractive planting bed. This bed works like a sponge and a natural filter to clean the water and allow it to slowly seep into the surrounding soil. Creating a rain garden isn’t difficult if you’re willing to dig and bring your own machinery. Check with your local cooperative extension office for more information about soil mixes, garden sizes, and plants in your area.

Rain Garden

About Rain Garden

The rain garden is a landscaping element that substitutes an area of your yard to contain runoff (rain and melted snow) from lawns, roofs, and driveways. This shallow pit is loose, deep soil that receives rainfall or naturally purifies runoff water. They complement any landscape style and can be customized to your unique preference. They can be large or small and can take up space in your garden or window.

Designing-a-Rain-Garden

Why assemble a rain garden?

Rain Garden is not only beautiful and innovative, but it is also applicable. By constructing rain gardens, you can conserve the natural water cycle while shielding local rivers, lakes, and drinking water sources.

Rain Gardens:

Limitations the amount of water penetrating local stormwater systems declines the chance of flooding, drainage issues, and erosion. Reduces the number of impurities entering waterways from gardens and roads There is low maintenance to repair and revive groundwater systems. Drawing the attention of Birds, Butterflies and Beneficial Insects like Mosquito-Eating dragonflies. It completes any landscape style and enriches the beauty of the surrounding area.

Choosing the right location for a rain garden in your home

Take a good look at your garden plant. After serious rain, is there a small amount of water in the low places?
This may be a genuine place to initiate a rain garden building. The area should also be in full sun exposure to partial shade and at least 10 feet away from your home. Finally, place the rain garden on a slope away from downspouts, trenches, or other drains that drain off the hard surfaces of the site.

Choosing the right location for a rain garden

Prepare Soil

Eradicate grass and other vegetation from the area where you plan to create a rain garden.
Clay soil works best because it has a slow infiltration rate and slow drainage of water. If you are doubtful of the sort of soil, do a soil test. For loose sandy soil, you should add porous compost and topsoil to the rain garden of your home. You have to dig the soil into deep of 6 inches, inclining gently from the outer rim towards the center where it should be the deepest.

Utilize loose soil to construct a low ridge on the lower side of your rain garden. When water runs into your new rain garden, the trench will help retain the water long enough.

Deepening the garden deeper than 6 inches will allow the water to fully penetrate and evaporate sufficiently. Mosquitoes can be a problem because it takes a long time to.

Prepare Soil

Deciding Size and Shape

  • If you’re short on space or don’t know how to estimate the size, you can always make a small rain garden and imagine at least better results than you have now.
  • If you like an estimable-looking garden, you have to make it at least 150 square meters. Ovals and kidney shapes look most appropriate, but you can make rain gardens long and thin. Once you have determined the design, decide where the water will flow and where it will overflow.
  • Mark the formation with spray dye. On your yard, mark another 18 inches to remove turf. Also, you have to mark other areas that you wish to excavate.
  • The outline of this rain garden protrudes downward to show the extent of the dry well, an optional underground reservoir that stores surplus water when the rain garden overfills.

Deciding Size and Shape

Remove unwanted grass.

To remove such plant or grass, cut the roots at the lowest possible angle with a sharp spade, or use a lawnmower that day.


Make a Water Basin

  • You have to dig first to the depth you need. Assemble a flat bottom so that the water absorbs in evenly. If your rain garden is on a gradient, you can accumulate some of the excavated soil on the lower steps to preserve water. For stability, you have to tighten the base soil well.
  • The base of the rain garden has to be at least 2 feet broad, and the top is at least 1 foot vast. When the rain garden is full, the top of the ridge should be at least 6 inches above the water level.
    Also, dig any dry wells. One of these rain gardens is about two feet square and three feet deep.

basin for rain garden


Relocate Inlet Pipes

  • Dig grooves for pipes that lead water from one or more downspouts to the rain garden. Rigid, smooth-walled tubes are the most durable, but corrugated tubes are easier to handle.
  • Get a variety of pipes without perforations. Spread the tubing about a foot into the rain garden pool. You can cover the place below with rocks to prevent erosion.
  • You can also put rocks above and beside the pipe to obscure it and control the furrowed hose from curling up.

Fill Basin

Fill all but the top 6-12 inches of the excavated area with rain garden soil. Gently chamfer the sides. If the soil you excavate is moderately clay-free, you can use a combination of 65% soil and 35% compost, or two shovels of soil for each cup of compost.

If you’ve dug clay soil, bury it with a mixture of 60% sifted sand and 0% compost. If you are constructing a dry well, pack it with cleaned round stones 1.5 to 2 inches in diameter. Also, packstones around the downpour area to control erosion.

Fill basin.

Plant Selection for rain gardens

  • Cultivating areas and soils vary considerably from country to country, but plant preference for this type of garden is fairly typical.
  • Aster, daylily, iris, sedum, cornflower and sedge are examples of specimens suitable for rain gardens. Select plants with a moistness requirement of “Average to Moist” on the label.
  • Position them in the lowest part of the rain garden. At the higher end of the bed, place plants that flourish in “average to dry” water conditions.
  • It may seem instinctive to buy moisture-loving plants for your rain garden but don’t. Your garden is designed to drain within 2 hours, so moisture-loving plants will quickly grow tall and dry.
  • Almost all plants thrive in a rain garden with adequate moisture requirements However, there are some adequate reasons to choose native plants. Native grasses, wildflowers, and shrubs generally have very deep root systems, sometimes burrowing 10 feet or more.
  • Also, most native plants shed their roots each year to form new roots, promoting soil aeration and water flow. And because they are native species, you know these plants will thrive in your area and soil conditions.

plants for rain gardens

Protect the plants with mulch.

  • Once the plants are planted in the ground, shield the inside of the rain garden with a 3-inch layer of mulch to retain the soil moist and deter weed seeds from germinating.
  • Even drought-tolerant plants require extra watering to persist during the dry season until the plants in the Rain Garden are set.
  • Check mulch depth annually and top up if required. Rain gardens demand no fertilizer other than the compost used in the soil mix.

Here is why your fiddle leaf fig turning brown: Reasons for leaves turning brown

Here is why your fiddle leaf fig is turning brown.

One of the most common questions fiddle leaf fig shop owners has been how to treat brown stains on their plant’s beautiful leaves. Finding brown spots on your fig’s magnificent large green leaves is disappointing, and the problem may be aggravating and perplexing since knowing what’s causing the brown patches on the fig leaf takes a keen eye and a little bit of effort.

Here are the reasons why your fig leaves are turning brown.

To help your fiddle leaf fig properly recover, it is vital to identify and address the problem as soon as possible. Four significant reasons contribute to brown spots:

• Rotting root systems

• Bacterial contamination

• Dry leaves

• Insect damage


What are the brown marks on a fig leave?

Fiddle’s brown areas on a fiddle-leaf fig generally indicate problem. If your fig’s leaves begin to turn brown, this signals that your plant is unwell or anxious and needs treatment. The good news is that none of the possible reasons for spots on your fig is dangerous. If detected early and treated immediately, your fig leaf has a good chance of fully recovering.

The most common reason for your fig leaves turning brown is an external or internal infection. To put it another way, plant tissue starts to die, resulting in patchy, brown leaves. This isn’t the sole explanation for brown spots on figs leaf.

They can also acquire sunburn, which seems to be a sickness. In most cases, illness in fig leaves is directly tied to their growth circumstances. Fortunately, you can rapidly adjust them and have your beautiful plant back to life. The first step is to identify the source of the brown areas on your fig leaf.

What are the brown marks on a fiddle leaf fig?

What produces brown patches on a fig leaves?

There are a few primary reasons why the fig leaves houseplant may have brown spots. These include bacterial or fungal root rot, insect infections, more sunshine, and dryness.

A thorough study of your leaves may help you pinpoint the exact problem that your plant is experiencing.

Root Rot causes fig leaves to turn brown.

Overwatering causes root rot, which is likely the most common cause of brown spots on a fig leaf.
Root rot is a fungal infection that happens when roots are submerged in water for an extended length of time without adequate drainage. A lack of sunlight might aggravate root rot illness. A container that is too big may also cause your plant’s roots to become excessively wet between water routines.

Your plant’s bottom leaves are the first to be harmed by root rot, so begin your search there. Roots of fiddle leaf figs, in particular, demand well-drained soil. Root rot is frequently treatable, especially if detected early.
Make sure you’re using a well-draining container and fast-draining potting soil and that you’re not overwatering.

The next stage will be to evaluate the damage. If your plant simply has a few brown patches on the leaves, you do not need to repot it. Allow two weeks or longer for your plant to dry out to allow the roots to recuperate. Remove any damaged leaves and make sure your plant gets enough sunlight.

Root Rot causes fig leaves to turn brown
Invasion of insects causes fig leaves to turn brown.

Fig brown spots can also be created by insects, although small holes in the leaves commonly accompany them. To spot an insect infestation, look for indications of little insects crawling over your plant, as well as remaining webs or eggs.

Dealing with an insect infestation may be a simple process since removing the bugs, and damaged leaf detritus should cure the problem. Insect spots are lighter in color than root rot spots and do not spread on their own.

Bacterial Infection in Figs causes brown leaves.

Bacterial root rot shows as irregular dark brown spots along the leaf margins of your fig. Bacterial root rot is caused by overwatered or waterlogged soil, which is mainly caused by insufficient drainage and aeration. The goal is to address afflicted regions as soon as possible before the damage becomes too severe. The treatment is similar to that of root rot: ensure that the roots of your plant dry out between waterings and that it receives plenty of sunlight.

Remove all of the leaves with brown spots and repot your plant in a container with appropriate drainage and fresh, sterile soil if the damage is minor. Allow it plenty of light and water sparingly till it heals. Fresh air also helps in this case!

Bacterial Infection in Figs causes brown leaves
Dryness causes brown spots on Fig leaf.

Parched fig leaf plants can soon develop brown spots that are tanner than brown in color and start at the leaf’s edge and travel within.

Your plant’s relative humidity should be between 30-65%; therefore, if your home humidity is significantly lower or your plant, you may need to mist or move it to produce extra humidity for your fig plant. The most basic treatment for a dry plant is to keep it from drowning and having a proper watering routine. Water your plant just until the top inch of soil has dried up. If you see soil shrinkage, repot your plant to ensure the root receives adequate water.

Repotting is simple, and just a few actions are required to ensure success for your houseplants. Water your fiddle leaf fig plant on a regular basis and keep an eye on fiddle leaf to ensure it gets enough water.

Sunburn causes your fig’s leaves to turn brown.

If you expose your indoor fig suddenly to a lot of sunshine, your fig leaves might acquire sunburn. While this is not very common, it does occur and shows as light-tan spots on your plant’s upper outer leaves.

The size of sunburned areas of fiddle leaf fig leaves can range differently, depending on how much exposure the plant has received. The burned edges will not recover, but they may be removed without causing more damage to the plant.

Illness or bruising of the leaves.

Sometimes brown spots on your fig, might be caused by leaf bruising or by a leaf-specific disease, such as bacterial leaf spot.

In this case, you can spot brown patches usually on yellow fiddle leaf figs. The yellowing of the leaves is visible and precedes the brown spots that follow.

Spray with fertilizers on fiddle leaf fig’s plant to stop them from turning brown. Spray the underside of each leaf, giving careful attention to where the leaf meets the stem. Wait two weeks before examining again and, if required, repeating the spraying process.


What should you do if there are brown spots on your fig leaf?

Once you’ve identified the source of your fiddle leaf brown spots, you’ll want to treat the issue as quickly as possible so that your plant may fully recover. Here are some tips to save your houseplants:

• Fix your irrigation difficulties to avoid the recurrence of brown areas.

• Use a fast-draining soil

• Make sure your plant receives adequate sunlight for food

• Fertilize appropriately

• Inspect your plant on a regular basis

While fig leaves are relatively resistant, keep an eye out for any disease symptoms to fix the problem. Fiddle leaf fig brown spots on your plant might suggest a variety of issues with your plant and if left untreated, your fig leaves may fall off, inflicting irreversible damage to your plants’ health.

Plumeria Plant Care: Plumeria Care and Grow Plumeria Tree

Plumeria Plant Care: Plumeria Care and Grow Plumeria Tree

Plumeria Plant Care: Plumeria Care and Grow Plumeria Tree

If you are looking for a beautiful statement piece for your garden, then a plumeria plant is a great option. Not only do these plants have stunning flowers, but they are also easy to care for. In this blog post, we’ll discuss the basics of plumeria care and maintenance and how to ensure your plants stay healthy and bloom for years to come.

What Are Plumeria Plants?

What Are Plumeria Plants

A Plumeria Plant is a tropical flowering shrub native to Central America, Mexico, and South America that produces large, colorful blossoms in shades of pink, yellow, white, red, and orange; and let’s be honest, who wouldn’t want a gorgeous Plumeria Plant in their home? But to take good care of it, you need to know what you’re doing! Provide your Plumeria Plant with bright sunlight and well-draining soil; make sure to water it only when the soil is slightly dry; don’t forget to prune the tips of the stems after blooming season; and watch out for pests like mealybugs, aphids, and scale. With a little love and care, you’ll have a beautiful, fragrant Plumeria Plant in no time!

The plants thrive in warm temperatures and prefer plenty of sunlight and well-draining soil for optimal growth Similarly, when caring for a plumeria plant, the plant must be kept in warm temperatures and given plenty of sunlight. Additionally, it is important for the soil to be well-draining and not overly wet. With these care tips in mind, even novice gardeners will find that plumeria plants are easy to maintain and grow!

The beauty of Plumeria Flowers

The beauty of Plumeria Flowers

Flowers from the plumeria genus are prized for their stunning beauty and seductive scent. White, yellow, pink, red, and multicolored variations are just a few of the many colors that these tropical flowers come in. The petals have a distinctive, sweet scent that is frequently utilized in perfumes and other scented items. They are typically waxy and thick with a velvety texture.

The form of plumeria blooms is one of their most recognizable characteristics. With a conspicuous center that is frequently a different color than the rest of the flower, the petals form a five-pointed star configuration. While some plumeria blossoms have an appearance that is more rounded or cup-shaped, others are more elongated and pointed.

Plumeria blossoms are stunning, but they also hold cultural significance in many regions of the world. They are frequently used in traditional Hawaiian leis, where they are worn as a sign of love and affection on a string with other flowers. Plumeria flowers are frequently utilized in religious ceremonies and offerings in Hindu and Buddhist cultures because they are connected to devotion.

Overall, plumeria plants are a valued and highly sought-after tropical plant because to their beauty and aroma. These flowers are certain to please the senses and spread joy to everyone they come into contact with, whether they are cultivated in a yard or used in floral arrangements.

Benefits of Growing Plumeria

Benefits of Growing Plumeria 

Owning a Plumeria plant has many benefits – from its beautiful blooms to its sweet, fragrant aroma. But with any living thing, proper care is necessary to ensure its health and vitality. The good news is that plumeria plant care isn’t as hard as you might think! They thrive in full sun and well-drained soil and can easily be transplanted when needed. Watering should be done regularly, but be careful not to overwater, as too much moisture can lead to root rot. In addition, fertilizing every couple of months will help keep the plant healthy and blooming. With a few simple tips, you’ll have your Plumeria looking its best all year long!

In addition to beautifying your home, these plants are also easy to care for. They require minimal maintenance, making them the perfect choice for busy people looking for an attractive houseplant.

Not only do these plants require minimal upkeep, but they also are easy to care for and bloom with minimal effort. So, if you want to take care of a plant without spending too much time on it, the plumeria is an excellent choice!

Plumeria Care and Grow Plumeria
To maintain your Plumeria plant’s health and long-term attractiveness, proper care is required. This includes fertilization, pruning, and appropriate watering.

To properly water your Plumeria, make sure you are not over-watering it. Too much moisture in the soil can lead to rot. Pruning is an important part of Plumeria plant care. The branches need to be trimmed once a year to promote healthy growth. Lastly, fertilizing should be done during the growing season with a diluted solution of fertilizer. Keeping up with these steps will help your Plumeria stay as beautiful and healthy as possible!

Watering is done two to three times a week, depending on the season. Make sure the soil is moist but not soggy. Pruning should be done in early spring to promote new growth and eliminate dead branches. Fertilize with a balanced fertilizer specifically designed for plumeria plants every two weeks during the growing period. Thereafter, taking care of your plumeria plant should become easier as you know what to do. A good watering routine two to three times a week, with the soil moist but not soggy. As well as pruning in early spring will set your plant up for success. Fertilizing every two weeks during its growing period will help make sure it’s getting enough nutrients. Properly caring for your plumeria plant will help it grow and bloom.

Extra Care Tips for Planting Plumeria Trees

Extra Care Tips for Planting Plumeria Trees

Plumeria trees are tropical plants that produce beautiful and fragrant flowers. If you’re planning to plant a plumeria tree, here are some extra care tips to keep in mind:

  • Choose the right location: Plumeria trees need full sun exposure to thrive, so choose a location that gets at least 6-8 hours of direct sunlight per day. They also prefer well-draining soil, so avoid planting them in areas that are prone to waterlogging.
  • Provide regular watering: Plumeria trees need regular watering, especially during the hot and dry summer months. Water deeply once a week, and ensure that the soil is moist but not waterlogged. Avoid overhead watering, as this can cause the leaves to develop fungal diseases.
  • Fertilize regularly: Plumeria trees are heavy feeders and require regular fertilization to promote healthy growth and flowering. Use a balanced fertilizer with equal amounts of nitrogen, phosphorus, and potassium, and apply it every 2-3 weeks during the growing season.
  • Prune to encourage branching: Plumeria trees naturally grow in a tall and spindly shape, but you can encourage branching by pruning the tips of the branches. This will help the tree develop a fuller and more bushy shape, and also promote more flowers.
  • Watch out for pests and diseases: Plumeria trees can be susceptible to pests such as mealybugs and spider mites, as well as diseases such as black tip fungus and frangipani rust. Monitor your tree regularly and treat any issues promptly with insecticides or fungicides as needed.

By following these extra care tips, you can help your plumeria tree thrive and produce an abundance of beautiful and fragrant flowers.

Plant Care for Plumeria Rubra

Plumeria rubra, also known as the red frangipani, is a tropical plant that produces beautiful and fragrant flowers. Here are some plant care tips to help your Plumeria rubra thrive:

  • Light: Plumeria rubra needs full sun exposure to grow and flower well. Choose a location that receives at least 6-8 hours of direct sunlight per day.
  • Soil: Plumeria rubra prefers well-draining soil with a slightly acidic pH. If your soil is heavy and poorly draining, you may need to amend it with sand, perlite, or other materials to improve drainage.
  • Watering: Plumeria rubra needs regular watering during the growing season, especially during hot and dry periods. Water deeply once a week, and allow the soil to dry out slightly between watering. In winter, reduce watering to prevent root rot.
  • Fertilizer: Plumeria rubra is a heavy feeder and needs regular fertilization to produce abundant flowers.
  • Use a balanced fertilizer with equal amounts of nitrogen, phosphorus, and potassium, and apply it every 2-3 weeks during the growing season.
  • Pruning: Prune your Plumeria rubra in late winter or early spring, before new growth starts. This will encourage branching and promote a fuller, bushier shape. Remove any dead, damaged, or diseased branches, and cut back any long, leggy growth.
  • Pests and diseases: Plumeria rubra can be susceptible to pests such as mealybugs, spider mites, and scale insects, as well as diseases such as black tip fungus and frangipani rust. Monitor your plant regularly and treat any issues promptly with insecticides or fungicides as needed.

By following these plant care tips, you can help your Plumeria rubra thrive and produce an abundance of beautiful and fragrant flowers.

Troubleshooting Common Problems with Growing Plumerias

Troubleshooting Common Problems with Growing Plumerias

Troubleshooting common problems with plumeria plants starts with identifying the source. This could be a lack of nutrients, poor soil drainage, too much or too little sunlight, or pests and diseases. Before starting any plumeria plant care, it’s crucial to figure out what exactly is causing the issue — otherwise, anything you do might only be a temporary fix. Thankfully, with a little detective work and research, you can take the necessary steps to ensure your plumeria plants stay healthy and thrive.

Plumeria plants are susceptible to root rot if they are overwatered, so make sure to check the soil before watering and wait until it is dry before adding more water. Additionally, providing proper drainage for the soil will help reduce the risk of root rot. Furthermore, it’s important to ensure that your plumeria is receiving adequate light. If you can, position the plant in a spot near a window or outside in a sunny location to ensure it has enough light. Lastly, if you want your plant to bloom abundantly, make sure it’s receiving proper nutrition by applying fertilizer every five weeks during the active growing season. Following these tips will help you keep your healthy plumeria plant thriving!

Pests can also be problematic – look for signs of mealybugs, scale insects, and other small pests on the leaves of your plumeria plants and treat accordingly with insecticidal soap or neem oil solution Next, when it comes to plumeria plant care, remember to keep an eye out for pests. Mealybugs, scale insects, and other small pests can be problematic for your plumeria plants if not treated quickly. To address this issue, turn to an insecticidal soap or neem oil solution for a quick fix. With proper care, your plumeria plant can last a long time.

Conclusion

In conclusion, a plumeria plant is a great way to brighten up your garden and add a vibrant, colorful accent to any outdoor space. With proper care and maintenance, these plants not only look beautiful but are also incredibly easy to keep alive and healthy. So, if you’re looking for an eye-catching statement piece for your garden, why not consider a plumeria plant?

Plant Propagation Supplies: A Plant Propagation Supply Guide

Plant Propagation Supplies: A Plant Propagation Supply Guide

Plant Propagation Supplies

Propagating plants is a great way to multiply your plants without having to purchase new ones. It can also be a fun and rewarding experience.

There are a few things you will need in order to successfully propagate plants. These include a growing medium, pots or containers, plant food, water, and patience! I will go into detail about each of these things in future posts. For now, we hope this gives you a general idea of what you need to get started with plant propagation.

Introduction to Plant Propagation

Introduction to Plant Propagation

Plants can be multiplied vegetatively, such as through seeds, cuttings, or division. Although certain plants are easier to propagate than others, most plants may be done successfully with some practice.

  • Use of clean, sterile propagating equipment is among the most crucial considerations when propagating plants. Your plants will have the best chance of success and the spread of illness will be curbed.
  • Despite the wide variety of plant propagation products available, starting off doesn’t require a big financial commitment. A pair of razor-sharp scissors or a knife, some pots or trays or propagation trays, and some potting mixes are all you need to get started.
  • When you have everything, you need, you can choose the propagation method that is best for the plant you want to grow more of.
  • You must cut or divide some of the parent plants after deciding on your technique of plant propagation. Divisions should be produced while the plant is dormant, and cuttings should be obtained from healthy, non-flowering stems.
  • It’s critical to pot up your cuttings or divisions as soon as possible after taking them and covering them up. Use sterilized potting soil and give it plenty of water. Keep the compost moist but not damp in your pots or trays and place those trays in a warm, well-lit area.

It can take several weeks or months for plants to successfully root and establish themselves, so be patient and don’t be tempted to give up too soon. With a little care and attention, your plants should soon be ready to plant out in the garden.

Why is Propagation Necessary?

Why is Propagation Necessary

Plant reproduction, which involves growing new plants from existing plant material, is required for a number of reasons, including:

  • Plant reproduction and the development of new individuals are made possible by plant propagation. The sustainability of plant species depends on preserving genetic diversity within plant populations.
  • Crop production: Plant propagation is a crucial component of horticulture and agriculture since it enables the mass production of edible and ornamental plants. Farmers and growers can create several plants with desirable features by using plant propagation procedures like cuttings, grafting, and tissue culture.
  • Preservation of uncommon and endangered species: Plant propagation can also help to protect rare and threatened plant species. It is feasible to preserve genetic variety and stop the extinction of these species by multiplying these plants and producing new individuals.
  • Modification of plant traits: Plant propagation methods can be used to change plant characteristics like disease resistance or yield. New plant types may result from this that are more adapted to particular growing circumstances or have features that make them better for human food or other use.

In general, plant propagation is an essential method for preserving rare and endangered species, generating crops and attractive plants, and creating new plant types with enhanced features.

Plant Propagation Techniques

To reproduce your plants, you can utilize a variety of plant propagation strategies. The more popular techniques include layering, germination of seeds, and re-rooting of cuttings.

  • Germinating seeds is the process of producing plants from seed. The most widespread technique for propagating annuals, biennials, and perennials is this one. Depending on the type of plant, seeds can be planted either indoors or outside.
  • Another common technique for plant propagation is root cuttings. From an existing plant, cuttings are removed, and they are then rooted in potting soil. This method is frequently applied to woody ornamentals like magnolias, hollies, and azaleas.
  • Layering is a third propagation technique that can be used to multiply your plants. Layering involves taking a stem from an existing plant and burying it in the ground. The buried stem will then produce new roots, and a new plant can be propagated from the original. Layering is often used for shrubs, such as rhododendrons, camellias, and Forsythia.

Why Cloning Machines Are Used for Plant Propagation?Why Cloning Machines Are Used for Plant Propagation

Cloning devices often referred to as hydroponic cloning systems or propagation tools, are frequently used for plant propagation because they offer a quick and easy approach to multiplying a mother plant into many offspring. The following justifies the usage of cloning machines in plant propagation:

Cloning machines offer a stable environment for the growth of new plants. To guarantee that new plants are growing in the same conditions as the mother plant, they regulate variables including temperature, humidity, and lighting. A better success rate in establishing roots and developing new plants results from this uniformity.

Rapid plant propagation is made possible by cloning devices. In comparison to conventional propagation techniques like seed germination, certain systems allow for the rapid development of young plants into transplant-ready plants in as little as a few weeks.

  • Reliability: Cloning devices successfully create healthy young plants on a regular basis. This is due to the fact that the new plants are genetically similar to their mother plants and are raised under optimum conditions, which lowers the likelihood of illness and other issues.
  • Saving space: Cloning machines are small and can grow several plants in a little area. They are therefore perfect for gardeners that need to produce a lot of plants yet have limited room.

Overall, using cloning machines to create numerous baby plants from a single mother plant is an efficient and effective method. They are a crucial tool for plant propagation in horticulture and agriculture because they offer a predictable environment, are dependable, and may generate plants quickly.

Plant Propagation Supplies

The equipment and materials used in the process of growing new plants from existing plant material are known as propagation supplies. Depending on the propagation technique being utilized, particular supplies may be required, but the following are some typical examples:

Growing medium:

Growing medium

A growing medium is a substance used to nourish and nurture a young plant. Peat moss, perlite, vermiculite, and soil are examples of typical growing mediums as supplies.

Containers:

Containers

Growing media and fresh plants are stored in containers. These supplies can be little pots or big containers for several plants, and they can be made of plastic, terracotta, or other materials.

Cutting tools:

Cutting tools

To take cuttings from the mother plant, sharp cutting instruments like pruning shears, scissors, and knives as supplies are required.

Rooting hormone:

Rooting hormone

Used to promote new roots to emerge from cuttings, the rooting hormone is a powder or liquid.

Heat mats:

Heat mats

Heat mats are used to keep the new plants’ temperature constant, which can hasten their rooting and growth.

Humidity domes:

Humidity domes

These plastic covers are placed over young plants to produce a humid atmosphere that can aid in the retention of moisture and the promotion of roots in cuttings.

Grow lights:

Grow lights

Grow lights are used to give new plants artificial light, which is particularly crucial for indoor propagation or when there is a lack of natural light.

Overall, these supplies might vary based on the specific method being used, but they often consist of a container, cutting tools, rooting hormone, grow lights, and other equipment to provide the best conditions for new plants to root and thrive.

When propagation by cuttings, it is necessary to seal the ends of the cutting with wax, plant immediately, and keep moist. A rooting hormone may also be used.

Rooting hormone is one of the supplies obtained as a powder, liquid, or gel. The powdered form is mixed with water and often comes with a surfactant to help wet the surface of the cutting. The liquid hormone is applied with a spray bottle and the gel is painted on with a brush.

The use of rooting hormone increases the number of cuttings that will root, but not all cuttings will root even when treated with the hormone.

There are a few basic supplies that you’ll need for plant propagation:

  • Pots or containers to hold your plants
  • A growing path like soil, sand, or perlite
  • A humidity dome or plastic bag to maintain moisture
  • A tray to catch water drainage

You’ll also need some basic tools:

  • A sharp knife or pair of scissors
  • A pencil or chopstick for making holes in the growing path

Once you have your supplies gathered, you’re ready to start propagating your plants!

Containers for Plant Propagation

Containers for Plant Propagation

Plant propagation can be done in a wide variety of containers. Plastic container is the most typical kind of plant propagation equipment. These are available in a range of sizes, from little pots to big buckets. Some feature holes for drainage, whereas others don’t.

The paper pot is yet another useful container type. These are biodegradable and manufactured from recycled paper. They are available in a range of sizes, from little pots to big buckets. Some feature holes for drainage, whereas others don’t.

The biodegradable pot is a third form of container that can be used. These are constructed from degradable substances like peat moss or coconut coir. They are available in a range of sizes, from little pots to big buckets. Some feature holes for drainage, whereas others don’t.

Make sure the container includes drainage holes regardless of the kind you use. This will let extra water drain away and keep the roots from rotten from standing water. You can drill the drainage holes yourself if the container is missing them.

Growing Mediums for Plant Propagation

Plant propagation can be accomplished using a wide range of methods and supplies. A key component in propagation is the growing media. The plants will be rooted in and grow in this substance. Because there are so many options, it is crucial to choose the optimal growing medium for your needs.

Among the most prevalent types of growth mediums are soil, sand, vermiculite, and perlite. Soil is a common natural substance found in gardens. Considering how easy to locate and inexpensive it is, it is widely utilized for propagation. Working with the soil, though, can occasionally be challenging and heavy. Sand is a further choice that is usually used for dissemination.

It is lightweight and easy to work with, but it does not retain water very well.

Volcanic ash is used in the production of vermiculite and perlite, respectively. They are effective options for propagation since they are both light and absorbent. Vermiculite, though, can occasionally cost a little more than perlite. When selecting a growing medium, the pH level is a crucial factor as well. Although this might vary depending on the plant, most plants like a pH range of 6.5 to 7.0.

Consider the requirements of the plants you are propagating while selecting a growth medium. For the majority of plants, soil is an excellent choice, but there are alternative materials that can be used.

Plant Support Systems

It’s crucial to employ the right supporting system while propagating plants in order to maintain the plant in place. Choosing the best plant support system for you might be challenging because there are so many different kinds on the market.

1. Stake

Stake

The stake is one sort of plant support system. Stakes are easy to use, cheap, and effective for plants that don’t require much support. They come in different sizes and can be made of metal, wood, or bamboo. Stakes’ biggest drawback is that, if not utilized properly or when used with heavy plants, they can harm delicate plants.

2. Trellis

Trellis

The trellis is yet another sort of plant support structure. A metal, wood, or plastic frame called a trellis is used to support climbing plants. Usually, it has a number of horizontal bars around which the plants’ stems can be wrapped. Trellises are available in a range of sizes and can be used both inside and outside. Trellises’ primary drawback is that they can be pricey.

3. Netting

A third type of plant support system is netting. Netting is made from cloth or plastic and is used to support plants that grow in a radial pattern, such as tomatoes or cucumbers. It comes in a variety of sizes and can be used indoors or outdoors. The main disadvantage of netting is that it can be difficult to install correctly.

Finally, there are also plant rings and cages. Plant rings, which may sustain trees and shrubs with extensive root systems, are composed of metal or plastic. Plant cages, which may hold tiny plants like flowers or herbs, are often composed of plastic or metal. There are several sizes available for both rings and cages.

The size, kind, and environment of the plant you are propagating, as well as the temperature and habitat in which the plant will be developed, should all be taken into account when selecting a plant support system.

How to Grow Healthy Plants?

Creating the ideal conditions for growth, giving plants the care, they require, and attending to their unique requirements are all necessary for producing healthy plants. It’s crucial to offer enough light, hydrate properly, utilize quality soil, provide the right nutrients, keep an eye out for pests and diseases, and maintain the right humidity levels in order to develop healthy plants.

Every plant has different requirements, thus it’s critical to learn about and comprehend the particular demands of the plants you are growing. Your plants can flourish and produce lovely leaves, flowers, and fruits if they are given the proper growing conditions and attention.

What is HTG Supply?

HTG Supply is a company that specializes in providing equipment and supplies for indoor gardening, hydroponics, and plant propagation. The company was founded in 2002 and is based in Golden, Colorado.

HTG Supply offers a wide range of products for both commercial and personal use, including grow lights, hydroponic systems, growing tents, environmental controls, and plant propagation supplies such as cloning machines and rooting hormones. They also offer a variety of nutrient and supplement products for plant growth and health.

In addition to their online store, HTG Supply has several retail locations across the United States, and they offer support and advice to customers through their customer service team and online resources such as blogs and forums.

Overall, HTG Supply is a well-known and respected company in the indoor gardening and hydroponics community, and they provide a wide range of products and services to support plant growth and propagation.

Protecting Grapes From Birds: A Guide To Protect Grape Plant From Bird

Protecting Grapes From Birds: A Guide To Protect Grape Plant From Bird

Protecting Grapes From Birds

Many crop growers struggle with the problem of birds. They destroy food like grapes, spread disease, and harm farms. We have a fix for the bird damage issue. We assure you that all grape growers deal with this issue. By consuming only a few grapes, they can potentially sabotage an entire harvest.

Don’t worry though; there are steps you can take to protect your grapes from birds. We’ll share some of the most effective techniques for preventing them from getting near your grapes with you in this blog post. So continue reading if you want to discover how to keep birds away from your grapes!

The Types of Birds That Are a Threat to Grapes

The Types of Birds That Are a Threat to Grapes

There are several bird species that could endanger grape harvests. Swallows, starlings, and blackbirds are the three primary bird species that frequently cause the greatest harm. They are especially drawn to ripening grapes and will consume them voraciously if given the chance.

There are a number of strategies to protect grape crops from them. The use of nets or actual obstacles is one way to prevent them from reaching the grapes. Another choice is to utilize bird scarers, which are contraptions that frighten birds away with loud noises or alarming visual effects.

Finally, to prevent birds from perching on the vines, grape producers might employ bird repellents. These deterrents can be applied to the vines using a spray bottle or included in irrigation water.

All of these techniques can be useful for protecting grapes, but it’s crucial to pick the one that best fits the requirements of the specific grape crop. For instance, nets or barriers can be the best choice if the area around the vines is large. Bird scarers might be a more practical option if there is little room. Additionally, bird repellents can be the only choice if there is a sizable area where the grapes are inaccessible to humans.

Installing bird netting

Installing bird netting

Many vineyard owners install netting to protect their grapes from being eaten. This is a quick and inexpensive method of deterring birds from eating the grapes that are also easy to implement.

You may choose a bird netting that will suit your particular requirements because it is available in a range of sizes and shapes. Additionally, it is portable and lightweight, allowing you to change it as necessary. Furthermore, bird netting is translucent, so it won’t obscure the view or detract from the beauty of your vineyard.

Bird netting is the ideal solution if you’re trying to save your grapes. It works well, is reasonably priced, and is simple to install.

Planting decoy crops

Planting decoy crops

Planting spook crops is one strategy for preserving grapes. Plants known as decoys imitate the crop you’re attempting to rescue but don’t provide the same nutritional benefits. They consume less of the grapes when they consume the decoys, which is less healthy for them.

When using decoys, there are a few factors to bear in mind. To begin with, confirm that the decoys are the exact same size and shade as the grapes. The decoys should also be placed near the grapes. The birds will have a difficult time distinguishing between the two as a result. Lastly, avoid using too many decoys. They might simply eat the decoys and overlook the grapes if there are more decoys than grapes.

If you follow these tips, you can save your grapes from birds without too much trouble.

Using scare tactics

Using scare tactics

Scare techniques are one approach to stop them from eating your grapes. This entails startling them and causing them fly away by creating loud noises or using other techniques. As birds are drawn to shiny stuff, you might also try hanging shiny objects from the grapevines. The grapevines could also be netting-covered as an alternative. This will keep them and other animals away from the grapes.

Grape producers can take a few steps to guard their grapes against them. These consist of growing ruse crops, employing fear-mongering techniques, and netting the grapevines. Growers may protect their grapes from these feathered buddies by using the advice in this article.

Visual deterrents

Visual deterrents

Scare tactics have been employed by farmers for a long time to deter people from eating their grapes, but modern technology has made it simpler and more successful than ever. Birds are scared away from grapes using a mix of sight and sound using visual deterrents, which are now widely accessible.

The HawkEye II, one of the most well-known visual deterrents, scares away birds by imitating a real hawk. The hawk is perched on a tall pole and moves realistically to frighten away birds. The hawk may be programmed to move in many ways and can be adjusted to match the farm’s colors.

The Scarecrow is a famous visual deterrent that scares birds by making loud noises and flashing lights. The Scarecrow is battery-powered and may be connected to a fence or put on a post. Additionally customizable, it can be tailored to each farm’s requirements.

The Scarecrow and HawkEye II are both offered by Bird-B-Gone, a renowned producer of visual deterrents. Farmers who are interested in bird protection for their grapes can learn more on the Bird-B-Gone website or by getting in touch with a representative.

Habitat Modification Strategies

Habitat Modification Strategies

Grapes can be protected from birds in a number of methods. Utilizing netting is one popular technique. Usually, pegs are used to anchor the netting to the ground and surround the grape crop. Birds won’t be able to enter the field and consume the grapes because of the netting.

To rescue your grapes, scare techniques are a typical alternative. This can involve the use of visual deterrents like predator models or reflective film as well as noisemakers like propane cannons. These techniques are effective at keeping birds away from the grapes.

Finally, some farmers may combine the use of nets and fear-mongering techniques. The grapes are frequently best protected from birds in this way.

Utilizing chemical repellents

Utilizing chemical repellents

Numerous birds love grapes, which can cause substantial crop loss for grape growers. Bird protection strategies include netting, scarecrows, and noisemakers, among others. Sometimes, chemical repellents are also employed, but these must be sprayed carefully to protect the grapes.

Methyl anthranilate is a typical chemical repellant that is acceptable to use on food crops. The birds taste this chemical when they attempt to consume the grapes after it has been applied to the grape plants. The birds rapidly learn to avoid it since the taste is unpleasant.

Acetophenone is yet another chemical repellent. This product, which is made from cinnamon oil, has a potent scent that keeps birds away. Although acetophenone costs more than methyl anthranilate, it might be more effective at deterring birds.

The use of chemical repellents has a few drawbacks. They must first be reapplied frequently to maintain their effectiveness. If not utilised appropriately, they might also hurt other animals. Last but not least, some people think chemical repellents are cruel since they hurt or distress the birds.

Despite these drawbacks, chemical repellents are often the best option for protecting grapes from birds. They are safe and effective at keeping grapes safe from damage when used correctly.

Protect Grapes and Grape Plants: Conclusion

Protect Grapes and Grape Plants

Birds can be kept away from grapes in a variety of methods. The most successful technique will depend on the type of grape and the severity of the infestation. Some techniques are more effective than others. Scarecrows, traps, and netting are a few typical techniques.

The most popular and efficient kind of protection is netting. In order to prevent the birds from seeing the grapes, it is crucial to select an opaque net. Additionally, the net ought to be impenetrable to birds so that it is tight enough.

Scarecrows can be useful, but they must be well-made and positioned properly. The scarecrow should be positioned in an area where birds can see it and be large enough to frighten them.

Traps can be useful, but they must be rigged with a tasty treat for the birds. After being captured, the bird needs to be released far from the grapevines.

Although there are many various strategies for bird protection, netting is perhaps the most successful one. Scarecrows and traps, for example, can be useful alternatives but they take more work to set up and maintain.

Chemical repellents are another option, but they must be used carefully to avoid harming the grapes.