How to build a rain garden and make it beautiful: A Comprehensive Guide
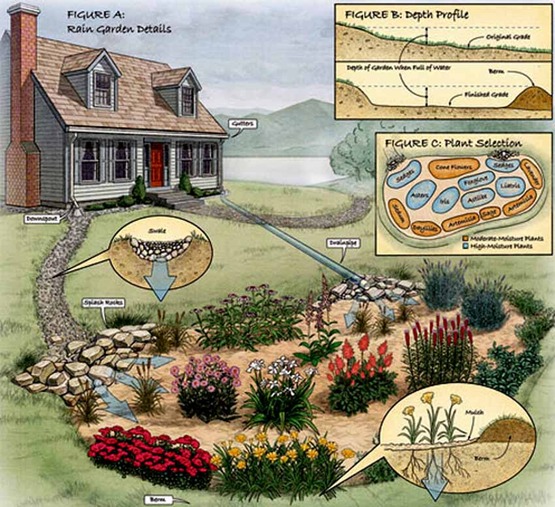
When heavy rainfall strikes a typical home in many communities, water rushes from downspouts across pesticide- and fertilizer-treated lawns and into greasy streets, eventually taking its contaminants with it. By building a rain garden, you can divert gutter water into an attractive planting bed. This bed works like a sponge and a natural filter to clean the water and allow it to slowly seep into the surrounding soil. Creating a rain garden isn’t difficult if you’re willing to dig and bring your own machinery. Check with your local cooperative extension office for more information about soil mixes, garden sizes, and plants in your area.
About Rain Garden
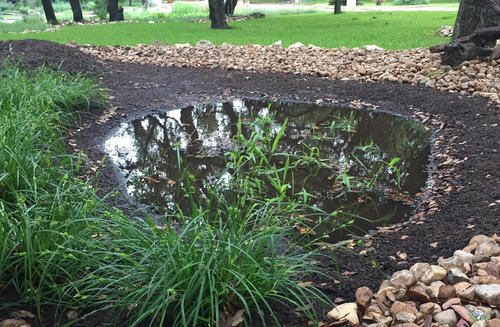
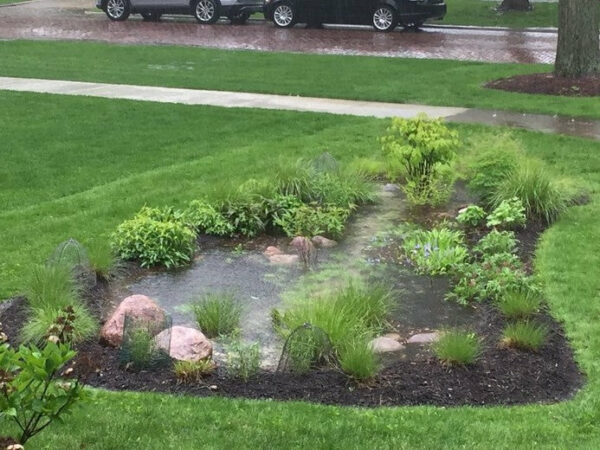
The rain garden is a landscaping element that substitutes an area of your yard to contain runoff (rain and melted snow) from lawns, roofs, and driveways. This shallow pit is loose, deep soil that receives rainfall or naturally purifies runoff water. They complement any landscape style and can be customized to your unique preference. They can be large or small and can take up space in your garden or window.

Why assemble a rain garden?
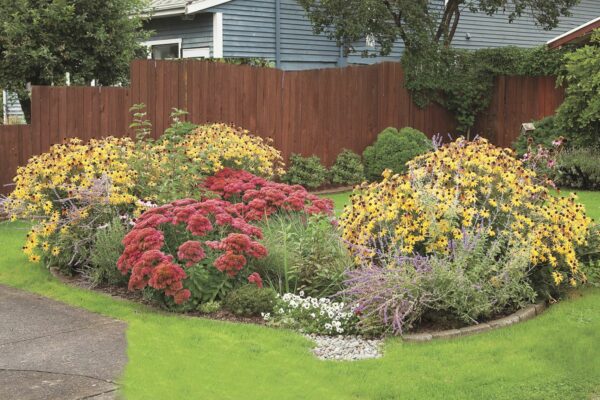
Rain Garden is not only beautiful and innovative, but it is also applicable. By constructing rain gardens, you can conserve the natural water cycle while shielding local rivers, lakes, and drinking water sources.
Rain Gardens:
Limitations the amount of water penetrating local stormwater systems declines the chance of flooding, drainage issues, and erosion. Reduces the number of impurities entering waterways from gardens and roads There is low maintenance to repair and revive groundwater systems. Drawing the attention of Birds, Butterflies and Beneficial Insects like Mosquito-Eating dragonflies. It completes any landscape style and enriches the beauty of the surrounding area.
Choosing the right location for a rain garden in your home
Take a good look at your garden plant. After serious rain, is there a small amount of water in the low places?
This may be a genuine place to initiate a rain garden building. The area should also be in full sun exposure to partial shade and at least 10 feet away from your home. Finally, place the rain garden on a slope away from downspouts, trenches, or other drains that drain off the hard surfaces of the site.
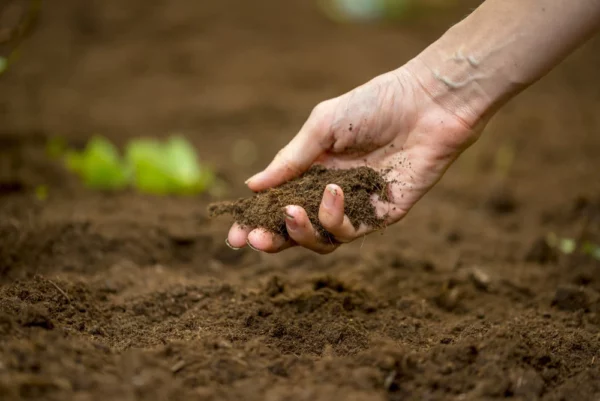
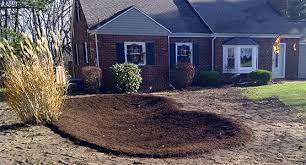
Prepare Soil
Eradicate grass and other vegetation from the area where you plan to create a rain garden.
Clay soil works best because it has a slow infiltration rate and slow drainage of water. If you are doubtful of the sort of soil, do a soil test. For loose sandy soil, you should add porous compost and topsoil to the rain garden of your home. You have to dig the soil into deep of 6 inches, inclining gently from the outer rim towards the center where it should be the deepest.
Utilize loose soil to construct a low ridge on the lower side of your rain garden. When water runs into your new rain garden, the trench will help retain the water long enough.
Deepening the garden deeper than 6 inches will allow the water to fully penetrate and evaporate sufficiently. Mosquitoes can be a problem because it takes a long time to.
Deciding Size and Shape
- If you’re short on space or don’t know how to estimate the size, you can always make a small rain garden and imagine at least better results than you have now.
- If you like an estimable-looking garden, you have to make it at least 150 square meters. Ovals and kidney shapes look most appropriate, but you can make rain gardens long and thin. Once you have determined the design, decide where the water will flow and where it will overflow.
- Mark the formation with spray dye. On your yard, mark another 18 inches to remove turf. Also, you have to mark other areas that you wish to excavate.
- The outline of this rain garden protrudes downward to show the extent of the dry well, an optional underground reservoir that stores surplus water when the rain garden overfills.
Remove unwanted grass.
To remove such plant or grass, cut the roots at the lowest possible angle with a sharp spade, or use a lawnmower that day.
Make a Water Basin
- You have to dig first to the depth you need. Assemble a flat bottom so that the water absorbs in evenly. If your rain garden is on a gradient, you can accumulate some of the excavated soil on the lower steps to preserve water. For stability, you have to tighten the base soil well.
- The base of the rain garden has to be at least 2 feet broad, and the top is at least 1 foot vast. When the rain garden is full, the top of the ridge should be at least 6 inches above the water level.
Also, dig any dry wells. One of these rain gardens is about two feet square and three feet deep.

Relocate Inlet Pipes
- Dig grooves for pipes that lead water from one or more downspouts to the rain garden. Rigid, smooth-walled tubes are the most durable, but corrugated tubes are easier to handle.
- Get a variety of pipes without perforations. Spread the tubing about a foot into the rain garden pool. You can cover the place below with rocks to prevent erosion.
- You can also put rocks above and beside the pipe to obscure it and control the furrowed hose from curling up.
Fill Basin
Fill all but the top 6-12 inches of the excavated area with rain garden soil. Gently chamfer the sides. If the soil you excavate is moderately clay-free, you can use a combination of 65% soil and 35% compost, or two shovels of soil for each cup of compost.
If you’ve dug clay soil, bury it with a mixture of 60% sifted sand and 0% compost. If you are constructing a dry well, pack it with cleaned round stones 1.5 to 2 inches in diameter. Also, packstones around the downpour area to control erosion.
Plant Selection for rain gardens
- Cultivating areas and soils vary considerably from country to country, but plant preference for this type of garden is fairly typical.
- Aster, daylily, iris, sedum, cornflower and sedge are examples of specimens suitable for rain gardens. Select plants with a moistness requirement of “Average to Moist” on the label.
- Position them in the lowest part of the rain garden. At the higher end of the bed, place plants that flourish in “average to dry” water conditions.
- It may seem instinctive to buy moisture-loving plants for your rain garden but don’t. Your garden is designed to drain within 2 hours, so moisture-loving plants will quickly grow tall and dry.
- Almost all plants thrive in a rain garden with adequate moisture requirements However, there are some adequate reasons to choose native plants. Native grasses, wildflowers, and shrubs generally have very deep root systems, sometimes burrowing 10 feet or more.
- Also, most native plants shed their roots each year to form new roots, promoting soil aeration and water flow. And because they are native species, you know these plants will thrive in your area and soil conditions.
Protect the plants with mulch.
- Once the plants are planted in the ground, shield the inside of the rain garden with a 3-inch layer of mulch to retain the soil moist and deter weed seeds from germinating.
- Even drought-tolerant plants require extra watering to persist during the dry season until the plants in the Rain Garden are set.
- Check mulch depth annually and top up if required. Rain gardens demand no fertilizer other than the compost used in the soil mix.