Holiday Cactus Types: Cactus Plants Varieties

Holiday Cactus Types: Cactus Plants Varieties

Holiday Cactus Types: Cactus Plants Varieties

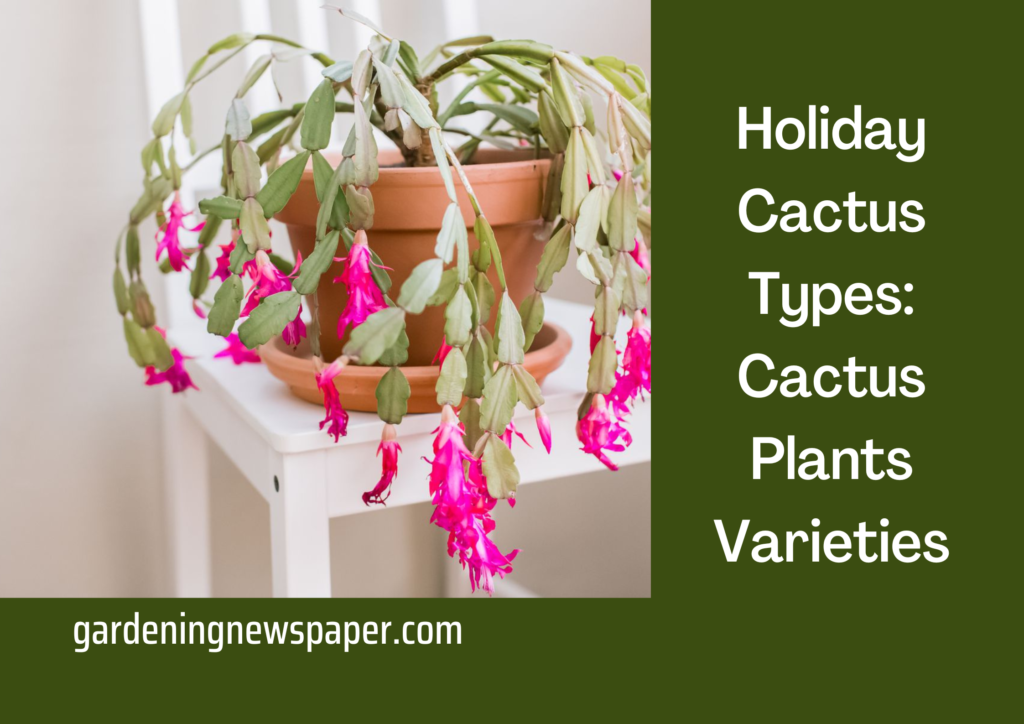
Cacti are a fun and festive addition to any home, especially around the holidays. While they’re not as commonly seen as other houseplants, they still offer a unique and beautiful way to decorate. In this blog post, we’ll explore the different varieties of holiday cacti and provide tips for growing and caring for these festive plants. Read on to learn more!

Overview of Holiday Cactus Types

Holiday cactus is a family of plants that includes Easter, Thanksgiving, and Christmas cactus. All of these plants are native to South America and are easy to care for houseplants. The Easter cactus, formally known as Hatiora gaertneri, is a flowering cactus with bright pink, red, or white flowers. It blooms from late winter to early spring and is a very popular choice for holiday decorations.

The Thanksgiving cactus is known as Schlumbergera truncata and has dainty, star-shaped pink or white blooms. It flowers from October to January and is often used in dried floral arrangements. Christmas Cactus, also known as Schlumbergera bridgesii, has bright red and white blooms that can be seen in November or December. All of these holiday cacti are low-maintenance plants that make for great houseplants or festive decorations around the holiday season.

Easter cactus is the most common type of holiday cactus, with its bright pink or white flowers blooming in springtime. It prefers cooler temperatures and more humidity than other types of holiday cactus, so it’s best to keep it away from direct sunlight and dry air.

Additionally, the Christmas cactus is another popular type of holiday cactus. This festive flower is known for its long blooms that start in the winter and typically reach their peak during the Christmas season. Unlike the Easter cactus, it prefers bright, indirect sunlight and drier air. The Thanksgiving cactus is also common in homes during the holiday season, and it blooms typically two weeks before Thanksgiving with its deep pink petals. Its requirements are similar to the Christmas cactus and are a great addition to any home during this special time of year.

Thanksgiving Cactus

Thanksgiving Cactus

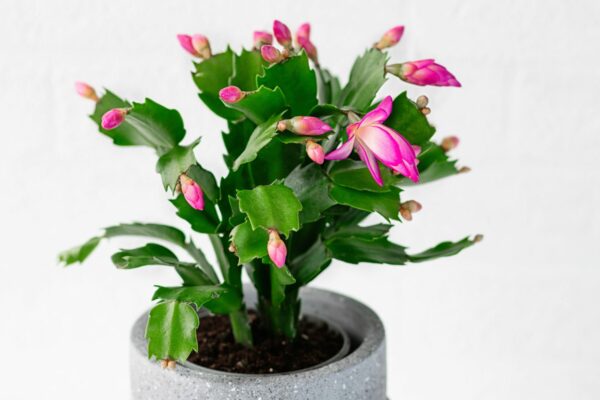
The thanksgiving cacti is a type of cactus that blooms around the Thanksgiving holiday. There are two types of thanksgiving cacti: the Schlumbergera truncata and the Rhipsalis pilocarpa.

The Schlumbergera truncata, also known as the false Christmas cactus, is native to Brazil. It has thin, flat, green stems and small, white flowers. The Rhipsalis pilocarpa, on the other hand, is native to Mexico and has thicker, curved stems with pink or white flowers.

If you’re looking for a festive addition to your holiday decorations, consider adding a thanksgiving cactus to your home. These beautiful plants are relatively easy to care for and will bloom year after year.

What Are Some Species of Thanksgiving Cactus?

The Thanksgiving cactus is a well-liked indoor plant that produces stunning, vibrant blooms in the late fall, right before Thanksgiving. The Thanksgiving cactus’ most prevalent species are:

Schlumbergera truncata

Often referred to as the “real” Thanksgiving cactus, this species features pointed, claw-shaped segments with pink, red, purple, and white blooms.

Schlumbergera russelliana

Due to the fact that this species blooms a few weeks later than the Thanksgiving cactus, it is frequently referred to as the “Christmas cactus.” It comes in pink, red, orange, and white hues and features segments with rounded, smooth edges.

Christmas Cactus
Christmas Cactus

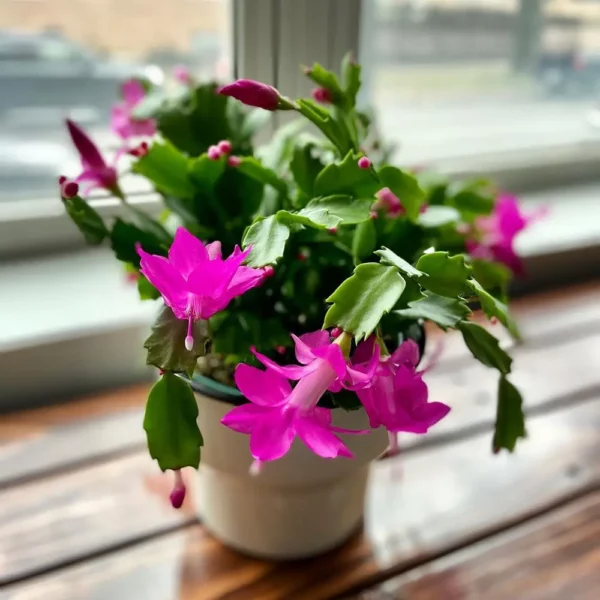
Christmas cacti are beautiful and easy-to-care-for plants that bloom indoors during the winter months. While there are many holiday cactus types, Christmas cacti are among the most popular.

Christmas cacti are actually a group of three closely related species: Schlumbergera truncata, Schlumbergera russelliana, and Schlumbergera xbuckleyi. All three are native to Brazil and belong to the genus Schlumbergera, which includes about 20 species of cacti.

Christmas cacti are known for their colorful flowers, which can be pink, red, white, or purple. They typically bloom in December, hence their common name.

These cacti are relatively easy to care for. They prefer bright, indirect light and should be allowed to dry out between watering. Overwatering can lead to root rot, so it’s best to err on the side of underwatering.

If you’re looking for a festive plant to spruce up your home this winter, a Christmas cactus may be a perfect choice!

Easter Cactus

Easter Cacti

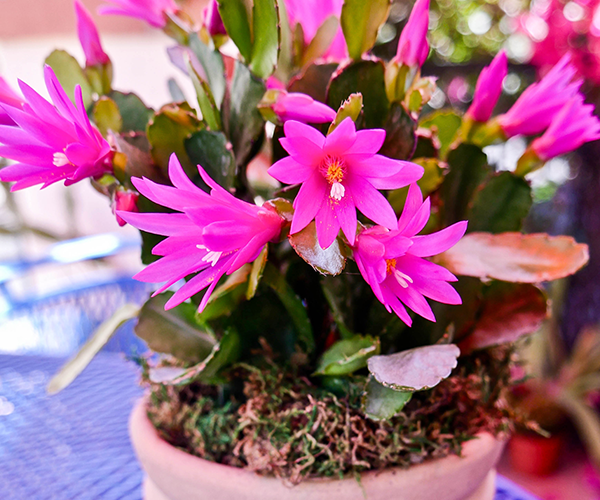
Easter cacti are a type of cactus that blooms around the Easter holiday. They are native to Brazil and are related to the Thanksgiving cactus. Easter cacti have become popular holiday plants in recent years.

There are two main types of Easter cacti, the Rhipsalidopsis gaertneri and the Schlumbergera truncata. The Rhipsalidopsis gaertneri is the most common type of Easter cactus. It has long, arching stems and pink, red, or white flowers. The Schlumbergera truncata is a smaller Easter cactus with shorter, more compact stems. It typically has red or purple flowers.

Easter cacti are easy to care for and can be propagated from stem cuttings. They should be allowed to dry out between watering and should be fertilized monthly during the growing season. Easter cacti can be put outdoors in the summer but should be brought indoors before the first frost.

If you are looking for a festive plant to add to your home for Easter, consider an Easter cactus!

Tips for Growing and Caring for Holiday Cacti

Holiday cacti, like Thanksgiving and Easter cacti, are popular houseplants because they are low-maintenance and easy to care for. To keep them thriving, however, it is important to provide them with the right environment; this means making sure they get the right amount of light, water and fertilizer.

One of the most popular holiday cacti is the Christmas cactus, which is known for its bright pink and red blooms. The Christmas cactus should be placed in an area with lots of indirect sunlight and watered once per week, or when the soil has dried out. It also benefits from fertilizer during the blooming season, which typically occurs between November and April. With the right amount of care and attention, a Christmas cactus can add a festive touch of beauty to any home.

For best results, place holiday cacti in bright but indirect sunlight; if grown indoors, a south-facing window is ideal. When it comes to watering, these plants should be kept evenly moist but not saturated; this can be achieved by allowing the top inch of soil to dry out before watering again.

Lastly, fertilize your holiday cactus every two weeks during their active growing season (typically April through September). A balanced liquid fertilizer applied at half strength is recommended for optimal growth and flowering potential Thus, christmas cactus should be fertilized every two weeks during their active growing period (April through September).

To ensure christmas cactus are healthy and reach their full growth and flowering potential, it is best to use a balanced liquid fertilizer at half strength. With regular fertilization and the right care, christmas cactus can bring lasting holiday cheer for years to come.

Common Problems to Look Out for When Growing Holiday Cactus Varieties

Common Problems to Look Out for When Growing Holiday Cactus Varieties

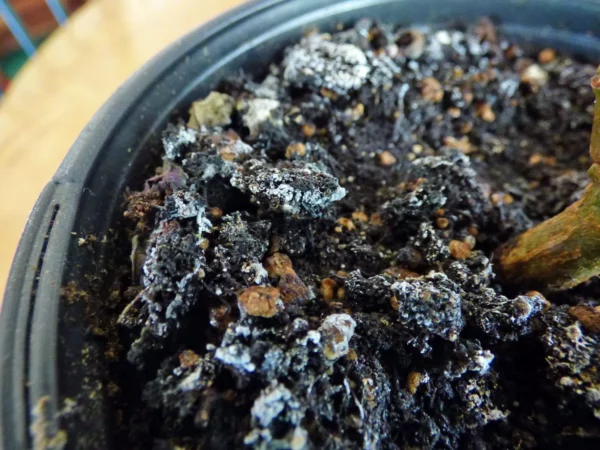
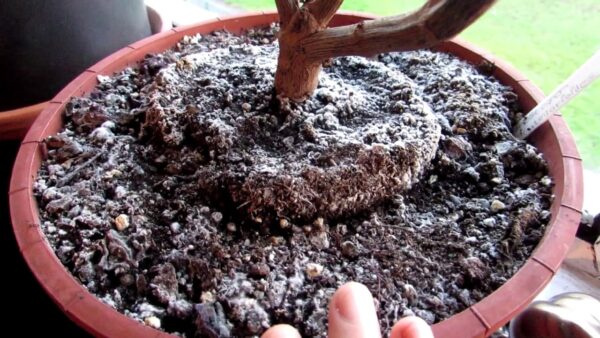
When growing a holiday cactus, it is important to look out for common problems that may arise. One of these problems is overwatering, as too much water can lead to root rot and propagate fungal diseases.

Amongst the most popular types of holiday cacti are the christmas cactus, which is a seasonal bloomer that is easy to care for. It produces a multi-colored display of flowers in shades of red, purple, orange and white. To ensure christmas cactus blooms for the holiday season, ensure that it is not watered too often and provide adequate light. Additionally, christmas cacti should be kept out of direct sunlight and will thrive best in temperatures between 65°F-75°F. With proper care, the christmas cactus can offer an attractive holiday display for many years.

As holiday cacti are native to tropical climates, they require consistently warm temperatures to thrive. It is important to keep the temperature of your home between 65°F and 75°F, and keep your plant away from any cold drafts or air conditioning vents. Among the popular holiday cacti varieties are the easter cactus, which blooms between March and April and produces pink, yellow, purple, or red flowers.

Easter cactus prefers light shade and warm temperatures and should be kept slightly moist at all times for optimal growth. To ensure proper blooming for the easter cactus, place it in a sunny window with indirect sunlight for several hours a day. In addition to the easter cactus, there are several other types of holiday cacti that require similar care and attention. With the right conditions, your plant can bring color and life to your home throughout the year.

To Conclude

While holiday cacti may not be as popular as other houseplants, they are a unique and festive way to decorate your home. With proper care and maintenance, these plants can thrive for years to come and offer beautiful blooms when in season. No matter what variety you choose, a holiday cactus can help bring some holiday cheer to any home.

The Ultimate Guide to Plumeria Propagation Through Plumeria Cuttings

The Ultimate Guide to Plumeria Propagation Through Plumeria Cuttings

The Ultimate Guide to Plumeria Propagation Through Plumeria Cuttings

Plumeria plants are some of the most beautiful and unique plants that you can find. Propagating them can help you get more of these amazing plants, and it can also be a fun and rewarding project. Here, we’ll provide you with a step-by-step guide to propagating plumeria plants, so you can enjoy their beauty for years to come!

Understanding the Basics of Plumeria Propagation

In order to ensure the successful propagation of plumeria plants, it is important to understand the basics of propagation. To begin, you’ll need two things: a healthy, mature plumeria cutting and some patience! These plants can be easily propagated by rooting the cuttings in water or directly in the soil. Once your cuttings are planted in either a container or ground bed, they should root within four to eight weeks. Taking care to ensure they are watered regularly and under the right conditions, you will soon be well on your way to creating a beautiful plumeria garden!

This includes understanding the ideal climate for growing plumeria plants, the right soil and fertilizer requirements, and how to properly prune and propagate new cuttings Again when it comes to successful plumeria propagation, knowledge is power. Understanding the right climate conditions, soil requirements, and how to properly prune and propagate new cuttings is key. Armed with this knowledge and skill, you can confidently grow your own plumeria plants!

Preparing for Successful Plumeria Propagation

Preparing for Successful Plumeria Propagation

Preparing for successful plumeria propagation starts with knowing the basics and making sure you have the right supplies.

This includes having a pot that’s appropriate for the propagated plants, as well as soil and rooting hormones. Don’t forget to give your propagated plumeria some well-deserved love and attention, otherwise, they may never reach their desired flowering potential. With a little bit of extra effort, your propagation will be blooming in no time! Be sure to water regularly and apply the rooting hormone as directed. With the right tools, a bit of dedication, and some patience, you will soon be basking in the beauty of your very own propagated plumeria!

Once you’ve gathered all of your supplies, you can then move on to preparing your cutting for propagation. This involves trimming off any damaged leaves and stems, and sterilizing the knife or shears used to make the cut. Dipping the cutting into a rooting hormone before planting it in your container with soil.

With a bit of careful preparation and TLC, you’ll be rewarded with some beautiful plumeria plants in no time!

What is Root Plumeria and Rooting Plumeria

What is Root Plumeria and Rooting Plumeria

Most people think that propagating plumeria is difficult. However, with a little know-how and the right tools, it can be easy to root plumeria. In this article, we will cover everything you need to know about propagating plumeria, from finding the right plumeria cutting to taking care of your new plumeria plant.

When it comes to propagating plumeria, the most important thing is to find a healthy cutting. The cutting should be at least six inches long and should have two or three leaves. Once you have found a suitable cutting, you will need to prepare it for propagation. To do this, you will need to strip the leaves from the bottom half of the cutting.

Next, you will need to dip the stripped portion of the cutting in the rooting hormone. Rooting hormone will help the cutting to develop roots more quickly. Once the hormone has been applied, you can plant the cutting in a pot filled with a well-draining potting mix.

Be sure to keep the potting mix moist but not wet. You can do this by placing the pot in a tray of water and allowing the potting mix to absorb the water from the bottom. After a few weeks, you should see roots developing on your cutting. Once the roots are several inches long, you can transplant your new plumeria plant into a larger pot or into your garden.

Cutting Propagation: Grow Plumeria

Cutting Propagation

Plumeria, also called Frangipani, is a tropical tree that produces beautiful, fragrant flowers. They are native to Central America, Mexico, and the Caribbean, but can be grown in any frost-free climate.

Plumeria is easy to grow from cuttings. The best time to take cuttings is in the spring or early summer when the weather is warm and the plants are actively growing.

  • To take a cutting, use a sharp knife or pruning shears to remove a stem with at least two leaves from the parent plant. The cutting should be about 6-8 inches long.
  • Remove the lower leaves from the cutting, leaving only the top two leaves. Dip the base of the cutting into rooting hormone powder or gel.
  • Place the cutting in a pot filled with a well-drained potting mix. Water the soil around the cutting, then place the pot in a warm, sunny location.
  • Keep the soil moist but not soggy, and in 4-6 weeks the cutting will have roots and new growth. Once the roots are established, you can plant the cutting in a larger pot or in your garden.

The Steps to Propagate Plumeria Plants Through Plumeria Cuttings

Propagating new plumeria plants is an easy way to increase the number of plants in your collection; the process requires a few simple steps. First, you need to carefully choose healthy and mature stems from the existing plant. It’s best to do this in April or May to ensure that the cuts heal quickly. Then, you want to cut them at a 45-degree angle just below a node—a spot where leaves and branches attach themselves to the stem—using sharp garden shears or pruning snips. Finally, let the cutting dry out for 24 hours before putting it in soil with an ample amount of drainage and warmth. Before you know it, you’ll have a beautiful new plumeria ready to join your collection!

1. Plumeria Cutting

Obtain a cutting from an existing plant that has at least three nodes and cut the stem into small segments, each with at least two nodes. This is the foundation of your plumeria propagation journey! The cutting should then be placed in a pot with moist soil and a little fertilizer to give it a boost. To ensure successful propagation, make sure the pot is well-draining and ensure the soil stays consistently moist. Once your cutting has developed roots, try propagating even more cuttings – you can never have too many plumeria plants!

2. Soil Requirements

Select a well-draining potting soil and fill the pot so that the nodes of the cuttings are just below the surface of the soil. After this, all you need to do is add water and wait for the magic to happen! With a little bit of luck, your cuttings will soon start developing roots and your own plumeria plants will be ready for propagation. Who knows, with a little bit of practice you might even become an expert in plumeria propagation!

3. Root Growth

After planting, make sure to water thoroughly, ensuring that all of the soil is saturated – this will help promote root growth and prevent wilting in your new cuttings. Plumeria propagation can be a great activity for gardening enthusiasts and novice gardeners alike! Not only is it an easy and fun way to add more plumeria to your garden, but it’s also cost-effective and a great way to get your horticulture on! Once you’ve planted your plumeria cuttings, make sure to give them ample water and plenty of sun, and soon enough you’ll be able to enjoy the beautiful blooms that come with proper plumeria propagation.

4. Light and Temperature

Place your newly propagated plants in a sunny location and keep them consistently moist while they establish themselves and take root – you should see signs of new growth within weeks! Meanwhile, have patience, as plumeria propagation can take some time. With the right conditions, your hard work will pay off and you’ll be rewarded with beautiful, fragrant blooms in no time. Don’t forget to keep your newly propagated plants in a sunny location and keep them consistently moist for the best results. Good luck!

Maintaining Your Plumerias After Propagated

After the plumeria cutting has grown roots, it is important to provide adequate water and light for optimal growth.

Watering the plant deeply once a week should be enough unless there is an extended period of hot or dry weather. Giving your plumeria too much water can actually be more damaging than not enough. Ensure to gauge the temperature, humidity, and your soil quality to ensure it doesn’t become over-saturated. Of course, light is also essential for success in plumeria propagation. Plenty of bright light is needed as this helps the plumeria cutting to adapt more readily and thrive. And there you have it – an easy guide to ensuring that your plumeria cutting enjoys a successful growth phase!

Providing appropriate sunlight exposure is key. Your newly propagated plumeria should be placed in an area that receives full sun for most of the day. This will ensure that the plumeria stays healthy and blooms successfully when it is ready to flower. It is essential to remember that your new plants will need plenty of sunshine and a warm temperature in order to thrive. Take the time to research the best location for your plant, as well as the food and water needs of the plumeria.

With the right materials and a bit of patience, propagating your plumeria plants is a straightforward process. Not only will it provide you with more of these beautiful plants, but it can also be a great way to connect with nature and take care of something that is truly your own. So get out there and give it a try!

Plumeria Plant Care: Plumeria Care and Grow Plumeria Tree

Plumeria Plant Care: Plumeria Care and Grow Plumeria Tree

Plumeria Plant Care: Plumeria Care and Grow Plumeria Tree

If you are looking for a beautiful statement piece for your garden, then a plumeria plant is a great option. Not only do these plants have stunning flowers, but they are also easy to care for. In this blog post, we’ll discuss the basics of plumeria care and maintenance and how to ensure your plants stay healthy and bloom for years to come.

What Are Plumeria Plants?

What Are Plumeria Plants

A Plumeria Plant is a tropical flowering shrub native to Central America, Mexico, and South America that produces large, colorful blossoms in shades of pink, yellow, white, red, and orange; and let’s be honest, who wouldn’t want a gorgeous Plumeria Plant in their home? But to take good care of it, you need to know what you’re doing! Provide your Plumeria Plant with bright sunlight and well-draining soil; make sure to water it only when the soil is slightly dry; don’t forget to prune the tips of the stems after blooming season; and watch out for pests like mealybugs, aphids, and scale. With a little love and care, you’ll have a beautiful, fragrant Plumeria Plant in no time!

The plants thrive in warm temperatures and prefer plenty of sunlight and well-draining soil for optimal growth Similarly, when caring for a plumeria plant, the plant must be kept in warm temperatures and given plenty of sunlight. Additionally, it is important for the soil to be well-draining and not overly wet. With these care tips in mind, even novice gardeners will find that plumeria plants are easy to maintain and grow!

The beauty of Plumeria Flowers

The beauty of Plumeria Flowers

Flowers from the plumeria genus are prized for their stunning beauty and seductive scent. White, yellow, pink, red, and multicolored variations are just a few of the many colors that these tropical flowers come in. The petals have a distinctive, sweet scent that is frequently utilized in perfumes and other scented items. They are typically waxy and thick with a velvety texture.

The form of plumeria blooms is one of their most recognizable characteristics. With a conspicuous center that is frequently a different color than the rest of the flower, the petals form a five-pointed star configuration. While some plumeria blossoms have an appearance that is more rounded or cup-shaped, others are more elongated and pointed.

Plumeria blossoms are stunning, but they also hold cultural significance in many regions of the world. They are frequently used in traditional Hawaiian leis, where they are worn as a sign of love and affection on a string with other flowers. Plumeria flowers are frequently utilized in religious ceremonies and offerings in Hindu and Buddhist cultures because they are connected to devotion.

Overall, plumeria plants are a valued and highly sought-after tropical plant because to their beauty and aroma. These flowers are certain to please the senses and spread joy to everyone they come into contact with, whether they are cultivated in a yard or used in floral arrangements.

Benefits of Growing Plumeria

Benefits of Growing Plumeria 

Owning a Plumeria plant has many benefits – from its beautiful blooms to its sweet, fragrant aroma. But with any living thing, proper care is necessary to ensure its health and vitality. The good news is that plumeria plant care isn’t as hard as you might think! They thrive in full sun and well-drained soil and can easily be transplanted when needed. Watering should be done regularly, but be careful not to overwater, as too much moisture can lead to root rot. In addition, fertilizing every couple of months will help keep the plant healthy and blooming. With a few simple tips, you’ll have your Plumeria looking its best all year long!

In addition to beautifying your home, these plants are also easy to care for. They require minimal maintenance, making them the perfect choice for busy people looking for an attractive houseplant.

Not only do these plants require minimal upkeep, but they also are easy to care for and bloom with minimal effort. So, if you want to take care of a plant without spending too much time on it, the plumeria is an excellent choice!

Plumeria Care and Grow Plumeria
To maintain your Plumeria plant’s health and long-term attractiveness, proper care is required. This includes fertilization, pruning, and appropriate watering.

To properly water your Plumeria, make sure you are not over-watering it. Too much moisture in the soil can lead to rot. Pruning is an important part of Plumeria plant care. The branches need to be trimmed once a year to promote healthy growth. Lastly, fertilizing should be done during the growing season with a diluted solution of fertilizer. Keeping up with these steps will help your Plumeria stay as beautiful and healthy as possible!

Watering is done two to three times a week, depending on the season. Make sure the soil is moist but not soggy. Pruning should be done in early spring to promote new growth and eliminate dead branches. Fertilize with a balanced fertilizer specifically designed for plumeria plants every two weeks during the growing period. Thereafter, taking care of your plumeria plant should become easier as you know what to do. A good watering routine two to three times a week, with the soil moist but not soggy. As well as pruning in early spring will set your plant up for success. Fertilizing every two weeks during its growing period will help make sure it’s getting enough nutrients. Properly caring for your plumeria plant will help it grow and bloom.

Extra Care Tips for Planting Plumeria Trees

Extra Care Tips for Planting Plumeria Trees

Plumeria trees are tropical plants that produce beautiful and fragrant flowers. If you’re planning to plant a plumeria tree, here are some extra care tips to keep in mind:

  • Choose the right location: Plumeria trees need full sun exposure to thrive, so choose a location that gets at least 6-8 hours of direct sunlight per day. They also prefer well-draining soil, so avoid planting them in areas that are prone to waterlogging.
  • Provide regular watering: Plumeria trees need regular watering, especially during the hot and dry summer months. Water deeply once a week, and ensure that the soil is moist but not waterlogged. Avoid overhead watering, as this can cause the leaves to develop fungal diseases.
  • Fertilize regularly: Plumeria trees are heavy feeders and require regular fertilization to promote healthy growth and flowering. Use a balanced fertilizer with equal amounts of nitrogen, phosphorus, and potassium, and apply it every 2-3 weeks during the growing season.
  • Prune to encourage branching: Plumeria trees naturally grow in a tall and spindly shape, but you can encourage branching by pruning the tips of the branches. This will help the tree develop a fuller and more bushy shape, and also promote more flowers.
  • Watch out for pests and diseases: Plumeria trees can be susceptible to pests such as mealybugs and spider mites, as well as diseases such as black tip fungus and frangipani rust. Monitor your tree regularly and treat any issues promptly with insecticides or fungicides as needed.

By following these extra care tips, you can help your plumeria tree thrive and produce an abundance of beautiful and fragrant flowers.

Plant Care for Plumeria Rubra

Plumeria rubra, also known as the red frangipani, is a tropical plant that produces beautiful and fragrant flowers. Here are some plant care tips to help your Plumeria rubra thrive:

  • Light: Plumeria rubra needs full sun exposure to grow and flower well. Choose a location that receives at least 6-8 hours of direct sunlight per day.
  • Soil: Plumeria rubra prefers well-draining soil with a slightly acidic pH. If your soil is heavy and poorly draining, you may need to amend it with sand, perlite, or other materials to improve drainage.
  • Watering: Plumeria rubra needs regular watering during the growing season, especially during hot and dry periods. Water deeply once a week, and allow the soil to dry out slightly between watering. In winter, reduce watering to prevent root rot.
  • Fertilizer: Plumeria rubra is a heavy feeder and needs regular fertilization to produce abundant flowers.
  • Use a balanced fertilizer with equal amounts of nitrogen, phosphorus, and potassium, and apply it every 2-3 weeks during the growing season.
  • Pruning: Prune your Plumeria rubra in late winter or early spring, before new growth starts. This will encourage branching and promote a fuller, bushier shape. Remove any dead, damaged, or diseased branches, and cut back any long, leggy growth.
  • Pests and diseases: Plumeria rubra can be susceptible to pests such as mealybugs, spider mites, and scale insects, as well as diseases such as black tip fungus and frangipani rust. Monitor your plant regularly and treat any issues promptly with insecticides or fungicides as needed.

By following these plant care tips, you can help your Plumeria rubra thrive and produce an abundance of beautiful and fragrant flowers.

Troubleshooting Common Problems with Growing Plumerias

Troubleshooting Common Problems with Growing Plumerias

Troubleshooting common problems with plumeria plants starts with identifying the source. This could be a lack of nutrients, poor soil drainage, too much or too little sunlight, or pests and diseases. Before starting any plumeria plant care, it’s crucial to figure out what exactly is causing the issue — otherwise, anything you do might only be a temporary fix. Thankfully, with a little detective work and research, you can take the necessary steps to ensure your plumeria plants stay healthy and thrive.

Plumeria plants are susceptible to root rot if they are overwatered, so make sure to check the soil before watering and wait until it is dry before adding more water. Additionally, providing proper drainage for the soil will help reduce the risk of root rot. Furthermore, it’s important to ensure that your plumeria is receiving adequate light. If you can, position the plant in a spot near a window or outside in a sunny location to ensure it has enough light. Lastly, if you want your plant to bloom abundantly, make sure it’s receiving proper nutrition by applying fertilizer every five weeks during the active growing season. Following these tips will help you keep your healthy plumeria plant thriving!

Pests can also be problematic – look for signs of mealybugs, scale insects, and other small pests on the leaves of your plumeria plants and treat accordingly with insecticidal soap or neem oil solution Next, when it comes to plumeria plant care, remember to keep an eye out for pests. Mealybugs, scale insects, and other small pests can be problematic for your plumeria plants if not treated quickly. To address this issue, turn to an insecticidal soap or neem oil solution for a quick fix. With proper care, your plumeria plant can last a long time.

Conclusion

In conclusion, a plumeria plant is a great way to brighten up your garden and add a vibrant, colorful accent to any outdoor space. With proper care and maintenance, these plants not only look beautiful but are also incredibly easy to keep alive and healthy. So, if you’re looking for an eye-catching statement piece for your garden, why not consider a plumeria plant?

Plant Propagation Supplies: A Plant Propagation Supply Guide

Plant Propagation Supplies: A Plant Propagation Supply Guide

Plant Propagation Supplies

Propagating plants is a great way to multiply your plants without having to purchase new ones. It can also be a fun and rewarding experience.

There are a few things you will need in order to successfully propagate plants. These include a growing medium, pots or containers, plant food, water, and patience! I will go into detail about each of these things in future posts. For now, we hope this gives you a general idea of what you need to get started with plant propagation.

Introduction to Plant Propagation

Introduction to Plant Propagation

Plants can be multiplied vegetatively, such as through seeds, cuttings, or division. Although certain plants are easier to propagate than others, most plants may be done successfully with some practice.

  • Use of clean, sterile propagating equipment is among the most crucial considerations when propagating plants. Your plants will have the best chance of success and the spread of illness will be curbed.
  • Despite the wide variety of plant propagation products available, starting off doesn’t require a big financial commitment. A pair of razor-sharp scissors or a knife, some pots or trays or propagation trays, and some potting mixes are all you need to get started.
  • When you have everything, you need, you can choose the propagation method that is best for the plant you want to grow more of.
  • You must cut or divide some of the parent plants after deciding on your technique of plant propagation. Divisions should be produced while the plant is dormant, and cuttings should be obtained from healthy, non-flowering stems.
  • It’s critical to pot up your cuttings or divisions as soon as possible after taking them and covering them up. Use sterilized potting soil and give it plenty of water. Keep the compost moist but not damp in your pots or trays and place those trays in a warm, well-lit area.

It can take several weeks or months for plants to successfully root and establish themselves, so be patient and don’t be tempted to give up too soon. With a little care and attention, your plants should soon be ready to plant out in the garden.

Why is Propagation Necessary?

Why is Propagation Necessary

Plant reproduction, which involves growing new plants from existing plant material, is required for a number of reasons, including:

  • Plant reproduction and the development of new individuals are made possible by plant propagation. The sustainability of plant species depends on preserving genetic diversity within plant populations.
  • Crop production: Plant propagation is a crucial component of horticulture and agriculture since it enables the mass production of edible and ornamental plants. Farmers and growers can create several plants with desirable features by using plant propagation procedures like cuttings, grafting, and tissue culture.
  • Preservation of uncommon and endangered species: Plant propagation can also help to protect rare and threatened plant species. It is feasible to preserve genetic variety and stop the extinction of these species by multiplying these plants and producing new individuals.
  • Modification of plant traits: Plant propagation methods can be used to change plant characteristics like disease resistance or yield. New plant types may result from this that are more adapted to particular growing circumstances or have features that make them better for human food or other use.

In general, plant propagation is an essential method for preserving rare and endangered species, generating crops and attractive plants, and creating new plant types with enhanced features.

Plant Propagation Techniques

To reproduce your plants, you can utilize a variety of plant propagation strategies. The more popular techniques include layering, germination of seeds, and re-rooting of cuttings.

  • Germinating seeds is the process of producing plants from seed. The most widespread technique for propagating annuals, biennials, and perennials is this one. Depending on the type of plant, seeds can be planted either indoors or outside.
  • Another common technique for plant propagation is root cuttings. From an existing plant, cuttings are removed, and they are then rooted in potting soil. This method is frequently applied to woody ornamentals like magnolias, hollies, and azaleas.
  • Layering is a third propagation technique that can be used to multiply your plants. Layering involves taking a stem from an existing plant and burying it in the ground. The buried stem will then produce new roots, and a new plant can be propagated from the original. Layering is often used for shrubs, such as rhododendrons, camellias, and Forsythia.

Why Cloning Machines Are Used for Plant Propagation?Why Cloning Machines Are Used for Plant Propagation

Cloning devices often referred to as hydroponic cloning systems or propagation tools, are frequently used for plant propagation because they offer a quick and easy approach to multiplying a mother plant into many offspring. The following justifies the usage of cloning machines in plant propagation:

Cloning machines offer a stable environment for the growth of new plants. To guarantee that new plants are growing in the same conditions as the mother plant, they regulate variables including temperature, humidity, and lighting. A better success rate in establishing roots and developing new plants results from this uniformity.

Rapid plant propagation is made possible by cloning devices. In comparison to conventional propagation techniques like seed germination, certain systems allow for the rapid development of young plants into transplant-ready plants in as little as a few weeks.

  • Reliability: Cloning devices successfully create healthy young plants on a regular basis. This is due to the fact that the new plants are genetically similar to their mother plants and are raised under optimum conditions, which lowers the likelihood of illness and other issues.
  • Saving space: Cloning machines are small and can grow several plants in a little area. They are therefore perfect for gardeners that need to produce a lot of plants yet have limited room.

Overall, using cloning machines to create numerous baby plants from a single mother plant is an efficient and effective method. They are a crucial tool for plant propagation in horticulture and agriculture because they offer a predictable environment, are dependable, and may generate plants quickly.

Plant Propagation Supplies

The equipment and materials used in the process of growing new plants from existing plant material are known as propagation supplies. Depending on the propagation technique being utilized, particular supplies may be required, but the following are some typical examples:

Growing medium:

Growing medium

A growing medium is a substance used to nourish and nurture a young plant. Peat moss, perlite, vermiculite, and soil are examples of typical growing mediums as supplies.

Containers:

Containers

Growing media and fresh plants are stored in containers. These supplies can be little pots or big containers for several plants, and they can be made of plastic, terracotta, or other materials.

Cutting tools:

Cutting tools

To take cuttings from the mother plant, sharp cutting instruments like pruning shears, scissors, and knives as supplies are required.

Rooting hormone:

Rooting hormone

Used to promote new roots to emerge from cuttings, the rooting hormone is a powder or liquid.

Heat mats:

Heat mats

Heat mats are used to keep the new plants’ temperature constant, which can hasten their rooting and growth.

Humidity domes:

Humidity domes

These plastic covers are placed over young plants to produce a humid atmosphere that can aid in the retention of moisture and the promotion of roots in cuttings.

Grow lights:

Grow lights

Grow lights are used to give new plants artificial light, which is particularly crucial for indoor propagation or when there is a lack of natural light.

Overall, these supplies might vary based on the specific method being used, but they often consist of a container, cutting tools, rooting hormone, grow lights, and other equipment to provide the best conditions for new plants to root and thrive.

When propagation by cuttings, it is necessary to seal the ends of the cutting with wax, plant immediately, and keep moist. A rooting hormone may also be used.

Rooting hormone is one of the supplies obtained as a powder, liquid, or gel. The powdered form is mixed with water and often comes with a surfactant to help wet the surface of the cutting. The liquid hormone is applied with a spray bottle and the gel is painted on with a brush.

The use of rooting hormone increases the number of cuttings that will root, but not all cuttings will root even when treated with the hormone.

There are a few basic supplies that you’ll need for plant propagation:

  • Pots or containers to hold your plants
  • A growing path like soil, sand, or perlite
  • A humidity dome or plastic bag to maintain moisture
  • A tray to catch water drainage

You’ll also need some basic tools:

  • A sharp knife or pair of scissors
  • A pencil or chopstick for making holes in the growing path

Once you have your supplies gathered, you’re ready to start propagating your plants!

Containers for Plant Propagation

Containers for Plant Propagation

Plant propagation can be done in a wide variety of containers. Plastic container is the most typical kind of plant propagation equipment. These are available in a range of sizes, from little pots to big buckets. Some feature holes for drainage, whereas others don’t.

The paper pot is yet another useful container type. These are biodegradable and manufactured from recycled paper. They are available in a range of sizes, from little pots to big buckets. Some feature holes for drainage, whereas others don’t.

The biodegradable pot is a third form of container that can be used. These are constructed from degradable substances like peat moss or coconut coir. They are available in a range of sizes, from little pots to big buckets. Some feature holes for drainage, whereas others don’t.

Make sure the container includes drainage holes regardless of the kind you use. This will let extra water drain away and keep the roots from rotten from standing water. You can drill the drainage holes yourself if the container is missing them.

Growing Mediums for Plant Propagation

Plant propagation can be accomplished using a wide range of methods and supplies. A key component in propagation is the growing media. The plants will be rooted in and grow in this substance. Because there are so many options, it is crucial to choose the optimal growing medium for your needs.

Among the most prevalent types of growth mediums are soil, sand, vermiculite, and perlite. Soil is a common natural substance found in gardens. Considering how easy to locate and inexpensive it is, it is widely utilized for propagation. Working with the soil, though, can occasionally be challenging and heavy. Sand is a further choice that is usually used for dissemination.

It is lightweight and easy to work with, but it does not retain water very well.

Volcanic ash is used in the production of vermiculite and perlite, respectively. They are effective options for propagation since they are both light and absorbent. Vermiculite, though, can occasionally cost a little more than perlite. When selecting a growing medium, the pH level is a crucial factor as well. Although this might vary depending on the plant, most plants like a pH range of 6.5 to 7.0.

Consider the requirements of the plants you are propagating while selecting a growth medium. For the majority of plants, soil is an excellent choice, but there are alternative materials that can be used.

Plant Support Systems

It’s crucial to employ the right supporting system while propagating plants in order to maintain the plant in place. Choosing the best plant support system for you might be challenging because there are so many different kinds on the market.

1. Stake

Stake

The stake is one sort of plant support system. Stakes are easy to use, cheap, and effective for plants that don’t require much support. They come in different sizes and can be made of metal, wood, or bamboo. Stakes’ biggest drawback is that, if not utilized properly or when used with heavy plants, they can harm delicate plants.

2. Trellis

Trellis

The trellis is yet another sort of plant support structure. A metal, wood, or plastic frame called a trellis is used to support climbing plants. Usually, it has a number of horizontal bars around which the plants’ stems can be wrapped. Trellises are available in a range of sizes and can be used both inside and outside. Trellises’ primary drawback is that they can be pricey.

3. Netting

A third type of plant support system is netting. Netting is made from cloth or plastic and is used to support plants that grow in a radial pattern, such as tomatoes or cucumbers. It comes in a variety of sizes and can be used indoors or outdoors. The main disadvantage of netting is that it can be difficult to install correctly.

Finally, there are also plant rings and cages. Plant rings, which may sustain trees and shrubs with extensive root systems, are composed of metal or plastic. Plant cages, which may hold tiny plants like flowers or herbs, are often composed of plastic or metal. There are several sizes available for both rings and cages.

The size, kind, and environment of the plant you are propagating, as well as the temperature and habitat in which the plant will be developed, should all be taken into account when selecting a plant support system.

How to Grow Healthy Plants?

Creating the ideal conditions for growth, giving plants the care, they require, and attending to their unique requirements are all necessary for producing healthy plants. It’s crucial to offer enough light, hydrate properly, utilize quality soil, provide the right nutrients, keep an eye out for pests and diseases, and maintain the right humidity levels in order to develop healthy plants.

Every plant has different requirements, thus it’s critical to learn about and comprehend the particular demands of the plants you are growing. Your plants can flourish and produce lovely leaves, flowers, and fruits if they are given the proper growing conditions and attention.

What is HTG Supply?

HTG Supply is a company that specializes in providing equipment and supplies for indoor gardening, hydroponics, and plant propagation. The company was founded in 2002 and is based in Golden, Colorado.

HTG Supply offers a wide range of products for both commercial and personal use, including grow lights, hydroponic systems, growing tents, environmental controls, and plant propagation supplies such as cloning machines and rooting hormones. They also offer a variety of nutrient and supplement products for plant growth and health.

In addition to their online store, HTG Supply has several retail locations across the United States, and they offer support and advice to customers through their customer service team and online resources such as blogs and forums.

Overall, HTG Supply is a well-known and respected company in the indoor gardening and hydroponics community, and they provide a wide range of products and services to support plant growth and propagation.

Protecting Grapes From Birds: A Guide To Protect Grape Plant From Bird

Protecting Grapes From Birds: A Guide To Protect Grape Plant From Bird

Protecting Grapes From Birds

Many crop growers struggle with the problem of birds. They destroy food like grapes, spread disease, and harm farms. We have a fix for the bird damage issue. We assure you that all grape growers deal with this issue. By consuming only a few grapes, they can potentially sabotage an entire harvest.

Don’t worry though; there are steps you can take to protect your grapes from birds. We’ll share some of the most effective techniques for preventing them from getting near your grapes with you in this blog post. So continue reading if you want to discover how to keep birds away from your grapes!

The Types of Birds That Are a Threat to Grapes

The Types of Birds That Are a Threat to Grapes

There are several bird species that could endanger grape harvests. Swallows, starlings, and blackbirds are the three primary bird species that frequently cause the greatest harm. They are especially drawn to ripening grapes and will consume them voraciously if given the chance.

There are a number of strategies to protect grape crops from them. The use of nets or actual obstacles is one way to prevent them from reaching the grapes. Another choice is to utilize bird scarers, which are contraptions that frighten birds away with loud noises or alarming visual effects.

Finally, to prevent birds from perching on the vines, grape producers might employ bird repellents. These deterrents can be applied to the vines using a spray bottle or included in irrigation water.

All of these techniques can be useful for protecting grapes, but it’s crucial to pick the one that best fits the requirements of the specific grape crop. For instance, nets or barriers can be the best choice if the area around the vines is large. Bird scarers might be a more practical option if there is little room. Additionally, bird repellents can be the only choice if there is a sizable area where the grapes are inaccessible to humans.

Installing bird netting

Installing bird netting

Many vineyard owners install netting to protect their grapes from being eaten. This is a quick and inexpensive method of deterring birds from eating the grapes that are also easy to implement.

You may choose a bird netting that will suit your particular requirements because it is available in a range of sizes and shapes. Additionally, it is portable and lightweight, allowing you to change it as necessary. Furthermore, bird netting is translucent, so it won’t obscure the view or detract from the beauty of your vineyard.

Bird netting is the ideal solution if you’re trying to save your grapes. It works well, is reasonably priced, and is simple to install.

Planting decoy crops

Planting decoy crops

Planting spook crops is one strategy for preserving grapes. Plants known as decoys imitate the crop you’re attempting to rescue but don’t provide the same nutritional benefits. They consume less of the grapes when they consume the decoys, which is less healthy for them.

When using decoys, there are a few factors to bear in mind. To begin with, confirm that the decoys are the exact same size and shade as the grapes. The decoys should also be placed near the grapes. The birds will have a difficult time distinguishing between the two as a result. Lastly, avoid using too many decoys. They might simply eat the decoys and overlook the grapes if there are more decoys than grapes.

If you follow these tips, you can save your grapes from birds without too much trouble.

Using scare tactics

Using scare tactics

Scare techniques are one approach to stop them from eating your grapes. This entails startling them and causing them fly away by creating loud noises or using other techniques. As birds are drawn to shiny stuff, you might also try hanging shiny objects from the grapevines. The grapevines could also be netting-covered as an alternative. This will keep them and other animals away from the grapes.

Grape producers can take a few steps to guard their grapes against them. These consist of growing ruse crops, employing fear-mongering techniques, and netting the grapevines. Growers may protect their grapes from these feathered buddies by using the advice in this article.

Visual deterrents

Visual deterrents

Scare tactics have been employed by farmers for a long time to deter people from eating their grapes, but modern technology has made it simpler and more successful than ever. Birds are scared away from grapes using a mix of sight and sound using visual deterrents, which are now widely accessible.

The HawkEye II, one of the most well-known visual deterrents, scares away birds by imitating a real hawk. The hawk is perched on a tall pole and moves realistically to frighten away birds. The hawk may be programmed to move in many ways and can be adjusted to match the farm’s colors.

The Scarecrow is a famous visual deterrent that scares birds by making loud noises and flashing lights. The Scarecrow is battery-powered and may be connected to a fence or put on a post. Additionally customizable, it can be tailored to each farm’s requirements.

The Scarecrow and HawkEye II are both offered by Bird-B-Gone, a renowned producer of visual deterrents. Farmers who are interested in bird protection for their grapes can learn more on the Bird-B-Gone website or by getting in touch with a representative.

Habitat Modification Strategies

Habitat Modification Strategies

Grapes can be protected from birds in a number of methods. Utilizing netting is one popular technique. Usually, pegs are used to anchor the netting to the ground and surround the grape crop. Birds won’t be able to enter the field and consume the grapes because of the netting.

To rescue your grapes, scare techniques are a typical alternative. This can involve the use of visual deterrents like predator models or reflective film as well as noisemakers like propane cannons. These techniques are effective at keeping birds away from the grapes.

Finally, some farmers may combine the use of nets and fear-mongering techniques. The grapes are frequently best protected from birds in this way.

Utilizing chemical repellents

Utilizing chemical repellents

Numerous birds love grapes, which can cause substantial crop loss for grape growers. Bird protection strategies include netting, scarecrows, and noisemakers, among others. Sometimes, chemical repellents are also employed, but these must be sprayed carefully to protect the grapes.

Methyl anthranilate is a typical chemical repellant that is acceptable to use on food crops. The birds taste this chemical when they attempt to consume the grapes after it has been applied to the grape plants. The birds rapidly learn to avoid it since the taste is unpleasant.

Acetophenone is yet another chemical repellent. This product, which is made from cinnamon oil, has a potent scent that keeps birds away. Although acetophenone costs more than methyl anthranilate, it might be more effective at deterring birds.

The use of chemical repellents has a few drawbacks. They must first be reapplied frequently to maintain their effectiveness. If not utilised appropriately, they might also hurt other animals. Last but not least, some people think chemical repellents are cruel since they hurt or distress the birds.

Despite these drawbacks, chemical repellents are often the best option for protecting grapes from birds. They are safe and effective at keeping grapes safe from damage when used correctly.

Protect Grapes and Grape Plants: Conclusion

Protect Grapes and Grape Plants

Birds can be kept away from grapes in a variety of methods. The most successful technique will depend on the type of grape and the severity of the infestation. Some techniques are more effective than others. Scarecrows, traps, and netting are a few typical techniques.

The most popular and efficient kind of protection is netting. In order to prevent the birds from seeing the grapes, it is crucial to select an opaque net. Additionally, the net ought to be impenetrable to birds so that it is tight enough.

Scarecrows can be useful, but they must be well-made and positioned properly. The scarecrow should be positioned in an area where birds can see it and be large enough to frighten them.

Traps can be useful, but they must be rigged with a tasty treat for the birds. After being captured, the bird needs to be released far from the grapevines.

Although there are many various strategies for bird protection, netting is perhaps the most successful one. Scarecrows and traps, for example, can be useful alternatives but they take more work to set up and maintain.

Chemical repellents are another option, but they must be used carefully to avoid harming the grapes.

How To Propagate Succulents

How To Propagate Succulents

Succulents are a popular choice for both outdoor and indoor gardening because of their distinctive beauty and simple maintenance needs. But did you know that you can easily propagate succulents at home with minimal effort? In this blog post, we’ll go over the basics of succulent propagation so you can easily increase the number of succulent plants in your collection. So, continue reading!

How To Propagate Succulents

Understanding Succulent Propagation

Propagating succulents is a great way to get more of these beautiful, easy-care plants for your home. Propagation by offsets is perhaps the easiest, most convenient method of getting new plants. Simply pinch off an offset – a small plant that has developed from the main plant – and pot it up, and you’ll soon have a brand-new succulent to enjoy! Propagate away and soon you’ll have enough of these trendy and low-maintenance plants to fill your entire home with!

To propagate succulents, it’s important to understand the key steps: division, cuttings, and leaf propagation. For anyone interested in becoming a succulent-growing pro, mastering these techniques is essential. Division involves splitting apart a single plant into multiple plants; cuttings are pieces of the stem or leaf from an existing parent plant; leaf propagation involves rooting the leaves of a succulent in soil or water Similarly, propagation by stem cuttings is another way to propagate succulents.

In this method, you would take a piece of the stem from the existing parent plant and place it in a soil mixture suitable for succulents. The stem will then take root and form new plants. Propagation by stem cuttings is a great option for those wanting to fill their space with more succulents quickly and easily!

Supplies Needed for Propagation

To propagate succulents, you will need the following supplies: rooting hormone, a sterile knife or scissors, well-draining soil, and a container for planting. Succulent propagation is an easy and effective way to increase the collection of your favorite plants.

Once you have your supplies gathered, cut off a leaf from the succulent parent plant and ensure it has some stem attached. Then use the knife or scissors to create a shallow groove in the stem for the rooting hormone to adhere to before placing the leaf in soil and watering lightly Again, propagation by stem cuttings is a fun and easy way to propagate succulents! With some basic supplies, a little bit of patience, and the right technique, you’ll be on your way to growing your own succulent garden in no time.

The process is simple – just make sure to cut off a leaf from the parent plant with some stem attached, groove it with the knife or scissors, dip it in rooting hormone, and place it in soil and water lightly. With a little TLC, you’ll be well on your way to having more succulents!

How to Propagate Succulents?

How to Propagate Succulents

Propagating succulents is an easy way to increase the number of plants in your collection without having to purchase additional ones. If you’re ready to dive into the fascinating world of succulent propagation, then read on! Propagating succulents will introduce you to a whole new level of understanding of these unique and hardy plants.

You’ll learn how to take cuttings, create clones of your favorite plants, and provide plant care for them as they grow. With just a little bit of patience and perseverance, you can be on your way to building a stunning succulent collection in no time at all!

What are succulent leaves?

What are succulent leaves?

When learning how to propagate succulents, it is important to know the different types of leaves succulents have. There are three types of succulent leaves:

  1. Thick, fresh leaves store energy as well as water. The most prevalent kind of succulent leaves is often green or blue-green in color.
  2. Thin, papery leaves are common on cacti but are less frequent than thick, meaty leaves. They collect solar energy from the sun’s beams.
  3. Non-fleshy or papery succulent leaves, that look hairy or spiky and help keep the plant safe.

Rooting hormone

Rooting hormone

When it comes to propagating succulents, the rooting hormone is essential. This helpful product can be found at most nurseries or garden centers, and it’s very easy to use. Simply dip the cutting into the hormone, then plant it in the soil. Within a few weeks, you’ll see new growth emerging from the succulent.

Propagation by stem cuttings

Propagation by stem cuttings

The best way to propagate succulents is by stem cuttings. First, take a sharp knife or pair of scissors and cut a piece of stem from the mother plant. Cut just below a node, which is the point on the stem where a leaf is attached. Make sure to make your cut at an angle so that more surface area is exposed. This will help the cutting to form roots more easily.

Next, remove the leaves from the lower half of the cutting. Again, this will help the cutting to form roots more easily. Finally, allow the cutting to callous over for a few days before potting it up in a well-draining succulent potting mix.

Be sure to keep your cutting moist but not wet during this rooting period. Once roots have formed, you can treat your new succulent plant just like any other. Allow the soil to dry out completely between waterings and give it plenty of bright light. With a little patience, you’ll soon have a whole collection of succulents propagated from stem cuttings!

Propagation by leaves cutting

Propagation by leaves cutting

One of the most common ways to propagate succulents is by leaf cuttings. This is a simple process that just about anyone can do with success. All you need is a sharp knife or scissors, a pot or container filled with well-draining soil, and of course, a healthy succulent plant.

To start, carefully remove a leaf from the mother plant. It is important to make sure that the leaf is free of any pests or diseases. Once you have a healthy leaf, use your knife or scissors to cut the leaf into smaller pieces. Each piece should have at least one healthy-looking stem with some leaves attached.

Next, plant the leaf cuttings in your pot or container filled with well-draining soil. Make sure that the leaves are not touching each other and that they are pointing up. Water the soil until it is evenly moist and place the pot in a bright location but out of direct sunlight.

Within a few weeks, you should see new growth appearing on the leaf cuttings. Once the new plants are big enough, you can carefully transplant them into pots of their own.

In conclusion, succulent propagating is a relatively easy process that can be done by stem or leaf cuttings. Once you have your cuttings, simply pot them up in well-draining soil and water regularly. With a little patience, you’ll soon have a whole new batch of succulents to enjoy!

Troubleshooting Common Problems

Troubleshooting Common Problems

Common problems with succulent propagating can include browning or wilting leaves, an accumulation of pests, or a lack of root growth. If succulents are wilting or browning, the most likely cause is overwatering. Make sure to reduce the frequency of waterings and allow the soil to dry out completely between waterings.

As an alternative, if pests are present, they can be in the form of tiny worms or aphids, eliminate the by enhancing airflow around the succulent and washing it with warm water.

Last but not least, you may check for roots by gently pulling on the stem and see if they are there. If not, try repotting in new soil and make sure the soil is well-drained. Succulent propagation, meantime, is one of the most satisfying gardening activities.

Propagation by stem cuttings is a great way to increase the number of succulents in your collection.

To sum up, propagating succulents can be a great and easy way to increase the number of succulent plants you have in your collection. With just a few simple steps, you can easily propagate your succulents with minimal effort and get some beautiful new additions to your garden. So why not give it a try? Your succulents will thank you!

Protecting Garden Plants From Frost

Protecting Garden Plants From Frost

Protecting Garden Plants From Frost

Despite the cold temperatures and shorter days of winter, you can still extend your growing season and save your plants from freezing temperatures and frost. In this blog post, we will discuss several strategies and tips for extending your growing season and saving your plants from frost. Read on to learn more!

Understanding Frost

Understanding Frost

Understanding frost is key to saving plants from it. Frost can be characterized by temperatures below 32 degrees F and the formation of ice crystals on surfaces, which can damage plants. Many plants are highly susceptible to frost damage and have a difficult time adapting to cold temperatures. To help your plants from frost, cover your plants with a frost blanket or polyester sheet at night.

Doing so prevents the formation of ice crystals on the surface of plants and helps keep them protected during cold nights from frost. Additionally, watering your plant in the evening can help insulate the soil and reduce the chance of frost damage. Finally, be sure to choose hardier varieties of plants that are more resistant to frost damage when planning your yard. With these practices in mind, you can ensure that your garden is protected from damaging frost.

Frost blanket

When trying to protect plants from frost, it’s important to pay attention to forecasted temperatures and cover or move vulnerable plants indoors if necessary. Next, there are multiple methods to protect plants from frost. One way is to keep an eye on the forecast and take precautionary steps, such as moving vulnerable plants indoors or covering them with a frost blanket if necessary.

However, it should be noted that some plants may not survive even with the use of protective measures against frost. Therefore, it is important to familiarize oneself with their plant’s hardiness zone and choose plants that can withstand potential frost conditions.

Frost Protection: Preventing Frost Damage

Saving your plant from frost damage requires being proactive – start by covering vulnerable plants with a frost cloth, which insulates them from frosty temperatures. This protective layer creates a microclimate around your plants that can reduce the risk of frost damage while still allowing air and light to reach them.

Preventing Frost Damage

Additionally, make sure to water your plants for protection in the late afternoon before the temperature drops, as moist soil is better able to resist damaging frost. If possible, move the delicate or frost-sensitive plants indoors for the chillier months. These strategies will help prevent damage from frost and allow you to enjoy your garden all year round.

Also, you should strategically utilize pruning to reduce the amount of surface area exposed to the cold, making it easier for the plant to stay warm and avoid frost. Pruning away some of the foliage and thinning out the branches help plants to retain heat even during cold and frosty weather.

Additionally, adding a thick layer of mulch around the plant to protect plants can also help keep them warm. The mulch helps insulate the plant by providing an extra layer of protection from cold temperatures. Lastly, if necessary, use special frost covers to further protect your garden plants from frost.

mulching for frost protection

Utilizing mulch is another great approach to saving your garden plants from freezing frost damage – as mulch helps insulate the soil and retain heat, creating a buffer between your plants and cold temperatures Meanwhile, utilizing mulch is a great approach to saving plants from freezing frost damage. Mulch acts as an insulator for the soil, helping to retain heat and create a buffer between the cold temperatures and plants. This simple step can help to save plants from facing severe freezing frost damage in cold weather.

Extending Your Growing Season to Protect Plants

One way to extend your growing season is to protect garden plants from unexpected freezing frost by creating a sheltered environment using an outdoor plant cover. This can easily be accomplished with a few simple tools such as plant covers, cloches, and row covers made of breathable fabric. Plant covers are very useful for protecting individual plants in the garden from frost.

Extending Your Growing Season to Protect Plants

A simple and easy way to do this is to use a lightweight frost cloth, which will cover the plants and retain warmth during cold weather. Frost cloth is an effective way to protect plants from freezing frost when temperatures drop in your home. It can be laid over plants to create a protective barrier against the cold, trapping heat and allowing for continued growth.

The lightweight fabric is breathable and allows for air circulation, preventing condensation and providing ample ventilation for plants. Additionally, frost cloths can be easily removed during warmer temperatures without harming the trees beneath. Protecting garden plants from frost does not have to be expensive or complicated—a lightweight frost cloth can provide an effective solution with minimal effort.

plant covers

Plant covers can also be used to protect young plants from the harsh sun or wind in your home, so they can grow stronger and faster during the extended growing season Thus in this view, using protective covers for your sensitive garden plants and vegetables is a great way to ensure that you maximize your growing season.

Protecting the trees from frost and harsh sun or wind will allow them to grow stronger and faster, increasing their chance of survival. It is important to remember that covering your plants to avoid frost can make a huge difference in the quality and yield of the garden.

Building a Protect Layer for Your Plants

Making a layer of protection for your plants is one of the greatest strategies to keep your vegetable gardens safe from frost. This will assist maintain the soil temperature constant and protect them from harsh temperatures. A layer of insulation can be created by wrapping plants in a frost blanket to help keep them warm. Move containerized plants to sheltered spaces, such as a porch or garage.

Use items like horticultural fleece, bubble wrap, old blankets, sheets, and even cardboard boxes to cover your plants over the winter to create this protective barrier. The most suggested materials are bubble wrap and horticultural fleece because they are made to shield plants from frost. Make sure the materials are fastened so that high gusts won’t blow them away.

Building a Protect Layer for Your Plants

Old blankets and sheets provide additional insulation, and cardboard boxes should be used in conjunction with other objects to keep your plants from becoming frozen. Using these items to protect your garden plants from frost can ensure their survival throughout the chilly winter air months.

If you use the proper coverings and take them off when the temperature rises, your plants will get the right quantity of sunlight and ventilation and will be protected against frost. It’s also essential to check on your plants frequently to make sure they are adequately protected throughout the cold air to avoid frost. If you carry out these simple tasks, your cherished garden plants will be more likely to survive the winter cold air.

Final Say

In conclusion, extending your growing season and protecting your garden from frost and cold temperatures is possible by using a combination of strategies and ideas. One of those ideas includes using garden covers and other frost protection methods to keep them safe during chilly winter nights. It is also important to choose varieties of greens as a sign that are well-suited to your climate and planting zone to avoid frost. With these tips in mind, you can enjoy a longer growing season and continue to watch your garden flourish throughout the winter months.

How To Treat Mold On Seedlings: Get Rid Of Fungus Mold On Seedling

How To Treat Mold On Seedlings: Get Rid Of Fungus Mold On Seedling

How To Treat Mold On Seedlings

If you enjoy gardening, it’s likely that you’re aware of the potential damage that mold may cause to young plants. Mold has the potential to kill or seriously harm seedlings.

Untreated mold on seedlings may be treatable, so don’t worry. In this blog post, I’ll offer you some tips for preventing mold on seedlings.

Use the tips in this blog post with caution if your seedling has mold damage. With careful loving care, you can get rid of the mold and keep your seedling healthy!

What is mold?

What is mold

Among the fungi, mold is one type that develops on seedlings. Despite the fact that there are many different types of molds, they all prefer warm, humid surroundings. If you keep your seedlings in a place that is overly damp or moist, mold growth could occur.

  • The first step in preventing mold on seedlings is making sure that the environment is not excessively moist or humid. The use of dehumidifiers can assist maintain dry air. Make sure the seedlings have enough airflow if a dehumidifier is not an option.
  • If your seedling begins to sprout mold, remove them from the growing place as soon as you can. Examine each plant thoroughly after removing it from the grow chamber.
  • Throw away any plants that have an excessive amount of mold growth.
  • You can attempt to salvage a seedling if it only has a few areas of mold by carefully removing the impacted leaves. Make sure to fully wash your hands after handling the leaves with mold.
  • Apply a fungicide to the remaining leaves after removing the damaged ones. Make sure you adhere to the label’s instructions to the letter.

Mold can be a difficult problem to manage, but it can also be avoided and cured. By taking a few simple steps, you can keep your seedlings healthy and growing without mold.

What causes mold on seeds?

What causes mold on seeds?

Mold on seedlings is a frequent issue that can be brought on by a number of things. One of the most frequent causes is overwatering since mold prefers damp environments. Mold development can also be caused by poor drainage and stagnant air. Seedlings exposed to excessive light or those that are close together are both more prone to mold growth.

The first thing to do if you find mold on your seedlings is to look for the source. Adjust your watering schedule and make sure the seedlings have sufficient drainage because overwatering is to blame. Thin out the seedlings if overcrowding is the cause of the issue. Move the seedlings to a shady area if too much light is the cause of the issue.

You can attempt to remove the mold itself when you’ve determined its cause and fixed it. It is frequently sufficient to use a stiff brush to scrub the troubled areas or to mist them with diluted bleach solution. You might have to throw away the afflicted seedlings and start again if the mold doesn’t go away.

Although mold on seedlings is a prevalent issue, it may be avoided and treated. One of the most frequent causes of mold is overwatering, so be sure to water your seedlings sparingly. If mold does appear, make an effort to determine its root cause and take appropriate measures. Mold may frequently be removed by using a stiff brush to scrub the infected areas or by misting them with a weak bleach solution.

Harms caused by Mold on seedlings.

Harms caused by Mold on seedlings.

To stop additional harm, action must be taken as soon as mold is discovered on seedlings. Numerous factors, such as disturbing the roots, obstructing the light, and creating toxins that might kill the plant, can hurt the plant. There are certain methods you may take to avoid mold if you notice it on your seedlings.

  • The contaminated soil must first be removed, and fresh dirt added. Before adding additional soil, make sure the container or tray is thoroughly cleaned. You might also wish to give the plants a good water rinse to remove mold spores.
  • You can try to relocate your seedlings if you are growing them in a garden. The sunlight and air movement will aid in drying out the mold and eradicating any spores that might still be present.
  • The plants might need to be thrown out if the mold is bad or if any evidence of fungal development is present. It is crucial to treat as soon as possible since fungal growth can swiftly infect other plants.
  • It’s also crucial to watch out for future mold symptoms in your seedlings. The best course of action is always prevention, so make sure your plants are in a healthy environment.

How to treat and prevent mold from growing?

How to treat and prevent mold from growing

Don’t freak out if you notice mold on your seedlings! Even though it’s not perfect, it can be fixed. Determine the mold’s kind first. White mold can be eliminated by delicately removing it with a cotton swab dipped in rubbing alcohol. However, you’ll need to take more extreme measures if it’s black mold.

Since black mold is actually a fungus that is feeding on the plant, it is more challenging to eradicate. Spraying the plant with a diluted bleach and water solution works best for treating black mold. Replant the plant in new potting soil after allowing it to dry in the sun for a few hours.

How to get rid of mold on seedlings?

How to get rid of mold on seedlings

It’s crucial to take precautions to avoid mold on your seedlings as they grow indoors. Seedlings that have been exposed to mold may become more vulnerable to illness.

You may take a few quick steps to prevent mold on your seedlings:

  1. Maintain a clutter-free and tidy growing area.
  2. Use a drip irrigation system or a watering can with a long nozzle to water your seeds from below.
  3. Steer clear of overhead watering, which can promote the spread of mold.
  4. Use a fan or open a window to create adequate ventilation for your plants.
  5. Regularly check your seeds, and discard any seedlings that exhibit mold symptoms.
  6. You can help maintain your seedlings healthy and mold-free by paying attention to these suggestions.

Conclusion

Seeds can suffer from mold, but it is curable. The best approach to prevent mold is to take precautions, such as maintaining a clean and clutter-free growth space, watering from below, and offering adequate ventilation. If you do discover mold on your seedlings, you may remove it by either spraying the plant with a diluted bleach and water solution or gently cleaning it away with a cotton swab dipped in rubbing alcohol.