Seed Selection – How to select good quality seeds class 8

Seed Selection – How to select good quality seeds class 8

There are several things to plan before selecting the seeds you want to plant. You need to have a plan. The first part of the plan is what you want to plant. You should determine that by a few things.

How much space do you have to plant?

The ideal space you want to have will get 6 hours or more sun per day in the primary growing months. If you are determining this in the winter months when the daylight is much shorter, first see what part of your yard, deck, or patio window gets the most sunlight per day. It will be longer in the summer and farther north in the country.

Here in Minnesota, we get close to sixteen hours of daylight at the peak of summer. You can look up sunrise and sunset times in your area at the longest time of the year. The summer solstice is June 21. It will be the longest daylight hours of the year in the few days before and after. The sun will also be higher in the sky the farther north you go.

On the winter solstice, December 21, the sun will be the shortest daylight and much lower in the sky. You can get some idea even in the winter by taking a percentage of the day at whatever time of year you look at it. The spot in your yard that gets the most sunlight will be the same most of the time year-round if trees or buildings do not block it. Look at the spot you are considering every hour for a few weeks and see if it will get enough sun to grow your garden well.

If you live south, where it gets sweltering for several months, it can be beneficial if the area you are thinking of using gets shade in the later part of the day, so it does not burn up the plants. The east and south-facing parts of your yard are best, although not always. In my yard, my garden is on the west side of my house. The garden gets a bit of sunlight early in the day. Then again from about eleven till about seven in the summer.

After determining the spot, you must select the garden type you want. Do you want to till up the yard and plant it in the ground? Do you want to make raised beds? Do you want to use grow bags?

I recommend you do raised beds and or grow bags if possible. The initial cost is higher because you must build or buy the beds and bags, and you need to get good raised bed soil to fill the beds and or bags. I do a combination of raised beds and bags.

Here is my design. I have six, six feet by three-foot raised beds with a fence around the entire garden, and I use grow bags in the middle between the beds.

Potatoes, a few tomatoes, and beats in the grow bags in the middle. This setup works well. I have changed it after it grows for a while. I put the potatoes outside the fence to have more room. Rabbits won’t eat the potato plants, so they are safe on the outside.

I also put landscape fabric under the whole thing and mulched the center section to make it look better and be more uniform.

Look at the section on square foot gardening later in the book to determine how much you can grow in your area. You can then see how much of each thing you want to plant can fit into your space. Square foot gardening gives you a much higher yield from the same area by telling how many plants you can grow per square foot for each type of plant. It works, so it’s well worth using this method of planting. It works very well in raised beds.

For example, you can plant 8 or 9 bush beans per square foot. It feels like a lot when you’re doing it, but it works.

Once you know this, you can determine how much room you need for the number of plants you think you want to plant for each type of vegetable. Gardening is a process. You should learn as much as you can when you plan. After that, you experiment and learn more as you go. You will have things that don’t work out as planned. That is normal. Learn what you can and go for it. Change it next time if it doesn’t work well.

Now you know what veggies you want and how many plants you need to get the desired harvest. The next step is to lay out your plan as you are doing this. Look up companion planting. Some plants like to be planted with or close to other plants. Some plants don’t do well at all if we plant them near other plants. Take this into consideration when you are planning out your garden.

Importance of seed selection

This is where it gets fun and frustrating. There are so many choices. If you are like me, you want to try all the newest and best of everything you can. You can’t do it all in one year.

There are two types of seeds: hybrid, and heirloom. Heirloom seeds have a long history and are the same as the original parent plant. The plants should be the same when you grow a plant from heirloom seeds.

Hybrid seeds are cross-pollinated with another variety of the same plant. For instance, they pollinate the pollen from a male flower of a sweet one hundred cherry tomato with the female flower of another cherry tomato, and the outcome will be a different tomato. Because of creating hybrid seeds, we now have thousands of tomatoes that we never had before. There is nothing wrong with using hybrid seeds unless you want to save your seeds and plant them next year. Don’t save hybrid seeds if you’re going to save seeds from your plants. Only save seeds from heirloom tomatoes. Hybrid seeds may not give you the same plant that the seeds came from.

You will also see seeds listed as non-GMO. Gmo is a genetically modified organism. Gmo seeds have had their DNA genetically modified. Done mainly to make them more resistant to drought and pests. Some people say that gmo food causes cancer and other issues. The FDA has approved the use of gmo seeds, so they are safe per the FDA. Some gmo food is used for consumer food. There is considerable controversy about GMOs. You will have to decide when and if these seeds become available to consumers.

You don’t have to worry about seeds that you can buy. Gmo seeds are only available to farmers currently. They could become available in the future. They are also much more expensive.

To set up your plan, you need to list what you like to eat and what things you want to grow.

List the veggies that you want to get out of the garden.

Once you know what you want and how much you can grow in your space, you are ready to look at seeds. There are many good places to find seeds. When you go to their websites, sign up for their seed catalogs. They are nice to have if you need something to do and want to look at all the flowers and plants you never even knew existed.

If you want a great plant that you can add to anything and have excellent color all summer, Coleus is a splendid choice. I started this inside, and they were about five inches tall when I transplanted them. These are all in grow bags on the railing of my porch, and they are fantastic. They don’t need a lot of sun. They get large and shade out anything else around them, so be careful about what you plant them with.

Most veggie gardeners grow the basics for gardens. Tomatoes, Beans, Carrots, Zucchini, and squash. Other popular veggies are cucumbers, strawberries, Peas, spinach, etc. These are all some of my favorites as well. I got crazy with the tomatoes this year. There are so many that I wanted to try, and several that I always want to have. So, I have about thirty tomato plants this year.

For Cherry tomatoes and salads and just snacking on, the Sun gold tomatoes are unbeatable. They are easy to grow. They grow fast, and they produce a lot of fruit. This year, I’m experimenting with them. I have taken a few suckers from the outside plants and started new plants for the inside. I will prune them, keep them small enough to grow inside, and have tomatoes all winter. It will be a challenge. The plants outside are about nine feet tall now and show no signs of slowing.

When you grow your plants from seed, you open an endless variety of plants that you could not even find if you looked for garden center plants.

Growing plants from seeds – Advantages of growing plants from seed

Growing plants from seeds

Gardening is a great hobby; it is fun and rewarding but there is a big learning curve. If you must learn it all by trial and error, it can be frustrating. This book will help you through the beginning of the gardening process by starting your plants from seed and have you well on your way to success.

Most people know canned vegetables are not the best tasting. While they are accessible and able to keep for a long time. Frozen veggies are better, but nothing compares to fresh.

You can grow and have your fresh vegetables no matter what space you have available.

  • You can grow in-ground gardens
  • You can use raised beds in your yard
  • You can use raised beds on your deck or patio
  • You can use grow bags on the balcony of your apartment
  • You can grow most veggies in your house with the proper lights or an excellent sunny window
  • You can grow microgreens in a minimal space and quickly get great high-quality food that is loaded with vitamins

No matter what you have, you can grow your vegetables in your space.

Not all plants should start inside from seed. We can directly plant many in their final growing spot without starting inside. Some plants don’t like to have their roots disturbed. They are also faster-growing plants, in most cases, that don’t need extra time to grow.

Advantages of growing plants from seed

Why not go to the garden center and buy your plants? They are already started, and someone else has done most of the hard work.

  • Cost is one of the big reasons.
  • What chemicals and pesticides do they use on the plant?
  • If you grow your own, you can use organic seeds and know what you put on them for fertilizer or pesticides.
  • It is a great sense of accomplishment to see that you start with a tiny seed and get a beautiful plant that gives you food. If you have ever had vegetables out of the garden.
  • You know nothing tastes better.
  • You have an almost limitless variety of plants you can grow. Gardening is fun.

COST

Cost is a considerable concern. Suppose you go to a garden store or the garden center at a big box store. A tomato plant will cost you from a few dollars to thirty dollars if it is an older and larger plant. The average price for a decent tomato plant is around five dollars each. If you want a decent crop of tomatoes, you will want to have a variety of at least eight to ten plants for your family. You are looking at thirty dollars or more for just one type of garden plant.

You can buy top-quality seeds from online seed sellers like Burpee. I will go into where to get the best and most affordable seeds later in this book. You can get a packet of seeds for around six dollars for 20 to 50 seeds. Most gardeners put two seeds in each planter, so you make sure you get at least one to germinate. You can get Better Boy tomato plants at that price for around twenty cents per plant.

You can even get seeds for plants that you can’t get at garden centers for a reasonable cost. Sun gold tomatoes are one of the best eating, most productive, and one of my favorite cherry tomatoes. You can get a packet of twenty seeds for around seven dollars. You get these plants for about seventy cents per plant if you double-seed them.

CHEMICALS USED ON THE SEEDLINGS

When you buy plants from a garden center or big box store, you don’t know what chemicals they are using on the plants. I am not saying they are using something that can hurt you, but if you grow your own and use no chemicals, you know they are excellent and chemical-free.

Most people want their food to be chemical-free and organically grown. I don’t use any chemicals on my plants; I only use organic fertilizer from kelp and fish. It has a strong smell, but it works well. The plants love it.

I love to fish and have caught a lot of fish and eaten them. I have taken fish guts and bones and buried them next to tomato plants, and they grow like they are on steroids. Fish is a fantastic fertilizer for your plants.

ORGANIC GROWN SEEDS

You know what you have if you buy organically grown seeds and grow your plants organically. The definition of organic is ” (of food or farming methods) produced or involving production without the use of chemical fertilizers, pesticides, or other artificial agents:”

TO SEE WHAT YOU CAN GROW FROM A TINY SEED

It’s very satisfying and makes you proud of what you did. Gardening is a learn-as-you-go hobby. You can learn a lot before you start and even after you are gardening from reading. I learn something every day about gardening, from reading or my experience. It is a great feeling when the top of your plant rises above the surface of the soil and grows on its way to becoming a delicious food.

It is very satisfying to take a tiny seed, put it in dirt and water, care for it, and raise it to maturity. Here is a picture of me with a sun gold tomato plant behind me. I am six foot two, and the plant is a good foot taller than me. It all started in my basement four months ago with a tiny seed.

TASTE

The taste and variety of types of tomatoes vary significantly. Many of the best-tasting tomatoes you can’t find in the garden centers. You can’t even find the seeds to grow them in most garden stores. You must buy them from seed companies online to make the best choices with the greatest variety.

Some store-bought veggies have improved over the years, but they still don’t taste like the ones you grow. This is primarily because of freshness. The veggies that ripen on the plant taste better than the ones picked before they are ready. Picking, sorting, ripening, shipping to a distributor, and then shipping to the store where you buy them takes time. Time, since picked, makes a tremendous difference in taste. The longer after picking, the less flavor they have.

VARIETY

You also have only the choice of five to ten types of plants. Most of them don’t have the room to stock all the ones you might want. Do you know that there are around ten thousand varieties of tomatoes around the world? Many of the best varieties you can’t find in the store. Go online and read what people say about different tomatoes, and what they like. You can find varieties that are far better than what you can get from the garden center stores.

I have watched hundreds of YouTube videos about what people like and read thousands of blogs and articles about the best veggies. Then I find them online, get the seeds and try them. One of the best tomatoes you can get is a yellow tomato called Kellogg’s breakfast. I have never seen them for sale in stores. I have never seen the seeds for sale in garden centers or big box stores. You can buy them online, and they are delicious.

I would never have heard of them if I hadn’t researched to see what people think are the best tomatoes. There are many varieties of yellow tomatoes, but you don’t find yellow tomatoes in the produce department in grocery stores, at least not in Minnesota, where I live.

The main reasons to grow your plants from seed

  • Cost
  • You have control of the chemicals that are used to grow your plants.
  • A sense of accomplishment for what you have done.
  • Variety. You have access to growing thousands of different plants that are not available at the garden centers and big box stores.

NOT JUST VEGETABLES

Most of the seeds that gardeners start inside are vegetables, although several vegetables are better started outside. Many flowers grow fast enough that you can plant them from seed in the garden, and they will grow well and fast enough if planted outside in the ground.

Some flowers are better to plant inside, so you can have them bloom sooner than you can if you plant them outside. A great example is Marigolds. I plant marigolds in my garden to attract good bugs and avoid bad ones. Many flowers are suitable to grow in the garden. I planted a tray of marigolds in the house in the early spring, and when I put them in the garden, they bloomed in a week or two.

I also like to start sunflowers inside, so they have a good start when they go outside. One thing I have learned from gardening that I never knew about sunflowers is birds not only eat the seeds but also love to eat the leaves. At least the birds in my yard. I never knew that until I planted sunflowers and observed them eating the leaves. I must be on my toes to get a picture of a full flower before they eat the leaves off it.

Coleuses are another of my favorites. I like to start them inside to give them a head start. As you can see from these that with a head start, they get huge and look fantastic.

Gazanias are another of my favorite flowers to start inside. I started these in the house. I started too many and had to give several to friends and family. They didn’t mind. I started two full forty-cell starter trays and had to replant them twice. The work was worth it if you like beautiful flowers. They come in a variety of colors.

They are all over the yard. I am glad I planted too many. I guess I didn’t plant too many.

  • Morning glories are another flower I started inside. They are slow growing, so giving them a head start is excellent, but they are delicate and beautiful flowers. Here is what they looked like shortly after germinating.
  • Marigolds are easy to grow and easy to start inside. Starting them inside gives them a jump on other plants. They are good to plant near and around vegetables because they are companion plant that attracts good bugs and keeps away bad ones.
  • Basil is another good companion plant. I’m not too fond of the taste of basil, but I like its smell. It is nice to have just for the scent, but it is good to grow with tomatoes. Sweet basil is easy to grow. I started this plant inside also, so it was ready to plant with the tomatoes when I put those in the garden.
  • Johnny jump-ups are a great spring flower to grow from the seed inside. I started the Jonny jump-ups seeds inside, and they were blooming when I put them out in the window boxes, so they were colorful at the start of the garden season. Here they are inside after a couple of weeks.
  • Jonny Jump ups blooming. They bloom for a long time. It probably would have been longer if not for the heat this summer.
  • Here are some marigolds I started inside, so they would bloom soon after being planted outside. They were blooming a couple of weeks after planting outside.

If you are a gardener, you should grow flowers and vegetables. Flowers are important to have in your yard. They attract bees and other good insects that will make your vegetables grow better.

Choosing right plants for your garden

Choosing right plants for your garden

Before social media, people use to take a trip to their local plant nursery over the weekend, spend a good amount of time wandering every corner, making sure that the staff gets annoyed with you asking questions about every other plant you see, and then buying just 2 plants…LOL!! Many still do, at least I know about me.

Over the last decade, because of the internet, there is a tremendous increase in the temptation to buy exotic plants.

Let’s me tell you some real-world secrets here, it’s the Gyan that no one talks about.

Geography

Trust me, the sooner you figure this out, the fewer setbacks you will have with your newly bought plant babies. There are four major and broad climatic conditions in India:

  • Tropical wet
  • Tropical dry
  • Subtropical humid
  • Montane

Tropical wet

  • Mainly found in regions with warm or high temperatures.
  • The tropical wet monsoon climate in Indian coastal states of Kerala, southern Assam, and the Western Ghats,
  • Andaman and Nicobar Islands, and Lakshadweep islands.
  • The above-listed places experience moderate to high- temperature conditions throughout the year.
  • These areas receive an annual rainfall of 2,000 mm ranging from May to November.
  • The driest of the months in these regions range from December to March.

Tropical dry

  • Due to over evaporation and moisture loss, different states of India experience a tropical dry climate.
  • Places like Karnataka, Maharashtra, Tamil Nadu, and Andhra Pradesh (mainly the states lying south of the tropic of Cancer) are tropical dry in nature.
  • All the aforementioned states receive an annual rainfall of 400- 750 mm.
  • From March to May, these areas are massively hot and dry while from October to December, they are comparatively cool with a substantial amount of rainfall.
  • Moreover, parts of western Rajasthan also experience tropical dry climatic conditions.
  • East of the Great Indian desert is the states of Punjab and Haryana.
  • The aforementioned states experience less extreme temperatures as compared to the desert region.
  • The annual rainfall in Punjab and Haryana amounts to around 35-65 cm, comparatively less than the southern parts of India.

Subtropical humid

  • Most of the parts of north and northeast India experience a subtropical climate.
  • These regions experience extreme temperature conditions that are extremely hot in summers and extremely cold in winter.
  • The winter season advances some amount of precipitation in these areas.
  • Due to their immediate proximity to the Himalayan mountains, high wind speeds prevail throughout these regions.
  • Winters are mostly dry with occasional rainfall or snowfall or even thunderstorms in some parts.
  • Receive an annual rainfall of 1000-2500 mm.
  • Average temperatures may range between 24-27 degrees celsius.

Montane

  • Also known as the alpine climate, this type of climate is usually found in the northernmost tip of India.
  • The climatic conditions in this region decrease with elevation (around 5 degrees celsius lowering the temperature after every single km).
  • Most of these areas are landscaped with thick layers of snow. Rainfall under this climatic diversity is variable. It means that no particular record or measurement can be accorded to annual rainfall in this belt.
  • Most of the precipitation occurs during the winter and the spring seasons.
  • Areas south of the Himalayas experience this type of montane climate.
  • The months of December and January receive the maximum snowfall.
  • Elevations beyond 5000 m do not receive rainfall and only snowfall occurs beyond these heights.

The tropical climate is suitable for large varieties of plants but have you ever wondered why Apples grow mostly in an alpine climate like J&K and Himanchal. Because they thrive in such climatic conditions.

Adenium or Desert Rose do better in dry or subtropical climates but may not thrive in a colder region. The same goes for succulents.

Many plants may be perennials in Tropical Wet/Dry climates but they are grown like Annuals in Subtropical Humid climates.

  • Always begin with your local nursery to choose plants, if they are thriving there, there are higher chances that they will survive in your garden.
  • You live in a subtropical region like Madhya Pradesh and it’s November. You visited the nursery and got spellbound by Petunia or other seasonal plants, you bought dozens of them and suddenly your home is like a valley of flowers. But by the beginning of March, the weather becomes so hot that these plants could not survive and your garden became barren. Be careful if you are a new gardener. Seasonal plants are a short affair.
  • If you are tempted to buy a plant online, research well about its growing conditions. I have seen people growing apples in Haryana but that is a very specific variety developed for low lands and is adopted from Israel.

A flower lover

If you are a flower lover and many of us are, you will find that flowering plants attract you a lot. And that’s a trap. Bear with me. You love to have flowering plants in your terrace garden. You want to have flowers in your garden all year round.

  • Some people do better with seasonal flowering plants, it’s easier to buy plants and fill your garden with them till the season lasts and then move on to next season to replay with new plants. Most government parks or municipal parks are maintained all year round like this way.
  • Some people do not like the additional work that comes with every season so they stick to perennials flowering plants like roses, Bougenvelias, hibiscus to name a few.

The trap here is that it is easy to get tempted with flowers be it a nursery or online and you end up buying a seasonal plant that you thought was a perennial. Got it?

Foliage lover

You love 50 shades of green and whatnot. Anything green or variegated, you would love to have it in your garden.

Few things to consider while keeping foliage as your primary plants

  • In nature, there is nothing called indoor plants but it’s just the right environment where these plants adapt and thrive. If you are tempted to buy greenhouse plants from your nursery, make sure you know how to provide the right environment. Even though the Fiddle Leaf fig is popular as a living room plant, I have seen it thriving outdoors in the right environment.
  • Lighting is a key factor for your plants, make sure you consider that.

A succulent/cacti lover

Oh, those little spongy and thorny beauties. Succulents and Cacti are wonderful to keep if you have small spaces. They do well with little care but you can easily kill them.

Some factors to consider when keeping succulents

  • If you want a succulent garden, start slow.
  • Start with semi-succulents hardy plants.

GYF (Grow your food) Person

You love to grow what you eat. Although this topic is beyond the scope of this book, I still have a few things to say to you.

  • If you choose to grow your food, grow only organically otherwise please don’t, it’s not worth it.
  • Start slow with things like herbs, microgreens, a few local veggies, and vines. There are commercial service providers who set up an end-to-end terrace garden for you from seeds to plants but don’t go for it unless you have grown some food on your own.
  • Organic terrace gardening requires a system in place.

Fruit Gardener

The idea of growing fruits in a container is not new but with new plant varieties available that do well in a container, it is now a dream come true for every fruit gardener.

I have a terrace dedicated to just fruit plants but I started with just one plant and that was a mulberry tree. If you want to grow fruits in a container, keep the following things in mind.

  • Some fruit plants do well on their own in containers like mulberries but not all.
  • Look for varieties that are grafted/air-layered/cutting grown or dwarf. They produce fruit faster.
  • Tropical varieties are your best bets.
  • Don’t be fooled by so-called exotic varieties. If grafted or otherwise they simply don’t thrive in non-native climates.
  • Choose bigger containers from the beginning, at least a 20-liter bucket.
  • Fruit plants often need annual pruning during spring, make the best use of cuttings and propagate more plants. If you want sufficient fruits for your family, one plant each fruit will do no good. Therefore keep increasing the count if space permits.
  • Don’t forget to share extra produce with neighbors, friends, and relatives. Remember giving is the only form of receiving.

Protecting Plants from extreme heat – How to protect plants from heat

Protecting Plants from extreme heat

Summers in certain parts of India can be really hot. So hot that even fully grown crops/plants may dry to death in the absence of proper hydration. No wonder why poly-house farming is increasing day by day because it allows controlling a variety of conditions like temperature, light, humidity required for specific crops.

Container-grown plants need protection from heat for various reasons, below are the most important ones as per my experience.

  • Unlike ground, pot sizes may be different. That means their capacity to retains moisture also varies. An 8-12 inch pot kept in full sun during peak summers when the temperature is 40+ degrees Celsius may dry out by the evening.
  • Heatwaves can burn tender leaves, buds, flowers, and stems too.
  • Everyday survival for plants will hamper the overall growth of the plant thereby making it weak for coming seasons.

Remember, while plants love warm/tropical weather, your ultimate goal during extreme summer should be to protect your plant and let them survive through the heat.

How to protect plants from heat

In simple terms, you provide cover to your plants. But is it that simple? Let’s dive into the following options with the pros and cons of each.

  • Relocating plants
  • Garden nets
  • Polyhouse sheets
  • Permanent covers like metal/polycarbonate sheets

Relocating plants

Move your plants to a location that’s cooler & covered. Mostly on the eastern side with some wall covering the west so that your plant doesn’t get exposed to scorching heatwaves. Gets some morning sun.

Pros:

  • You do not need anything but such space. Just shift your plants. It will be a good physical activity for your body.
  • Practically free of cost.

Cons:

  • Works only if you have a small number of plants.
  • Large containers may be difficult to move.
  • Can be tedious with lots of plants.
  • You may not have such a space.
  • It is not a very scalable solution.

HDPE garden nets

Perhaps the most widely used option for protection from heat not just for plants but for houses/animal shelters/stores/patios etc. Also known as green nets, agro nets, shade nets, etc.

These green nets come in all sorts of varieties, not just the quality of the material. These nets are available everywhere especially during early summer they begin to show up on hardware stores/building material stores/general stores/home furnishing stores and off-course garden stores.

Besides the quality of material, the most important characteristic is the amount of sunlight they let through. Usually, they come as 30% 40% 50% 75% 90% 95% (these numbers are usually not standard but you get the idea). The higher the percentage the thicker/denser the weaving pattern therefore lesser the amount of light that passes through.

Use 70% to 80% nets for containers placed on the west/south-west side or exposed to heat all day.

You may use anything between 50%-75% for the east/ northeastern sides of your garden.

If your garden is exposed from the sides, it is vulnerable to heatwaves. In such a case covering the side using the nets helps a lot. Remember your local nursery with the greenhouse made just using these nets?

Pros:

  • Easily available.
  • Pocket friendly.
  • Comes in all sizes. You can buy based on the size you need.
  • Lots of color options these days.
  • Relatively easy to install if you just want the job to get done (read desi Jugad). Can be easily tied with ropes. Even better if a metallic/bamboo base support frame is built.
  • Easy to uninstall and can be reused multiples times if the quality of the material is good.

Cons:

  • So easily available that it’s easy to get confused for good quality.
  • Mostly comes length-wise. Therefore needs more support for covering a broader area.
  • Unless the net has built-in eyelets, it’s not easy to install using ropes. Some sellers can attach them for a small fee.
  • The edges are prone to tear unless reinforced with cotton bands (Does saree fall rings a bell?).
  • Can be blown away with strong winds unless installed on top of a metal/strong bamboo frame.
  • No protection from rains. They form a basin in the center, collecting water. This can subsequently hurt the plants directly below it. However, this happens only if there are prolonged rains and you are using a 90%+ net that does not let the water pass through as it pours. It’s better to remove it just before the rainy season.

Poly-house Sheets

Poly house sheets or greenhouse plastics sheets are large plastic sheets that you may have spotted on a dome-shaped structure (Poly- house) in plain lands. These sheets are made using high-quality plastic and used widely across the world to create poly-house for controlled environment farming.

Pros:

  • They are strong and are often UV-treated. Therefore they protect from the sun and heat for a long time.
  • They protect your plant from rains and harsh winds as well when installed correctly (similar to the dome or supported by structure)
  • They last for years.
  • They come in a variety of colors and transparency to suit the needs of light from transparent, diffused, or colored.

Cons:

  • Not as pocket-friendly as HDPE nets.
  • May need professional help to install.
  • It does not come in small sizes.
  • Not easy to uninstall

Permanent Roofing using metal/polycarbonate sheets

Perhaps the most common form of covering open spaces for creating patios, covered terraces, etc. For terrace gardening it’s easier to weigh their usefulness using pros and cons.

Pros:

  • Strong, lasts forever.
  • Protects from rains too.

Cons:

  • Very expensive as compared to other options
  • Needs professionals to install.
  • Not removable.
  • Not suitable for covering sides. You may have to use poly sheets/nets.

However, if you get a transparent/diffused polycarbonate sheet installed then it serves a better purpose:

  • One-time investment.
  • Get exposure to full sun.
  • Protection from rain.
  • You can easily cover it further with garden nets to protect extra heat exposure.

Important things to consider when using protective covers for your garden.

  • Always keep a higher ceiling of at least 8-10 feet. A low ceiling may defeat the purpose of protection from heat.
  • Keep the area breathable or else it will accumulate too much moisture and may become a breeding ground for pests, fungus, and infections.
  • Start with the least expensive option, to begin with, you will gradually figure out moving forward the option that best suits your needs.
  • Keep an eye on forthcoming weather as soon the spring sets in so that you can plan the installation before it gets too hot for your plants

This might be a bit overwhelming if you are a new terrace gardener but do not worry. As you gain more experience, these organized set of activities will be more and more rewarding with each day.

Is potting mix same as soil? Ingredients of potting mix

Is potting mix same as soil? Ingredients of potting mix

When you refer to the soil in gardening it is often a confusion between a potting mix and gardening soil. So what is a potting mix and why it is not soil and it should not be called so?

Plants grow perfectly well in healthy, well-amended garden soil so why can’t we use the same soil in our containers?

  • One reason is drainage, on the ground in a garden bed gravity acts on the soil from deep underground, allowing excess water to drain down and away from plants’ roots. But in a container, the force of gravity can only pull water to the bottom of the container, where it may or may not find a drain hole to escape.
  • At the same time, water is also drawn upward and is held in the soil by capillary action – the same force that pulls water slightly up the straw as it sits in a cup of water. (Remember ground clearance characteristic of a good container?) And the thinner the straw, the higher the water is pulled.
  • Similarly, water gets pulled upward into the pores of soil – particularly in the tiny pores of our clay-heavy soils – where it’s held. So even with a good drain hole, some of the water just won’t be able to escape in a container filled with garden soil. And too much water in the soil for too long can cut off air circulation around the roots, which can stress or even kill a plant.
  • Another reason is contamination of soil by chemicals, sewage, chemical fertilizers, and pesticides. To understand why a potting mix over garden soil is preferable, understand what a potting mix is.

Potting mix

Like soil, potting mix provides support & nutrition for plants but it is not soil. It’s a growth medium formulated specifically to help plants live happily in pots forming a comfortable ecosystem to support their growth.

Instead of garden soil, commercial potting mixes contain a combination of peat moss or coco peat, composted material like vermicompost, tree bark, cow manure, perlite, and vermiculite – and sometimes a few other components, depending on the mix.

Because of these ingredients, a good potting mix holds just the right amount of moisture while letting the excess drain away easily. It also maintains an airy, “fluffy” structure whether wet or dry. Potting mix just makes container life a lot easier for plants.

Soil less potting mix

In layman’s terms, soil-less potting mix (media) is something that does not have dirt/garden soil/mitti as an ingredient.

Advantages of soil-less potting mix over the soil- based

  • Planters with mixes weigh 50-70% lighter than traditional mixes.
  • Plants grow better because its fluffy and loose nature.
  • Roots grow better and faster as they have more breathing space.
  • Potting mix encourages moisture retention and excess water drainage, roots of the plant breath better.
  • Adding periodic manuring or organic additives like bone meal, mustard cake, neem cake, etc. is easy and efficient. You rarely need hoeing. This can mimic the surface of the soil in the forest thus help build a great ecosystem for the plant to grow.
  • Goes without saying that this mix holds nutrition longer than regular soil-based mixed.
  • To some extent, you can be sure that your mix will have lesser fungal, pest, or insect infestation as normal garden soil/dirt may be contaminated.
  • Re-potting becomes easier and efficient.
  • Removal of weed is easier.

Ingredients of potting mix

There are no rules when it comes to creating a potting mix but certain organic ingredients have been in use for such a long time in gardening for their obvious benefits. Let’s understand why I chose these organic ingredients for my potting mix recipe

1. Vermicompost

Vermicompost (vermicompost, vermiculture) is the product of the decomposition process using various species of worms, usually red wigglers, white worms, and other earthworms, to create a mixture of decomposing vegetable or food waste, bedding materials, and vermicast (worm poop).

  • Vermicompost is a great source of organic carbon and other necessary nutrients for plants.
  • You can easily buy vermicompost these days from your local garden store or nursery.
  • You may also use garden compost or homemade compost as well. Homemade compost is a great way to reduce kitchen waste.

2. Cow manure

  • For decades cow manure (gobar khad in Hindi) has been used extensively in Indian farming methods and gardening because of its ease of availability.
  • Cow manure is made up of digested grass and grain. Cow dung is high in organic materials and rich in nutrients. It contains about 3% nitrogen, 2% phosphorus, and 1% potassium (3-2-1 NPK).
  • Cow manure also contains high levels of ammonia and potentially dangerous pathogens. Therefore it must be aged or composted before its use as cow manure fertilizer.
  • Cow manure is an economic and easily available source of organic carbon, organic matter, and other plant nutrients. Which makes it an excellent ingredient for my potting mix.

3. Coco peat

Coco peat, also known as coir pith. coir fiber pith, coir dust, or simply coir, is made from coconut husks, which are byproducts of other industries that use coconuts.

  • Coco peat does not have any nutritional value but it’s completely organic and has great water holding capacity. It also acts as a neutralizer for heavy mediums like vermicomposting and cow manures.
  • Coco peat is used to add further light-ness, water holding capacity, and conditioning to the potting mix.

Commercially available cocopeat blocks have a higher level of salt contains which may affect the quality of your potting mix and therefore subsequently hinder the growth of your plant, therefore before mixing it into your mix, soak cocopeat overnight in a tub or bucket with a hole in it to wash away salts.

4. Perlite/vermiculite

Perlite is the name of a naturally occurring mineral. A type of volcanic glass, created when the volcanic obsidian glass gets saturated with water over a long time. Natural perlite is dark black or grey colored amorphous glass. For use in gardening, the hard mineral glass needs to be processed into a light, white color, that resembles styrofoam, To complete the transformation, crushed perlite needs to be heated quickly to 900 degrees Celsius.

The process leads to the expansion of the crushed pieces of the mineral between 7 and 16 times their original size and volume, creating that lightweight tiny popcorn.

Advantages of using perlite in your potting mix:

  • Perlite retains its shape even when pressed into the soil.
  • It has a neutral pH level
  • It is non-toxic and natural
  • It is super porous and contains pockets of space inside for air. It can retain some amount of water promoting moisture in the mix and while allowing the rest to drain away

Similar to perlite, Vermiculite is a hydrous phyllosilicate mineral that undergoes significant expansion when heated.

Differences between perlite and vermiculite:

  • Both are naturally occurring mineral additives that have many of the same qualities.
  • Both improve soil quality, especially aiding with aeration.
  • Perlite is known to be more effective at aerating soil.
  • Vermiculite is better at retaining moisture.
  • Perlite is somewhat cheaper than vermiculite.

Neem cake powder

Neem cake is organic manure is a bio product obtained in the process of cold pressing of neem tree fruit and kernels, and the solvent extraction process for neem oil cake.

The AZADIRACHTIN content in neem cake organic manure protects plant roots from various fungi & pests and also works as a soil conditioner. Due to this Neem cakes have been reported to have been (a) antifeedant (b) attractant (c) repellent (d) insecticide (e) nematicide (f) growth disruptor and (g) antimicrobial.

Neem cake manure performs the dual function of both fertilizer and pesticides.

Advantages of using Neem Cake Powder in your potting mix:

  • Protects the root from various fungal infections.
  • Neem cake improves the organic matter content of the soil, helping improve soil texture, water retention capacity, and soil aeration for better root development.
  • Neem cake manure can also reduce alkalinity in the soil by producing organic acids when mixed with the soil hence ensure the fertility of the soil. It’s a great acidity enhancer for plants needing acidic soils.

Bone meal powder

Bone meal is a mixture of finely and coarsely ground animal bones and slaughterhouse waste products. Bone meal is primarily used as a source of phosphorus, calcium, and protein.

As a fertilizer, the N-P-K (Nitrogen-Phosphorus-Potassium) ratio of bone meal can vary greatly, depending on the source. From a low of 3-15-0 to as high as 2-22-0. , though some steamed bone meals have N- P-Ks of 1-13-0.

IMPORTANT: According to recent Colorado State University research, plants can only get phosphorus from bone meal if the soil pH is below 7.0 (acidic soil). That is because in alkaline soil high calcium content will bind to phosphorus and create calcium-phosphate that is unavailable to the plant. Therefore adjusting bone meal quantity for potting mix specific to plants is desirable.

Another thing to note is that while buying bone meal as powder, make sure that it is sterilized/steamed. This is important for proper storage and to avoid the development of fungus on the powder itself.

Mustard cake powder

Like Neem Cake, the mustard cake is also a byproduct obtained from mustard seeds after extracting the oil from the seeds. When mixed as an additive to potting mix, it adds to essential both macro-nutrients and micro-nutrients.

Potting mix recipe example

Here’s my tried and tested potting mix recipe.

  • 30% Vermicompost
  • 30% Cow Manure
  • 20% Cocopeat (Washed)
  • 10-15% Perlite/Vermiculite
  • 10% Additive (Mix of neem cake powder + bone-meal powder + mustard cake powder)

Mix all the ingredients and if possible put them in a sealed large barrel or bag and leave them to brew for about a week. This is optional but I have experienced that it gives good results.

IMPORTANT: While this recipe works for a large variety of plants I can’t say that it is a universal mix. For example, some plants need more moisture, while some don’t. Adjustment in cocopeat and/or perlite is advisable for particular plants.

How to measure potting mix proportions

Proportions are as simple as they sound but they may often confuse. Here are two simple methods to get good accurate proportions:

By Weight:

If you have a weighing machine, following a recipe becomes much simple for example 300g vermicompost, 300g cow manure, 200-gram cocopeat, 100gram perlite, 30g+30g+30g (neem cake + bonemeal + mustard cake powder). This would make a 1 kg potting mix.

By size:

Take a small container or mug now measure as 3 containers of vermicompost, 3 containers of cow manure, and so on. Now add a handful of each additive neem cake powder etc in one container. You get the idea. Right? A bit of approximation here but do not worry it will work just fine.

to add bone meal or not…

When I first made this potting mix I added bone meal powder as aforementioned however once I had learned that bone meal is advantageous only when the potting mix is acidic, I stopped adding it to the primary mixture, instead, once my mix was ready and if I am growing any plant that loves acidic mix I add bone meal to that.

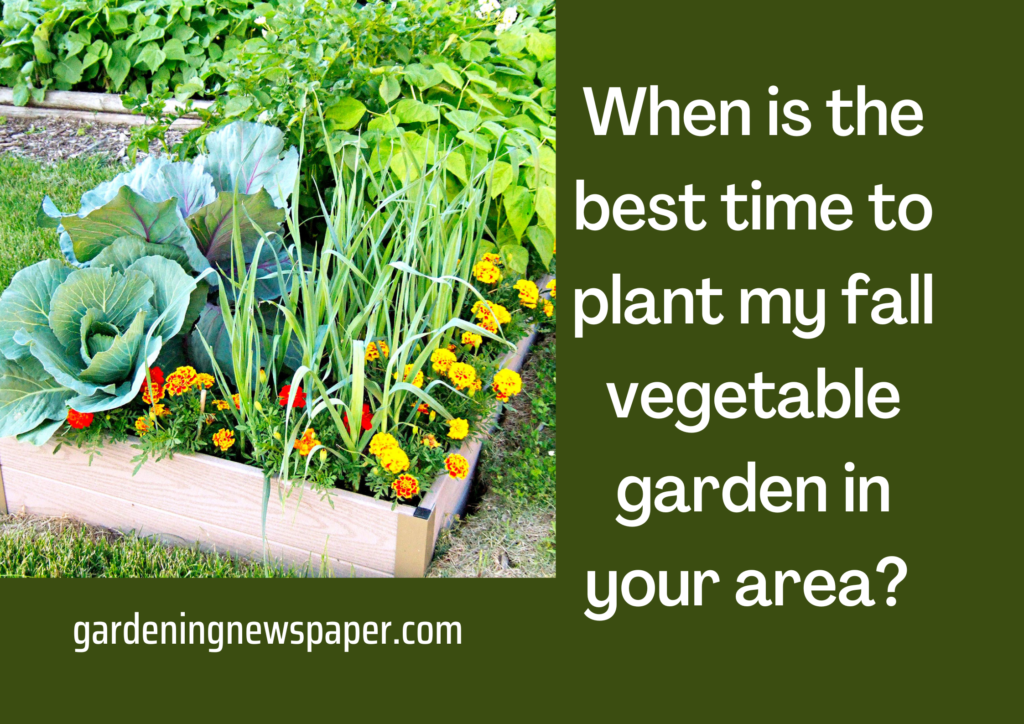
When is the best time to plant my fall vegetable garden in your area? 

Fall Gardening Tips: When is the best time to plant my fall vegetable garden in your area?

When is the best time to plant my fall vegetable garden in your area? 

People tend to view spring and early summer as the best times to tend to their garden. In reality, Fall gardening is the most pleasant.

There is nothing better than being outside in the cool air and when the leaves are changing. You’d be amazed at the variety of things you can plant and harvest once the seasons change.

If you have already packed away your shears, trowels, and gloves for the season, you can grab them from the shed and spend some more time in your favorite spot. There are so many things you could do before the winter months to make the most of your time outdoors.

We are now in the dog days, no matter how carefully you staked your tomatoes and pulled weeds. The veggie garden plants will either have bolted or succumbed to various insects and diseases or been eaten or eaten by the deer. They are coming, even if they haven’t yet. The gradual decline in spring and summer vegetable plantings does not have to be the end of the food gardening season. Many people overlook the importance of planting now for the fall harvest. You can expect a 120-day cycle if you start in August and work your way forward.

What plants do well in a fall-garden?

There are many vegetables that you can grow in your garden before the winter chill hits. Growing A Greener World claims that cooler temperatures actually repel pests and other diseases which can plague summer gardens.

Even though they may require some protection from cold wintry frost damage, most plants can be grown in the fall. They just might have different growing instructions for the cooler months.

  • When planning the fall harvest most people go right to the cabbages, kales, and other frost/freeze tolerant crops — the so-called cole crops.
  • There are many frost-tolerant crops that you can plant right away and still get a good harvest.
  • Bush beans are a great choice for fall planting, as they harvest earlier than pole beans and produce more.
  • Sweet corn is another option for early August that many people are surprised by. Many of us will stand on our heads and ask the garden gods for sweet corn to be planted as soon as possible. You have to be the first one to harvest some ears. The early maturing varieties are worth trying right away. Sweet corn can be sown in warm, sunny summer soil and harvested as soon as October, with maturation times as short as 58 to 60 days.
  • There are also obvious choices. You can grow root crops like carrots, radishes, and turnips late in the season.
  • You can plant many vegetables late in the summer or early in the autumn. Arugula is a type of lettuce that grows well. Even in cold soil, it germinates in a matter of weeks.
  • For a late fall harvest, both broccoli and cauliflower can be planted at the end of August or early September.
    • Brussels sprouts require warm weather in order to germinate. However, they are super resilient so they will be fine once they sprout.
  • You can still plant many vegetables throughout the year, even if temperatures drop. These include carrots which are slow growing but great for fall gardening. There’s also garlic and onions. You can easily grow garlic, but you will need to research which kind of onions you should plant based on your location.
  • You can also take your shot by planting fall kohlrabi and Swiss chard.

What crops should you harvest in the fall?

If you have been gardening for some time, you know that fall harvest is the best. However, if you harvest in fall, it means you must plant them somewhere in the summer.

  • June and July are the best months to plant fall harvest crops. These include parsnips, celeriac, winter squash, leeks, pumpkins, and rutabagas. They should be sown early as they can take up to 120 days for them to germinate, grow and harvest.
  • In the later part of the summer, during July and August, you can plant vegetables for the fall harvest. These include turnips, endives, and winter radishes. Each one of these crops takes up to 80 days before they are fully grown and ready for harvest.
  • Finally, if you have planted any of these items in August, you will be able to harvest them this fall: lettuce, mesclun greens, and mustards.

Although fall may be almost here, that doesn’t necessarily mean the end of the gardening season. It’s actually just the beginning for many.

What are cole crops? When should I plant them and what do they look like?

The cole crops are, however, the most popular fall vegetables.

  • All of these vegetables, including cabbage, broccoli, Brussels sprouts, and kohlrabi, love cooler temperatures and are tolerant to light freeze exposure.
  • They are all great for seeding. The cole crops have a smaller fan base than the regal tomatoes and other summer garden stars.
  • Brussels sprouts are similar to the way partially fermented balsawood might taste.

The late- and early-season cole crops. What is the origin of cole? And why are these pungently flavored and aroma-ed crops being grown under?

The Latin “caulis”, which roughly translates to “stem or stalk”, is most commonly used for plants with thickened stalks. Many brassicas go to great lengths to make sure this happens. This “caulis” has evolved into the German word cole, which is the name for cabbage. Have you ever tried coleslaw?

What is a cold crop?

This term is used to describe any crop that prefers cooler weather both true cole and non-brassicas such as lettuce and peas.

The fall crops are worth trying, no matter how you view them or whether you love kohlrabi as much as summer tomatoes. It’s so much better than trying to get that last tomato from a dying vine!

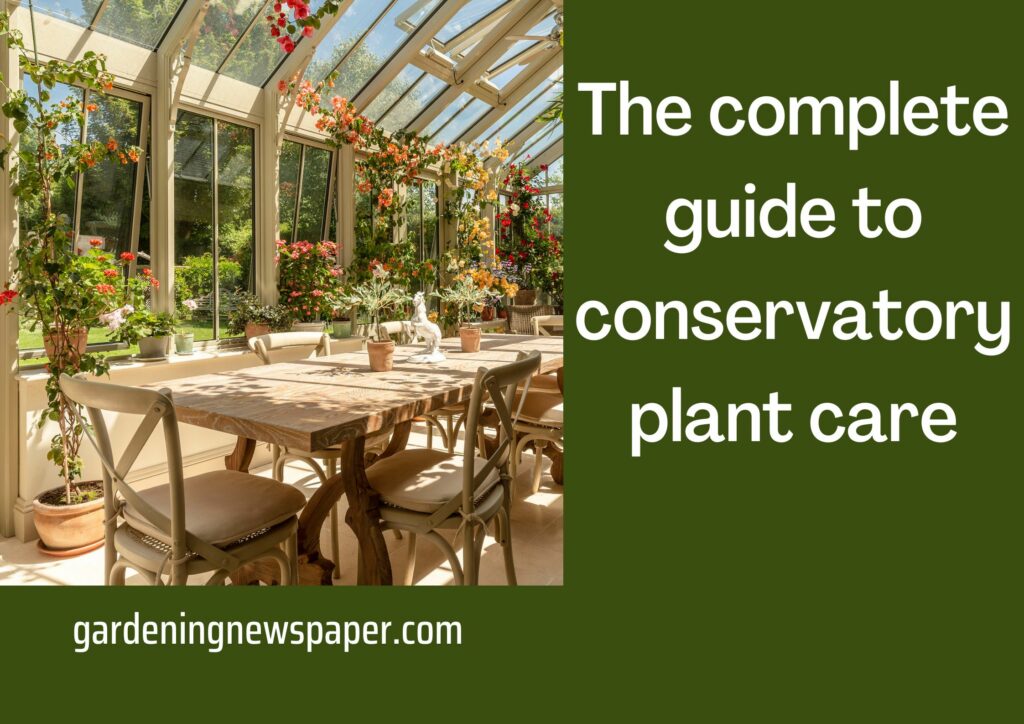
The complete guide to conservatory plant care

The complete guide to conservatory plant care

These top tips will help you take care of your conservatory plants, from choosing the right plants to nurturing them, to how to do it.

The complete guide to conservatory plant care

Are you blessed with a well-built conservatory?

There are many ways to make any room in your home an extension of your house. This guide will show you how to enhance your conservatory by adding beautiful greenery.

Make your space work

Our desire to live with green plants goes back to Victorian greenhouses. Glass buildings were traditionally used to preserve rare species. Today, we want to recreate the beauty, romance, color, and fragrance that you feel when you inhale the warm, humid atmosphere of a greenhouse. We can explore our desire to “grow” in a variety of places, including a conservatory, orangery or pool room, porch, or even simple windowsills.

There are subtle differences in the environments each building can provide. Ask yourself what you want to achieve, whether it is a modern statement or a lush green oasis. You should also be honest about how much light, shade, heat, winter, humidity, attention, and to care you can give your plants. Also, where would you like them to be located and why?

  • Because the direction of your space is important, it will be necessary to determine which direction the light, heat, and cold are experienced by the plants.
  • Conservatories are most effective if they are not overheated in summer.
    • Therefore, south-facing conservatories need plenty of ventilation and external blinds that can easily be pulled down in bright weather, from April to September.
    • North-facing conservatories work better in summer but must be able to withstand low light in winter.
  • It’s not just about the aspect of the house, but also its size. When it comes to conservatories, volume matters – the larger the volume, the better the conditions. This means that there are fewer extremes or fluctuations in temperature which, in turn, results in happier plants.

Choose the right plants

Start with plants that are tolerant of sunlight if you’re a complete beginner. Succulents and cacti are good for beginners because they love the sun and only require occasional watering. If they’re happy enough, they might even produce a few flowers.

Finding the right plants for your space can be a challenge. However, here are top choices for conservatory plants:

conservatory plants list

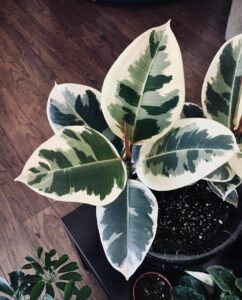
  • Ficus Tineke
  • Ficus Abidjian
  • Shangri-La Philodendron
  • Ginny Mini Monstera
  • Blue Star Fern
  • Raindrop Peperomia
  • Goldfinger(tm) Hardy Schefflera
  • Begonias Tectonic ™.
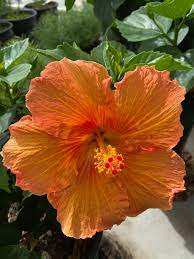
  • Jazzy Jewel ™ Hibiscus

Jazzy Jewel (tm) Hibiscus

If your goal is to find something exotic and colorful for special design elements, citrus trees will produce more fruit when placed in a sunny area. They will also be happier indoors when it’s warm. Fiddle leaf figs are a statement plant that loves light. However, they need to be kept at a steady temperature because they can be sensitive.

A rare variegated monstera is a truly special plant. However, it will thrive in bright sunlight. In winter, however, keep it out of cold drafts as they can cause damage to their delicate leaves.

Every space that I have seen in the past 30 years has been unique. Creating height, width and a waterfall full of flowers and foliage is a challenge in any building. But there’s always a way.

  • The type of building and the design will determine the plants that you can grow, and where they are from.
  • The climate and light levels of a garden room with a solid roof and glazed sides (windows or doors) are often conducive to growing tropical plants, also known as houseplants.
  • These plants like to live under the shade of a forest canopy, which blocks sunlight and provides a similar temperature year-round.
  • Certain groups of ornamental plant species like the Mediterranean ones that love a glass roof with no shade in winter and a little shade during the summer. This climate is also appreciated by South American plants, but they prefer a little more shade in the summer. To thrive, South African species need full sun all year.

Care for conservatory plants

You’ve chosen your favorite plants and they look great. But how do you care for them?

  • Light can make any space more attractive for plants all year. Keep your windows clean and trim any shade-loving plants. If you don’t have an extremely sunny area, adding artificial light or mirrors can help.
  • While light is great, heat can be dangerous so limit heat stress in summer and place plants outside in the shade.
  • Avoid overwatering in winter when the light levels are low. If you want to keep your plants healthy and happy, repot every 2 years with potting compost that is suitable for indoor plants.
  • You can also use liquid feed every fortnight if the plants are in summer. You can also check your plants for pests daily or more often to introduce biological controls.
  • Even the most hardy plants prefer stable temperatures. Keep them away from cold drafts and warm radiators in winter. Your plant will also be comfortable if it is comfortable in the room.

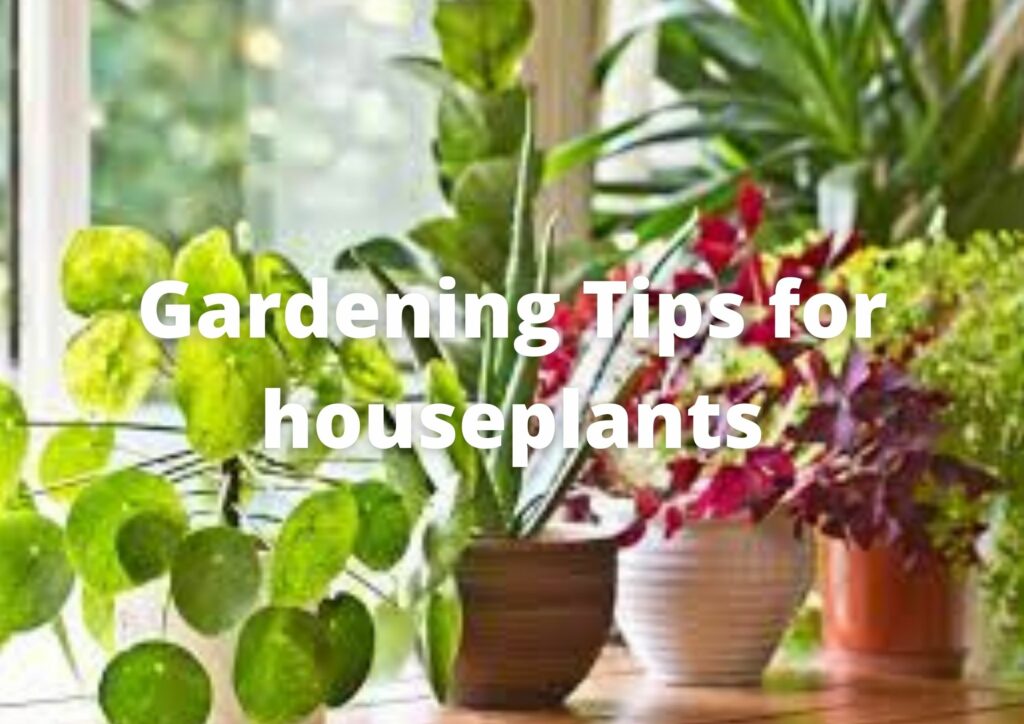
Gardening Tips for houseplants

Gardening Tips for houseplants

Gardening Tips for houseplants

1. Watering your Houseplants.

Each houseplant has a different watering requirement depending on its growth and the season, different plant care. Watering your houseplants should be done as needed, not according to a schedule. Plants that have been grown in well-drained soil should be watered only when the soil is dry to the top. Cacti and succulents require less water, while flowering plants need more. Houseplant death is most commonly caused by overwatering. It’s better not to know how much water to give to your houseplants.

2. Fertilize your houseplants regularly

There is no easy way to determine how much fertilizer to apply. It all depends on the plant’s growth rate, age, and time of the year. Spring and summer are the best times to fertilize houseplants. Most houseplants won’t require much fertilizer during the shorter days of winter and fall. To determine how much food you should use, refer to the label.

Overwatering is the same as overwatering. It’s important not to fertilize your houseplants too often. Overfeeding your houseplants can cause damage to their roots and slow down their growth. Use a fertilizer with three numbers (nitrogen, phosphorus, and potassium) that are fairly equal for flowering varieties. A high nitrogen content can cause the plant to produce a lot of leaves but not many flowers.

3. Propagate houseplants

Many houseplants can be propagated using division or other methods every once in a while. It can be used to revive an old plant or encourage new growth. It’s also an economical way to grow more plants from the ones you already own.

Bromeliads and other houseplants like bromeliads can send up new shoots at their base or offsets. These are easy to divide and place in new pots. Houseplants that climb, such as pothos and philodendron, form new roots when their stems contact the soil. This makes them a good candidate for cuttings. You can also root African violets using a single leaf. Just soak the stem in water for a few weeks.

Some houseplants like strawberry begonia and spider plants reproduce by sending runners that have new plantlets at their ends. Rooting these plants is easy. You just need to soak them in water for a few more days to allow them to develop roots. Then you can plant them in the soil.

4. Repot overgrown houseplants

Are you unsure if your houseplants require repotting? You should inspect the root systems. It is possible to repot the pot if the roots are growing into the container. You can transfer the plant to a larger container if it has outgrown its current pot. You can keep the plant in the same pot by removing some roots using a sharp knife. Then, replant the plant into the container with fresh potting soil.

It’s a great time to repot houseplants and also to split those with multiple stems in order to make new plants. Repotting houseplants is best done in spring and summer.

5. Get rid of dust from plants

Regular cleaning is a must for all houseplants. If your plants have hairy leaves, you can wash them with room-temperature water. Dust builds up on the leaves. You can also gently wipe off the dust from smooth leaves with a cloth. This will not only improve the appearance of your plant but also help it absorb more light.

6. Prune and pinch back houseplants

While you can prune at any time of year, fall is the best time to get out your pruning tools after a long summer of growth. Pruning houseplants is a great way to improve their appearance and prevent them from growing too big. Rejuvenating overgrown houseplants is similar to propagating.

  • It’s important to cut them back to 4 to 6 inches in height. This is a great way to encourage new growth in trailing plants like pothos and Swedish ivy that have fallen at their base.
  • Cut just above the set of side shoots or buds on the stem you wish to trim back. These are the places where new growth will begin.
  • To prevent the problem from spreading, you should also remove dead or diseased stems and leaves.

Pinching is the act of removing the stem tips with your fingers or pruners. To encourage side buds to grow, pinch off the tips of the stems and the topmost leaves. Regular pinching is a good way to encourage rapid growth.

7. Take out dying leaves and deadhead flowers

To encourage more flowers and prevent diseases, remove faded blooms from your plants. Make sure you remove any yellow, brown, or withered foliage while you are at it. To make a clean cut, use a narrow-bladed hand pruner or sharp scissors. To prevent spreading pests or diseases, it’s a good idea for your pruner blades to be wiped with rubbing alcohol before you move on to another plant.

8. Controlling Insect Pests

Many insects are known to attack houseplants. The most common soft-bodied pests, such as spider mites and aphids, can be treated with insecticidal soap. It is easy to use and effective. The hose can also be used to forcefully spray the pest population. Rub alcohol with a cotton ball on waxy insects such as mealybugs and scale.

Be consistent, regardless of what treatment you choose. You may need to treat plants every other week to get rid of fast-reproducing pests like aphids or spider mites.

Fungus gnats, tiny black flies, are common pests of houseplants. They often confuse fruit flies with them. When plants are overwatered, you will often see fungus gnats in large numbers. You should allow the soil to dry between waterings. Also, make sure you remove any dead leaves from the soil surface. You may be able to repot your plant in fresh soil and a new container in extreme cases.