Growing Zucchini in 5 Gallon Buckets – Complete Guide to Grow Zucchini

Growing Zucchini in 5 Gallon Buckets – Complete Guide to Grow Zucchini

Growing Zucchini in 5 Gallon Buckets

Zucchini roots are deep and require a container that is at least 16 inches deep and 12 inches wide. Therefore, a five gallon bucket is a good choice as it meets these needs.

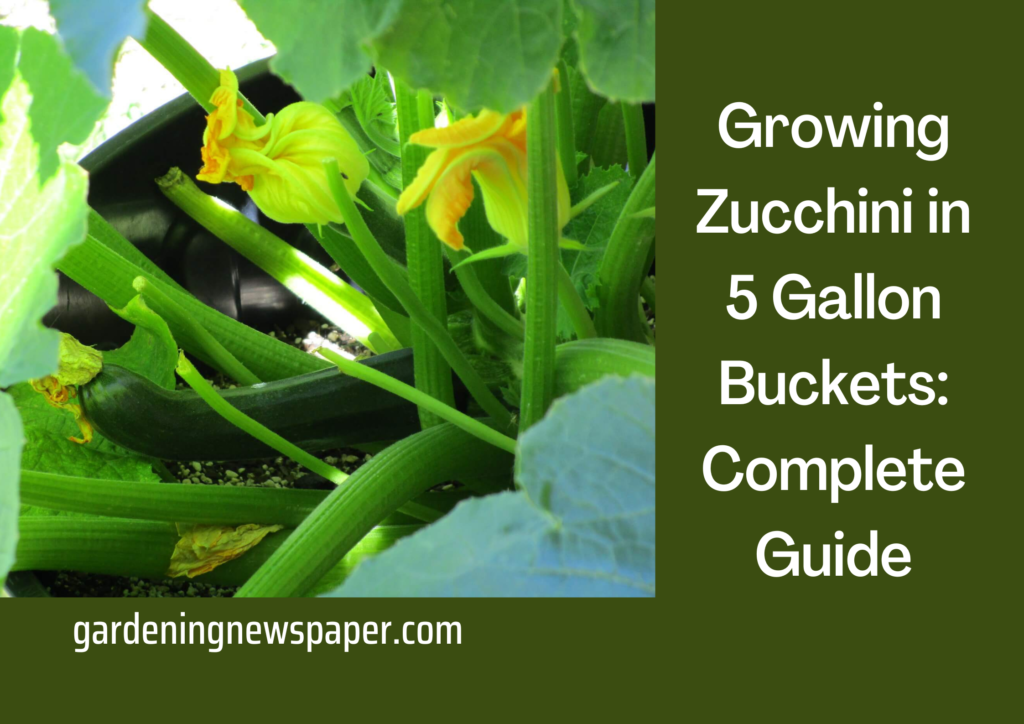
It is recommended growing zucchini in 5 gallon buckets. If you try to grow too many plants together, they will compete for nutrients and resources that will stunt their growth. Lightweight, durable, and inexpensive.

The plastic bucket also doesn’t lose moisture as quickly as things like terracotta. Zucchini is an excellent vegetable to grow for gardeners in small spaces and a great plant to grow in a 5-gallon bucket. But that doesn’t mean the plant can’t take advantage of gardeners’ support. If you’re thinking about growing zucchini, give it a go.

Growing zucchini in 5 gallon buckets

Growing Zucchini in containers

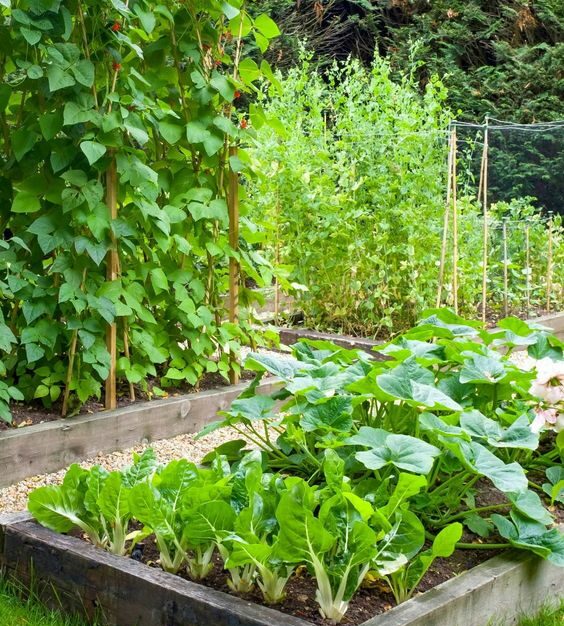
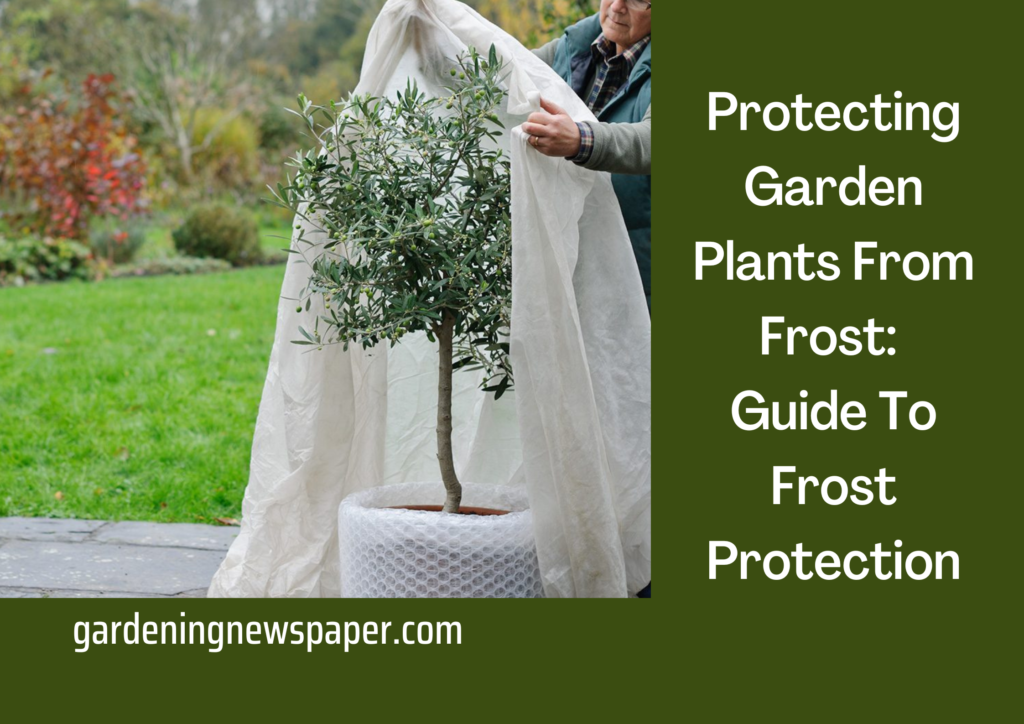
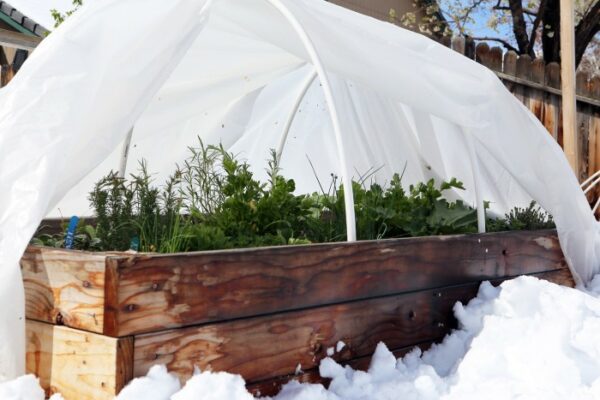
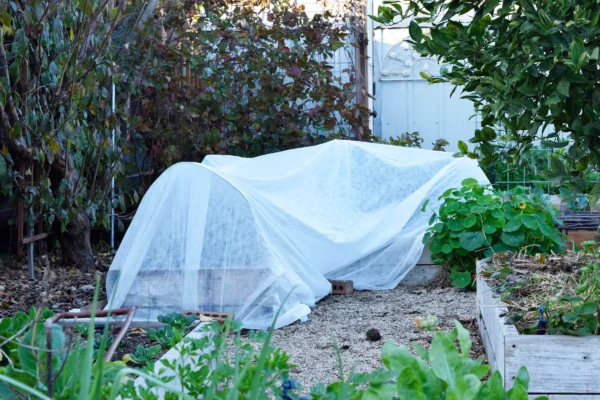
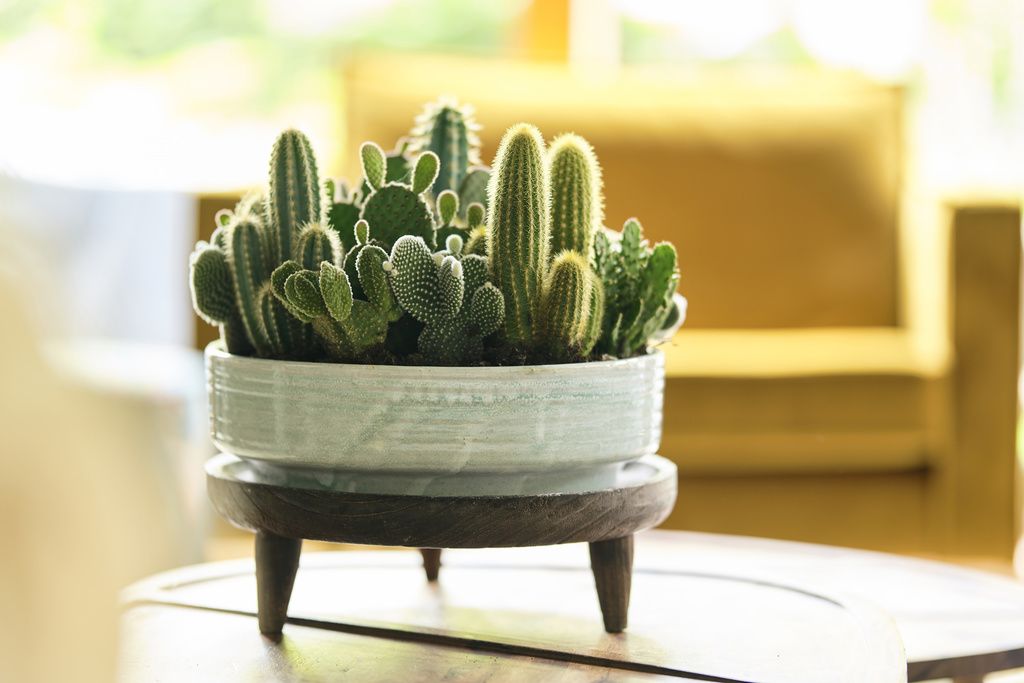
  • Container gardening or cultivating plants in containers or buckets is on the rise these days. It allows you to grow a wide variety of vegetables and fruits in a small space and gives you some control over your plant’s environment. Giving them the right amount of sunlight, protecting them from frigid winters, etc. can help them grow.
  • After all, zucchini can be planted in a 5-gallon bucket as long as it gives it what it needs to grow and produce it. Finally, you can customize or paint the container to blend in with the landscape or show your artistic skills and creativity. Sprinkle it, decorate it, and enjoy it as it is. Before planting zucchini, always use a “clean” 5-gallon bucket or a bucket that has not been used to store chemicals or toxic substances.

Growing Zucchini in containers

When and How to Plant Zucchinis in Gallon Bucket with Soil?

  • The best time to plant zucchini is spring when temperatures are consistently warm. Specifically, zucchini seeds need at least 70 degrees Fahrenheit to germinate and germinate. If you have the opportunity, especially if you’re new to container gardening or growing zucchini, choose compact, easy-to-grow strains such as Jackpot or Eight Ball. Zucchini seeds are planted 2.5 cm deep and watered immediately.
  • Seeds germinate in 5-10 days, and real leaves emerge a week later. It’s important to keep the soil moist, but not too wet. Spray or water can be used from below to prevent seeds from getting buried or washed away. When the seedlings are about 20-25 cm long, select the strongest and healthiest seedlings and discard the rest.
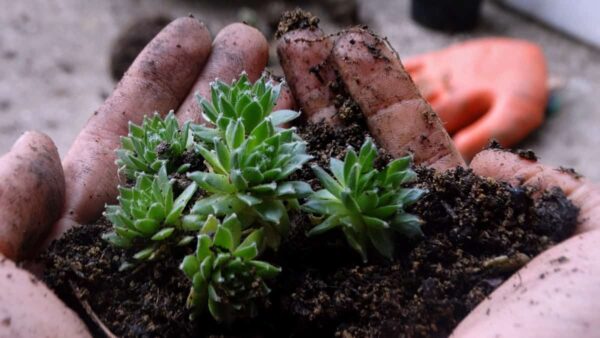
  • A good rule of thumb is to plant 1-3 zucchini seedlings about 3-5 inches apart per 5-gallon bucket. The recommended medium is potting soil mixed with organic matter such as fine bark, peat, and compost. You have to use sand or vermiculite to make well-drained and aerated soil. It is not recommended to use pure garden soil as it is compact and transmits pests and unwanted organisms.

When and How to Plant Zucchini in Containers
How to Care for Zucchini?

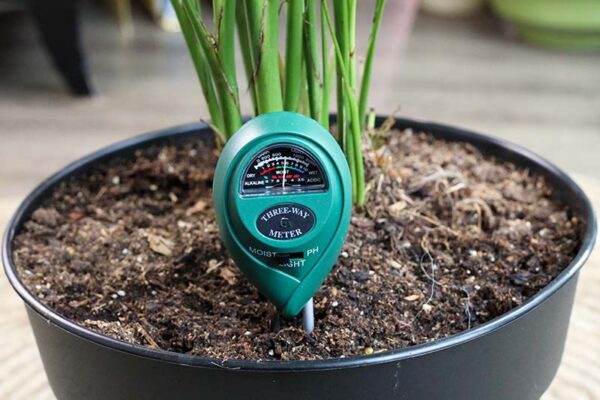
  • A 5-gallon bucket needs at least 6 hours of direct sunlight exposure. Moreover, regular watering is required, especially in hot weather or during the summer. You must keep the soil moist to stave off root rot and other diseases, but you must be careful not to overwater the plant. Feel the soil’s surface to see if it needs to be watered. If it’s too moist, you can usually leave it for a day or two. To ensure that it can be harvested when it’s ready, it should now be carefully monitored.
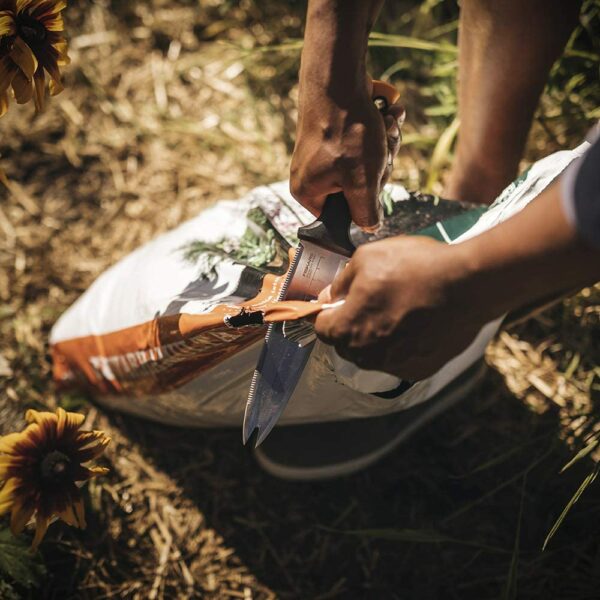
  • When the zucchini reaches 5 to 7 inches long and dark green in color, it is typically ready to be picked. When it is set, use sharp scissors or pruning shears to cut the stem just an inch or two away from the person. It is not advisable to handle or turn it because doing so will definitely ruin it.

What You Need to Grow Zucchini in a 5-Gallon Bucket?

There are a few things you need to start planting zucchini. Here’s a list of what you’ll need to grow this delicious vegetable.

  • 5 Gallon Buckets – The number of buckets you need depends on how much zucchini you plan to grow.
  • Planting Medium – Regular soil does not work well when growing zucchini in containers. Instead, you want a mixture of peat, compost, perlite, and fine bark.
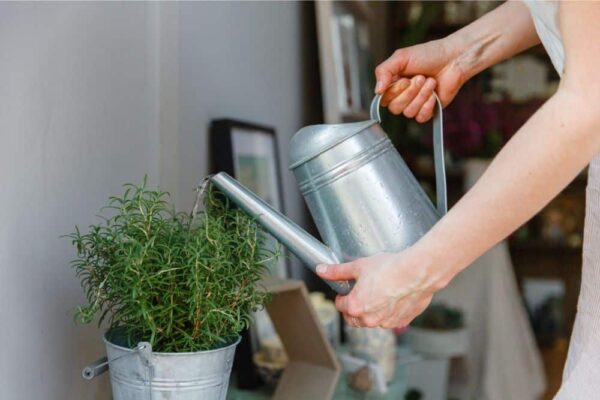
  • Watering Method – Whether you water your zucchini with a watering can, hose, or some other method, you should have a suitable watering method for your plants.
  • Seeds – Requires 1-6 seeds per bucket.
  • Fertilizer or Compost – You need something to keep the soil rich in nutrients.
  • Support – Not all zucchini plants need support. However, when deciding which zucchini variety needs support, something like a tomato cage will work.

Best Zucchini Varieties to Grow in 5 Gallon Buckets

There are several varieties of zucchini that can be grown in buckets. Let’s take a glance at some of these different varieties.

Geode

Geode Zucchini are small, round, light green zucchini that are perfect for stuffing. This plant grows only 1.5 feet tall and takes only 41 to 50 days to mature.

Best Zucchini Varieties to Grow in 5 Gallon Buckets
Eight Balls

Eight Ball Zucchini are round and dark green. It itself is only 3 inches and the plant grows 24 to 30 inches. This zucchini takes 55 days to mature.


Silverbush

This is an attractive striped zucchini. It got its name from its beautiful silver-green leaves. These zucchinis are best harvested when they are 6 to 8 inches or less in length.

Buckingham Patio

The Buckingham Patio zucchini is a variety made for containers. The peel is golden. This type of zucchini is best harvested when it is 6 to 7 inches long.

Container Care

  • Water plants well, but do not overwater. In the heat of summer, potted plants dry out faster than soil, so check the container daily. Poke your finger into the soil and water it when it is about 2cm dry.
  • You should use drip irrigation here so that you can be assured of watering and nutrients also.
  • Once the flowers have bloomed, fertilize again. Apply a 10-10-10 (NPK) fertilizer every two weeks according to the manufacturer’s instructions.
  • Instead of the granular fertilizer originally used, use a liquid fertilizer that can be applied with a watering can or sprayer so as not to disturb the roots and flowers of the plant. For more, you can use diluted fish emulsion and spray it on the leaves of the plant. Soft sunlight is shining in the background.
  • Harvest when the fruit is about half its ripe size – This depends on the species of zucchini. This will encourage the plant to continue growing and producing more fruit. In my opinion, young zucchini is the most delicious. If left on the plant for too long, the skin and seeds of the fruit will begin to harden and the overall taste will be poor. As the plant grows, it can have problems.

Common Zucchini Plants Diseases

There are only a handful of diseases to watch out for but remember to check your plants regularly to avoid problems.

Zucchini Plant Bacterial Wilt

Zucchini Plant Bacterial Wilt

  • Bacterial species Erwinia Tracheophyta cause this bacterial wilt, cucumber beetles are responsible for the transmission of this virus, so the first line of defense is to keep these pests away. The first thing you’ll notice is that the plants will begin to die.
  • Once the plant has it, there’s not much you can do. Do not destroy the zucchini plant, use it for composting. We may face this problem next year as well. You also need to disinfect the pots and pour potting soil. You should start next year with new soil.

Blossom End Rot in Zucchini

Blossom End Rot in Zucchini

  • Uneven watering and calcium deficiency cause blossoms to end rot. Common in tomatoes, you’ll know it’s there when the fruit turns into a dark, pitted ulcer.
  • Ensures consistent and adequate amounts of water as plants grow. There is no cure for this disease, and adding calcium to the soil will not cure it once it occurs. increase.
  • The disease usually occurs during the rainy season at the end of summer, when powdery mildew flourishes in this weather, resulting in hot and humid weather.
  • Twice a week, you should spray the plants with equal amounts of milk and water and a few drops of dish soap. You can also spray neem oil twice a week or use an organic fungicide containing potassium bicarbonate.

Growing zucchini in 5 gallon bucket conclusion

You can grow zucchini by following these tips and the gardeners can get benefit by growing zuccini as well as it can grow in limited space.

Indoor Plants with Striped Leaves: Characteristics of Striped Houseplants Leaf

Indoor Plants with Striped Leaves: Characteristics of Striped Houseplants Leaf

Indoor Plants with Striped Leaves: Characteristics of Striped Houseplants Leaf

Striped indoor plants immensely add astounding beauty to the garden. Naturally, there are many stunning plants with stunning foliage, such as striped houseplants. House plants with striped foliage make attractive additions to your indoor garden. Beginner Choose from a variety of striped houseplants, including some that are perfect for gardeners.

These indoor striped leaf plants not only help purify the air and produce oxygen, but they are also attractive decorative options for your home.

It also immerses you in nature and brings you relaxation from everyday chores. Therefore, having plants in your surroundings is a must. Striped foliage adds a touch of sophistication to the environment and transforms the overall look of your home. In addition, plants with multi-striped leaves do not require direct sunlight, stay fresh and maintain a greenish appearance with less maintenance. You can take it to your home or garden without worry.

Indoor with varicolored leaves are some of the most spectacular and remarkable plants which thrive the magnificence at home. They feature various shades of green, white, red, and other colors. The variety of colors will astound you. Some brightly colored houseplants are very popular due to their rarity and can be expensive.

There are many, but there are also many that are budget-friendly and can add just enough charm to your indoor garden.

Here are some listed indoor plants, it brings immense beauty to your home.

1. Chlorophytum cosmosum

  • Also known as spider plant.
  • The spider plant gets its name from the new branches that have long green and white striped leaves and hang from the plant like little spiders.
  • An easy-care houseplant that tolerates a wide variety of conditions and is perfect for those just starting out in gardening.

2. Codiaeum variegatum

  • It is one of the favorite houseplants of gardeners.
  • The leaves variegated in colors such as yellow, pink, orange, red, and green are beautiful.
  • This species of plant leaves needs lots of bright light, warmth, humidity, and regular misting, especially in hot weather.
  • You should carefully move this plant because unknowingly you could strip the leaves of the plant.

3. Fittonia albivenis

  • Moderate Indirect Sun exposure is recommended.
  • Common name Nerve plant,
  •  Well, Drained Potting Soil is useful and necessary for this genus.
  • Additionally, the leaves of this plant have dark green, white, or pink strikes. It enhances its beauty.
  • Patterned and perfect for enriching your home or garden.
  • This plant will keep fresh in temperatures between 60°C and 80°C.
  • With green or white-striped leaves, this plant can outlast perfectly well in low light, but constant exposure to sunlight will damage the leaf color and prevent the leaves from turning brown.

4. Cordyline Minalis

  • Bright indirect light sun exposure is good for this genus.
  • Sand and peat-based mixture soil is necessary for this genus.
  • This plant has a common name which is cabbage as the shape of its leaves is made of a cabbage-like structure.
  • The leaves of this plant are striped in pink, purple, brown, and green.
  • Dressing your home for gatherings and special occasions with this plant is supportive as its foliage transforms the entire environment.
  • This striped houseplant grows in bright, albeit indirect, sunlight. Fluoridated water can cause the leaf tips to turn brown, so you have to use rain, distilled, or filtered water for this plant. These plants have some toxic effects on pets that’s why you have to keep them out of reach.

5. Aphelandra squarrosa

  • Dark green leaves with bright white veins as foliage
  • The zebra plant displays stunning bright white stripes pulsing with dark green foliage.
  • This beautiful flower produces attractive spikes of long-lasting yellow flowers. Brazilian zebras enjoyed as indoors all year round.


6. Calathea ornata

  • Pinstripe Calathea is the common name.
  • Dark green foliage with white pinstripes enhances its striking beauty.
  • The broad, almond-shaped dark green leaves of this Calathea plant are lined with bright white.
  • Like other Calathea, the pinstripes are green and white on the upper surface of the leaves and burgundy underneath, a very exciting tricolor.
  • This native African Calathea ornata attains up to two feet tall.


7. Haworthiopsis Attenuata

  • The white-striped leaves are the main attraction of this house plant.
  • Zebra cacti plant is very easy to care for.
  • They will grow into beautiful plants even with little care.
  • Native to South Africa, these small succulent needs plenty of sun and warmth to thrive. Gardeners don’t have to worry about moisture with these plants. Like many other succulents, the zebra cactus needs watering sparingly as it is very sensitive to overwatering and leaf rot.
  • These plants are non-toxic, making them safe for children and pets who may want to nibble on the leaves.

8. Watermelon peperomia

  • Green iridescent silvery streaks, teardrop-shaped leaves.
  • Stripe lovers love the beautiful green leaves of Watermelon Peperomia. It is painted with dramatic thin silvery stripes that will faint.
  • Red stems amplify its beauty. South American native Watermelon peperomia is bright and light in color. Watermelons grow in vigorous mounds that grow 8 to 12 inches tall.

9. Philodendron Birkin

  • Large green striped leaf with creamy white striped leaf defines its attractive beauty.
  • You’ll love the creamy green hue in this striped striking beauty. Birkin Philodendron has large dark green leaves edged with creamy white variegation.
  • Birkin is a non-climbing and free-standing member of the Philodendron family. Grows into an attractive bush.

10.Aglaonema costatum

  • This plant is tolerant to shade.
  • It has white flecks on its long dark leaves.
  • It is very much beautiful but undemanding. Aglaonema is a great purifier, and it enhances the beauty of your home.
  • Familiar name Spotted Chinese Evergreen.

Tradescantia:

In addition to thriving in a range of lighting situations, including full sun and partial shade, tradescantia plants are also comparatively little maintenance and are beautiful striped houseplants. Stem cuttings can be used to multiply them, and they favor well-draining soil and light irrigation.

Before growing this species outside, it’s vital to verify with the appropriate authorities because some of these plants have the potential to become invasive in some environments.

The type of soil required for these houseplants while gardening:

As for soil moisture, keep striped leaf houseplants moist evenly. Striped leaf plants generally do not tolerate drought at all. Allow the surface of the soil to dry out a bit, but don’t let the soil dry out too much. Otherwise, you risk browning and crusting the edges of the leaves.

On the other hand, don’t keep the soil very wet or submerged in water. If you water the plant excessively the root of the plants can get rot. If you keep the soil too wet, you will find that the whole plant will start to wilt. Keep it in indirect sunlight, soil should be wet.

Water quality can affect your striped plant.

Water quality is also important for striped plants. Poor water quality exposure, bright indirect light can also burn the leaves. Do not use water that has passed through a water softener as it is generally toxic to plants.

These plants are also sensitive to hard water and water with too many additives. Distilled or rainwater is best. If this is not achievable, tap water can be left at least overnight.

Key Takeaways

In conclusion, some of the striped plants are very hardy and they can thrive as healthy plants without proper care.

Some of the striped plants are expensive but it is worth the money and your time as well. These striped houseplants are a highly effective means of improving indoor air quality, saving energy and enhancing the mood of residents. It makes an attractive addition to a home or office.

They have the ability to enhance mental and emotional health, reduce healing time, and improve indoor air quality by absorbing pollutants from the air. These plants benefit us, and this cannot be ignored.

Whether you’re a lifelong houseplant lover or just starting a collection with some spider plants, growing plants indoors can inspire you and instantly brighten up your home and mood.

Not only do these plants inspire creativity and build a bond or connection with mother nature. They also promote healing and stress relief, improve the quality of your space, and make situations ease by their enchanting beauty in chronic health conditions like depression and anxiety.

20×20 Vegetable Garden Layout: Some Garden Plans

20×20 Vegetable Garden Layout: Some Garden Plans

20x20 Vegetable Garden Layout

Garden design is an important factor that lays the foundation for the efficient use of space and proper cultivation of vegetables. It is also very helpful in choosing the right vegetable compartment according to your space and region.

A 20-by-20-foot garden looks very large but can produce oversize crops of a single type of vegetable, like potatoes, or small batches of a variety of vegetables during the season. Vegetables that do well in short rows or small blocks are the easiest alternative to a square garden, but runner beans and other tall vegetables need to be carefully positioned to avoid shadowing other plants. A square-foot layout is also a development approach that works well with a 20 x 20 vegetable bed.

We will talk about different garden layouts so you can pick the right one as per your needs and space at home. Happy reading and happy setting up a beautiful garden for yourself!

garden layout


Layouts

The layout level especially relies on the planting strategy. Here are three planting prospects for a good 20 x 20 vegetable green.

Crop Harvest: Planting levels vary with each technique.

Block Vegetable gardening: The rows of plants are typical in vegetable gardens. However, many vegetables grow just as well, or perhaps better and higher, in blocks.

Floor Plans Form: Divide the 20 x 20 garden into 8 beds. Each bed measures 8 feet by 8 feet, with a cruciform path about a foot wide separating the beds in the middle of the garden.

Plants that do well on the block include tomatoes, corn, chard, kale, spinach, lettuce, basil, super liquor, zucchini, black cumin lettuce, collards, bok choy, tomatoes, and other perennial plants. They grow the best in clusters because the pollen that falls from the male flowers can easily reach the female flowers of surrounding plants within a smaller radius.

Layout Factors

There are the following factors to consider when forming the layout garden plan.

Soil Depth:

Soil Depth

For best results, square foot garden soil should be 12 inches deep, but greens produce excellent yields even in 6-inch deep soil. On top of each bed, spread a 4-inch layer of backyard compost or other healthy organic cloth that must be at least a year old, and add a 2-inch layer of backyard soil. Using a fork, mix each layer into the soil to a depth of 6 inches.

Crop Rotation plan:

Crop Rotation plan

Do a crop rotation in a 20 x 20 garden, rotating the plant families in each section once a year, or simply growing one family across the plot for 1-12 months, then growing a specific family the following year. Raising just one vegetable family at a time provides ultimate security against pests and disease. By growing plants in sequence, you can avoid plant pests and diseases that accumulate in your garden.

Vegetables belonging to the same plant family are attacked by similar kinds of pests. For example, pests that attack cucumbers often also attack ice squash and other vegetables belonging to the same family. Growing the same family in the same place for 12 months or more increases the pest and disease population, whereas growing different plant families once every 12 months reduces pest and disease problems.

Watering plans :

Avoid depressions where standing water collects in the garden or where unexpected rain forces wash the plants away. Try to place the garden near water outlets. This eliminates the need for long pulls on the hose.

Disadvantages Of 20×20 Garden Layout

Read on to know about the other side of the coin, i.e; the disadvantages of the 20×20 garden layout.

Block Layout

Most vegetables require at least 6 hours of direct sunlight each day to grow properly, and in a 20″ x 20″ garden, these taller vegetables will cast shadows and be placed on opposite sides. Due to this, plants are at risk of receiving very less sunlight.

If you grow cucumbers on a trellis with countless tomatoes in tomato cages and green beans and other tall veggies at the north end of the garden, these plants grow at the east end of a 20×20 field and they turn color in the morning. When they come to the west side, they produce color in the afternoon, and all day long the south side has large blooms.

sqft Method:

sqft Method

After growing vegetables in the block design, there is another very nice sqft method for making good use of your 20 x 20 garden. A square foot garden is a huge 20 x 20 garden consisting of 8 x 8 high beds, each of which is divided into 1 square meter sections to grow vegetables on raised beds.

Growing vegetables on one square foot allow you to develop an accurate assortment of seeds. For example, a square might contain garlic, carrots, lettuce, tomato, or bean plants. Cucumbers and other large vegetables require 2 square feet to grow.

Catch Crop

It is recommended to add a catch crop or cover the plantings to ensure an even yield of vegetables. Simply have two different plants sharing the same garden phase in an alternating or checkerboard pattern. This setup may seem pretty nifty, but it also has some meaningful benefits. Smaller, faster-growing plants could grow alongside larger, slower-growing plants, so there was always something to harvest.

Types of Garden Layout

Here are some of the most common garden layouts for growing vegetables.

Column space

The simplest garden plan consists of a design with long straight columns running north south. The north-south orientation ensures that the garden receives the best sunlight and air circulation. Plants growing in the front row tend to shade east and west gardens too much.

Grow taller plants such as corn and beans on the north side of your garden to keep smaller plants out of shade. Medium-sized harvests such as tomatoes, squash, and cabbage should cultivate in the center.

You should plant short yields such as carrots, lettuce, and radishes at the southern fringe of the garden. Typically, the gardener lays out square foot gardens in squares and attaches rows or lumber to the structure to divide the area into equal divisions. You should yield each in each section.

Square Foot

Square Foot

The gardener generally lays out square foot garden plots in a grid of squares, attaching strings or lumber to the frame to divide the bed into equal sections. When climbing plants are grown, they are usually placed with a trellis behind them to allow the plants to grow. This constitutes a 1 square foot plot.

Block garden planner

Another garden layout plan is called a block-style garden layout. Also called a limited row or wide row, this approach greatly improves products over conventional row gardens. It also protects your produce from weeds, fungi, and viruses. The idea is to produce vegetables in rectangular beds or blocks rather than in long single rows that look like square feet but are of arbitrary measurements.

Maximize your garden space by eliminating redundant walkways. Plants sprouts densely and in adequate well-drained, fertile, or nutrient-rich soil in organic matter. Due to its high density, it must be fertilized. Make sure you don’t overload the vegetables this way. The beds are 3 feet wide and can be any length. This width makes it easy to reach the bed for weeding, harvesting, or repotting. Aisles should be minimal, approximately 18 to 20 inches in diameter.

Plant crops with even spacing between adjacent plants in either direction. For example, center a bed of carrots on a 3″ x 3″. Think of the layout as 3-inch rows across the bed, with the carrots thinned out to 3 inches within the rows. A 2-foot conventional green row of carrots fits into a 3-foot x 2-foot area.

Vertically cultivating plants

Vertically cultivating plants

A vegetable garden vertically is another prospect. These gardens are finagled for those with little or no definitive garden space. Plant towers are another vertical alternative for producing plants and are prevalent in potatoes. Instead of planting in a typical garden bed, take advantage of the vertical space to grow plants along a trellis, hanging baskets or turning them upside down. Simply stack the pots like a tower and there are also stackable containers that allow you to grow multiple plants in one area.

Raised Beds/Containers

Raised Beds/Containers

Again, planting vegetables in raised beds or containers is a great alternative, if space is limited or soil is inadequate. There are no limits to this layout option. Because you can flexibly move around the garden and use all available space, including vertical areas.

What vegetables grow well together in containers: Planting Vegetable in Container

What vegetables grow well together in containers: Planting Vegetable in Container

What vegetables grow well together in containers: Planting Vegetable in Container

Container gardening is a great way to enjoy fresh produce year-round. If you don’t have the space for a full-sized garden, you may feel like your options are limited. However, with a little gardening knowledge and careful attention, many vegetables and herbs can be grown in a container and harvested right on the plate.

Some vegetables that grow well in containers are nightshades, such as tomatoes, potatoes, peppers, and eggplants. Some plants such as peas, and lettuce are fast-growing and easy to grow in plants it will magnify the beauty of your garden. In general, use a good-quality organic potting with good drainage soil to fill your vegetable pot.

what vegetables grow well together in containers? In this article we try to answer this question. The container can vary in size depending on the type of vegetable you are harvesting. Some vegetables, such as leafy greens, have relatively shallow roots and do not require a deep container. But others, like potatoes, need deep soil for proper development. Some container garden ideas include using fabric pots that are lightweight to move when needed or planting a vertical garden with pots attached to a fence or wall.

Easy vegetables to grow in pots are listed in this article.

You can grow vegetables together in containers if they both have the same requirement for nutrition. For example, herbs and salad greens can often be grown together. If you’re peeking for ideas for vegetable containers, here are some vegetables that do well in containers on your verandah, terrace, or balcony, as long as they get adequate sun.

Vegetables combination ideas that well together in container gardening.

Here are more details about each of these pairs you can harvest in your little indoor garden.

Carrot and tomato growing together.

  • Tomatoes are suitable to plant with carrots, it gives them shade in your home. Tomatoes protect carrots from weeds, carrot flies, and pests as well.
  • Carrots give tomatoes soil to aerate. This ensures good moisture and nutrient circulation in the soil. Tomatoes and carrots grow well together in container its evident from these facts.
  • Leeks, Rosemary, Sage, and Chives can as well protect the tomato plants from weeds as well. You want to avoid growing plants like cilantro and dill near carrots, as they will slow their growth.

Basil and Chili plant are good for each other.

  • Basil is a good partner for chili plants as they help improve their growth and flavor in your home.
  • It can also prevent some harmful insects from entering your plants.
  • Basil also grows together with tomatoes, parsley, oregano, and rosemary. But it is not good to grow basil together with sage. Basil needs soil with a lot of moisture to grow well. But a sage prefers dry soil.

Vegetables that grow well together in containers - Basil and Chilli

Beans and Pumpkin grow well together

  • Beans and squash are three staple vegetables. This is a very common choice of staple veggies to grow together for a very long term. Although they often grow in containers, beans, and squash easily grow together in large pots. Zucchini also good to grow with beans in a container garden.
  • Beans are nitrogen fixers, which means they take nitrogen from the air and store it in the soil. This is useful for squash, which needs a lot of nitrogen to produce long vines and fruit.
  • Squash acts as a natural mulch for the beans, binding moisture and nutrients. Both beans and squash are available as vine and bush varieties. Choose one of each, such as beans, and a squash, such as a pumpkin. This way you benefit your container and cover space.

Okra, Lettuce vegetables, and Basil

  • If you live in the south or another warm climate, you should really try to grow okra in your container garden. It is a unique, highly productive addition to your other herbs and vegetables.
  • Lettuce and herbs like basil, and mint are good neighbors for long, shiny okra. Okra plants a long stem and grows up to 6 feet tall, providing partial shade for lettuce and basil.
  • They like the full sun, but in the hottest part of the summer, they can take a breather in the middle of the day.
  • Lettuce and basil have lower root systems that do not compete with okra. Basil, like other herbs, can repel many pests and is a good companion plant for many vegetables.

Vegetables that grow well together in containers - Okra, Lettuce, and Basil

Green beans and corn vegetables

  • Green beans grow well with them because they can be used as a grill. Green beans fix nitrogen in the soil, which is good for the plant.
  • Other useful companion plants for green beans are broccoli, Brussels sprouts, cabbage, cucumber, potatoes, and radishes.
  • You don’t want to grow beets or onions near green beans because they stunt growth.

Onions and carrots in containers

  • Onions grow well with carrots because they protect them from pests such as the carrot fly or aphids.
  •  Lettuce, Beetroot, Cabbage, Tomatoes, Cucumber, and Rosemary are also very suitable to grow together with them.
  • You want to keep bulbs away from plants like beans, peas, cucumber, and asparagus because they slow the growth of those plants.

Vegetables that grow well together in containers - Onions and carrots

Green beans and corn in pots

  • Green beans grow well with corn. Green beans fix nitrogen in the soil, which is good for the corn plant.
  • Other useful companion plants for green beans are broccoli, Brussels sprouts, cabbage, cucumber, peas, and potatoes.
  • You don’t want to grow beets or onions near green beans because they stunt growth.

Spinach and Peas (easy vegetable to grow in pots)

Peas are perfect for containers and small spaces. The grid behind the container gives the peas plenty of space. This leaves room in the rest of the dish for the legume lover, spinach.

Spinach helps keep the soil moist thanks to its low-growing leaves. A tall pea trellis can also provide shade from the hot afternoon sun, something spinach needs to survive warmer weather.

Eggplant and paprika planting

  • Eggplant and paprika both belong to the night cream family. Because they belong to the same family, they have similar nutrient, pH, and sunlight requirements.
  • Planting them together can be beneficial and you don’t have to worry about them competing for nutrients or resources.

Cabbage and cauliflower vegetable container garden

Cabbage and cauliflower are both members of the Brassica family. When plants belong to the same family, it means that they have similar needs for nutrients, pH, and sunlight. So planting them together is a good way to make a good environment for them as there is no competition for resources.

Vegetables that grow well together in containers - Cabbage and cauliflower

Much of the success of your container garden depends on the growing medium you choose. Plants have very limited access to water or nutrients, so you have to choose substrate on the basis of its quality so that your vegetables can obtain their required nutrition.

When choosing a containers gardening, consider the following characteristics:

  • Does the soil hold adequate moisture and nutrient?
  • Does the soil have enough drainage and ventilation system?
  • If the soil has weeds and pests that can harm your vegetable?

For container garden, you can buy pre-mixed potting soil in bags. It is excellent if you are planting a few containers for your vegetables and watering them. However, if you intend to plant widely, it is more economical to mix the mixture yourself. Container gardens are the best gifts you can give to your family or friends.

Prepare soil for planting vegetables in container.

The garden soil or normal soil is not suitable for tools or products for container gardening. Most often, the garden soil in the containers becomes too dense, which prevents the growth of the plant. It also has a greater chance of becoming contaminated with weed seeds, diseases, and pests.

Don’t get disappointed because of the shortage of space. Container gardening is very useful for households, and it can help you to stay healthy as well. Just go for the combination of veggies you want to harvest.

10 Captivating Blue Flowers and Blue Annuals that bloom all Summer

10 Captivating Blue Flowers and Blue Annuals that bloom all Summer

Blue Annuals that bloom all Summer

If you’re craving ideas for planting an annual blue flower in your home, read on for our list of 10 blue beauties that inspired us. These 10-year-old blue annuals are a delicate, hearty botanical combination that you might love planting again next year.

If you see perennials on the list, it’s because they are also cultivated as annuals in frigid climates. some perennials evolve well in low temperatures during the season, but few endure long-term. Blue flowering plants always emerge to be an increased need. I think it’s only natural that rare things are highly valued, and blue flowers certainly are. In this article, you’ll find 10 beautiful ideas for blue-flowered annuals.

There is something comforting about the blue pigment. From the palest aqua blue to the deep blue sapphire, blue blossoms look exquisite in any environment, from a charming cottage-style property to a standard English garden. No matter which style you choose, these sweet blue flowers create an adorable landscape.

There are many spring flowers in diverse hues of blue. To provide your plant with a healthy beginning to life, you have to know the plant’s needs and how much light or shade it requires. The full sun signifies more than 6 hours of direct sunlight, and the partial sun denotes about half of that. Also, pay attention to USDA hardiness zones so that your shrub or perennial can survive the winter in that area. Introducing some favoured blue flowers to add colour to your garden in the form of annuals, perennials and small flowering shrubs.

Here are some common blue flowering plants throughout all summer season.

1. Petunia( blue flowers )

Blue Petunias are rare but it brings impeccable beauty to your garden. Petunias are naturally considered to be the plants that thrive best throughout the spring and winter during the season. Typically known as ‘Purple Wave’, hybrid petunias offer some habits that are regarded more versatile in nature: they have the capability to bloom year-round, regardless of the season. Initially, petunia flowers were believed to be purple, but now they can be made in a variety of colors, including purple, Pink, violet, blue, red, or creamy white. The blooms of petunia are very charming, and it is rare, so it is in high need.

Petunia( blue flowers )

2. Illuminated Browallia

Especially blue flowering species

Blue flowers are invariably problematic to find. Well, this article allows you to find a great choice for you. As well as being shade loving, Browallia values warmth and endures periods of dry soil. The Lasting Illumination continues to bloom all the summer season long and never lags behind the custom; it can create a beautiful waterfall of blue flowers by cascading to the rim of the pots.

Illuminated Browallia

3. Azure Aster flower

Gives flowers throughout the summer season.

These blue perennial lives and gives us flowers throughout most of the summer. The beautiful blue daisy-like flowers blooming will fascinate you. These flowers bloom from late summer until the first frost of the year. It is adequate to plant from seed rather than harvesting plants from the wild. You can develop this type of plant in USDA Zones 3 to 9. It can endure shaded areas but should provide full sun for flowering. These blue flowering plants don’t favor too damp soil. Dry, sandy, or rocky soils are best. They also prefer slightly acidic soils – soils with a pH of 5.5 to 7.5 are most appropriate for this plant. This plant with blue flowers is highly valued all over the world and it is endangered species.

Azure Aster

4. Bluebell ( blooms in spring)

Botanical name: Hyacinthoides non-scripta 

This blue perennial plant, also called the English bluebell, has stunning blue bell-shaped blossoms. These blooms are sweetly aromatized and entice large numbers of pollinators. The right choice for those who appreciate butterflies and birds in the garden.

They are naturally seen in dimmed habitats. However, they still appreciate living in the sunshine. If you live in a wooded area, bluebells will develop just fine in your garden.

This plant gives flowers from early spring to late spring. Blossoms fall in summer. Bluebells are little and easy to grow. They easily defy pests and diseases. Bluebells favor damp soil requirements if planted in a well-drained area. This blue flowering plant has a USDA hardiness zone of 8. This blue flowering plant is poisonous, so be cautious around it.

Bluebell

5. Blue Hibiscus

Botanical Name: Alyogyne huegelii

Most gardeners comprehend that hibiscus is a very tropical colour, but do you know it can give blue blooms?

Blue hibiscus blossoms are related to the mallow family. They’re not exactly hibiscus, and they’re not completely blue, but still, they’re incredible. This blue flowering plant suffers very little from pests and diseases, so it’s adequate for organic gardens. Blooms several times a year from summer to late autumn. This plant appreciates the full sun. The soil in which it is planted should be rich well-draining soil.

Alkaline soils are best, but they also do well in acidic soils and demand little fertilizer. Blue Hibiscus is remarkably low maintenance. These blue annual blooming require to be pruned to encourage growth, but this is fairly minimal. You can multiply this plant by rooting semi-mature cuttings in late of the summer season. Once installed then, this plant is very hardy and can endure drought if given enough time. It grows in USDA hardiness zones 9-11.

Blue flowers Hibiscus

6. Blue flowering  Orchid 

Botanical Name: Vanda coerulea

Blue Orchid blooms with a faint blue-purple bloom, perfect for adding a touch of color to your garden. Orchids are tricky to care for, and you should know this before you even try to grow them in your garden. Blue orchid flowers prefer a hanging planter, so be sure to provide one. grow well. Several different species of blue orchids exist in nature. Requires regular watering from summer to autumn, but is dormant in winter. Keep the soil moist during the hottest months of the year and gradually in the fall. Blue orchid flowers grow best in USDA hardiness zone 9-11. You can also buy blue orchid seedlings as this is the easiest way to grow blue orchids yourself.

Blue flowering  Orchid 

7. Blue Violet bloom 

Botanical Name: Viola sororia

Blue Violet flowers may be widespread, but their blue flowers are a unique phenomenon. The annual plant’s leaves are heart-shaped, They bloom in spring from March to May. Blue violets may also bloom sporadically in the summer season. Violets are present in purple and blue shades, but these flowers are wild and considered weeds.  This blue flowering plant needs full sun exposure but this plant will endure partial shade as well. Blue violets love water and do best in damp but well-drained soil. They are normally located in southern states.  It is crucial to note that it can be challenging to grow these annuals if left alone and can evolve into a weed under certain conditions. These plants draw the attention of many birds and butterflies These Blue perennials give 8 inches wide bloom. These blue perennials cultivate most pleasing in USDA hardiness zones 3 to 7.
Blue Violet

8. Columbine plant

Botanical name: Aquilegia

Aquilegia is a fantastic horticultural perennial with blue bell-shaped blooms. It blooms from mid-spring through the summer, so you can relish the blue flowers before autumn arrives. This blue perennial comes in a variety of sizes, but there are also dwarf varieties, which give 6 inches wide bloom. Columbine flowers prefer full sun exposure, but will also thrive in partial shade. They cultivate in rich well-drained soils and medium dampness.

Birds, bees, and butterflies are attracted to Columbine flowers and can be expected to flock to your garden and consume the nectar from the blooms. Effortless to evolve and does pleasingly in most gardens. These plants are self-seeded, although particular plants only prevail for about three years. For best consequences, plant columbine in the spring and they blooms beautifully in summer as well. These perennials flourish best in USDA hardiness zone 3 to 8.

Columbine

9. Forget-Me-Not annual

Botanical name: Myosotis scorpioides 

This blue annual flower is outstanding, but you might be surprised to learn that it’s a weed that spread in some parts of the world. Check the regulations to see if these stunning annual flowers can thrive well in your surroundings. It is a blue perennial herb that grows 6 to 12 inches tall and is 9 to 12 inches vast. These blue annuals need full sun exposure and partial shade. These blue perennials also favor damp, organically rich soils. It blooms 6 to 12 inches blue blooms.

Forget-me-nots are very easy to care for and look amazing in any garden as long as you can supervise their growth. You’ll find butterflies flocking during the flowering period from June to August. This plant is also naturally unsusceptible to most pests. This blue annual flourishes best in USDA zones 5 to 9.

Forget-Me-Not

Unique gift ideas for plant lovers – 24 Plant lover gifts to choose from.

Unique gift ideas for plant lovers – 24 Plant lover gifts to choose from.

Unique gift ideas for plant lovers

Are you trying to gift unique and best gifts for the plant lover in your life? Or Want to choose unique plants for your loved ones?

Of course, the easiest and conceivably most evident gift idea is one of the best indoor options or plants that can thrive in office circumstances, so choose according to your preference.

You should purchase plants that nurture your health, or hardy succulents which bring magnificence to your place. Green can induce your sleep as well.

Giving gifts is a very challenging task. Especially if you’re shopping for someone who likes unique things. For example, if you have somebody who is positively and actively obsessed with plants, you might not like to go down the evident path of fetching a flower or some kind of succulent. Because they already have one in their place.  So, let’s get innovative rather. We’re here to assist you to find the best gift ideas for plant lovers. Below you’ll find wonderful or unique gifts such as plant-inspired art prints and puzzles, cute flower pots, and stands.

Here is a list of gifts or gift ideas that can help with Gardening.

Get Plant Terrarium

It’s really cool to watch plants grow. That’s why terrariums are such a popular item. This 3-ball terrarium from him is also perfect for small living spaces and office desks.

Get Plant Terrarium
Buy Smart Growframe

This stylish shelf frame doubles as a lighting tool for plants that require low to bright light, such as aloe and English ivy. It can be turned on manually or programmed by connecting to the Modern Sprout App.

Buy Smart Growframe
Bonsai Starter Kit for home

Give your plant-loving friend this Bonsai Starter Kit and you’ll have everything you need to grow four beautiful miniature trees. This kit comes with a 100% satisfaction guarantee, so don’t worry if your green thumb suddenly turns black.

Bonsai Starter Kit for home

Plant Mister

Step outside with your watering can and pop in your glass mister, like this undeniably exquisite thing that will make any plant lover effuse about. The is not only ravishing enough to display on your windowsill, but it’s actually functional, letting the user regulate how much water the plant gets.

Plant Mister
Elephant Watering Can

This Elephant watering can is a unique gift, especially for indoor plant parents. Green Thumb meets a ceramic stem for incredible results.

Elephant Watering Can

For candle lovers

Scented candle with the freshness of plants. Sage Lavender Chakra Candle Filled with the harmonious scent of sage and lavender, the Natural Soy Wax Candle will brighten up any plant lover’s life even when it’s not lit.

Scented candle with the freshness of plants

Plant Pillow is a better gift as well

When real plants just aren’t enough, there’s always the most suitable home decor like this pillow. No matter what color your couch or sheets are, this green leaf-designed pillow is non debatably the best option for your plant lover companion.

For the Plant lover who has a pet

Calathea Orbifolia indoor plant

Calathea Orbifolia Of course a good opt, you can always give plants as a gift. (FYI: This plant is pet friendly and has no toxic reaction to pets and humans also so you don’t have to worry about your dog chewing it.). For Pet Lovers, this is a unique or rather very meaningful gift.

Calathea Orbifolia indoor plant

Bernie Sanders Plant Marker

If your friends always get jobs looking after plants when they’re traveling around town, it’s time to give Bernie the role. Your plant-loving companion will get a kick out of this adorable gift.

Bernie Sanders Plant Marker

Buy Cactus Humidifier

Clean air has never been so sweet. Portable and super easy to use, this mini humidifier is the immaculate office or bedside buddy.

Buy Cactus Humidifier
Hanging Cork Planter

The first thing I heard was that the planter was the new bulletin board. Your gift recipient will love this clean, handcrafted cork hanging planter to make their new home a success.

Hanging Cork Planter
Micro-Greens Growing Kit

Give the gift of fresh coriander micro-greens thanks to this kit that makes indoor gardening a breeze. If you enjoy instant gratification, then it’s for you it grows in just 7 days.

Micro-Greens Growing Kit

Rose Black Tea

You should gift this beautiful and delicious rose black tea to someone who has a very deep love or fonding for flowers this rose petal-infused tea would feel their cups.

Rose Black Tea

Made Succulent Garden Handmade Notebook

Support your plant lover friend to keep track of how much their plant has thrived and/or how they can take care of the little plants in this cute succulent notebook. A handmade gift is a different and thoughtful gift.

Succulent Garden Handmade Notebook

Adorable Mystery Jungle Box

When you can’t help but fetch a plant, gift an adorable Mystery Jungle Box. Arrives with three mysterious 2-inch potted plants that can be attractive little additions to an office or their place.

Adorable Mystery Jungle Box

Azalea Bonsai

A bonsai tree is a stunning gift to give a plant lover because the probabilities are they don’t have a pretty one that blooms Azaleas. Plus, they’ll treasure knowing about the diverse paths to care for a new plant.

Azalea Bonsai

Hydroponic Indoor Garden

This compact hydroponic garden (which comes with six herb seed packets) delivers a nutrient-rich solution directly to a plant’s roots, which will save your partner from the hassle and chaos of growing indoors with soil. This is ranked the best indoor herb garden tool overall by professionals, thanks to its compact size and ease of use.

Hydroponic Indoor Garden
Crucial Garden Tote Bag and Tools

Present them with a new pack of gardening tools. This tool has a digging trowel, a planting trowel, and a garden cultivator. It even arrives with a cute and immense tote that has plenty of room for all their tools, gloves, sheers, and more.

Crucial Garden Tote Bag and Tools

Organic Kitchen Herb Garden Kit

This Hortiki Plants Organic Herb Kit comprises 3 seed bags, a biodegradable pot, and drip tray, organic potting soil, a spray bottle, plant markers and instructions, and some instructions which can guide beginners or can help to thrive in their little indoor garden.

Organic Kitchen Herb Garden Kit

Soil Moisture Meter

Need the perfect gift for plant lovers? Get a soil moisture meter to test both indoor and outdoor plants and see the consequences instantly.

Soil Moisture Meter

Indoor Gardening Kit

Designed specifically for indoor plants, this indoor plant healthiness kit includes protein-rich plant foods, natural organic fungicides, natural organic pesticides, and a spray bottle with a measuring cup.

Indoor Kit

Fiskars Garden Hori Knife

Fisker’s iconic orange-patterned garden tools are acknowledged around the world. The Hori Knife is the toolmaker’s version of the popular Japanese ground knife. Great for digging and cutting, this versatile tool features a double-edged blade. An accurate ground edge for multi-purpose cutting dense growths. This device is a must-have for our friends who flourish plants.

Fiskars Garden Hori Knife

Microfiber Dusting Gloves

For indoor plants that entice dust, there is a simple solution. Give this microfiber dusting mitt to any plant parent who wants to keep their plants looking their best. Pollination also helps plants absorb sunlight.

Microfiber Dusting Gloves

Plant Parent clothing

This minimalistic embroidered sweatshirt is excellent for all plant lovers to display their plant affection. This ultra-soft, hand-embroidered sweatshirt is available in unisex sizes from Small to XXL. The best option to buy this on amazon, it gives you a discount also if available.

Plant Parent clothing

These are some unique ideas for plant lovers. You can get the above-listed things at amazon or you can cart whatever you like to gift in your shopping list amazon, it it is a holiday then you can get offers depending upon the circumstances.

How To Propagate Succulents

How To Propagate Succulents

Succulents are a popular choice for both outdoor and indoor gardening because of their distinctive beauty and simple maintenance needs. But did you know that you can easily propagate succulents at home with minimal effort? In this blog post, we’ll go over the basics of succulent propagation so you can easily increase the number of succulent plants in your collection. So, continue reading!

How To Propagate Succulents

Understanding Succulent Propagation

Propagating succulents is a great way to get more of these beautiful, easy-care plants for your home. Propagation by offsets is perhaps the easiest, most convenient method of getting new plants. Simply pinch off an offset – a small plant that has developed from the main plant – and pot it up, and you’ll soon have a brand-new succulent to enjoy! Propagate away and soon you’ll have enough of these trendy and low-maintenance plants to fill your entire home with!

To propagate succulents, it’s important to understand the key steps: division, cuttings, and leaf propagation. For anyone interested in becoming a succulent-growing pro, mastering these techniques is essential. Division involves splitting apart a single plant into multiple plants; cuttings are pieces of the stem or leaf from an existing parent plant; leaf propagation involves rooting the leaves of a succulent in soil or water Similarly, propagation by stem cuttings is another way to propagate succulents.

In this method, you would take a piece of the stem from the existing parent plant and place it in a soil mixture suitable for succulents. The stem will then take root and form new plants. Propagation by stem cuttings is a great option for those wanting to fill their space with more succulents quickly and easily!

Supplies Needed for Propagation

To propagate succulents, you will need the following supplies: rooting hormone, a sterile knife or scissors, well-draining soil, and a container for planting. Succulent propagation is an easy and effective way to increase the collection of your favorite plants.

Once you have your supplies gathered, cut off a leaf from the succulent parent plant and ensure it has some stem attached. Then use the knife or scissors to create a shallow groove in the stem for the rooting hormone to adhere to before placing the leaf in soil and watering lightly Again, propagation by stem cuttings is a fun and easy way to propagate succulents! With some basic supplies, a little bit of patience, and the right technique, you’ll be on your way to growing your own succulent garden in no time.

The process is simple – just make sure to cut off a leaf from the parent plant with some stem attached, groove it with the knife or scissors, dip it in rooting hormone, and place it in soil and water lightly. With a little TLC, you’ll be well on your way to having more succulents!

How to Propagate Succulents?

How to Propagate Succulents

Propagating succulents is an easy way to increase the number of plants in your collection without having to purchase additional ones. If you’re ready to dive into the fascinating world of succulent propagation, then read on! Propagating succulents will introduce you to a whole new level of understanding of these unique and hardy plants.

You’ll learn how to take cuttings, create clones of your favorite plants, and provide plant care for them as they grow. With just a little bit of patience and perseverance, you can be on your way to building a stunning succulent collection in no time at all!

What are succulent leaves?

What are succulent leaves?

When learning how to propagate succulents, it is important to know the different types of leaves succulents have. There are three types of succulent leaves:

  1. Thick, fresh leaves store energy as well as water. The most prevalent kind of succulent leaves is often green or blue-green in color.
  2. Thin, papery leaves are common on cacti but are less frequent than thick, meaty leaves. They collect solar energy from the sun’s beams.
  3. Non-fleshy or papery succulent leaves, that look hairy or spiky and help keep the plant safe.

Rooting hormone

Rooting hormone

When it comes to propagating succulents, the rooting hormone is essential. This helpful product can be found at most nurseries or garden centers, and it’s very easy to use. Simply dip the cutting into the hormone, then plant it in the soil. Within a few weeks, you’ll see new growth emerging from the succulent.

Propagation by stem cuttings

Propagation by stem cuttings

The best way to propagate succulents is by stem cuttings. First, take a sharp knife or pair of scissors and cut a piece of stem from the mother plant. Cut just below a node, which is the point on the stem where a leaf is attached. Make sure to make your cut at an angle so that more surface area is exposed. This will help the cutting to form roots more easily.

Next, remove the leaves from the lower half of the cutting. Again, this will help the cutting to form roots more easily. Finally, allow the cutting to callous over for a few days before potting it up in a well-draining succulent potting mix.

Be sure to keep your cutting moist but not wet during this rooting period. Once roots have formed, you can treat your new succulent plant just like any other. Allow the soil to dry out completely between waterings and give it plenty of bright light. With a little patience, you’ll soon have a whole collection of succulents propagated from stem cuttings!

Propagation by leaves cutting

Propagation by leaves cutting

One of the most common ways to propagate succulents is by leaf cuttings. This is a simple process that just about anyone can do with success. All you need is a sharp knife or scissors, a pot or container filled with well-draining soil, and of course, a healthy succulent plant.

To start, carefully remove a leaf from the mother plant. It is important to make sure that the leaf is free of any pests or diseases. Once you have a healthy leaf, use your knife or scissors to cut the leaf into smaller pieces. Each piece should have at least one healthy-looking stem with some leaves attached.

Next, plant the leaf cuttings in your pot or container filled with well-draining soil. Make sure that the leaves are not touching each other and that they are pointing up. Water the soil until it is evenly moist and place the pot in a bright location but out of direct sunlight.

Within a few weeks, you should see new growth appearing on the leaf cuttings. Once the new plants are big enough, you can carefully transplant them into pots of their own.

In conclusion, succulent propagating is a relatively easy process that can be done by stem or leaf cuttings. Once you have your cuttings, simply pot them up in well-draining soil and water regularly. With a little patience, you’ll soon have a whole new batch of succulents to enjoy!

Troubleshooting Common Problems

Troubleshooting Common Problems

Common problems with succulent propagating can include browning or wilting leaves, an accumulation of pests, or a lack of root growth. If succulents are wilting or browning, the most likely cause is overwatering. Make sure to reduce the frequency of waterings and allow the soil to dry out completely between waterings.

As an alternative, if pests are present, they can be in the form of tiny worms or aphids, eliminate the by enhancing airflow around the succulent and washing it with warm water.

Last but not least, you may check for roots by gently pulling on the stem and see if they are there. If not, try repotting in new soil and make sure the soil is well-drained. Succulent propagation, meantime, is one of the most satisfying gardening activities.

Propagation by stem cuttings is a great way to increase the number of succulents in your collection.

To sum up, propagating succulents can be a great and easy way to increase the number of succulent plants you have in your collection. With just a few simple steps, you can easily propagate your succulents with minimal effort and get some beautiful new additions to your garden. So why not give it a try? Your succulents will thank you!

Protecting Garden Plants From Frost

Protecting Garden Plants From Frost

Protecting Garden Plants From Frost

Despite the cold temperatures and shorter days of winter, you can still extend your growing season and save your plants from freezing temperatures and frost. In this blog post, we will discuss several strategies and tips for extending your growing season and saving your plants from frost. Read on to learn more!

Understanding Frost

Understanding Frost

Understanding frost is key to saving plants from it. Frost can be characterized by temperatures below 32 degrees F and the formation of ice crystals on surfaces, which can damage plants. Many plants are highly susceptible to frost damage and have a difficult time adapting to cold temperatures. To help your plants from frost, cover your plants with a frost blanket or polyester sheet at night.

Doing so prevents the formation of ice crystals on the surface of plants and helps keep them protected during cold nights from frost. Additionally, watering your plant in the evening can help insulate the soil and reduce the chance of frost damage. Finally, be sure to choose hardier varieties of plants that are more resistant to frost damage when planning your yard. With these practices in mind, you can ensure that your garden is protected from damaging frost.

Frost blanket

When trying to protect plants from frost, it’s important to pay attention to forecasted temperatures and cover or move vulnerable plants indoors if necessary. Next, there are multiple methods to protect plants from frost. One way is to keep an eye on the forecast and take precautionary steps, such as moving vulnerable plants indoors or covering them with a frost blanket if necessary.

However, it should be noted that some plants may not survive even with the use of protective measures against frost. Therefore, it is important to familiarize oneself with their plant’s hardiness zone and choose plants that can withstand potential frost conditions.

Frost Protection: Preventing Frost Damage

Saving your plant from frost damage requires being proactive – start by covering vulnerable plants with a frost cloth, which insulates them from frosty temperatures. This protective layer creates a microclimate around your plants that can reduce the risk of frost damage while still allowing air and light to reach them.

Preventing Frost Damage

Additionally, make sure to water your plants for protection in the late afternoon before the temperature drops, as moist soil is better able to resist damaging frost. If possible, move the delicate or frost-sensitive plants indoors for the chillier months. These strategies will help prevent damage from frost and allow you to enjoy your garden all year round.

Also, you should strategically utilize pruning to reduce the amount of surface area exposed to the cold, making it easier for the plant to stay warm and avoid frost. Pruning away some of the foliage and thinning out the branches help plants to retain heat even during cold and frosty weather.

Additionally, adding a thick layer of mulch around the plant to protect plants can also help keep them warm. The mulch helps insulate the plant by providing an extra layer of protection from cold temperatures. Lastly, if necessary, use special frost covers to further protect your garden plants from frost.

mulching for frost protection

Utilizing mulch is another great approach to saving your garden plants from freezing frost damage – as mulch helps insulate the soil and retain heat, creating a buffer between your plants and cold temperatures Meanwhile, utilizing mulch is a great approach to saving plants from freezing frost damage. Mulch acts as an insulator for the soil, helping to retain heat and create a buffer between the cold temperatures and plants. This simple step can help to save plants from facing severe freezing frost damage in cold weather.

Extending Your Growing Season to Protect Plants

One way to extend your growing season is to protect garden plants from unexpected freezing frost by creating a sheltered environment using an outdoor plant cover. This can easily be accomplished with a few simple tools such as plant covers, cloches, and row covers made of breathable fabric. Plant covers are very useful for protecting individual plants in the garden from frost.

Extending Your Growing Season to Protect Plants

A simple and easy way to do this is to use a lightweight frost cloth, which will cover the plants and retain warmth during cold weather. Frost cloth is an effective way to protect plants from freezing frost when temperatures drop in your home. It can be laid over plants to create a protective barrier against the cold, trapping heat and allowing for continued growth.

The lightweight fabric is breathable and allows for air circulation, preventing condensation and providing ample ventilation for plants. Additionally, frost cloths can be easily removed during warmer temperatures without harming the trees beneath. Protecting garden plants from frost does not have to be expensive or complicated—a lightweight frost cloth can provide an effective solution with minimal effort.

plant covers

Plant covers can also be used to protect young plants from the harsh sun or wind in your home, so they can grow stronger and faster during the extended growing season Thus in this view, using protective covers for your sensitive garden plants and vegetables is a great way to ensure that you maximize your growing season.

Protecting the trees from frost and harsh sun or wind will allow them to grow stronger and faster, increasing their chance of survival. It is important to remember that covering your plants to avoid frost can make a huge difference in the quality and yield of the garden.

Building a Protect Layer for Your Plants

Making a layer of protection for your plants is one of the greatest strategies to keep your vegetable gardens safe from frost. This will assist maintain the soil temperature constant and protect them from harsh temperatures. A layer of insulation can be created by wrapping plants in a frost blanket to help keep them warm. Move containerized plants to sheltered spaces, such as a porch or garage.

Use items like horticultural fleece, bubble wrap, old blankets, sheets, and even cardboard boxes to cover your plants over the winter to create this protective barrier. The most suggested materials are bubble wrap and horticultural fleece because they are made to shield plants from frost. Make sure the materials are fastened so that high gusts won’t blow them away.

Building a Protect Layer for Your Plants

Old blankets and sheets provide additional insulation, and cardboard boxes should be used in conjunction with other objects to keep your plants from becoming frozen. Using these items to protect your garden plants from frost can ensure their survival throughout the chilly winter air months.

If you use the proper coverings and take them off when the temperature rises, your plants will get the right quantity of sunlight and ventilation and will be protected against frost. It’s also essential to check on your plants frequently to make sure they are adequately protected throughout the cold air to avoid frost. If you carry out these simple tasks, your cherished garden plants will be more likely to survive the winter cold air.

Final Say

In conclusion, extending your growing season and protecting your garden from frost and cold temperatures is possible by using a combination of strategies and ideas. One of those ideas includes using garden covers and other frost protection methods to keep them safe during chilly winter nights. It is also important to choose varieties of greens as a sign that are well-suited to your climate and planting zone to avoid frost. With these tips in mind, you can enjoy a longer growing season and continue to watch your garden flourish throughout the winter months.

DIY Cactus Soil – Benefits of Using DIY Cactus Mix

DIY Cactus Soil – Benefits of Using DIY Cactus Mix

DIY Cactus Soil - Benefits of Using DIY Cactus Mix

Cacti are some of the most popular house plants in the world. They’re easy to take care of, they look great, and they’re also a great way to add a bit of greenery to your home. But if you want your cacti to thrive, you need to make sure you give them the right plant soil and care. In this article, we’ll provide you with the ultimate guide to growing healthy cacti with DIY cacti soil.

What is DIY Cactus Soil Mix?

DIY Soil is a combination of potting soil and other ingredients that you can create at home to use for growing cacti. It requires a unique blend of components that provide the necessary nutrients and aeration to ensure your cactus thrives.

Peat moss, perlite, sand, and your regular potting soil make up the ideal recipe for DIY cactus soil. With these four ingredients, you’ll have everything you need to create an ideal environment for your cactus to grow in – no green thumb required!

The soil mixture should be lightweight and well-draining for optimal growth conditions, typically consisting of a mix of perlite, horticultural charcoal, and composted soil. When making your own DIY cactus soil, it’s important to remember the requirements of cactus soil, namely that it should be gritty and nutrient-rich.

What is DIY Cactus Soil Mix?

The perlite helps with drainage while the horticultural charcoal adds aeration and porosity which is essential for root health, and the composted soil keeps the pH level balanced and adds organic matter. With this perfect blend of components, you can rest assured that you’ve created a reliable growing environment for your prickly friends!

Different types of cacti may require slightly different soil mixtures to achieve the ideal growing environment, so it is best to research the specific requirements of the particular species you are trying to grow before making your own DIY Cactus Soil Again, how to make the perfect DIY cactus soil can vary depending on the species of cactus you are trying to grow.

It is important to do your research before you start creating your own cactus soil so that you can provide the best environment possible for your plant. Making your own DIY cactus soil is a great way to show some extra love and care to your beloved plants!

Benefits of Using DIY Soil Mix

DIY soil has more advantages than conventional store-bought soil. It has a better texture and helps with moisture regulation, as it is specifically designed to reduce the risk of over-watering, which can be harmful to cacti.

Making your own soil means that you are in control of the requirements of your cacti by adding your own mix of sand and peat moss, ensuring that it is airy, loose, and well-draining for optimal root growth. If you want to get creative, you can even add perlite and vermiculite to make sure your DIY cactus soil is just the way you like it in pots.

Additionally, DIY soil is much cheaper than store-bought products; the majority of ingredients can be gathered from around the house or from your local garden center for a fraction of the cost. Making your own cactus soil is surprisingly easy and a great way to save money.

Benefits of Using DIY Soil Mix

Finally, a DIY soil mix provides greater control over the nutrients and minerals in the mix, allowing you to tailor your mix to cater to your cacti’s individual needs and preferences. besides how to make DIY cactus soil, it’s important to also know how to effectively use it.

DIY soil provides greater control over the nutrients and minerals in the DIY mix, allowing you to tailor your mix to cater to your cacti’s individual needs and preferences. So, if you’re an avid home gardener looking for ways to actively control the quality of your cacti’s soil, then crafting your own DIY soil is the way to go!

How to Make Your Own Soil Mix?

An easy way to create your own homemade cactus soil is to use a combination of potting soil and sand, which provides the drainage and aeration that cacti need to thrive. With a bit of ingenuity and a trip to the garden store, you can whip up a soil blend that’s sure to make your desert friends happy. Simply combine equal amounts of potting soil and sand in a large bucket, then add perlite for extra aeration and drainage. With this simple soil recipe, you’ll be keeping your prickly pals healthy in no time!

How to Make Your Own Soil Mix

To give your soil an extra boost, you can also add small amounts of perlite or vermiculite, which will help to improve drainage and aeration even further Additionally, creating your own DIY cactus soil is a great way to ensure your cacti grow healthy and strong. With some basic ingredients like sand and compost, plus the addition of perlite or vermiculite for extra aeration and drainage, you’re well on your way to creating the perfect soil mix for your beloved cacti and succulent. After all, how to make DIY cactus soil is an easy task that requires just a few simple ingredients and a bit of know-how!

Can I Use Regular Potting Soil for Cactus?

Can I Use Regular Potting Soil for Cactus

It is not recommended to use regular potting soil mix for cacti as it tends to retain too much moisture, which can lead to root rot and other issues for cacti that prefer a well-draining soil mix. Regular potting soil typically contains organic matter, such as peat moss and compost, which can hold onto moisture for longer periods, whereas cactus soil mix has more inorganic materials like coarse sand, perlite, or pumice, which help with drainage.

If you don’t have access to the soil mix, you can create your own by mixing regular potting soil with sand or perlite to improve drainage.

Are Coffee Grounds Good for Cactus Soil?

Are Coffee Grounds Good for Cactus Soil

Typically, cactus soil shouldn’t be used with coffee grounds. Even though coffee grounds are a great source of organic matter that can assist the soil’s texture and ability to retain water, cacti typically find them to be excessively acidic since they prefer more alkaline soil. In addition to raising the possibility of bacterial or fungal growth, coffee grinds’ acidity can also injure cactus roots by increasing their risk of development.

Instead of using coffee grounds, it’s preferable to use a specialist cactus soil blend that has the correct ratio of inorganic components, such as coarse sand, perlite, or pumice, to increase drainage and prevent overwatering. Instead, you might want to think about using compost or coconut coir to add organic matter to your soil mixture.

What Is the Best Soil for a Cactus Mix?

What Is the Best Soil for a Cactus Mix

A well-draining soil mixture is ideal for cacti because it prevents standing water from damaging the roots by allowing excess water to swiftly drain away. The optimum soil mixture for cacti should contain both some organic matter to supply the plant with nutrients and some inorganic components that aid in drainages, such as coarse sand, perlite, or pumice.

One-part coarse soil or perlite, one part pumice or gravel, and two parts of a high-quality commercial cactus potting mix would make up a standard cactus soil mix. This particular soil mixture will aid in simulating the desert-like environments that cactus like. Additionally, it’s crucial to select pots with drainage holes to let extra water drain.

Avoid compressing the dirt too tightly around a cactus’ roots when potting it up to prevent improper water drainage. When the earth is fully dry, water lightly after allowing the plant to settle naturally. This will assist in ensuring proper growth and avert overwatering, which is the most typical root of cacti issues.

Cactus Soil and How it Differs from Regular Potting Mix

In a few crucial ways, cactus soil is different from the conventional potting soil. Cactus thrive in dry climates and favor soil that drains well and has a low moisture content. Cactus soil is created to replicate the arid environment where these plants normally flourish.

Here are some of the primary distinctions between conventional potting soil and cactus soil:

Drainage: Compared to conventional potting soil, cactus soil has considerably greater drainage, which helps keep water from building up around the cactus’s roots, which it can lead to root rot. The inorganic components of cactus soil, including sand, gravel, perlite, or pumice, don’t hold moisture as well as the organic components of a typical potting mix.

Because cacti have evolved to grow in nutrient-deficient soils, cactus soil has fewer nutrients than conventional potting soil. Cactus must be fertilized with a low-nitrogen fertilizer during their growing season because the inorganic components in cactus soil do not give many nutrients.

pH: It is greater than that of ordinary potting soil. Cactus soil often contains more sand or grit and less peat moss than standard potting mix because cacti prefer slightly alkaline soil.

Cactus soil has a gritty texture compared to conventional potting soil. The inclusion of coarse sand or perlite/pumice in the mixture aids in forming air pockets in the soil, improving drainage and promoting greater airflow around the cactus’ roots.

To ensure health and growth, it’s crucial to use the proper soil. Regular potting soil might work for some plants, but to give cacti and other succulents the optimal growing circumstances, it’s important to use specific cactus soil.

Can You Make Your Succulent Soil?

Yes, it’s possible to make your succulent soil mix. Succulent plants require well-draining soil that doesn’t retain too much moisture, as their roots are prone to rot in wet conditions. Here’s a simple recipe for making your succulent soil:

  • Start with a base of potting soil. You can use any commercial potting soil as a base, but make sure it doesn’t contain any added fertilizers or moisture-retaining materials.
  • Add in a gritty material such as perlite or pumice. This will help improve drainage and prevent the soil from becoming too compact. Aim for a ratio of around 1:1, or 50% potting soil and 50% grit.
  • Optionally, you can add in other amendments like coarse sand or small stones to further improve drainage and add weight to the soil.
  • Mix all the ingredients thoroughly, and your succulent soil mix is ready to use.

Remember to always use a well-draining container with a drainage hole to prevent water from pooling in the soil, and water your succulents sparingly, allowing the soil to dry out between waterings.

Tips for Growing Healthy Cacti with Homemade Cactus Soil

Tips for Growing Healthy Cacti with Homemade Cactus Soil

When growing healthy cactus with DIY soil, it’s important to make sure that the soil is well draining, so that the roots of the plants can properly absorb water and oxygen. To achieve this, mix coarse sand with a lightweight potting mix; think of the former as providing the “base” for how to make DIY cactus soil, and the latter as providing essential nutrients for plant growth. So, don’t skimp on quality! After all, a healthy cactus starts with good soil.

Additionally, be sure to use the right proportion of potting soil and sand to ensure that the soil has good aeration and drainage without becoming overly dry or compacted. A ratio of 2 parts potting soil to 1 part sand should work well, so you can say goodbye to worrying about how to build the perfect cactus soil! Plus, it’s a great way to save money when doing DIY projects. Who knew sand was such an important ingredient to potting success? Now, you’ll be able to make your mixed cactus soil in no time!

Finally, adding organic matter like compost or aged manure will provide extra nutrients for your cactus. And help balance out the texture and moisture levels of your DIY cactus soil.

Thereafter, it is important to remember the information that when creating your own cactus soil, you must be mindful of meeting the requirements of cactus soil, such as good drainage, coarse particles, and organic matter. Adding organic matter like compost or aged manure will ensure your DIY cactus soil meets these requirements while also providing extra nutrients to ensure your cactus has everything it needs to thrive.

Conclusion

In conclusion, taking care of cacti is not as intimidating as some people may think. With the right soil and knowledge, anyone can grow healthy and vibrant cacti in their own home. So, if you’re looking for an easy way to add a bit of green to your living space, DIY cactus soil is definitely worth trying out!

Is It a Weed or a Flower? The Top 7 Weeds That Look Like Flowers

Is It a Weed or a Flower? The Top 7 Weeds That Look Like Flowers

Weeds That Look Like Flowers

When it comes to gardening, there are some plants that are a gardener’s best friend, while others are their worst enemy. But how do you tell the difference between dazzling flowers and pesky weeds in your garden? In this post, we will take a look at the top 7 flower lookalikes that are actually weeds and learn how to identify each one. Keep reading to find out more!

Identifying Weeds That Look Like Flowers

Identifying weeds that look like flowers in your garden can be confusing, as there are many varieties of plants that have similar appearances.

One of these is bindweed, also known as wild morning glory. This fast-growing weed has small flowers that are trumpet-shaped that can appear almost indistinguishable from other flowers. It does however have one telltale difference; bindweed has leaves in pairs along the stem, whereas many flowers have just a single leaf. Although bindweed resembles delightful flowers, it can be invasive and difficult to remove – so if you’re not sure what kind of plant you’re looking at, it’s best to do your research before you start loving them too much!

Identifying Weeds That Look Like Flowers

To help differentiate the two groups, it is important to look closely at the plant’s leaves, stems, and flowers. Common daisy weeds, for example, may appear to be beautiful young daisy flowers from a distance in your garden, but upon closer examination, you’ll notice that the daisy weed has rough, far less symmetrical leaves than daisy flowers. Furthermore, daisy weeds have much shorter stems than their flower counterparts and their flowers don’t have the same delicate petals. So, if you’re wondering if it’s a weed or flowers, take the time to get up close and personal!

Common weeds that have flower appearances include dandelion, purslane, white clover, chicory, thistle, oxalis, and yellow wood sorrel. Moreover, chickweed is another common weed that many mistakes for a flower due to its delicate blossoms. It is an annual weed that thrives in moist soil and is a pesky problem for gardeners as chickweed can quickly take over. Although it may appear as a flower, chickweed should be removed to avoid any further infestations as chickweed can spread rapidly.

What are flowering weeds?

People often think of weeds as dirty and unkempt-type plants. However, there are actually many different types of weeds that can flower and look quite beautiful.

Simply put, flowering weeds are weeds that bear flowers. Due to their potential to compete with desired plants for nutrients, water, and light, these plants are considered undesirable in gardens, lawns, and other manicured areas.

What are flowering weeds?

Common flowering weeds that need to be removed are dandelions, clover, chickweed, crabgrass, and thistle. Some flowering weeds, like wildflowers, can be invasive and difficult to control despite having lovely immature blossoms. It’s essential to appropriately identify and manage these weeds in order to maintain a garden or landscape’s health and beauty.

Dandelions, clover, chickweed, spurge, and plantain are a few of the most prevalent floral weeds in your yard. Most people consider all of these weeds to be annoyances, but if you let them grow, they can actually bring a little bit of beauty to your garden. Don’t give up if you have flower weed in your garden.

You may get rid of them and admire your flower’s beauty without having to worry about them taking over if you put in a little effort.

Different types of weeds – Yellow Flowers, White Flowers, and Blue Flowers Weed

Various hues, forms, and sizes can be found in flower weeds. The more popular kinds include blue flowers, white flowers, and yellow flowers. The shape and color of every kind of flower are distinctively their own.

One of the most typical varieties of weed flowers has yellow blossoms. Because of their vivid hue, they are easily recognizable and may be found all over the world. Additionally widespread are white blooms, which can range in size from little to enormous. In comparison to the other two, blue blossoms are less frequent, yet they are still quite lovely.

The Top 7 Weeds That Look Like A Flower

Weeds can often look strikingly like flowers, making them difficult to differentiate.

Dandelion Weeds

Dandelion weeds
Dandelion weeds

A dandelion initially appears to be a yellow flower, but if it has a fluffy, white ball on top of the stem, you might be able to spot it in your garden more easily. These are frequently plentiful in the spring and fall, and because they have the potential to grow rather large, they are easy to spot. Even while having thick, healthy grass is the best way to get rid of weeds in your yard, there are herbicides you may use to spray dandelions that won’t hurt your lawn.

Chickweed

Chickweed

Chickweed (Stellaria media) is the most common type of weed that looks similar to flowers in your garden. The white, star-shaped flowers have five petals and are about 1/4 inch wide. Chickweed flowers are found in clusters at the end of stems. The leaves of chickweed are opposite each other on the stem and are lance-shaped with pointed tips as flowers. Chickweed is a low-growing plant that spreads quickly by seed. It is often found in lawns, gardens, and fields. Chickweed can be controlled with herbicides or by hand pulling.

Creeping Charlie

Creeping charlie
creeping charlie

Charlie, also known as creeping charlie, ground ivy, and gill-over-the-ground, is a persistent weed that can be difficult to control in your garden. The dark green, glossy leaves of this fast-growing ground cover have scalloped edges and hairy surfaces. Charlie produces small, blue flowers that bloom in spring and summer.

While creeping charlie isn’t normally considered like other pretty flowers, some people appreciate its ground-covering abilities and enjoy its violet blooms. Charlie can be a problem in gardens, however, because it quickly spreads and crowds out other flowers and plants.

If you have creeping charlie in your garden then you should remove it, the best method is to dig it up by hand. You can also try smothering it with a thick layer of mulch or using a Weed Wrench to pull it out of the ground. Herbicides containing glyphosate or dicamba will kill creeping charlie, but they will also damage other flowers, so use them with care.

White Clover Flower

White clover weed
White clover weed

The family of legumes includes weeds like clover. It grows slowly and has little, white or pink blooms as well as three-part leaves. Because it can spread quickly and compete with other plants for nutrients, water, and sunlight, clover is frequently seen as a weed. Clover does, however, possess some advantageous traits, such as the capacity to fix nitrogen in the soil, which is advantageous for other plants. Due to its low maintenance needs and eye-catching blossoms, some people also think that clover makes a good ground cover for gardens and lawns.

Although clover is frequently referred to be a weed, neither humans nor animals may be harmed by it because it is not poisonous. It is important to get rid of clover blossoms before they become established because they can be challenging to get rid of from yards and gardens. Clover is a fantastic choice if you’re seeking for a weed that resembles a flower. Both its identification and removal are simple processes.

Plantain Weeds

Plantain weed
Plantain weed

Broadleaf weeds like plantain weed (Plantago) are widespread in lawns, gardens, and other manicured areas. There are many different varieties of plantains, but the Broadleaf Plantain (Plantago major) and the Narrowleaf Plantain are the most widely cultivated (Plantago lanceolata). Low-growing plantains grow in a rosette of leaves near to the ground. The long, narrow leaves may feature ribs or veins that are easily distinguished since they run the length of the leaf. Plantain grows tall, slender stalks with tiny, insignificant blossoms that are simple to overlook. Plantain is a robust, resistant plant that, once it establishes itself, can be challenging to control, making it a typical issue in lawns and gardens.

Dandelion flowers can be mistaken for the flowers of plantain weed. Long, slender leaves and yellow blooms are characteristics of dandelion blossoms. The hairy leaves and stem of plantain weed help to distinguish it from dandelion weed.

Purslane Weeds

Purslane Weeds

The low-growing annual plant known as purslane is widespread in lawns and gardens. Summertime brings forth the small, yellow blossoms of purslane. The blooms have five petals and can be found alone or in pairs. A member of the Portulacaceae family is purslane.

A common weed in gardens, purslane (Portulaca oleracea) is a delicious, succulent plant. It grows in a spreading manner and makes little yellow flowers.

One of the most prevalent weeds in gardens, purslane is also one of the most beneficial ones. All portions of the plant are edible, and it is a good source of omega-3 fatty acids, vitamins A and C, and both. Purslane can be prepared like spinach or eaten raw in salads.

Spurge Weeds

Spurge Weeds

Spurge is a low-growing, annual weed that is common in gardens and lawns. This one has small, greenish-yellow flowers that bloom in the summer. Many people think that spurge weeds are actually pretty little flowers. But the truth is, this weed is actually one of the peskiest weeds around!

The key thing to keep in mind about spurge is that it not only looks like nice flowers but that it also binds to soil or porous surfaces and spreads very quickly, even since the sixties.

Spurge plants are usually found in the mulch bed or in pots of dirt. They are often green with white or yellow flowers which look similar to a hibiscus flower. To get rid of these weeds from the garden, gardeners can just pull the weed out or use a spray-on weed killer or weed barrier, so they stop spreading. As any gardener knows, one of the challenges of gardening is weeds coming up in the wrong places and taking over your plants.

Tips & Tricks for Differentiating Flowers from Weed

Here are some tips and tricks for differentiating flowers from weeds:

  • Look at the leaves: Flowers generally have distinct and attractive leaves, while weed leaves are often simple and plain.
  • Check the stems: Flowers typically have strong and sturdy stems, while weeds have thin and spindly stems.
  • Observe the flowers: Obviously, flowers have flowers, and weeds generally do not. But some weeds like dandelions have flowers too, but they often look different from those of flowers.
  • Pay attention to the growth pattern: Flowers usually grow in a uniform and organized manner, while weeds tend to grow haphazardly and irregularly.
  • Compare with known plants: If you’re unsure, compare the plant in question with known plants. You can also use plant identification apps to help identify unknown plants.

Remember, these methods are just general guidelines, and there are many exceptions. If you’re still unsure, it’s best to consult with a professional gardener or horticulturist.

For example, weed often has shallow roots that can spread quickly, while flowers typically have deep, more concentrated roots. Take chicory for example; it may look like a flower, but chicory has a shallow root system that expands quickly, making it a weed instead. Knowing how to tell chicory and other weeds apart from flowers can help you pinpoint the most vibrant and well-tended garden blooms.

Additionally, paying attention to the leaves and stems can help you distinguish between flowers and weeds; weeds often have smaller leaves that are arranged in a much less uniform pattern than flowers.

Finally, daisy weeds may look similar to daisies, but they can be distinguished by the smaller leaves and random pattern of the stem of the flowers. It may look pretty, but daisy weeds are still technically a weed and not flowers. Paying attention to the leaves and stems can help you distinguish between flowers and weeds; weeds often have smaller leaves that are arranged in a much less uniform pattern than flowers.

What Damage Can these Weeds Possibly do to a Garden?

The following are some ways that weeds that mimic flowers might hurt your garden:

  • Resource competition: Weeds can compete with the plants in your garden for nutrients, water, and sunlight. Your desired plants may experience decreased development and yield as a result of this.
  • Transmission of diseases and pests: Certain weeds can harbor pathogens and pests that can infect and infest your garden plants.
  • Crowding and shading: Tall, dense weeds can block sunlight from reaching your garden plants, causing them to grow statedly and restricting their access to sunshine.
  • Damage to appearance: Weeds can make your garden look messy and unpleasant, taking away from its charm and attractiveness.
  • Weeds can produce a lot of seeds, and those seeds can spread rapidly and readily, encouraging additional weed growth in your garden.

To avoid these negative consequences and to keep your garden’s attractive plants thriving in a healthy and productive setting, it’s crucial to manage weeds.

How Can I Get Rid of Weeds That Resemble Flowers?

It might be difficult to free your garden of weeds that resemble flowers without harming your real flowers if you have some. Here are some suggestions for getting rid of various kinds of weeds:

  • Identify the weed: Be sure to know the name of the weed that resembles a flower so that you can comprehend its growth pattern and mode of propagation in the garden.
  • Hand-pull: You can manually remove weeds that are small and don’t have deep roots. To stop regrowth, try to pull up the entire root system.
  • Utilize a hoe: To cut the weed off at the base, use a hoe. Take care to avoid damaging any neighboring plants.
  • Use herbicide: You can use herbicides if hand-pulling or hoeing is not an option. Pick one that won’t hurt your flowers but be cautious. Many different kinds of flowering plants are considered broadleaf weeds, and some herbicides are made to destroy them.
  • Mulch: Adding mulch to your garden might help stop weed development. Sunlight, which is critical for weed germination, will be blocked by mulch.

When using herbicides in your garden, keep in mind that they might also easily kill valuable insects and pollinators.

To Conclude

In conclusion, each of these seven flowers has distinct characteristics that make them easily distinguishable from one another. It’s important for gardeners to know how to tell the difference between beautiful flowers and creepy weeds so that they can nurture their gardens properly and enjoy the rewards of their hard work. With some knowledge and practice, gardeners can take preventative measures like fertilizers against invasive pests and make sure they get the most beautiful flowers in their gardens.