What temperature is frost for plants: Protecting plants to freeze in frost temperatures

What temperature is frost for plants?

What temperature is frost for plants

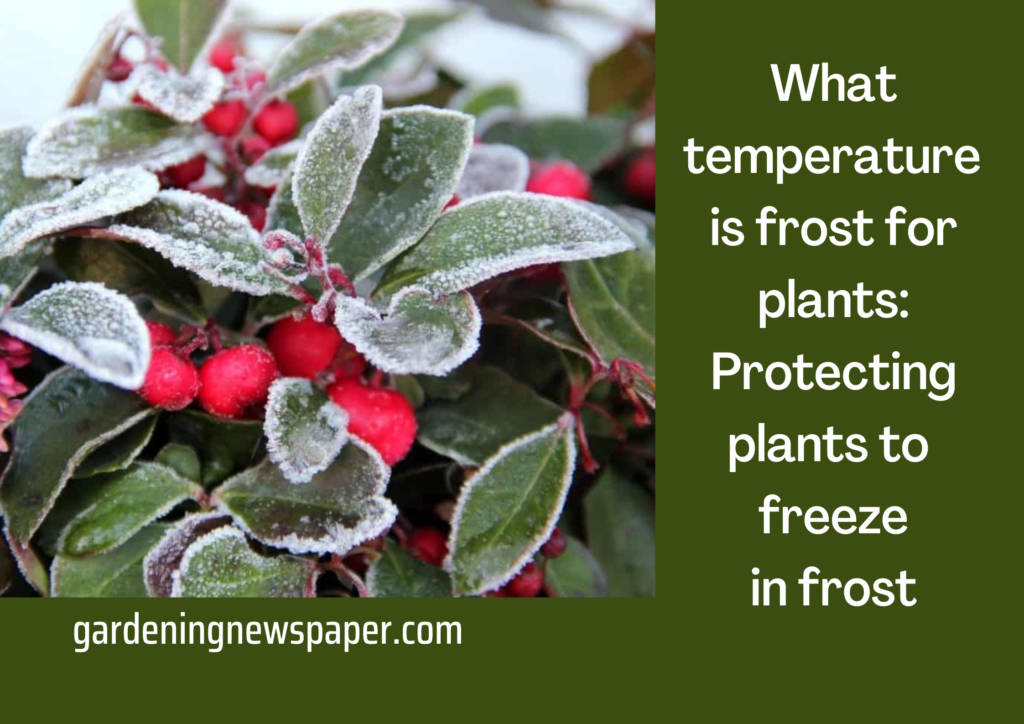
“FROST” is predominantly ice crystals that develop when ice crystals form on the outside of your plant. It forms when the moistness in the air and converted to ice without first becoming mist.

In our middle school these phenomena of gaseous interconverting into solid or ice crystals without becoming liquid. Some factors are noteworthy for evolving it.

Firstly, the temperature of the atmosphere has to fall between 36- and 32 degrees Fahrenheit. The moisture of the air converts into ice crystals, so there has to be a little breezy. It usually occurs on clear nights.

Our hardiest and coldest plants can withstand frost without the help of a gardener as they are natural health survival. Most of the sensitive plants, valuable summer produce vegetables such as tomatoes, peppers, and squash, can thrive at this temperature with the help of a gardener.

To shield your outdoor plants from cold temperatures while gardening, learning to anticipate when requirements for frost strike the area and what safeguards to take is useful.

How to Protect Them from Frost and Avoid the Freeze?

1. The potted plant should be kept inside at room temperature.

When it is in the forecast or you predict frost, at dusk you have to move your potted plants and hanging baskets indoors.

Plants in pots are more in danger or susceptible to harm because they aren’t benefited from the insulating capacities of the ground soil like in-ground plants are.

Roots of potted plants are exposed to colder temperature and at that temperature frost occurs. Although they have threats, extreme survival of these plants saves them.

Gardeners have to choose a place that isn’t too warm because sudden shifts in temperature can shock plants.  A place in your garage shed or cellar can be used as a shelter for plants.

Examine plants thoroughly for pests and diseases before fetching them inside your home. Keep plants separated from your houseplants to discourage the potential spread of insects.

Once the threat of frost has passed from the air, transport all plants back outside first thing in the morning.

How to Protect Plants from Frost

2. Shield them with coverings like plant frost cloth.

To protect a larger group of plants, simply wrap them with coverings like bed sheets, towels, or drop cloths.

Before applying the plant frost cloth, place some stakes around the plant so that the plant is in warm weather. Let the material drape over the plants to the mud line. Do not tie around the stem or stem of the plant.

Tie them together to prevent heat from the earth from reaching your plants. For even more resistance, consider adding a final layer of plastic.

No part of the plastic cover should come into contact with plant vegetation, as plastic can interfere with plants.

Weigh down the corners and boundaries with heavy stones or bricks to prevent the coverings from blowing away in the night. The next day the first task of the gardener should remove the covers of plants.

How to Protect Plants from Frost - shield plants with coverings

3. Watering them in the afternoon

It appears counterintuitive because it can hold the soil moist can aid protect plants from freezing weather.

Damp soil has an insulating result, which emits warmth upward come nightfall.

If you water your plants before the cold wind blows, do so at the meridian, when the temperature is still slightly warm.

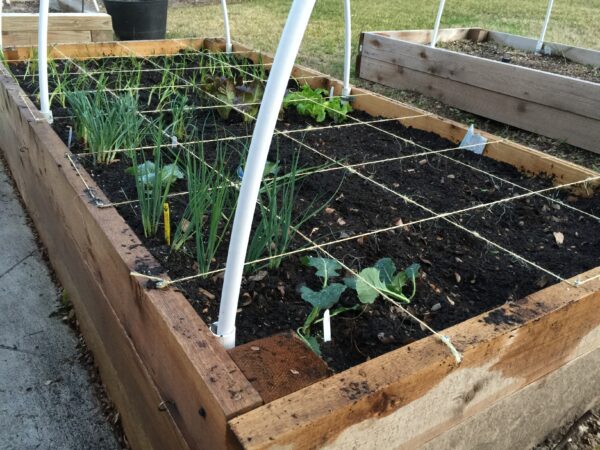
4. Adding a dense layer of mulch

When it’s freezing, you should add a layer of mulch to your garden beds. It will help shield the soil from impulsive swings in temperature.

  • Utilize straw, wood chips, dry leaves, or precisely just a heap of leaves. It provides necessary insulation for the plant’s root system below ground.
  • Heavy mulch 3 to 6 inches deep to create a good barrier.
  • Leave one or two openings around the central stem to allow heat from the soil to reach the plants.
  • Mulching your green beds is one of the best things you can do to keep them low maintenance. But be sure to remove some of the defensive mulch when the weather warms up.

5. Soil perfect to use as frost resistant

The kind of soil your garden is thriving in also influences the quantity of dampness it maintains. Profound, loose, heavy, productive soil discharges more moisture into the air than sandy, nutrient-poor soil.

The more humid the air is, the better elevated the moisture point will be, and less frost can form on those plants. The mulched plants are more likely to become frosted since the mulch holds moisture and heat released from the soil and heats up the surrounding air.

6. Comprehend the behavior of plants in garden.

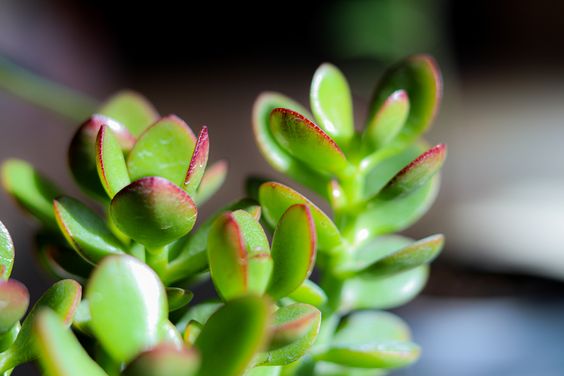
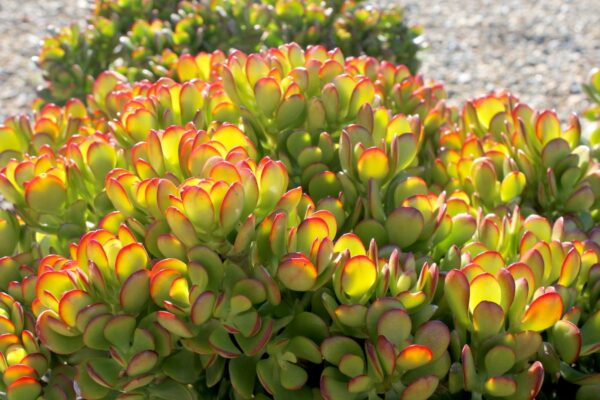
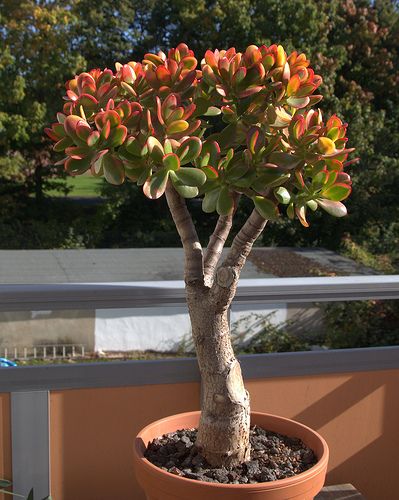
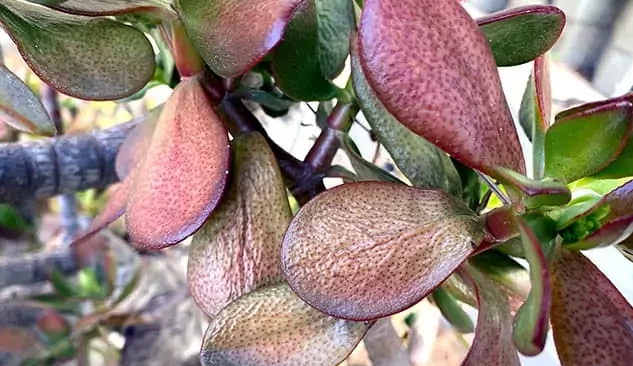
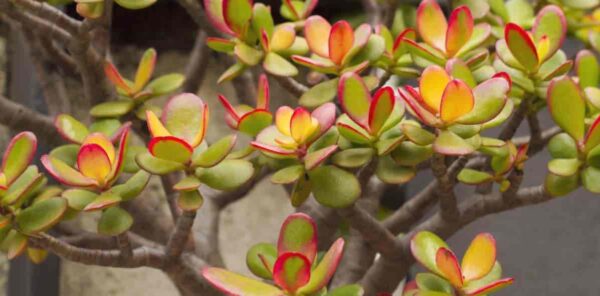
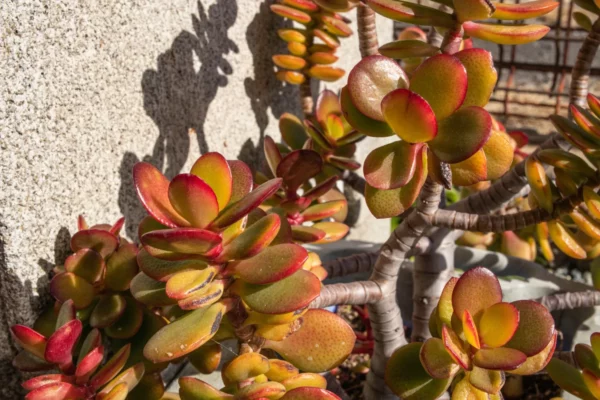
The plant itself defines its probability of harm. Immature plants or those still growing are most susceptible. Especially the new growth plants are in danger. The toleration against frost tends to be more elevated in the plants with deep maroon leaves and such leaves can absorb and controls heat.

Soft-leaf plants also can retain their warmness. Hardy or frost-resistant plants expose less portion of their leaves to chilling and drying winds.

In what temperatures frost can damage a plant?

Plants can endure a huge variety of temperature ranges, however, there are particular threshold temperatures that should be met earlier than they may develop and flourish. Frost is the maximum not unusual place form of plant harm that takes place at temperatures below 32 stages Fahrenheit.

Plants will develop naturally withinside the low-temperature sector as much as 32 stages Fahrenheit, however, beneath this temperature it can also arise on stems or leaves in bloodless climates.

Should you cowl flora at 39 stages? Are forty stages too bloodless for flowers?

When plants are exposed to frost, the temperature can damage the plant completely. The damage can deviate from browning leaves and drying out the plant to killing the tender plants completely.

  • Understanding how to inform in case your plant has hoar destroyed is essential if you want to keep away from unnecessary waste of time and money.
  • The leaves may be brown and there may be masses of lifeless or loss of life leaves in addition to stems.
  • The plant could have a great yellowing or browning color. If you detect those symptoms, they perhaps had been killed because of frost.
  • For interior plants, it’s an exceptional test of the leaves for frost harm inside. To do this, you need to use your arms softly to push down at the pinnacle of the leaves and experience any raised regions or bumps. For a door plant, it’s simpler to look if the leaves are frosted.

To do this, sincerely have a take a monitor how a whole lot of water you spot popping out of in which stems meet leaves.

Here are a few florae that need not be blanketed with the aid of using frost protection:

Here are a few florae that need not be blanketed with the aid of using frost protection:

Frost is an herbal phenomenon that takes place all through wintry weather. Rhododendron, Petunias, and snapdragons are some frost-resistant varieties.

It generally determines flora due to low temperatures. Its injures flora, which may be devastating to the general fitness of the tender plants.

Some people suppose that if they spray water on the frosty leaves, they may clean the frost and kill it.
Nonetheless, that is a wrong practice and can even induce extra troubles than it solves.

Frost is a form of ice that administrators and accumulates on flora and shrubs all through the bloodless wintry weather months.

More frequently than now that no longer, it’s now simply the leaves of plants that get frosted, however, the flowers, stems, trunks, or maybe the roots.

Key Takeaways

Climate change induces several differences in the physical conditions, such as plants and leaves. The natural environment and local climate extremes influence flowers and plants. The anticipated growth in frost events drives sense in plant replica and plant structure vegetation.

Plant life’s ability to avoid frost is dependent on the timing of its development and reproduction on the same hand for survival gardening, off-grid method is also useful.

In this article, we have evaluated the impact of frosts on plants and flowers, how the frost is damaging the roots, and tips on how to protect them from frost.

After that, we have to predict frost occurrence to take standards to save plants. The prediction of hoar frost events comprises a complicated decision study that employs conditional possibility and economists.

Will baking soda make hydrangeas pink: Baking Soda for Hydrangeas

Will baking soda make hydrangea pink?

Will baking soda make hydrangea pink

Pink Hydrangea is not a miracle is a chemistry that brings beauty to gardening. Hydrangeas are a beautiful plant with many tints of pink and white. These are widely known as hortensia. Hydrangeas are exceptional performers and add a spectacular asset to the garden. Hydrangeas have the potential to change hue depending on the condition of the soil.

So, the common question amongst gardeners is whether baking soda helps transpose the color of hydrangeas to pink or not. The answer is yes and no because it needs both acid and alkaline to thrive which means they are most likely not like the presence of baking soda.

The pH of the soil determines flower pigment- particularly whether or not the hydrangeas are taking up aluminum from the soil. The pink color indicates the plant is getting aluminum and the blue indicates it isn’t.

Gardeners can control the color by altering the ph so it is useful to add baking soda as baking soda is the most cost-effective way to turn your hydrangeas in pink color.

Will baking soda make hydrangeas pink?
How Does Baking Soda Good for Hydrangeas?

The question is baking soda good for hydrangeas has these answers:

  • Baking soda is sodium bicarbonate. It’s used in so many different ways in gardening, and also used in industrial applications. It’s a naturally occurring substance, which indicates it’s safe to use in both organic and non-organic gardens.
  • A simple and quick way to check the pH level of garden soil is through the soil test kit. If the soil pH level is below 5.5, then it is acidic. If the pH level is at or above 7, then the soil is alkaline and perfect for growing pink hydrangeas.
  • After a soil test is done, gardeners know how important pH is to the health of the plants. That’s the reason a gardener is advised always plant in acidic soil and add lime if he is in an alkaline environment. So, sodium bicarbonate is added to water to change the pH level.
  • It also causes the carbon dioxide in water to escape. This makes the water less acidic, which is why baking soda is used as a pH buffer. If you have soil with a high pH (above 6.5), baking soda will help to lower the pH level.
  • If the soil has a pH of 6.0 or lowers that means the soil is acidic and it helps to induce blue or lavender-blue hydrangea. Alkaline soil, with a pH above 7.0, facilitates pinks and reds. When a pH is between 6 and 7, the blossoms turn purple or bluish pink.

What Is Appropriate Soil for Hydrangeas?

Hydrangeas love acidic soil. They prefer soils with high amounts of compost, decomposed leaves, and aged manure. However, their soil also has a high pH level of between 5.5 and 6.2. Baking soda can’t help soil with a high pH level.

That’s why a gardener is supposed to improve the acidity of the soil. Adding compost, aged manure, or additives like sulfur improves the acidity of the soil which helps to change the hue of the Hydrangea flower.

What Is Hydrangea Soil?

Baking Soda for Hydrangeas

So, by adding baking soda, hydrangeas can get help to lower the pH level in soil with a high pH level. And that’s exactly what a gardener wants to do for enhancing the beauty of the flower. If the soil has a high pH level, one will be able to plant more types of flowers in one’s garden and even grow citrus trees.

In organic gardens plants, baking soda can be safely used. It is sodium bicarbonate, and plants cannot be harmed in any manner by it. Baking soda enhances the pH buffering properties of soil by causing the release of carbon dioxide from the soil and can change hydrangea color easily.

The Pros to Add Baking Soda to Change Hydrangea Color.

  • Baking soda is the most cost-effective way to grow pink hydrangeas and baking soda is the secret of it.
  • It works well to bring down soil pH levels and can be a fantastic remedy for acidic soil.
  • The irrigation system is easily expanded by it.
  • Baking soda changes the pH buffer in both organic and inorganic gardening.
  • It can be used to enhance soil structure by increasing its porosity and aeration.
  • Both soil sanitizer and plant fertilizer can be made from it.
  • It can also be used to eliminate unpleasant smells from one’s backyard.
  • The carpets and floors in your house can also be cleaned using it.
  • Every non-organic garden can use baking soda or NaHCO3 without risk.
  • Obtaining a reasonably priced new garden might be beneficial.
  • You may find it beneficial to stay away from rotten tomato odor.

The Cons of Using Baking Soda

It is caustic, which means it will burn the skin if it gets on the gardeners.

  • Baking soda is alkaline and is not a natural soil amendment that can be made so it can leave behind a sour smell.
  • It can cause soil to become alkaline, leaving it harder to grow vegetables and flowers.
  • It only works on hard, compacted soils. If you don’t rinse off the baking soda, it can stain your driveway.
  • NaHCO3 or baking soda must use carefully. It can damage some plants if used too often. It may be harmful to animals.

Make sure to mix the baking soda (1 tablespoon) well and evenly distributed it through the soil before bedding in the plant. Adding baking soda to the soil around the hydrangea will give the roots the protection they need from the winter temperatures as well as the summer ones.

Because hydrangeas are such large plants the roots often battle to provide enough moisture for the leaves, so keeping them cool and moist ensures that the plant survives both hot and cold temperatures.

The Pros and Cons of Using Baking Soda on your hydrangeas

Baking Soda on hydrangeas

It does take time to change the ph. level of the soil from 3 to 8 months. Adding excessive baking soda for a long time may damage the soil so gardeners have to keep patience as a substitute he can use garden lime as well which will help the blossoms to become pink.

Maintaining consistent pink blossoms will demand standard applications of baking soda, so it’s a suitable idea to add the baking soda with the fertilizer. When hydrangea flowers turn pink, they won’t change color, so gardeners have to wait until the following year to see a different tint resulting from the efforts to modify soil pH.

In Conclusion, Baking soda can be a helpful addition to your hydrangea fertilizer regimen. It can help to lower the pH level in your soil and make it more acidic, which is what hydrangeas are looking for. Also, baking soda will make hydrangeas pink.

Baking soda is also a good soil sterilizer and odor eliminator, so used as unwanted smells is a problem.

It uses to disinfect home floors, so it is a helpful addition to the backyard fertilizer regimen.

But baking soda should use with caution and moderation, as it is not a natural additive and can harm your plants if used too frequently.

It uses in moderation, as it damages some soil types. Baking soda is an inexpensive and easy-to-find addition to your hydrangea fertilizer regimen, so it can be a great way to get a new garden.

Growing Onions in 5 Gallon Buckets – Complete Guide to Grow Onions in Bucket.

Growing Onions in 5 Gallon Buckets – Complete Guide to Grow Onions in Bucket

Growing Onions in 5 Gallon Buckets

Sandwiches, salads, soups, and other dishes can all benefit from the simple and extremely easy addition of onions. Also, there are numerous types of onions, including red, yellow, and white, and those with hot and sweet stems.

Of course, there are green onions, which give the meal flavor and color. For both rookie and seasoned gardeners, growing onions is enjoyable. Many people think homegrown onions in a 5-gallon bucket taste better than store-bought ones.

Some gardeners have asked me if they can grow onions in 5-gallon buckets.

If you’re wondering if you can grow onions in a 5-gallon bucket while living in an urban area, the answer is unquestionable yes. To make room for the bulb’s subsurface root system to expand. Likewise, provided the bucket is at least 10 inches deep, you may grow onions in 5 gallon buckets.

How many onions grow in a 5-gallon bucket?

How many onions grow in a 5-gallon bucket

Within each bulbous plant, there is only one bulb. The good news is that six to eight bulbous plants can fit in a five-gallon bucket. It gets even better by making the most of the available space in your bucket.

Some things need to be taken care of.

  • Selection of container: The soil depth of bulb containers should be at least 10 inches. The diameter can be as large as it fits but remember that each bulb needs about 3 inches of space to grow in container gardening.
  • A 5-gallon bucket is perfect for growing 6 or 8 bulbs.
  • A large planter box or even a container works well.
  • Make sure your tank has good drainage holes and try to raise it slightly off the ground.

The proper soil for onion in gardens

Container-grown onions do best in well-drained clay soil in pots with a slightly acidic to neutral pH. Before planting or growing, enrich the soil with plenty of mature compost and a balanced fertilizer to grow onions indoors.

How many onions grow in a 5-gallon bucket?Proper watering

The onion needs about 1-2 cups of water per week. Be sure to check the soil because bulb plants often look healthy even though they need water. If using soil, the onion plant doesn’t need as much water. However, they should be checked regularly and watered, if necessary, especially during hot and dry periods. Review the dampness by sticking your finger into the soil from time to time. If you don’t feel moisture after that, it’s time to water.

Choosing a proper container

  • Choosing the appropriate container can make a significant difference in growth. Like a root, an onion needs a lot of room to grow. But they don’t require as much space as people think. The actual onion you consume takes up most of the space.
  • In addition, the root system is relatively shallow. At 10 inches depth, bulbs can grow as large as possible without worrying about overcrowding. Depth is the most important factor, so please get as wide a container as you want. Using regular 5-gallon buckets is an excellent choice for these homegrown plants.
  • A standard hardware store 5-gallon bucket can grow 6-8 bulb plants. Plastic containers are light, durable, compact, and easy to carry with a handle. Take a few buckets and you can get a whole crop without taking up a lot of space. Other containers also work suitable for onion harvest.
  • Onion family plants do well in pots, bed-like containers, or terracotta pots. You can even use hanging plants or simple containers so that onions grow well in a bucket. Just make sure it’s 10 inches deep and the pot will work just fine.

Before you start planting onions, you need to make some preparations

Before you start planting onions, you need to make some preparations.

  • 5-gallon buckets are convenient but not suitable for container growing. So, it has to be rebuilt a bit. First, we need to make drainage holes. If you plant an onion directly in a bucket, water will collect at the bottom.
  • This can create a fungal problem. Use the drill to make a hole in the bottom of the bucket. Make sure the auger you use is large enough to allow the water to seep in while keeping the soil contained.
  • Place the drainage holes evenly around the perimeter of the pot. Also, some holes should be placed near the center. The goal here is to make sure there are no places for water to pool. We want all your tub bulbous plants to get the same amount of drainage capacity.
  • Most 5-gallon plastic buckets have a reinforced rim. This is great for carrying heavy loads, but not so good for gardening. Place the bucket directly on the ground and this reinforced rim will prevent water from leaking.
  • The easiest way is to use some pavers to grow onions. Arrange them so that they do not block the holes and you are ready to go. Many stores also sell risers that fit in 5-gallon buckets of onions.

Fertilization Methods for Onion Plants

  • Despite the shallow root system, onions are heavy in nutrients. Plants use the nutrients in the soil as much as possible. Fertilization helps improve soil quality and promotes the rapid growth of plants.
  • Onion needs all three major nutrients. These include nitrogen, potassium, and phosphorus. Plants take up moderate amounts of nitrogen. But they are higher in potassium and phosphorus. In general, standard nitrogen formulations work well. A 10-10-10 organic fertilizer works best.
  • We recommend using nitrate-based formulas rather than sulfate-based formulas, as sulfates tend to make the resulting crop sharper. If you want sweet and tangy onion, you need to do this, use nitrate-based fertilizers. Side-feed the bulbs with a water-soluble fertilizer about three weeks after planting. Additional applications can then be applied every time in 2-3 weeks during the growing season. This step will help a lot to plant onion sets.

Fertilization Methods for Onion Plants

How to Harvest Onions?

  • After treating the plants for about 90 days in a bucket, the bulbs are ready to be enjoyed in bucket. But you have to harvest them at the right time. Therefore, it is necessary to rely on the appearance of the culm.
  • Onions are usually ready when the stems begin to dry and turn yellow. They will fall over, indicating the onion is ready. To harvest, simply pull out the vegetables with a stick. Shake the onion well to remove any dirt and set aside. Don’t cut the tip of onion sets yet! It takes about 7-10 days for the onions to harden.
  • The aging process helps lock in and develop flavors. When you pull the vegetable out of the ground for the first time, you will notice that it has thin skin and thick flesh. Vegetables are very delicate at this point.

How much sunlight do onions need?

How much sunlight do onions need

Bulbs still need plenty of sunlight while growing underground in buckets indoor. These plants need full sun every day. It is not a plant to put on a windowsill or in the shade. Place the pot on the south side of your home so the plant can enjoy the sun from dusk to dawn. To grow large, healthy onions, it is important to choose varieties suitable for the indoor region. There are 3 types of onions to choose from. The difference between these categories has to do with the amount of daily sun you need.

Short Day Onions

Short Day Onions require medium sunlight for maximum performance. These plants should be taken daily for 10-12 hours. They thrive best in the South, where the days are slightly shorter. North can grow short-day onions with a long day. But you end up with a smaller bulb. In addition, plants can start flowering much earlier. Common varieties include Southern Bell and White Bermuda.

Long Day Bulbs

Long Day Bulbs are ideal for Northern gardens with long days. These strains require 14 hours of sunlight per day. Anything else and pears will not form properly. There are varieties of long-day onions such as Yellow Sweet Spanish and Ring Master. Chunichi Onions, these varieties are intermediate between long-day and short-day onions. Ideal for the Midwest and the Middle East, these bulbs require 12-14 hours of sunlight per day for bulb formation.

What are good companion plants for growing onions?

Onions are a popular vegetable crop that can benefit from growing companion planting. Growing some good companion plants can help repel pests or attract beneficial insects, while others can improve soil health and nutrient availability. One good companion plant for growing onions is garlic, which can help deter onion flies and other pests that feed on alliums.

Another helpful companion is chamomile, which can attract hoverflies that prey on aphids and other harmful insects. Additionally, growing beans or peas near onions can improve soil fertility by fixing nitrogen.

Marigolds can also be useful as they have been known to repel nematodes, which can damage onion roots. Overall, planting a variety of companion plants alongside onions can help support their growth and health, while also creating a diverse and thriving garden ecosystem.

Are carrots and potatoes good companion to plant onion sets?

Indeed, onions and potatoes make good gardening partners for planting onions.

Because their roots are at various depths, onions and carrots complement one another well. Carrots have longer roots than onions, which have shallower roots. As a result, they won’t have to compete with one another for the same soil nutrients as they develop together.

Also, a wonderful companion plant for onions is potatoes. By generating a smell that is repulsive to these pests, they can assist in warding off insects that can attack onions, such as onion flies. Furthermore, because potatoes require different nutrients than onions, they can assist maintain a balance in the soil’s nutrient levels.

Conclusion

In a 5-gallon bucket, grow onions at home in an affordable and efficient manner. Maintaining proper soil drainage, providing enough sunlight, and watering frequently are the keys to growing onions successfully in a bucket. With the right care and attention, onions may be grown in a 5-gallon bucket and will produce a sizable crop. Whether you have a small balcony or a large backyard, growing onions in a bucket is an excellent way to enjoy fresh, home-grown vegetables. Why not start growing onions and observe the consequences for yourself?

Growing Carrots in 5 Gallon Buckets: Ways to Grow Carrots in Bucket

Growing Carrots in 5 Gallon Buckets: Ways to Grow Carrots in Gallon Bucket

Growing Carrots in 5 Gallon Buckets

Almost all types of carrots which is one of a nutrition-packed root vegetables can be grown in any container, but long carrot varieties require very deep straight-sided containers. A 5-gallon bucket works best for most carrot varieties and can hold up to 5 Holds 10 carrots per gallon bucket.

One thing to keep in mind when growing vegetables in buckets with quality potting soil or other containers is that plants grown in containers need to be watered more often than plants planted directly in the bucket. As soon as you plant the carrots, start watering them daily for root to strengthen.

Once the seedlings emerge, keep the soil moist throughout the growing season, but do not overwater. To see if carrots need water, dig about inches into the soil. Add more water when dry to within inches.

Growing carrots in 5 gallon buckets

Whether you grow carrots in 5-gallon buckets or any other type of container, the care instructions are very similar. When growing carrots in 5-gallon buckets, follow these guidelines. Drill as many holes in the soil as possible, keeping 3 inches apart.

Ask your local shop for extra buckets or buy your own at your local hardware center. Most shops receive bulk food items such as pickles in five-gallon buckets. If they don’t have extra on hand, they probably don’t mind saving some for you. Rather than leaving the buckets a color such as white, we recommend spraying painting all buckets in one or more colors to brighten the outdoor space.

Read further for more information:

Place 2 to 3 inches of gravel in the bottom of the 5-gallon bucket for good drainage. Then, fill the remaining bucket with equal parts of peat moss, potting soil, and compost. Stir the medium with a garden fork until evenly mixed, leaving a little space above the bucket for the carrots to be planted.

You have to water the carrots when the soil begins to dry out. Water daily, especially in hot or dry weather. Compost provides a good amount of nutrients for carrots during the growing season, but you can also add liquid fertilizer once or twice during the season to enrich the compost and encourage carrot growth.

What requires planting or growing carrots in containers?

Growing carrots in containers require fewer gardening supplies. Growing plants in containers are one of the easiest gardening strategies because it demands minimal supplies. To grow carrots in a container you will need a Bucket to drill a hole with a small bit. However, they cannot simply be mixed in arbitrary proportions. must be integrated for balance. The starting balance is 2/3 potting soil and 1/3 compost.

The gardener should use organic matter made at home and compost. Non-organic options can add nasty toxins and chemicals to the mix. This means drilling drainage holes in both the bottom and sides of the bucket. Without drainage holes, water will pool at the bottom of the bucket. This causes plant roots to deteriorate and die. Similarly, you can grow physalis successfully.

How to Plant Carrots in Containers?

There are two options for planting carrots in 5 gallon buckets. You can transplant carrot seeds indoors or sow them directly into the containers in the garden.

How to Plant Carrots in Containers
Carrots Grown in Buckets

If you are growing indoors in 5 gallon bucket, read up on how to grow seeds indoors beforehand. Carrots are cold-hardy plants, so they can be planted whenever the soil cools in the bucket. If you grow carrot seeds indoors, transplant them when they are 6 inches tall and have hardened for 1 to 2 weeks at ambient temperature. If you want to sow the seeds directly in the bucket, fill the bucket with a mixture of soil and compost for growing. Then use a pencil eraser to make a hole for the seed in the bucket.

Carrots as veggies should be planted 1 inch deep and 2 to 3 inches apart. If they are planted too deep or too close, there is a risk that the plants will not grow as they should or grow too close together. For this reason, the seeds should be evenly distributed in the bucket.

Proper watering for growing carrot

Carrots should be watered frequently and flat. This equates to about 1 inch of water per week while the seeds are germinating, and about 2 inches of water per week thereafter increase.

If the topsoil dries out and forms a hard crust, the seeds will not germinate and will protrude through the soil in a bucket. A little compost or mulch can help prevent this and keep the surface moist. Most plants germinate within a few weeks, but carrot seedlings can take up to three weeks to germinate in the bucket.

Why Grow Carrots in 5 Gallon Buckets?

There are several reasons why you might want to grow carrots in 5-gallon buckets.

First of all, these containers are perfect for those who want to grow vegetables but are short on space.

Second, buckets make startup easier. No need for various container gardening tools. And since the plants can be started indoors, you don’t even have to till the land or wait for the right temperature to start planting.

In addition, it can eliminate some problems associated with regular gardens, such as small children running around the garden and trampling your plants. Or the vegetables are being eaten by animals such as rabbits or deer and need constant weeding in order for the plants to grow.

Why Grow Carrots in 5 Gallon Buckets?

What is the best quality potting soil type for carrots grown in 5-gallon buckets?

Carrots need fairly loose soil to grow optimally. It does not do pleasingly in rich, condensed soils. Good all-purpose compost or all-purpose potting soil is perfect.

If desired, you can mix 3 handfuls of sand in for better drainage. Press down on the bottom to remove the air pocket.

Carrot seeds are very small, so spread about 1 inch of the carrot seed starting to mix on the surface of the potting soil. This will make it easier for the carrot to germinate. Thoroughly soak the soil with a watering can or garden hose and drain carrot seeds before sowing.

What is the best potting soil type for carrots grown in 5-gallon buckets?

How can I prevent the growing of pests from eating carrots?

Insects and snails are small animals to watch out for in most vegetables, and carrots are no exception. To keep carrot flies away, insert a few short bamboo stalks or pea sticks into the bucket and surround a fine mesh net. Place the net on the stick and pull it down just past the edge of the bucket.

Tie a string around the bucket to secure the net. Tie the string tight enough to hide the snail so the slime ball won’t chew on the carrot. This is a good pest control in 5-gallon bucket tip.

What are good companion plants for carrots?

Companion Planting is a planting strategy that combines fruit and vegetables to help each other grow. Radishes are great companion crops for carrots on a certain level.  The harvest time for radishes is when carrots begin to grow long. You can also grow ground cherries companion plants.

What are good companion plants for carrots?

The harvesting period of carrots

Carrots harvest after maturity or any time he is 1/2 inch or more in diameter. However, carrots generally taste better the smaller they are. With this in mind, the harvest of spring carrots should be done before temperatures get too hot. The root system does not absorb enough heat of march and can change from healthy roots to fibrous roots, causing stagnant or dead carrots.

Leave the autumn carrots to harvest in the ground. This causes carrots to start storing sugars in their roots for energy. If you want to keep them in the ground pots after the first hard frost, cover them with 12 to 18 inches thick fallen leaves.

Harvesting period of carrots


How many days does it take for carrots to grow?

The time it takes to develop carrots in pots can vary based on various factors, including the carrot variety, growing circumstances, and desired size. Carrots typically mature and are ready for harvest in between 60 and 80 days. Certain baby carrot cultivars, usually 30 days after planting, can be harvested sooner.

It’s also important to remember that carrots are a cool-season crop, and they grow best at temperatures between 60°F and 70°F (15°C and 21°C). Moreover, carrots require constant moisture throughout their life cycle and thrive in loose, well-draining soil with a pH between 6.0 and 6.8.

How to supply carrots infinitely?

Carrots are biennial. This reason will give you an infinite supply of growing carrots. After harvesting, soak the tops of the carrots in a glass of water. When it starts to regenerate, plant it in the soil like a seed in pots. Your carrots will reappear in next season unless randomly harvested. If you don’t want to plant carrots in tubs, plant in bags as well as pots.

Growing bags come in a variety of sizes, but you need at least a 5-gallon to grow bag for carrots. This will allow you to use the amount of soil you need and ensure your carrots don’t stunt due to lack of space. Giving them plenty of room will help you grow some of the tastiest, healthiest carrots you’ve ever eaten.

Handbook of Best Manure Fork and Pitch Fork

Handbook of Best Manure Fork and Pitch Fork

Handbook of Best Manure Fork and Pitch Fork

A garden fork might resemble the fork the farmer in “American Gothic” was carrying. The task of loading loose hay into a cart or out of a haystack is one that is not performed frequently, even though this equipment is a depiction of farm life. Home gardeners employ phosphoric acid, which is something I think is essential.

The four prongs of a phosphorous fork are considerably heavier than those of a fork. When it is created properly, it is a sturdy tool designed to handle the soil and rocks it holds without bending.

It is better than a spade for breaking up thick soil patches to enhance them and for pre-loosening soil that you can subsequently shovel out because it penetrates the ground more easily.

Resistant, uninteresting grassroots give way and can then be entirely removed. As the spade prods the ground, dandelions are pulled. For maximum results when extracting root vegetables like carrots, use a fork, or a similar implement with flattened prongs.

A fork resembles a spade but has thinner, curved prongs for shaking. It has a maximum of three and a maximum of twelve branches. Gardeners love it for lifting compost by turning the pile, as well as for moving mulch from the pile to wheelbarrows and into the garden bed, even though it is intended for cleaning stalls and other agricultural activities.

It is a lifting instrument, nevertheless, and it is more powerful than a fork. The term is ambiguous because it is frequently used to refer to compost forks, stable forks, tin forks, and scoop forks.

Handling manure fork

The purpose of the manure fork is to pick up solid bits of manure from even finer stuff, like wood shavings, so that the waste can return to the box.

A huge, heavy implement called a pitchfork was created to work and aerate the soil. Its weight is advantageous because gravity handles the majority of the job.

The top-rated manure forks.

Heavy-duty Manure Fork (Saddlery forever fork)

The Saddlery Forever Fork weighs less than standard manure forks.

It also includes a number of difficult-to-spill times. The Dover fork, made of aluminum not steel, is a durable and lightweight mud fork. It serves as a good illustration of a plastic manure fork.

UV stabilizers provide the tines remarkable durability. The tines are shielded from damage and breaking by UV stabilizers. It is often referred to as a “horse dung fork” since it is the perfect fork for your livestock, particularly horse manure.

It also aids in impact protection for users hands. As a result, it can protect your shoulders and wrists even when working for extended periods of time. Bring gloves, though, as the metal handles might feel frigid in the winter.

Advantages

Durable, Lightweight, Easy to use.

Disadvantages

The times are not made for positive pressure and are expensive.

Heavy-duty Manure Fork (TRUPER 30323 pro)

TRUPER 30323 pro manure fork is designed specifically for lifting horse manure, this long, lightweight fork makes the job easier. Strong and lightweight, it will last for years.

Pros

The grips on this fork are made to be fantastic for lifting and tilting and are cushioned so you can use them for prolonged periods of time. Your hands won’t be harmed or develop blisters.

The forged head is extremely powerful and won’t break or twist your tines. Forged Head with a Rivet for Potency. The head is kept in place and firmly fastened to the body thanks to the rivets that fasten it to the handle.

This manure fork’s long, extremely light fiberglass handle can be used for extended periods of time without becoming fatigued.

With a lifetime warranty –

The manufacturer is so confident in this product that it comes with a lifetime warranty in case of any defects or issues.

Cons

The tines can bend when lifting very heavy loads. This manure fork is not used for very heavy loads. Failure to do so may bend the tines.


The Forged Manure Fork

This manure fork is better for transferring manure, straw, wood chips, and mulch, this fork is very sturdy and sturdy. Made from high-quality materials, it serves its purpose and is designed to last. It is also used for moving muck also.

Pros

The hardwood handle is very strong and sturdy. The handle of this fork is hardwood. It’s not the lightest, but it should withstand all forms of abuse and last for years.

Padded handle for ease – the handle of this forged manure work has an extra-large padded grasp that shields your hands from injuries and blisters also allowing you to utilize it for a long duration of time without blisters or chafing.

Durable Super Strong Tine – Forged tines made of hardened steel so the tine won’t bend or break under pressure.

Smooth and Balanced – The long handle is cumbersome but very comfortable to use as long as it’s balanced against the weight of the head. This fork is just a suitable combination of weight and balance.

Cons

Handling padding is more perishable material than the handle and may not last as long as the fork itself.

 LITTLE GIANT DuraFork

Little Giant is the best manure fork. It is a type of stall fork. This is a unique fork, primarily because of its polycarbonate construction.

Another distinguishing feature of this manure fork is its durability. Thoughtfully designed, you can use it for a long time.

It is also easy to clean and available in blue, black, red, green, and pink.

Pros

  • Easy to store.
  • Has eyelets for hanging.
  • Has riveted handles.

Cons

  • Wooden handles of the manure fork can break.
  • Expensive

Manure fork metal (Ergieshovel)

The Ergieshovel is an innovative manure fork that makes your work on the farm easier. It comes in black and orange and has a raked design. You will have no problems using it because it has a large handle to help you control the fork and it is useful for horse manure also.

This manure fork is also lightweight, so you can shovel manure easily. Thanks to the additional handle, which helps to absorb the severe impact on the back, you strain your back and work longer. This is an appropriate addition to your wish list of mini manure.

Pros

  • Easy to store.
  • Sturdy design

Cons

  • Does not hit the bottom with a shovel.

ERGIESHOVEL ERG-MCKS22 22 Tine

Best manure fork for sand paddocks

Most of the horses and donkeys are kept in sand paddocks. Gardeners’ favorite for sand is the simple plastic rakes which are usually found in markets. In fact, gardeners commonly have a good reserve around them. Gardeners preserve one in their space, one in the wheelbarrow for manure, and one in the hay barn to pick up surplus hay that falls (they feed the goats).

Not suitable for hard ground or mud. Trying to pick up wet, saturated manure can break the tines.
Prongs can break when hit by rocks or hard objects. The good news is that you can purchase replacement heads. In all honesty, even if you break a prong or two, it works fine most of the time.

The reason gardeners don’t buy Wave forks is that forks are more expensive to buy and replacement whole heads for regular plastic compost forks are only a few bucks cheaper than replacement fork tines for Wave forks in most cases. If you want to see the shaft fork, there is abundantly available in the market.

Best manure fork or pitchfork for the grass or rock paddocks

For grass or rock paddocks (including paddocks with gravel areas)

Gardeners prefer manure forks with metal teeth. It’s expensive, but if you take care of it, it will last a long time. Since the tines are metal, they can flex, but they infrequently break. The metal rake always demanded substituting the handle before substituting the head. If you hold a combination of barns and only require one solution, this is the manure fork. It is tough enough in a rocky paddock and won’t break if caught in the grass.

Desired manure fork head

Gardeners desired a forkhead that thwarts manure from sliding off the fork, so the body is easily attached to an existing fork for convenience and efficiency. These forkheads are tines. it is uniquely angled for this more manageable manure dumping and less spillage. Basket construction and Angled tips are the main characteristics of this type of manure fork head.

Conclusion

You have to choose good manure forks according to your needs. Above we discussed a handful of manure forks, and a few of them are budget-friendly.

If you’re looking for good manure forks, you’ve come to the right place. In this detailed review, we look at the best manure forks on the market. A good manure fork makes it easy to pick up animal poop, clean the stable and lift manure.

However, choosing the right manure fork can be overwhelming, especially if it’s your first time. A rough idea of ​​what to look for will help you make the right choice. Their features and benefits help you make an informed purchasing decision, so you get your money’s worth.

Growing Zucchini in 5 Gallon Buckets – Complete Guide to Grow Zucchini

Growing Zucchini in 5 Gallon Buckets – Complete Guide to Grow Zucchini

Growing Zucchini in 5 Gallon Buckets

Zucchini roots are deep and require a container that is at least 16 inches deep and 12 inches wide. Therefore, a five gallon bucket is a good choice as it meets these needs.

It is recommended growing zucchini in 5 gallon buckets. If you try to grow too many plants together, they will compete for nutrients and resources that will stunt their growth. Lightweight, durable, and inexpensive.

The plastic bucket also doesn’t lose moisture as quickly as things like terracotta. Zucchini is an excellent vegetable to grow for gardeners in small spaces and a great plant to grow in a 5-gallon bucket. But that doesn’t mean the plant can’t take advantage of gardeners’ support. If you’re thinking about growing zucchini, give it a go.

Growing zucchini in 5 gallon buckets

Growing Zucchini in containers

  • Container gardening or cultivating plants in containers or buckets is on the rise these days. It allows you to grow a wide variety of vegetables and fruits in a small space and gives you some control over your plant’s environment. Giving them the right amount of sunlight, protecting them from frigid winters, etc. can help them grow.
  • After all, zucchini can be planted in a 5-gallon bucket as long as it gives it what it needs to grow and produce it. Finally, you can customize or paint the container to blend in with the landscape or show your artistic skills and creativity. Sprinkle it, decorate it, and enjoy it as it is. Before planting zucchini, always use a “clean” 5-gallon bucket or a bucket that has not been used to store chemicals or toxic substances.

Growing Zucchini in containers

When and How to Plant Zucchinis in Gallon Bucket with Soil?

  • The best time to plant zucchini is spring when temperatures are consistently warm. Specifically, zucchini seeds need at least 70 degrees Fahrenheit to germinate and germinate. If you have the opportunity, especially if you’re new to container gardening or growing zucchini, choose compact, easy-to-grow strains such as Jackpot or Eight Ball. Zucchini seeds are planted 2.5 cm deep and watered immediately.
  • Seeds germinate in 5-10 days, and real leaves emerge a week later. It’s important to keep the soil moist, but not too wet. Spray or water can be used from below to prevent seeds from getting buried or washed away. When the seedlings are about 20-25 cm long, select the strongest and healthiest seedlings and discard the rest.
  • A good rule of thumb is to plant 1-3 zucchini seedlings about 3-5 inches apart per 5-gallon bucket. The recommended medium is potting soil mixed with organic matter such as fine bark, peat, and compost. You have to use sand or vermiculite to make well-drained and aerated soil. It is not recommended to use pure garden soil as it is compact and transmits pests and unwanted organisms.

When and How to Plant Zucchini in Containers
How to Care for Zucchini?

  • A 5-gallon bucket needs at least 6 hours of direct sunlight exposure. Moreover, regular watering is required, especially in hot weather or during the summer. You must keep the soil moist to stave off root rot and other diseases, but you must be careful not to overwater the plant. Feel the soil’s surface to see if it needs to be watered. If it’s too moist, you can usually leave it for a day or two. To ensure that it can be harvested when it’s ready, it should now be carefully monitored.
  • When the zucchini reaches 5 to 7 inches long and dark green in color, it is typically ready to be picked. When it is set, use sharp scissors or pruning shears to cut the stem just an inch or two away from the person. It is not advisable to handle or turn it because doing so will definitely ruin it.

What You Need to Grow Zucchini in a 5-Gallon Bucket?

There are a few things you need to start planting zucchini. Here’s a list of what you’ll need to grow this delicious vegetable.

  • 5 Gallon Buckets – The number of buckets you need depends on how much zucchini you plan to grow.
  • Planting Medium – Regular soil does not work well when growing zucchini in containers. Instead, you want a mixture of peat, compost, perlite, and fine bark.
  • Watering Method – Whether you water your zucchini with a watering can, hose, or some other method, you should have a suitable watering method for your plants.
  • Seeds – Requires 1-6 seeds per bucket.
  • Fertilizer or Compost – You need something to keep the soil rich in nutrients.
  • Support – Not all zucchini plants need support. However, when deciding which zucchini variety needs support, something like a tomato cage will work.

Best Zucchini Varieties to Grow in 5 Gallon Buckets

There are several varieties of zucchini that can be grown in buckets. Let’s take a glance at some of these different varieties.

Geode

Geode Zucchini are small, round, light green zucchini that are perfect for stuffing. This plant grows only 1.5 feet tall and takes only 41 to 50 days to mature.

Best Zucchini Varieties to Grow in 5 Gallon Buckets
Eight Balls

Eight Ball Zucchini are round and dark green. It itself is only 3 inches and the plant grows 24 to 30 inches. This zucchini takes 55 days to mature.


Silverbush

This is an attractive striped zucchini. It got its name from its beautiful silver-green leaves. These zucchinis are best harvested when they are 6 to 8 inches or less in length.

Buckingham Patio

The Buckingham Patio zucchini is a variety made for containers. The peel is golden. This type of zucchini is best harvested when it is 6 to 7 inches long.

Container Care

  • Water plants well, but do not overwater. In the heat of summer, potted plants dry out faster than soil, so check the container daily. Poke your finger into the soil and water it when it is about 2cm dry.
  • You should use drip irrigation here so that you can be assured of watering and nutrients also.
  • Once the flowers have bloomed, fertilize again. Apply a 10-10-10 (NPK) fertilizer every two weeks according to the manufacturer’s instructions.
  • Instead of the granular fertilizer originally used, use a liquid fertilizer that can be applied with a watering can or sprayer so as not to disturb the roots and flowers of the plant. For more, you can use diluted fish emulsion and spray it on the leaves of the plant. Soft sunlight is shining in the background.
  • Harvest when the fruit is about half its ripe size – This depends on the species of zucchini. This will encourage the plant to continue growing and producing more fruit. In my opinion, young zucchini is the most delicious. If left on the plant for too long, the skin and seeds of the fruit will begin to harden and the overall taste will be poor. As the plant grows, it can have problems.

Common Zucchini Plants Diseases

There are only a handful of diseases to watch out for but remember to check your plants regularly to avoid problems.

Zucchini Plant Bacterial Wilt

Zucchini Plant Bacterial Wilt

  • Bacterial species Erwinia Tracheophyta cause this bacterial wilt, cucumber beetles are responsible for the transmission of this virus, so the first line of defense is to keep these pests away. The first thing you’ll notice is that the plants will begin to die.
  • Once the plant has it, there’s not much you can do. Do not destroy the zucchini plant, use it for composting. We may face this problem next year as well. You also need to disinfect the pots and pour potting soil. You should start next year with new soil.

Blossom End Rot in Zucchini

Blossom End Rot in Zucchini

  • Uneven watering and calcium deficiency cause blossoms to end rot. Common in tomatoes, you’ll know it’s there when the fruit turns into a dark, pitted ulcer.
  • Ensures consistent and adequate amounts of water as plants grow. There is no cure for this disease, and adding calcium to the soil will not cure it once it occurs. increase.
  • The disease usually occurs during the rainy season at the end of summer, when powdery mildew flourishes in this weather, resulting in hot and humid weather.
  • Twice a week, you should spray the plants with equal amounts of milk and water and a few drops of dish soap. You can also spray neem oil twice a week or use an organic fungicide containing potassium bicarbonate.

Growing zucchini in 5 gallon bucket conclusion

You can grow zucchini by following these tips and the gardeners can get benefit by growing zuccini as well as it can grow in limited space.

Indoor Plants with Striped Leaves: Characteristics of Striped Houseplants Leaf

Indoor Plants with Striped Leaves: Characteristics of Striped Houseplants Leaf

Indoor Plants with Striped Leaves: Characteristics of Striped Houseplants Leaf

Striped indoor plants immensely add astounding beauty to the garden. Naturally, there are many stunning plants with stunning foliage, such as striped houseplants. House plants with striped foliage make attractive additions to your indoor garden. Beginner Choose from a variety of striped houseplants, including some that are perfect for gardeners.

These indoor striped leaf plants not only help purify the air and produce oxygen, but they are also attractive decorative options for your home.

It also immerses you in nature and brings you relaxation from everyday chores. Therefore, having plants in your surroundings is a must. Striped foliage adds a touch of sophistication to the environment and transforms the overall look of your home. In addition, plants with multi-striped leaves do not require direct sunlight, stay fresh and maintain a greenish appearance with less maintenance. You can take it to your home or garden without worry.

Indoor with varicolored leaves are some of the most spectacular and remarkable plants which thrive the magnificence at home. They feature various shades of green, white, red, and other colors. The variety of colors will astound you. Some brightly colored houseplants are very popular due to their rarity and can be expensive.

There are many, but there are also many that are budget-friendly and can add just enough charm to your indoor garden.

Here are some listed indoor plants, it brings immense beauty to your home.

1. Chlorophytum cosmosum

  • Also known as spider plant.
  • The spider plant gets its name from the new branches that have long green and white striped leaves and hang from the plant like little spiders.
  • An easy-care houseplant that tolerates a wide variety of conditions and is perfect for those just starting out in gardening.

2. Codiaeum variegatum

  • It is one of the favorite houseplants of gardeners.
  • The leaves variegated in colors such as yellow, pink, orange, red, and green are beautiful.
  • This species of plant leaves needs lots of bright light, warmth, humidity, and regular misting, especially in hot weather.
  • You should carefully move this plant because unknowingly you could strip the leaves of the plant.

3. Fittonia albivenis

  • Moderate Indirect Sun exposure is recommended.
  • Common name Nerve plant,
  •  Well, Drained Potting Soil is useful and necessary for this genus.
  • Additionally, the leaves of this plant have dark green, white, or pink strikes. It enhances its beauty.
  • Patterned and perfect for enriching your home or garden.
  • This plant will keep fresh in temperatures between 60°C and 80°C.
  • With green or white-striped leaves, this plant can outlast perfectly well in low light, but constant exposure to sunlight will damage the leaf color and prevent the leaves from turning brown.

4. Cordyline Minalis

  • Bright indirect light sun exposure is good for this genus.
  • Sand and peat-based mixture soil is necessary for this genus.
  • This plant has a common name which is cabbage as the shape of its leaves is made of a cabbage-like structure.
  • The leaves of this plant are striped in pink, purple, brown, and green.
  • Dressing your home for gatherings and special occasions with this plant is supportive as its foliage transforms the entire environment.
  • This striped houseplant grows in bright, albeit indirect, sunlight. Fluoridated water can cause the leaf tips to turn brown, so you have to use rain, distilled, or filtered water for this plant. These plants have some toxic effects on pets that’s why you have to keep them out of reach.

5. Aphelandra squarrosa

  • Dark green leaves with bright white veins as foliage
  • The zebra plant displays stunning bright white stripes pulsing with dark green foliage.
  • This beautiful flower produces attractive spikes of long-lasting yellow flowers. Brazilian zebras enjoyed as indoors all year round.


6. Calathea ornata

  • Pinstripe Calathea is the common name.
  • Dark green foliage with white pinstripes enhances its striking beauty.
  • The broad, almond-shaped dark green leaves of this Calathea plant are lined with bright white.
  • Like other Calathea, the pinstripes are green and white on the upper surface of the leaves and burgundy underneath, a very exciting tricolor.
  • This native African Calathea ornata attains up to two feet tall.


7. Haworthiopsis Attenuata

  • The white-striped leaves are the main attraction of this house plant.
  • Zebra cacti plant is very easy to care for.
  • They will grow into beautiful plants even with little care.
  • Native to South Africa, these small succulent needs plenty of sun and warmth to thrive. Gardeners don’t have to worry about moisture with these plants. Like many other succulents, the zebra cactus needs watering sparingly as it is very sensitive to overwatering and leaf rot.
  • These plants are non-toxic, making them safe for children and pets who may want to nibble on the leaves.

8. Watermelon peperomia

  • Green iridescent silvery streaks, teardrop-shaped leaves.
  • Stripe lovers love the beautiful green leaves of Watermelon Peperomia. It is painted with dramatic thin silvery stripes that will faint.
  • Red stems amplify its beauty. South American native Watermelon peperomia is bright and light in color. Watermelons grow in vigorous mounds that grow 8 to 12 inches tall.

9. Philodendron Birkin

  • Large green striped leaf with creamy white striped leaf defines its attractive beauty.
  • You’ll love the creamy green hue in this striped striking beauty. Birkin Philodendron has large dark green leaves edged with creamy white variegation.
  • Birkin is a non-climbing and free-standing member of the Philodendron family. Grows into an attractive bush.

10.Aglaonema costatum

  • This plant is tolerant to shade.
  • It has white flecks on its long dark leaves.
  • It is very much beautiful but undemanding. Aglaonema is a great purifier, and it enhances the beauty of your home.
  • Familiar name Spotted Chinese Evergreen.

Tradescantia:

In addition to thriving in a range of lighting situations, including full sun and partial shade, tradescantia plants are also comparatively little maintenance and are beautiful striped houseplants. Stem cuttings can be used to multiply them, and they favor well-draining soil and light irrigation.

Before growing this species outside, it’s vital to verify with the appropriate authorities because some of these plants have the potential to become invasive in some environments.

The type of soil required for these houseplants while gardening:

As for soil moisture, keep striped leaf houseplants moist evenly. Striped leaf plants generally do not tolerate drought at all. Allow the surface of the soil to dry out a bit, but don’t let the soil dry out too much. Otherwise, you risk browning and crusting the edges of the leaves.

On the other hand, don’t keep the soil very wet or submerged in water. If you water the plant excessively the root of the plants can get rot. If you keep the soil too wet, you will find that the whole plant will start to wilt. Keep it in indirect sunlight, soil should be wet.

Water quality can affect your striped plant.

Water quality is also important for striped plants. Poor water quality exposure, bright indirect light can also burn the leaves. Do not use water that has passed through a water softener as it is generally toxic to plants.

These plants are also sensitive to hard water and water with too many additives. Distilled or rainwater is best. If this is not achievable, tap water can be left at least overnight.

Key Takeaways

In conclusion, some of the striped plants are very hardy and they can thrive as healthy plants without proper care.

Some of the striped plants are expensive but it is worth the money and your time as well. These striped houseplants are a highly effective means of improving indoor air quality, saving energy and enhancing the mood of residents. It makes an attractive addition to a home or office.

They have the ability to enhance mental and emotional health, reduce healing time, and improve indoor air quality by absorbing pollutants from the air. These plants benefit us, and this cannot be ignored.

Whether you’re a lifelong houseplant lover or just starting a collection with some spider plants, growing plants indoors can inspire you and instantly brighten up your home and mood.

Not only do these plants inspire creativity and build a bond or connection with mother nature. They also promote healing and stress relief, improve the quality of your space, and make situations ease by their enchanting beauty in chronic health conditions like depression and anxiety.

20×20 Vegetable Garden Layout: Some Garden Plans

20×20 Vegetable Garden Layout: Some Garden Plans

20x20 Vegetable Garden Layout

Garden design is an important factor that lays the foundation for the efficient use of space and proper cultivation of vegetables. It is also very helpful in choosing the right vegetable compartment according to your space and region.

A 20-by-20-foot garden looks very large but can produce oversize crops of a single type of vegetable, like potatoes, or small batches of a variety of vegetables during the season. Vegetables that do well in short rows or small blocks are the easiest alternative to a square garden, but runner beans and other tall vegetables need to be carefully positioned to avoid shadowing other plants. A square-foot layout is also a development approach that works well with a 20 x 20 vegetable bed.

We will talk about different garden layouts so you can pick the right one as per your needs and space at home. Happy reading and happy setting up a beautiful garden for yourself!

garden layout


Layouts

The layout level especially relies on the planting strategy. Here are three planting prospects for a good 20 x 20 vegetable green.

Crop Harvest: Planting levels vary with each technique.

Block Vegetable gardening: The rows of plants are typical in vegetable gardens. However, many vegetables grow just as well, or perhaps better and higher, in blocks.

Floor Plans Form: Divide the 20 x 20 garden into 8 beds. Each bed measures 8 feet by 8 feet, with a cruciform path about a foot wide separating the beds in the middle of the garden.

Plants that do well on the block include tomatoes, corn, chard, kale, spinach, lettuce, basil, super liquor, zucchini, black cumin lettuce, collards, bok choy, tomatoes, and other perennial plants. They grow the best in clusters because the pollen that falls from the male flowers can easily reach the female flowers of surrounding plants within a smaller radius.

Layout Factors

There are the following factors to consider when forming the layout garden plan.

Soil Depth:

Soil Depth

For best results, square foot garden soil should be 12 inches deep, but greens produce excellent yields even in 6-inch deep soil. On top of each bed, spread a 4-inch layer of backyard compost or other healthy organic cloth that must be at least a year old, and add a 2-inch layer of backyard soil. Using a fork, mix each layer into the soil to a depth of 6 inches.

Crop Rotation plan:

Crop Rotation plan

Do a crop rotation in a 20 x 20 garden, rotating the plant families in each section once a year, or simply growing one family across the plot for 1-12 months, then growing a specific family the following year. Raising just one vegetable family at a time provides ultimate security against pests and disease. By growing plants in sequence, you can avoid plant pests and diseases that accumulate in your garden.

Vegetables belonging to the same plant family are attacked by similar kinds of pests. For example, pests that attack cucumbers often also attack ice squash and other vegetables belonging to the same family. Growing the same family in the same place for 12 months or more increases the pest and disease population, whereas growing different plant families once every 12 months reduces pest and disease problems.

Watering plans :

Avoid depressions where standing water collects in the garden or where unexpected rain forces wash the plants away. Try to place the garden near water outlets. This eliminates the need for long pulls on the hose.

Disadvantages Of 20×20 Garden Layout

Read on to know about the other side of the coin, i.e; the disadvantages of the 20×20 garden layout.

Block Layout

Most vegetables require at least 6 hours of direct sunlight each day to grow properly, and in a 20″ x 20″ garden, these taller vegetables will cast shadows and be placed on opposite sides. Due to this, plants are at risk of receiving very less sunlight.

If you grow cucumbers on a trellis with countless tomatoes in tomato cages and green beans and other tall veggies at the north end of the garden, these plants grow at the east end of a 20×20 field and they turn color in the morning. When they come to the west side, they produce color in the afternoon, and all day long the south side has large blooms.

sqft Method:

sqft Method

After growing vegetables in the block design, there is another very nice sqft method for making good use of your 20 x 20 garden. A square foot garden is a huge 20 x 20 garden consisting of 8 x 8 high beds, each of which is divided into 1 square meter sections to grow vegetables on raised beds.

Growing vegetables on one square foot allow you to develop an accurate assortment of seeds. For example, a square might contain garlic, carrots, lettuce, tomato, or bean plants. Cucumbers and other large vegetables require 2 square feet to grow.

Catch Crop

It is recommended to add a catch crop or cover the plantings to ensure an even yield of vegetables. Simply have two different plants sharing the same garden phase in an alternating or checkerboard pattern. This setup may seem pretty nifty, but it also has some meaningful benefits. Smaller, faster-growing plants could grow alongside larger, slower-growing plants, so there was always something to harvest.

Types of Garden Layout

Here are some of the most common garden layouts for growing vegetables.

Column space

The simplest garden plan consists of a design with long straight columns running north south. The north-south orientation ensures that the garden receives the best sunlight and air circulation. Plants growing in the front row tend to shade east and west gardens too much.

Grow taller plants such as corn and beans on the north side of your garden to keep smaller plants out of shade. Medium-sized harvests such as tomatoes, squash, and cabbage should cultivate in the center.

You should plant short yields such as carrots, lettuce, and radishes at the southern fringe of the garden. Typically, the gardener lays out square foot gardens in squares and attaches rows or lumber to the structure to divide the area into equal divisions. You should yield each in each section.

Square Foot

Square Foot

The gardener generally lays out square foot garden plots in a grid of squares, attaching strings or lumber to the frame to divide the bed into equal sections. When climbing plants are grown, they are usually placed with a trellis behind them to allow the plants to grow. This constitutes a 1 square foot plot.

Block garden planner

Another garden layout plan is called a block-style garden layout. Also called a limited row or wide row, this approach greatly improves products over conventional row gardens. It also protects your produce from weeds, fungi, and viruses. The idea is to produce vegetables in rectangular beds or blocks rather than in long single rows that look like square feet but are of arbitrary measurements.

Maximize your garden space by eliminating redundant walkways. Plants sprouts densely and in adequate well-drained, fertile, or nutrient-rich soil in organic matter. Due to its high density, it must be fertilized. Make sure you don’t overload the vegetables this way. The beds are 3 feet wide and can be any length. This width makes it easy to reach the bed for weeding, harvesting, or repotting. Aisles should be minimal, approximately 18 to 20 inches in diameter.

Plant crops with even spacing between adjacent plants in either direction. For example, center a bed of carrots on a 3″ x 3″. Think of the layout as 3-inch rows across the bed, with the carrots thinned out to 3 inches within the rows. A 2-foot conventional green row of carrots fits into a 3-foot x 2-foot area.

Vertically cultivating plants

Vertically cultivating plants

A vegetable garden vertically is another prospect. These gardens are finagled for those with little or no definitive garden space. Plant towers are another vertical alternative for producing plants and are prevalent in potatoes. Instead of planting in a typical garden bed, take advantage of the vertical space to grow plants along a trellis, hanging baskets or turning them upside down. Simply stack the pots like a tower and there are also stackable containers that allow you to grow multiple plants in one area.

Raised Beds/Containers

Raised Beds/Containers

Again, planting vegetables in raised beds or containers is a great alternative, if space is limited or soil is inadequate. There are no limits to this layout option. Because you can flexibly move around the garden and use all available space, including vertical areas.

What vegetables grow well together in containers: Planting Vegetable in Container

What vegetables grow well together in containers: Planting Vegetable in Container

What vegetables grow well together in containers: Planting Vegetable in Container

Container gardening is a great way to enjoy fresh produce year-round. If you don’t have the space for a full-sized garden, you may feel like your options are limited. However, with a little gardening knowledge and careful attention, many vegetables and herbs can be grown in a container and harvested right on the plate.

Some vegetables that grow well in containers are nightshades, such as tomatoes, potatoes, peppers, and eggplants. Some plants such as peas, and lettuce are fast-growing and easy to grow in plants it will magnify the beauty of your garden. In general, use a good-quality organic potting with good drainage soil to fill your vegetable pot.

what vegetables grow well together in containers? In this article we try to answer this question. The container can vary in size depending on the type of vegetable you are harvesting. Some vegetables, such as leafy greens, have relatively shallow roots and do not require a deep container. But others, like potatoes, need deep soil for proper development. Some container garden ideas include using fabric pots that are lightweight to move when needed or planting a vertical garden with pots attached to a fence or wall.

Easy vegetables to grow in pots are listed in this article.

You can grow vegetables together in containers if they both have the same requirement for nutrition. For example, herbs and salad greens can often be grown together. If you’re peeking for ideas for vegetable containers, here are some vegetables that do well in containers on your verandah, terrace, or balcony, as long as they get adequate sun.

Vegetables combination ideas that well together in container gardening.

Here are more details about each of these pairs you can harvest in your little indoor garden.

Carrot and tomato growing together.

  • Tomatoes are suitable to plant with carrots, it gives them shade in your home. Tomatoes protect carrots from weeds, carrot flies, and pests as well.
  • Carrots give tomatoes soil to aerate. This ensures good moisture and nutrient circulation in the soil. Tomatoes and carrots grow well together in container its evident from these facts.
  • Leeks, Rosemary, Sage, and Chives can as well protect the tomato plants from weeds as well. You want to avoid growing plants like cilantro and dill near carrots, as they will slow their growth.

Basil and Chili plant are good for each other.

  • Basil is a good partner for chili plants as they help improve their growth and flavor in your home.
  • It can also prevent some harmful insects from entering your plants.
  • Basil also grows together with tomatoes, parsley, oregano, and rosemary. But it is not good to grow basil together with sage. Basil needs soil with a lot of moisture to grow well. But a sage prefers dry soil.

Vegetables that grow well together in containers - Basil and Chilli

Beans and Pumpkin grow well together

  • Beans and squash are three staple vegetables. This is a very common choice of staple veggies to grow together for a very long term. Although they often grow in containers, beans, and squash easily grow together in large pots. Zucchini also good to grow with beans in a container garden.
  • Beans are nitrogen fixers, which means they take nitrogen from the air and store it in the soil. This is useful for squash, which needs a lot of nitrogen to produce long vines and fruit.
  • Squash acts as a natural mulch for the beans, binding moisture and nutrients. Both beans and squash are available as vine and bush varieties. Choose one of each, such as beans, and a squash, such as a pumpkin. This way you benefit your container and cover space.

Okra, Lettuce vegetables, and Basil

  • If you live in the south or another warm climate, you should really try to grow okra in your container garden. It is a unique, highly productive addition to your other herbs and vegetables.
  • Lettuce and herbs like basil, and mint are good neighbors for long, shiny okra. Okra plants a long stem and grows up to 6 feet tall, providing partial shade for lettuce and basil.
  • They like the full sun, but in the hottest part of the summer, they can take a breather in the middle of the day.
  • Lettuce and basil have lower root systems that do not compete with okra. Basil, like other herbs, can repel many pests and is a good companion plant for many vegetables.

Vegetables that grow well together in containers - Okra, Lettuce, and Basil

Green beans and corn vegetables

  • Green beans grow well with them because they can be used as a grill. Green beans fix nitrogen in the soil, which is good for the plant.
  • Other useful companion plants for green beans are broccoli, Brussels sprouts, cabbage, cucumber, potatoes, and radishes.
  • You don’t want to grow beets or onions near green beans because they stunt growth.

Onions and carrots in containers

  • Onions grow well with carrots because they protect them from pests such as the carrot fly or aphids.
  •  Lettuce, Beetroot, Cabbage, Tomatoes, Cucumber, and Rosemary are also very suitable to grow together with them.
  • You want to keep bulbs away from plants like beans, peas, cucumber, and asparagus because they slow the growth of those plants.

Vegetables that grow well together in containers - Onions and carrots

Green beans and corn in pots

  • Green beans grow well with corn. Green beans fix nitrogen in the soil, which is good for the corn plant.
  • Other useful companion plants for green beans are broccoli, Brussels sprouts, cabbage, cucumber, peas, and potatoes.
  • You don’t want to grow beets or onions near green beans because they stunt growth.

Spinach and Peas (easy vegetable to grow in pots)

Peas are perfect for containers and small spaces. The grid behind the container gives the peas plenty of space. This leaves room in the rest of the dish for the legume lover, spinach.

Spinach helps keep the soil moist thanks to its low-growing leaves. A tall pea trellis can also provide shade from the hot afternoon sun, something spinach needs to survive warmer weather.

Eggplant and paprika planting

  • Eggplant and paprika both belong to the night cream family. Because they belong to the same family, they have similar nutrient, pH, and sunlight requirements.
  • Planting them together can be beneficial and you don’t have to worry about them competing for nutrients or resources.

Cabbage and cauliflower vegetable container garden

Cabbage and cauliflower are both members of the Brassica family. When plants belong to the same family, it means that they have similar needs for nutrients, pH, and sunlight. So planting them together is a good way to make a good environment for them as there is no competition for resources.

Vegetables that grow well together in containers - Cabbage and cauliflower

Much of the success of your container garden depends on the growing medium you choose. Plants have very limited access to water or nutrients, so you have to choose substrate on the basis of its quality so that your vegetables can obtain their required nutrition.

When choosing a containers gardening, consider the following characteristics:

  • Does the soil hold adequate moisture and nutrient?
  • Does the soil have enough drainage and ventilation system?
  • If the soil has weeds and pests that can harm your vegetable?

For container garden, you can buy pre-mixed potting soil in bags. It is excellent if you are planting a few containers for your vegetables and watering them. However, if you intend to plant widely, it is more economical to mix the mixture yourself. Container gardens are the best gifts you can give to your family or friends.

Prepare soil for planting vegetables in container.

The garden soil or normal soil is not suitable for tools or products for container gardening. Most often, the garden soil in the containers becomes too dense, which prevents the growth of the plant. It also has a greater chance of becoming contaminated with weed seeds, diseases, and pests.

Don’t get disappointed because of the shortage of space. Container gardening is very useful for households, and it can help you to stay healthy as well. Just go for the combination of veggies you want to harvest.

Jade Plant Turning Red or Jade Plants Leaves Turning Red And Soft

Jade Plant Turning Red or Jade Plants Leaves Turning Red And Soft

Jade Plant Turning Red

Jade plants (Crassula ovata) are among the easiest to mature and hardiest houseplants, creating them an excellent choice for the beginner or inert indoor gardener. However, if you begin to see your jade plant turning red, you may wonder what is wrong with it and what you ought to do to fix the problem.

Don’t you worry! We are here with an article to share about various factors that affect the color of your jade plants along with what you need to do to fix the problem. This post also includes information on different varieties of Jade plants and some basic guidelines on how to care for your jade plants. Happy reading!

Your jade plant leaves turning red, is it good or bad?

There are roughly 200 species of Crassula or jade plants. Many of them have inherently reddened tips, like the golden jade tree. This plant has almost lime-green leaves adorned with reddish edges. Other varieties could be Botany Bay, Harbor Lights, Silver Dollar jade, or Silver Jade.

Many other types commonly have a red border on the leaves. So if the jade plant turns red, examine for the variety and see if it is characteristic of the plant. A jade plant with red edges is not necessarily bad and may be part of the color of the plant’s leaves.

jade plant leaves turning red

Varieties of Red Jade Plants

A red jade plant doesn’t necessarily mean that there is something to worry about it. In fact, it is typically an alluring quality that many people appreciate. This discoloration has a natural cause.

Some jade plant varieties are naturally red on the leaves and margins, and other bright colors are also attractive. Below are some of the considerably familiar types.

Sunset jade – inherently bright yellow foliage with pink or red trim.

Crosby’s compact – old leaves are green or yellowish with red trims, while fresh leaves are colorful red throughout.

Gollum (aka hobbit) – long, thin, finger-like foliage with bright red fringes on top.

California red tip – this type has large, thick, dark green leaves with red pinpoints.

Tricolour – variegated leaves of pink, white, and green with bright reddish hues.

Crassula-ovata red varieties

More about Red Jade Plants

You can control the amount of red that the leaves of a jade plant developed by controlling the amount of light, water, and nutrients they receive. However, if you want your jade leaves to remain glossy and dark green, there is nothing wrong with that. This is accomplished by growing them under specific conditions as mentioned below.

  • Maximum Greenness: Grow in fertile, well-drained potting soil, fertilize monthly with a semi-strength houseplant fertilizer, and place jade in moderate indirect light. Set it in water when the soil is dry.
  • Reddish Leaf Tips: Grow in rich, well-drained potting soil or a low-fertility cactus mix and place in partial sun. Decrease the frequency of watering the jade plant.
  • Maximum Redness: To keep the jade plant leaves red, consider growing them in less fertile soil and placing them in direct sunlight all day long. The more sunlight and less fertile soil, the redder the leaves. Keeping the soil dry for a long time also promotes the reddening of the leaves.

Underwatering can turn jade plant leaves red and soft

If Jade leaves turn red and become soft or wrinkled, it is probably due to a deficiency of water. With intense dehydration, they often darken and become burgundy or almost purple. Water it carefully and deeply, within a few days leaves should expand back within a few days. If you watered regularly, scan the stem to avoid rotting. Jade plant leaves turn red and soft when they are dry.

Underwatered jade plant leaves can turn soft and red

Why does my jade plant have a red spot on it?

Pest infestation is one of the main reasons for the small red spots or spots on the leaves. Examine them carefully for indications of damage and treat the disorder instantly before it can spread.

Jade turns Red and then Brown

If jade plants turn red and then brown, there is probably a sunburn or you place it in intense amounts of direct sun. This is very common when you take a houseplant outside or a plant that is in shade to full sun. It takes time to get used to the strong rays. So move the plant to a shady spot and give it several weeks to get used to the sun.

jade-plant-leaves-turning-brown

My jade plant turning brown and dry

If red leaves are blistered, cracked, or have brown spots, it’s probably due to too much sun exposure. To avoid burning, move it to the shade and acclimatize slowly for several weeks in the sun.

Jade Plant Leaves turning red and falling off

  • It is familiar for jade to drop dead or otherwise injured leaves and this can happen for other concerns listed above. But when it begins to drop full red leaves, it’s usually due to overwatering.
  • Make sure the soil is absolutely dry before watering again. I also urge using a soil moisture meter so you can hold the perfect amount.

Why is my jade plant turning yellow and red?

The Jade varieties need plenty of direct sunlight to keep their color. Otherwise, the decorative color will fade. Here is a list of factors other than sunlight affecting the color of your jade plants.

  1. Too Much Moisture
  2. Too Much Nutrient Supply
  3. Pest Infestation
  4. Overfertilization
  5. Spider mite pests can also cause yellow leaves.

Under fertilization and its effects on Jade Plant Leaves

  • If you don’t like the redness of the leaves and haven’t been fertilizing your plants, it may be time to start. It should (if the plants are well watered and don’t get a lot of sun exposure)
  • Now you know what’s causing it. You can determine if the plant is healthy if it likes red if you want to keep it and adjust your plant care according to your answers to these questions.

For little fertilization jade can turn into red also

Jade Plants turning Red under Natural Conditions

Extreme environments are not necessarily bad for the jade plant. It should be remembered that jade is a succulent plant that grows in dry, barren areas where most plants cannot survive.

These harsh conditions usually include intense sunlight, heat, soil fertility, and lack of water. Jade Plants look and perform their best when they are not pampered, and it’s perfectly normal to turn a reddish hue. It’s time to put on your detective hat and pay attention to environmental changes that are occurring.

Most likely, your jade is suffering from one or more of the following conditions that promote redness:

  • Jade that gets an excessive amount of sunlight turns red.
  • Jade leaves can turn red when it is very hot or cold, like in summer and winter. By reducing the frequency of watering, jade plants lose some of their dark green hues and change colors, including red.
  • Jade plants may be red because they grow in poor soil and are under-fertilized. If your jade leaves have turned a reddish color, but they look healthy and growing well, don’t worry.
  • It survives in nature and thrives in less-than-ideal conditions where water and nutrients are paramount. One of the elements of these naturally occurring changes is jade with reddish leaves.

jade-plant-leaves-turning-yellow

Basic Care for jade plants

  • Jade is one of the lowest-maintenance houseplants and requires minimal care for healthy growth. They are not picky about soil and fertility, as long as they are well-drained.
  • Watering is only necessary when the top few inches of soil are dry, as plants will rot and die if grown in damp conditions or overwatered.
  • In terms of light conditions, jade plants do well in all areas from full sun to moderately indirect light, and if the indoor temperature is comfortable, jade plants will be comfortable.

We hope this post could help you understand different factors affecting the color of the jade plants and what you can do about them.